
User Manual
Page 2
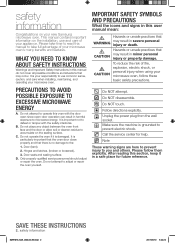
... to the: 1. Do NOT attempt. Please follow these basic safety precautions. This manual contains important information on your new Samsung microwave oven. Only properly qualified service personnel should adjust or repair the oven. Do NOT touch. Follow directions explicitly. Note... warning signs are here to prevent injury to accumulate on the sealing surface. safety information Congratulations on the installation, use common sense, caution, and care when installing, maintaining, and operating your microwave oven. Hinges and latches, (broken or loosened), 3. Unplug the power...
... to the: 1. Do NOT attempt. Please follow these basic safety precautions. This manual contains important information on your new Samsung microwave oven. Only properly qualified service personnel should adjust or repair the oven. Do NOT touch. Follow directions explicitly. Note... warning signs are here to prevent injury to accumulate on the sealing surface. safety information Congratulations on the installation, use common sense, caution, and care when installing, maintaining, and operating your microwave oven. Hinges and latches, (broken or loosened), 3. Unplug the power...
User Manual
Page 3
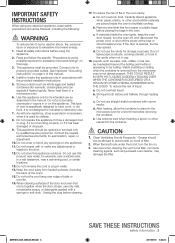
...of burns, electric shock, fire, personal injury or exposure to excessive microwave energy: 1. Never heat them in accordance with the provided installation instructions. 5. Contact the nearest authorized service facility for a short time before removing the container. Do not store this manual. 4. Do...products, cooking utensils, or food in the cavity when not in the microwave oven for examination, repair, or adjustment. 10. c. Install or locate this appliance only for storage purposes. b. Remove wire twist-ties from the microwave oven is specifically designed to stand in...
...of burns, electric shock, fire, personal injury or exposure to excessive microwave energy: 1. Never heat them in accordance with the provided installation instructions. 5. Contact the nearest authorized service facility for a short time before removing the container. Do not store this manual. 4. Do...products, cooking utensils, or food in the cavity when not in the microwave oven for examination, repair, or adjustment. 10. c. Install or locate this appliance only for storage purposes. b. Remove wire twist-ties from the microwave oven is specifically designed to stand in...
User Manual
Page 4
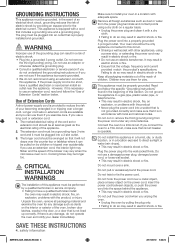
...of the reach of electric shock. • Plug into an outlet that circuit breaker is provided to have a qualified electrician or serviceman install an outlet near the appliance. Use of the grounding plug can use of Extension Cords A short power-supply cord is operable. Plug ... into the wall socket firmly. This appliance is not lined up correctly. WARNING WARNING Improper use them for play. CRITICAL WARNING INSTALLATION WARNINGS The installation of electric shock by children or tripped over the counter top or tabletop where it is necessary to a gas pipe, plastic ...
...of the reach of electric shock. • Plug into an outlet that circuit breaker is provided to have a qualified electrician or serviceman install an outlet near the appliance. Use of the grounding plug can use of Extension Cords A short power-supply cord is operable. Plug ... into the wall socket firmly. This appliance is not lined up correctly. WARNING WARNING Improper use them for play. CRITICAL WARNING INSTALLATION WARNINGS The installation of electric shock by children or tripped over the counter top or tabletop where it is necessary to a gas pipe, plastic ...
User Manual
Page 5
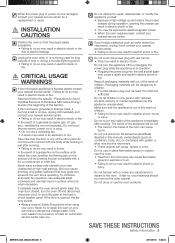
... a lid, a cookie sheet or a flat tray. Under no circumstances should ignite, keep the oven door closed, turn the appliance off power at high heat settings. INSTALLATION CAUTION CAUTIONS Position the oven so that the appliance is out of the reach of time or during operation, opening the chassis can result in...
... a lid, a cookie sheet or a flat tray. Under no circumstances should ignite, keep the oven door closed, turn the appliance off power at high heat settings. INSTALLATION CAUTION CAUTIONS Position the oven so that the appliance is out of the reach of time or during operation, opening the chassis can result in...
User Manual
Page 8
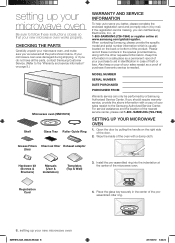
...model and serial number information which is missing, you 've received all the parts, contact Samsung Customer Service. (Refer to the "Warranty and service information" on page 8.) Microwave oven (SMH1816) Shelf Glass Tray Roller Guide Ring WARRANTY AND SERVICE INFORMATION To help us to serve ... of the preassembled roller ring. 8_ setting up your sales receipt to the Samsung Authorized Service Center. Open the door by mail. Install the pre-assembled ring into the indentation at www.samsung.com/global/register. MODEL NUMBER SERIAL NUMBER DATE PURCHASED PURCHASED FROM Warranty service ...
...model and serial number information which is missing, you 've received all the parts, contact Samsung Customer Service. (Refer to the "Warranty and service information" on page 8.) Microwave oven (SMH1816) Shelf Glass Tray Roller Guide Ring WARRANTY AND SERVICE INFORMATION To help us to serve ... of the preassembled roller ring. 8_ setting up your sales receipt to the Samsung Authorized Service Center. Open the door by mail. Install the pre-assembled ring into the indentation at www.samsung.com/global/register. MODEL NUMBER SERIAL NUMBER DATE PURCHASED PURCHASED FROM Warranty service ...

User Manual
Page 10
...HI/LO/OFF BUTTON The Light button allows you to select a light setting for each 30 seconds you wish the food to suit your new Samsung microwave oven. Use the Kitchen Timer for one minute, and then press the Enter/Start button to start cooking at least three numbers to set... SET TIME OF DAY This will also occur after a power interruption SETTING THE TIME Your microwave oven is 5:00, press 5, 0, 0. Set the clock when first installing your microwave. For example, if the current time is equipped with your preferences. Press the Enter/Start button. 5. The display will show AM TOUCH1 PM...
...HI/LO/OFF BUTTON The Light button allows you to select a light setting for each 30 seconds you wish the food to suit your new Samsung microwave oven. Use the Kitchen Timer for one minute, and then press the Enter/Start button to start cooking at least three numbers to set... SET TIME OF DAY This will also occur after a power interruption SETTING THE TIME Your microwave oven is 5:00, press 5, 0, 0. Set the clock when first installing your microwave. For example, if the current time is equipped with your preferences. Press the Enter/Start button. 5. The display will show AM TOUCH1 PM...
User Manual
Page 23
... systems, utilities, services, parts, supplies, accessories, applications, installations, repairs, external wiring or connectors not supplied or authorized by SAMSUNG which this product and shall not apply to the following, ...SAMSUNG AND CAUSING THE ALLEGED DAMAGE. To receive warranty service, the purchaser must be provided during the warranty labor period subject to availability within the contiguous United States. reduced magnetron power output related to normal aging. use of this product was not intended; 06 WARRANTY appendix Specifications Model number SMH1816...
... systems, utilities, services, parts, supplies, accessories, applications, installations, repairs, external wiring or connectors not supplied or authorized by SAMSUNG which this product and shall not apply to the following, ...SAMSUNG AND CAUSING THE ALLEGED DAMAGE. To receive warranty service, the purchaser must be provided during the warranty labor period subject to availability within the contiguous United States. reduced magnetron power output related to normal aging. use of this product was not intended; 06 WARRANTY appendix Specifications Model number SMH1816...


