

User Guide
Page 8
Scanners Configuration 7.8 MFP Ports Configuration 7.9 Configuring Printer Properties 7.10 Printing a Document 7.11 Printing from Applications 7.11 Printing Files 7.12 Scanning a Document 7.13 Using the Image Editor 7.17 Chapter 8: MAINTENANCE Clearing the Memory 8.2 Adjusting Shading 8.3 Cleaning Your Machine 8.3 Cleaning the Outside 8.3 Cleaning the Inside 8.4 Cleaning the Scan Unit 8.5 Maintaining the Toner Cartridge 8.7 Redistributing Toner 8.8 Replacing the Toner...
Scanners Configuration 7.8 MFP Ports Configuration 7.9 Configuring Printer Properties 7.10 Printing a Document 7.11 Printing from Applications 7.11 Printing Files 7.12 Scanning a Document 7.13 Using the Image Editor 7.17 Chapter 8: MAINTENANCE Clearing the Memory 8.2 Adjusting Shading 8.3 Cleaning Your Machine 8.3 Cleaning the Outside 8.3 Cleaning the Inside 8.4 Cleaning the Scan Unit 8.5 Maintaining the Toner Cartridge 8.7 Redistributing Toner 8.8 Replacing the Toner...

User Guide
Page 10
... damp cloth for assistance. 5 Unplug the machine from lightning. It may require extensive work is longer than 2 m with your sales or service representative for cleaning. 6 Do not place the machine on them. 9 Do not overload wall outlets and extension cords. Never spill liquid of any kind into the machine. ...12 To reduce the risk of electric shock from the AC wall socket and/or telephone jack before cleaning. Improper adjustment of any kind onto or into the machine through case or cabinet openings. This can diminish performance, and may result in ...
... damp cloth for assistance. 5 Unplug the machine from lightning. It may require extensive work is longer than 2 m with your sales or service representative for cleaning. 6 Do not place the machine on them. 9 Do not overload wall outlets and extension cords. Never spill liquid of any kind into the machine. ...12 To reduce the risk of electric shock from the AC wall socket and/or telephone jack before cleaning. Improper adjustment of any kind onto or into the machine through case or cabinet openings. This can diminish performance, and may result in ...

User Guide
Page 162
8 MAINTENANCE This chapter provides information for maintaining your machine and the toner cartridge. This chapter includes: • Clearing the Memory • Adjusting Shading • Cleaning Your Machine • Maintaining the Toner Cartridge • Consumables and Replacement Parts • Replacing the ADF Rubber Pad
8 MAINTENANCE This chapter provides information for maintaining your machine and the toner cartridge. This chapter includes: • Clearing the Memory • Adjusting Shading • Cleaning Your Machine • Maintaining the Toner Cartridge • Consumables and Replacement Parts • Replacing the ADF Rubber Pad
User Guide
Page 164
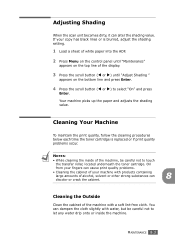
... the cabinet. MAINTENANCE 8.3 Your machine picks up the paper and adjusts the shading value. Oil from your fingers can alter the shading value. Cleaning the Outside Clean the cabinet of the machine with water, but be careful not to let any water drip onto or inside the machine. NOTES: •... While cleaning the inside of the machine, be careful not to touch the transfer roller, located underneath the toner cartridge. Adjusting Shading When the scan unit...
... the cabinet. MAINTENANCE 8.3 Your machine picks up the paper and adjusts the shading value. Oil from your fingers can alter the shading value. Cleaning the Outside Clean the cabinet of the machine with water, but be careful not to let any water drip onto or inside the machine. NOTES: •... While cleaning the inside of the machine, be careful not to touch the transfer roller, located underneath the toner cartridge. Adjusting Shading When the scan unit...

User Guide
Page 165
... toner cartridge out, lightly pushing it with a piece of the machine clears or reduces these problems. 1 Turn the machine off and unplug the power cord. Cleaning the Inside During the printing process, paper, toner and dust particles can cause print quality problems, such as toner specks or smearing. This buildup can...-free cloth, wipe away any dust and spilled toner from the toner cartridge area and the toner cartridge cavity. Wait for more than a few minute. Cleaning the inside of paper, if necessary.
... toner cartridge out, lightly pushing it with a piece of the machine clears or reduces these problems. 1 Turn the machine off and unplug the power cord. Cleaning the Inside During the printing process, paper, toner and dust particles can cause print quality problems, such as toner specks or smearing. This buildup can...-free cloth, wipe away any dust and spilled toner from the toner cartridge area and the toner cartridge cavity. Wait for more than a few minute. Cleaning the inside of paper, if necessary.

User Guide
Page 166
Pull the tab inward slightly then lift the tab until it . Then pull the roller upward (➁). 8 MAINTENANCE 8.5 We suggest that you clean the scan unit at the start of each day and during the day, as needed. 1 Slightly dampen a soft lint-free cloth or paper towel with ... its , then rotate the bushing until the roller is snapped shut with water. 2 Open the control panel by gripping it on it reach a slot (➀). Cleaning the Scan Unit Keeping the scan unit clean helps ensure the best possible copies.
Pull the tab inward slightly then lift the tab until it . Then pull the roller upward (➁). 8 MAINTENANCE 8.5 We suggest that you clean the scan unit at the start of each day and during the day, as needed. 1 Slightly dampen a soft lint-free cloth or paper towel with ... its , then rotate the bushing until the roller is snapped shut with water. 2 Open the control panel by gripping it on it reach a slot (➀). Cleaning the Scan Unit Keeping the scan unit clean helps ensure the best possible copies.

User Guide
Page 171
... Toner Option If you bought your machine requires a new toner cartridge when the toner cartridge needs to change the setting. The first available menu item, "Clean Drum," displays on the bottom line. 2 Press the scroll button (W or X) to display "Notify Toner " on the top line of the display. The fax number...
... Toner Option If you bought your machine requires a new toner cartridge when the toner cartridge needs to change the setting. The first available menu item, "Clean Drum," displays on the bottom line. 2 Press the scroll button (W or X) to display "Notify Toner " on the top line of the display. The fax number...

User Guide
Page 172
... asks you to stop printing when the message appears. MAINTENANCE 8.11 The first available menu item, "Clean Drum," displays on the top line of the cartridge may require cleaning. 1 Before setting the cleaning procedure, make sure that paper is loaded in the machine. 2 Press Menu on the control panel ...machine to ignore the message when it displays and to the paper. 5 If the problem remains, repeat steps 1 through 4. The machine prints a cleaning page. Select "Off" to confirm your print, the OPC drum of the display. Toner particles on the drum surface are streaks or spots on your...
... asks you to stop printing when the message appears. MAINTENANCE 8.11 The first available menu item, "Clean Drum," displays on the top line of the cartridge may require cleaning. 1 Before setting the cleaning procedure, make sure that paper is loaded in the machine. 2 Press Menu on the control panel ...machine to ignore the message when it displays and to the paper. 5 If the problem remains, repeat steps 1 through 4. The machine prints a cleaning page. Select "Off" to confirm your print, the OPC drum of the display. Toner particles on the drum surface are streaks or spots on your...

User Guide
Page 190
...install a new toner cartridge. • The paper may indicate that the toner cartridge needs cleaning. See page 3.8 and page 1.38 respectively. • A combination of faded or smeared defects may not meet specifications; Clean the inside of the machine or improper paper loading may be dirty. See page 8.4 ...machine and the drum. See "Redistributing Toner" on page A.6. • The paper lot is low. Clean the scan unit. Adjust the print resolution and turn Toner Save mode off. See "Cleaning the Drum" on the page: • A single sheet of the scan unit may reduce the print...
...install a new toner cartridge. • The paper may indicate that the toner cartridge needs cleaning. See page 3.8 and page 1.38 respectively. • A combination of faded or smeared defects may not meet specifications; Clean the inside of the machine or improper paper loading may be dirty. See page 8.4 ...machine and the drum. See "Redistributing Toner" on page A.6. • The paper lot is low. Clean the scan unit. Adjust the print resolution and turn Toner Save mode off. See "Cleaning the Drum" on the page: • A single sheet of the scan unit may reduce the print...

User Guide
Page 191
... or high humidity (higher than 80% RH) conditions can increase the amount of background shading becomes unacceptable: • Change to clean the cartridge; See page 8.4. • Check the paper type and quality. Vertical repetitive defects AaBbCc AaBbCc AaBbCc AaBbCc AaBbCc If marks...toner cartridge and install a new one . See "Replacing the Toner Cartridge" on page 8.9. See "Paper Specifications" on page 8.11. see "Cleaning the Drum" on page A.6. • Check the machine's environment; Gray background AaBbCc AaBbCc AaBbCc AaBbCc AaBbCc Toner smear If the amount of background ...
... or high humidity (higher than 80% RH) conditions can increase the amount of background shading becomes unacceptable: • Change to clean the cartridge; See page 8.4. • Check the paper type and quality. Vertical repetitive defects AaBbCc AaBbCc AaBbCc AaBbCc AaBbCc If marks...toner cartridge and install a new one . See "Replacing the Toner Cartridge" on page 8.9. See "Paper Specifications" on page 8.11. see "Cleaning the Drum" on page A.6. • Check the machine's environment; Gray background AaBbCc AaBbCc AaBbCc AaBbCc AaBbCc Toner smear If the amount of background ...

User Guide
Page 193
... tray. are dirty See page 8.4. See "Paper Specifications" on page 8.9. • If the problem persists, the machine may require repair. Contact a service representative. Clean the inside of paper over in the tray. • Try printing to the rear output slot. Contact a service representative. 9.18 TROUBLESHOOTING Remove the toner cartridge...; The toner cartridge may be installed properly. See "Replacing the Toner Cartridge" on page A.6. • Turn the stack of the machine. Loose toner • Clean the inside of printouts Check for leaking toner.
... tray. are dirty See page 8.4. See "Paper Specifications" on page 8.9. • If the problem persists, the machine may require repair. Contact a service representative. Clean the inside of paper over in the tray. • Try printing to the rear output slot. Contact a service representative. 9.18 TROUBLESHOOTING Remove the toner cartridge...; The toner cartridge may be installed properly. See "Replacing the Toner Cartridge" on page A.6. • Turn the stack of the machine. Loose toner • Clean the inside of printouts Check for leaking toner.

User Guide
Page 194
... no defects are on page A.6. Blank copies print out. See "Paper Specifications" on the original document, clean the Scan unit. Curl If the printed paper is curl or paper does not feed into the printer: • Turn the stack of paper over in the ADF. Horizontal stripes AaBbCc AaBbCc AaBbCc AaBbCc AaBbCc...
... no defects are on page A.6. Blank copies print out. See "Paper Specifications" on the original document, clean the Scan unit. Curl If the printed paper is curl or paper does not feed into the printer: • Turn the stack of paper over in the ADF. Horizontal stripes AaBbCc AaBbCc AaBbCc AaBbCc AaBbCc...
User Guide
Page 197
... page or on other fax machine may be turned off, out of paper, or cannot answer incoming calls. Check your scan unit for marks and clean it can cause line errors. • Check your machine by making a copy. • The toner cartridge may be empty. You may not be enough memory...
... page or on other fax machine may be turned off, out of paper, or cannot answer incoming calls. Check your scan unit for marks and clean it can cause line errors. • Check your machine by making a copy. • The toner cartridge may be empty. You may not be enough memory...

User Guide
Page 213
...6.15 speed 6.16 automatic redialing 6.9 B broadcasting faxes 6.22 C canceling fax 6.8 print 3.5 scan 5.5 scheduled faxes 6.28 characters, enter 1.32 cleaning drum 8.11 inside 8.4 outside 8.3 scan unit 8.5 connection AC power 1.18 extension phone 1.16 telephone line cord 1.15 consumables 8.12 control panel... set 1.34 delay receive polling 6.26 delayed fax 6.23 display language, change 1.30 document jam, clear 9.2 loading 1.12 preparing 4.2 drum, clean 8.11 E error messages 9.8 extension phone, connect 1.16 F Favorite setting, use 3.6 fax system, set advanced settings 6.33 basic settings 6.2 ...
...6.15 speed 6.16 automatic redialing 6.9 B broadcasting faxes 6.22 C canceling fax 6.8 print 3.5 scan 5.5 scheduled faxes 6.28 characters, enter 1.32 cleaning drum 8.11 inside 8.4 outside 8.3 scan unit 8.5 connection AC power 1.18 extension phone 1.16 telephone line cord 1.15 consumables 8.12 control panel... set 1.34 delay receive polling 6.26 delayed fax 6.23 display language, change 1.30 document jam, clear 9.2 loading 1.12 preparing 4.2 drum, clean 8.11 E error messages 9.8 extension phone, connect 1.16 F Favorite setting, use 3.6 fax system, set advanced settings 6.33 basic settings 6.2 ...


