User Manual (ENGLISH)
Page 4
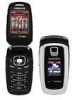
... the Battery 8 Activating Your Phone 9 Setting Up Your Voicemail 11 Understanding Your Phone 12 Features of Your Phone 12 Closed View of Your Phone 13 Open View of Your Phone 14 Command Keys ...16 Understanding the Display Screen 18 Your Phone's Modes 19 Call Functions 22... Entering Numbers 47 Entering Symbols ...47 Understanding Your Contacts 49 Contacts ...50 Finding a Contacts Entry 51 Adding a New Contacts Entry 52 Editing a Contacts Entry 54 Saving a Number After a Call 57 Speed Dial ...59 Contacts Groups ...61 Deleting a Contacts Entry 64 Memory Info ...65 Mobile Shop 66 ...
... the Battery 8 Activating Your Phone 9 Setting Up Your Voicemail 11 Understanding Your Phone 12 Features of Your Phone 12 Closed View of Your Phone 13 Open View of Your Phone 14 Command Keys ...16 Understanding the Display Screen 18 Your Phone's Modes 19 Call Functions 22... Entering Numbers 47 Entering Symbols ...47 Understanding Your Contacts 49 Contacts ...50 Finding a Contacts Entry 51 Adding a New Contacts Entry 52 Editing a Contacts Entry 54 Saving a Number After a Call 57 Speed Dial ...59 Contacts Groups ...61 Deleting a Contacts Entry 64 Memory Info ...65 Mobile Shop 66 ...
User Manual (ENGLISH)
Page 16
...pop-up menu appears. • In a message, press the Add (right) soft key ( ) to add a Contact to the Send To list. You can also use the CLR key to return to a previous menu or to return...8226; When the left soft key function is Edit, press the Edit (left) soft key ( ) to edit a Contact. • When the left soft key function is Options, press the Options (left soft key are defined by what .... • When the OK key function is EDIT, press the EDIT (OK) key ( ) to backspace (and delete) the character. 16 Left Soft Key Some functions of the right soft key are two soft keys, the (left) ...
...pop-up menu appears. • In a message, press the Add (right) soft key ( ) to add a Contact to the Send To list. You can also use the CLR key to return to a previous menu or to return...8226; When the left soft key function is Edit, press the Edit (left) soft key ( ) to edit a Contact. • When the left soft key function is Options, press the Options (left soft key are defined by what .... • When the OK key function is EDIT, press the EDIT (OK) key ( ) to backspace (and delete) the character. 16 Left Soft Key Some functions of the right soft key are two soft keys, the (left) ...
User Manual (ENGLISH)
Page 48
You can manage your daily contacts by storing their names and numbers in your Contacts entries sorted by name. Section 6: Understanding Your Contacts Topics Covered • Contacts • Finding a Contacts Entry • Adding a New Contacts Entry • Editing a Contacts Entry • Saving a Number After a Call • Speed Dial • Contacts Groups • Deleting a Contacts Entry • Memory Info This section details how you can have your Contacts list. Understanding Your Contacts 49
You can manage your daily contacts by storing their names and numbers in your Contacts entries sorted by name. Section 6: Understanding Your Contacts Topics Covered • Contacts • Finding a Contacts Entry • Adding a New Contacts Entry • Editing a Contacts Entry • Saving a Number After a Call • Speed Dial • Contacts Groups • Deleting a Contacts Entry • Memory Info This section details how you can have your Contacts list. Understanding Your Contacts 49
User Manual (ENGLISH)
Page 53
...options popup in the display. 4. Set the number the phone will dial when Contracts dialing, speed dialing, or voice dialing. - A 2-second pause after which dialing resumes (see "Speed Dial" on page 55 for more information). - See "Finding a Contacts Entry" on page 51 for more information). Set Speed... Dial / Remove speed dial - Use the navigation keys to Contacts Numbers" on page 59 for input from you wish to change . • Press CLR to backspace and delete numbers or letters. • Press and hold CLR to clear all numbers or ...
...options popup in the display. 4. Set the number the phone will dial when Contracts dialing, speed dialing, or voice dialing. - A 2-second pause after which dialing resumes (see "Speed Dial" on page 55 for more information). - See "Finding a Contacts Entry" on page 51 for more information). Set Speed... Dial / Remove speed dial - Use the navigation keys to Contacts Numbers" on page 59 for input from you wish to change . • Press CLR to backspace and delete numbers or letters. • Press and hold CLR to clear all numbers or ...
User Manual (ENGLISH)
Page 63
... • Send Pic Msg • Rename • Erase • Add 3. Deleting a Contacts Entry 1. Use the navigation keys to highlight Erase, then press the key. The phone prompts you to reassign the Contacts formerly in the display. 2. Erase a Group The Erase option lets you delete a Group, thus freeing you to confirm the erasure. 5. Press the No...
... • Send Pic Msg • Rename • Erase • Add 3. Deleting a Contacts Entry 1. Use the navigation keys to highlight Erase, then press the key. The phone prompts you to reassign the Contacts formerly in the display. 2. Erase a Group The Erase option lets you delete a Group, thus freeing you to confirm the erasure. 5. Press the No...
User Manual (ENGLISH)
Page 75
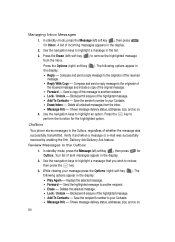
Enter the Date when this message will send, then use the Up and Down navigation keys to your phone. 4. Save the recipient's number or e-mail address as a Contacts list entry. Press the key to highlight the desired option, then press the key. Note: For more information on viewing and managing... been downloaded to your phone to choose the Time. • Remove Pic - Saves the message to your inbox, where you have the option to invoke the option. 9. Use the Up/Down navigation keys to highlight an option, then press the key to Reply, Forward, Delete, Save Text, Save Pic...
Enter the Date when this message will send, then use the Up and Down navigation keys to your phone. 4. Save the recipient's number or e-mail address as a Contacts list entry. Press the key to highlight the desired option, then press the key. Note: For more information on viewing and managing... been downloaded to your phone to choose the Time. • Remove Pic - Saves the message to your inbox, where you have the option to invoke the option. 9. Use the Up/Down navigation keys to highlight an option, then press the key to Reply, Forward, Delete, Save Text, Save Pic...
User Manual (ENGLISH)
Page 79
... - Shows message delivery status, addressee, size, and so on . 80 Verify if and when a message or e-mail was successfully transmitted. Deletes the selected message. • Lock / Unlock - Delivery Ack/Delivery Ack feature. Your list of incoming messages appears in the Outbox 1. The.... Review Messages in the display. 2. Block/permit erasure of the highlighted message. • Add To Contacts - The following options appear in the display. 2. Outbox Your phone stores messages in the Outbox, regardless of the original message. • Forward - Use the navigation keys...
... - Shows message delivery status, addressee, size, and so on . 80 Verify if and when a message or e-mail was successfully transmitted. Deletes the selected message. • Lock / Unlock - Delivery Ack/Delivery Ack feature. Your list of incoming messages appears in the Outbox 1. The.... Review Messages in the display. 2. Block/permit erasure of the highlighted message. • Add To Contacts - The following options appear in the display. 2. Outbox Your phone stores messages in the Outbox, regardless of the original message. • Forward - Use the navigation keys...
User Manual (ENGLISH)
Page 80
...Txt Msg screen or Create Pic Msg screen appears in the display: • Forward - Enter the phone Number or E-Mail address of sent messages appear in the display, but never sent. Compose your Contacts. • Erase Outbox - Use the navigation keys to the original recipient. • Lock /...Picture Message, def for Handwritten Message, or ghi for def Outbox. Press the Erase (left) soft key ( ) to highlight an option. Delete all unlocked messages from the Inbox. Messaging 81 Use the navigation keys to remove the highlighted message from the Outbox. • Message Info -...
...Txt Msg screen or Create Pic Msg screen appears in the display: • Forward - Enter the phone Number or E-Mail address of sent messages appear in the display, but never sent. Compose your Contacts. • Erase Outbox - Use the navigation keys to the original recipient. • Lock /...Picture Message, def for Handwritten Message, or ghi for def Outbox. Press the Erase (left) soft key ( ) to highlight an option. Delete all unlocked messages from the Inbox. Messaging 81 Use the navigation keys to remove the highlighted message from the Outbox. • Message Info -...
User Manual (ENGLISH)
Page 82
...8226; Delivery Ack - Send the highlighted message to perform the function for Drafts. The message edit screen appears in draft message. • Add To Contacts - Shows the message contents. • Add Quick Text - Choose High, Normal, or Low. • Validity Period - Remove sound file included ...Add To Contacts - Block/permit erasure of any needed changes and press the Options (right) soft key ( ). Use the navigation keys to view, then press the EDIT ( ) key. In standby mode, press the Message (left ) soft key ( ) to the Draft Box. • Priority Level - Delete all ...
...8226; Delivery Ack - Send the highlighted message to perform the function for Drafts. The message edit screen appears in draft message. • Add To Contacts - Shows the message contents. • Add Quick Text - Choose High, Normal, or Low. • Validity Period - Remove sound file included ...Add To Contacts - Block/permit erasure of any needed changes and press the Options (right) soft key ( ). Use the navigation keys to view, then press the EDIT ( ) key. In standby mode, press the Message (left ) soft key ( ) to the Draft Box. • Priority Level - Delete all ...
User Manual (ENGLISH)
Page 169
... 113 world time 116 TTY Mode 132 U Understanding Your Contacts 49 Deleting a Contacts entry 64 Editing an existing Contacts entry 54 Finding a Contacts entry 51 Understanding Your Phone 12 Closed View of Your Phone 13 Command Keys 16 Display Screen 18 Features of Your Phone 12 Open View of Your Phone 14 Using Abc Mode 46 V Version 143 Vibrate...
... 113 world time 116 TTY Mode 132 U Understanding Your Contacts 49 Deleting a Contacts entry 64 Editing an existing Contacts entry 54 Finding a Contacts entry 51 Understanding Your Phone 12 Closed View of Your Phone 13 Command Keys 16 Display Screen 18 Features of Your Phone 12 Open View of Your Phone 14 Using Abc Mode 46 V Version 143 Vibrate...
User Manual (ENGLISH)
Page 6
Table of Contents Section 6: Understanding Your Contacts ........ 69 Contacts 70 Finding a Contacts Entry 71 Adding a New Contacts Entry 74 Editing a Contacts Entry 76 Saving a Number After a Call 81 Speed Dial 83 Contacts Groups 86 Deleting a Contacts Entry 90 Memory Info 91 Section 7: @metro 93 Accessing @metro (Mobile Shop 94 Section 8: Messaging 99 Types of Messages 100 Create and Send...
Table of Contents Section 6: Understanding Your Contacts ........ 69 Contacts 70 Finding a Contacts Entry 71 Adding a New Contacts Entry 74 Editing a Contacts Entry 76 Saving a Number After a Call 81 Speed Dial 83 Contacts Groups 86 Deleting a Contacts Entry 90 Memory Info 91 Section 7: @metro 93 Accessing @metro (Mobile Shop 94 Section 8: Messaging 99 Types of Messages 100 Create and Send...
User Manual (ENGLISH)
Page 24
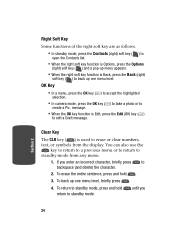
... level, briefly press . Right Soft Key Some functions of the right soft key are as follows. • In standby mode, press the Contacts (right) soft key ( ) to open the Contacts list. • When the right soft key function is Options, press the Options (right) soft key ( ) and a pop-up menu appears. •... a menu, press the OK key ( ) to accept the highlighted selection. • In camera mode, press the OK key ( ) to take a photo or to backspace (and delete) the character. 2.
... level, briefly press . Right Soft Key Some functions of the right soft key are as follows. • In standby mode, press the Contacts (right) soft key ( ) to open the Contacts list. • When the right soft key function is Options, press the Options (right) soft key ( ) and a pop-up menu appears. •... a menu, press the OK key ( ) to accept the highlighted selection. • In camera mode, press the OK key ( ) to take a photo or to backspace (and delete) the character. 2.

User Manual (ENGLISH)
Page 69
You can manage your Contacts list. Section 6: Understanding Your Contacts Topics Covered • Contacts • Finding a Contacts Entry • Adding a New Contacts Entry • Editing a Contacts Entry • Saving a Number After a Call • Speed Dial • Contacts Groups • Deleting a Contacts Entry • Memory Info This section details how you can have your Contacts entries sorted by storing their names and numbers in your daily contacts by name. Section 6: Understanding Your Contacts 69 Section 6
You can manage your Contacts list. Section 6: Understanding Your Contacts Topics Covered • Contacts • Finding a Contacts Entry • Adding a New Contacts Entry • Editing a Contacts Entry • Saving a Number After a Call • Speed Dial • Contacts Groups • Deleting a Contacts Entry • Memory Info This section details how you can have your Contacts entries sorted by storing their names and numbers in your daily contacts by name. Section 6: Understanding Your Contacts 69 Section 6
User Manual (ENGLISH)
Page 76
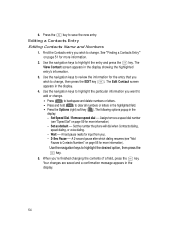
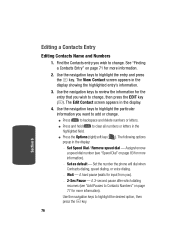
... CLR to backspace and delete numbers or letters. ⅷ Press and hold CLR to change, then press the EDIT key ( ). Set the number the phone will dial when Contracts dialing, speed dialing, or voice dialing. מWait - Editing a Contacts Entry Editing Contacts Name and Numbers 1. The Edit Contact screen appears in the display...
... CLR to backspace and delete numbers or letters. ⅷ Press and hold CLR to change, then press the EDIT key ( ). Set the number the phone will dial when Contracts dialing, speed dialing, or voice dialing. מWait - Editing a Contacts Entry Editing Contacts Name and Numbers 1. The Edit Contact screen appears in the display...
User Manual (ENGLISH)
Page 89
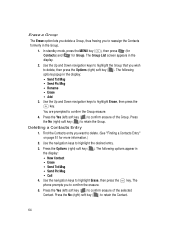
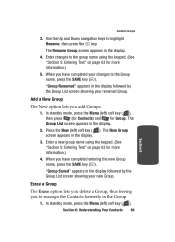
... more information.) 5. Enter changes to the Group name, press the SAVE key ( ). Press the New (left ) soft key ( ), Section 6: Understanding Your Contacts 89 Section 6 Enter a new group name using the keypad. (See "Section 5: Entering Text" on page 63 for more information.) 4. "Group Saved" appears ...in the display. 4. In standby mode, press the Menu (left ) soft key ( ). Erase a Group The Erase option lets you delete a Group, thus freeing you have completed entering the new Group name, press the SAVE key ( ). Add a New Group The New option lets you ...
... more information.) 5. Enter changes to the Group name, press the SAVE key ( ). Press the New (left ) soft key ( ), Section 6: Understanding Your Contacts 89 Section 6 Enter a new group name using the keypad. (See "Section 5: Entering Text" on page 63 for more information.) 4. "Group Saved" appears ...in the display. 4. In standby mode, press the Menu (left ) soft key ( ). Erase a Group The Erase option lets you delete a Group, thus freeing you have completed entering the new Group name, press the SAVE key ( ). Add a New Group The New option lets you ...
User Manual (ENGLISH)
Page 90
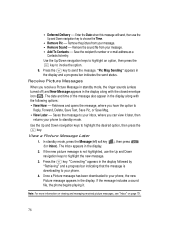
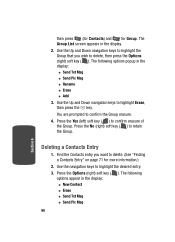
... press the key. Use the Up and Down navigation keys to confirm erasure of the Group. then press @ (for Contacts) and ghi for more information.) 2. Section 6 Deleting a Contacts Entry 1. Use the navigation keys to delete, then press the Options (right) soft key ( ). Use the Up and Down navigation keys to highlight the Group that...
... press the key. Use the Up and Down navigation keys to confirm erasure of the Group. then press @ (for Contacts) and ghi for more information.) 2. Section 6 Deleting a Contacts Entry 1. Use the navigation keys to delete, then press the Options (right) soft key ( ). Use the Up and Down navigation keys to highlight the Group that...
User Manual (ENGLISH)
Page 114
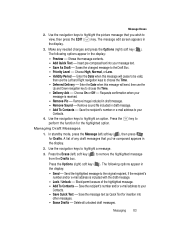
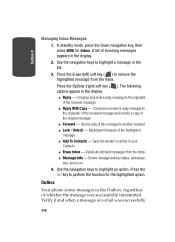
...Message Info - Press the Options (right) soft key ( ). Delete all unlocked messages from the Inbox. Shows message delivery status, addressee, size, and so on. 4. Save the sender's number to highlight an option. Outbox Your phone stores messages in the display: ⅷ Reply - In standby mode..., press the Down navigation key, then press abc for the highlighted option. Use the navigation keys to your Contacts. ⅷ Erase Inbox - Compose and send a...
...Message Info - Press the Options (right) soft key ( ). Delete all unlocked messages from the Inbox. Shows message delivery status, addressee, size, and so on. 4. Save the sender's number to highlight an option. Outbox Your phone stores messages in the display: ⅷ Reply - In standby mode..., press the Down navigation key, then press abc for the highlighted option. Use the navigation keys to your Contacts. ⅷ Erase Inbox - Compose and send a...
User Manual (ENGLISH)
Page 115
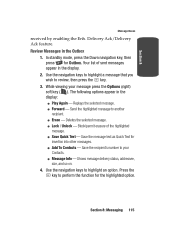
...message press the Options (right) soft key ( ). Save the recipient's number to another recipient. ⅷ Erase - Delivery Ack/Delivery Ack feature. Deletes the selected message. ⅷ Lock / Unlock - Block/permit erasure of sent messages appear in the display. 2. Review Messages in the display: &#...8567; Play Again - In standby mode, press the Down navigation key, then press def for insertion into other messages. ⅷ Add To Contacts - Section 8: Messaging 115 Shows message delivery status, addressee, size, and so on. 4. Section 8 Message Boxes received by enabling the Enh....
...message press the Options (right) soft key ( ). Save the recipient's number to another recipient. ⅷ Erase - Delivery Ack/Delivery Ack feature. Deletes the selected message. ⅷ Lock / Unlock - Block/permit erasure of sent messages appear in the display. 2. Review Messages in the display: &#...8567; Play Again - In standby mode, press the Down navigation key, then press def for insertion into other messages. ⅷ Add To Contacts - Section 8: Messaging 115 Shows message delivery status, addressee, size, and so on. 4. Section 8 Message Boxes received by enabling the Enh....
User Manual (ENGLISH)
Page 116
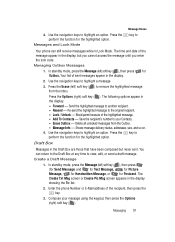
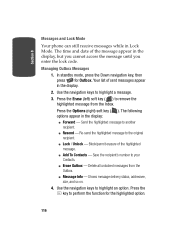
... the display: ⅷ Forward - Press the key to highlight a message. 3. Section 8 Messages and Lock Mode Your phone can still receive messages while in the display. 2. Send the highlighted message to your Contacts. ⅷ Erase Outbox - Delete all unlocked messages from the Inbox. Managing Outbox Messages 1. Use the navigation keys to perform the function... Press the Options (right) soft key ( ). Block/permit erasure of sent messages appear in Lock Mode. Your list of the highlighted message. ⅷ Add To Contacts -
... the display: ⅷ Forward - Press the key to highlight a message. 3. Section 8 Messages and Lock Mode Your phone can still receive messages while in the display. 2. Send the highlighted message to your Contacts. ⅷ Erase Outbox - Delete all unlocked messages from the Inbox. Managing Outbox Messages 1. Use the navigation keys to perform the function... Press the Options (right) soft key ( ). Block/permit erasure of sent messages appear in Lock Mode. Your list of the highlighted message. ⅷ Add To Contacts -
User Manual (ENGLISH)
Page 120
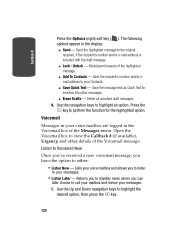
...: ⅷ Send - Send the highlighted message to perform the function for insertion into other details of the highlighted message. ⅷ Add To Contacts - Press the key to the original recipient, if the recipient's number and/or e-mail address is included with the draft message. ⅷ Lock .../ Unlock - Delete all unlocked draft messages. 4. Save the message text as Quick Text for the highlighted option. Returns you to standby mode where you have the...
...: ⅷ Send - Send the highlighted message to perform the function for insertion into other details of the highlighted message. ⅷ Add To Contacts - Press the key to the original recipient, if the recipient's number and/or e-mail address is included with the draft message. ⅷ Lock .../ Unlock - Delete all unlocked draft messages. 4. Save the message text as Quick Text for the highlighted option. Returns you to standby mode where you have the...


