User Manual
Page 2
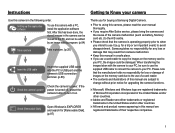
Check [Removable Disk] Open Windows's EXPLORER and search for [Removable Disk]. (p.87) Thank you for buying a Samsung Digital Camera. å Prior to using this camera, please read the user manual thoroughly. å If you require After Sales service, please bring the ...turned off, preset the camera button to avoid disappointment. Please note that may result from camera malfunction. å Keep this manual in the following order. Samsung takes no responsibility for any loss or damage that the manufacturer holds no responsibility for loss or damage of images on the memory card due...
Check [Removable Disk] Open Windows's EXPLORER and search for [Removable Disk]. (p.87) Thank you for buying a Samsung Digital Camera. å Prior to using this camera, please read the user manual thoroughly. å If you require After Sales service, please bring the ...turned off, preset the camera button to avoid disappointment. Please note that may result from camera malfunction. å Keep this manual in the following order. Samsung takes no responsibility for any loss or damage that the manufacturer holds no responsibility for loss or damage of images on the memory card due...

User Manual
Page 3
... use and it may result in use the camera as a sealed vehicle, direct sunlight or other places of children or animals to your dealer or Samsung Camera Service centre. Exposure to use , do so may cause heat to modify this product and accessories out of reach of extremes in flammable... or a foreign object enter the camera, do not use it time to cool. å Do not leave this be carried out by your dealer or Samsung Camera Service centre. å Please do not use this product in fire, injury, electric shock or severe damage to flammable or explosive gases...
... use and it may result in use the camera as a sealed vehicle, direct sunlight or other places of children or animals to your dealer or Samsung Camera Service centre. Exposure to use , do so may cause heat to modify this product and accessories out of reach of extremes in flammable... or a foreign object enter the camera, do not use it time to cool. å Do not leave this be carried out by your dealer or Samsung Camera Service centre. å Please do not use this product in fire, injury, electric shock or severe damage to flammable or explosive gases...

User Manual
Page 4
When changing the composition, there may be an after using it is in low temperatures, you are using the AC adapter. Caution CAUTION indicates a potentially hazardous situation which, if not avoided, may result in a minor or moderate injury. å Leaking, overheating, or damaged battery could result in fire. - Otherwise the battery may leak corrosive electrolyte and permanently damage the camera's components. å Do not fire the flash while it is switched on the LCD monitor. å Credit cards may differ from the wall socket. Then make sure that ...
When changing the composition, there may be an after using it is in low temperatures, you are using the AC adapter. Caution CAUTION indicates a potentially hazardous situation which, if not avoided, may result in a minor or moderate injury. å Leaking, overheating, or damaged battery could result in fire. - Otherwise the battery may leak corrosive electrolyte and permanently damage the camera's components. å Do not fire the flash while it is switched on the LCD monitor. å Credit cards may differ from the wall socket. Then make sure that ...
User Manual
Page 5
Contents 024 How to use the Movie clip mode 024 Recording the movie clip without sound 024 Pausing while recording a movie clip (Successive Recording) 025 Things to Watch Out for When Taking Pictures 026 Using the camera buttons to set the camera 026 POWER button 026 SHUTTER button 026 ZOOM button 028 Info (DISP) / Up button 028 Macro / Down button 030 Focus lock 030 Flash / Left button 032 Self-timer / Right button 034 MENU button 034 OK button 034 Functions 035 How to Enable Functions Using the MENU Button 035 Exposure compensation 036 White balance 037 ISO 037 Face Detection 039 Face Tone 4...
Contents 024 How to use the Movie clip mode 024 Recording the movie clip without sound 024 Pausing while recording a movie clip (Successive Recording) 025 Things to Watch Out for When Taking Pictures 026 Using the camera buttons to set the camera 026 POWER button 026 SHUTTER button 026 ZOOM button 028 Info (DISP) / Up button 028 Macro / Down button 030 Focus lock 030 Flash / Left button 032 Self-timer / Right button 034 MENU button 034 OK button 034 Functions 035 How to Enable Functions Using the MENU Button 035 Exposure compensation 036 White balance 037 ISO 037 Face Detection 039 Face Tone 4...

User Manual
Page 6
Contents 048 Display Bright 048 Quick view 048 Display SAVE 049 Settings 049 Formatting a memory 049 Initialisation 050 Setting up the Date / Time / Date type 050 Time Zone 050 File name 051 Imprinting the recording date 051 Auto power off 052 Selecting Video out type 053 Auto Focus lamp 053 Setting the USB PLAY 054 54 054 054 055 055 055 056 056 056 058 Starting play mode Playing back a still image Playing back a movie clip Movie clip capture function Playing back a recorded voice Playing back a voice memo LCD monitor Indicator Using the camera buttons to set the camera Thumbnail / ...
Contents 048 Display Bright 048 Quick view 048 Display SAVE 049 Settings 049 Formatting a memory 049 Initialisation 050 Setting up the Date / Time / Date type 050 Time Zone 050 File name 051 Imprinting the recording date 051 Auto power off 052 Selecting Video out type 053 Auto Focus lamp 053 Setting the USB PLAY 054 54 054 054 055 055 055 056 056 056 058 Starting play mode Playing back a still image Playing back a movie clip Movie clip capture function Playing back a recorded voice Playing back a voice memo LCD monitor Indicator Using the camera buttons to set the camera Thumbnail / ...
User Manual
Page 7
Contents 074 PictBridge : Reset 074 Important notes 076 Warning indicator 077 Before contacting a service centre 079 Specifications SOFTWARE 082 82 082 083 084 086 089 090 093 093 094 Software Notes System Requirements About the software Setting up the application software Starting PC mode Removing the removable disk Samsung Master Setting up the USB Driver for MAC Using the USB Driver for MAC FAQ 6
Contents 074 PictBridge : Reset 074 Important notes 076 Warning indicator 077 Before contacting a service centre 079 Specifications SOFTWARE 082 82 082 083 084 086 089 090 093 093 094 Software Notes System Requirements About the software Setting up the application software Starting PC mode Removing the removable disk Samsung Master Setting up the USB Driver for MAC Using the USB Driver for MAC FAQ 6
User Manual
Page 8
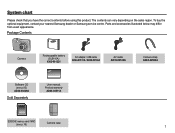
... from exact appearance. System chart Please check that you have the correct contents before using this product. To buy the optional equipment, contact your nearest Samsung dealer or Samsung service centre.
... from exact appearance. System chart Please check that you have the correct contents before using this product. To buy the optional equipment, contact your nearest Samsung dealer or Samsung service centre.

User Manual
Page 11
Identification of features Bottom Memory card slot Battery holder Battery chamber cover Battery chamber 5 Function button Information / Up button OK / Play & Pause button Flash / Left button Self-timer / Right button Macro / Down button Tripod socket Ä To open the battery chamber cover, slide it in the direction shown above. 10
Identification of features Bottom Memory card slot Battery holder Battery chamber cover Battery chamber 5 Function button Information / Up button OK / Play & Pause button Flash / Left button Self-timer / Right button Macro / Down button Tripod socket Ä To open the battery chamber cover, slide it in the direction shown above. 10

User Manual
Page 12
Blinking A picture will be taken after initializing the device) Transmitting Data with the subject's movement. Blinking After pressing the Shutter button, the image is The lamp lights up Text Sunset ICON MODE Dawn Backlight Firework Beach&Snow ICON 11 For the final 2 seconds, the lamp blinks quickly at 0.25-second intervals. Blinking For the 2 seconds, the lamp blinks quickly at 0.25-second intervals. Identification of features Self-timer lamp Icon Status Description - ICON MODE Beauty Shot SCENE Night Portrait Children ICON MODE Landscape ...
Blinking A picture will be taken after initializing the device) Transmitting Data with the subject's movement. Blinking After pressing the Shutter button, the image is The lamp lights up Text Sunset ICON MODE Dawn Backlight Firework Beach&Snow ICON 11 For the final 2 seconds, the lamp blinks quickly at 0.25-second intervals. Blinking For the 2 seconds, the lamp blinks quickly at 0.25-second intervals. Identification of features Self-timer lamp Icon Status Description - ICON MODE Beauty Shot SCENE Night Portrait Children ICON MODE Landscape ...

User Manual
Page 13
... the camera. å Low temperatures (below 0°C) can affect the performance of the battery and you can lose power over time and are measured under Samsung's standard conditions and shooting conditions and may become warm. You can be used as an AC cable and recharge the spare battery with the camera...
... the camera. å Low temperatures (below 0°C) can affect the performance of the battery and you can lose power over time and are measured under Samsung's standard conditions and shooting conditions and may become warm. You can be used as an AC cable and recharge the spare battery with the camera...

User Manual
Page 14
Connecting to a Power Source Important information about USB cable usage. å Use a USB cable with the correct specification. å If the camera is discharged again. 13 The camera may not be fully charged. In this case, use the flash frequently or take a movie clip with the camera power on the camera at the same time : remove other devices are connected to the PC. å If the camera and other device. å Camera can not be detected using the camera. å Do not use the back side USB port of computer. å If the USB port of the AC Charger does not turn...
Connecting to a Power Source Important information about USB cable usage. å Use a USB cable with the correct specification. å If the camera is discharged again. 13 The camera may not be fully charged. In this case, use the flash frequently or take a movie clip with the camera power on the camera at the same time : remove other devices are connected to the PC. å If the camera and other device. å Camera can not be detected using the camera. å Do not use the back side USB port of computer. å If the USB port of the AC Charger does not turn...

User Manual
Page 15
When the battery chamber cover is opened, do not force the battery chamber cover, this may be different from the actual battery status. 14 Inserting the memory card Ê Insert the memory card as shown - Doing so may damage the memory card slot. Ê There are displayed on after you have inserted battery, please check whether the battery (+ / -). - If the camera does not turn on the LCD monitor. Do not insert the memory card the wrong way round. Turn off the camera's power before inserting the memory card. - Have the front of the memory card facing toward the front of the ...
When the battery chamber cover is opened, do not force the battery chamber cover, this may be different from the actual battery status. 14 Inserting the memory card Ê Insert the memory card as shown - Doing so may damage the memory card slot. Ê There are displayed on after you have inserted battery, please check whether the battery (+ / -). - If the camera does not turn on the LCD monitor. Do not insert the memory card the wrong way round. Turn off the camera's power before inserting the memory card. - Have the front of the memory card facing toward the front of the ...

User Manual
Page 16
...extremes in an environment with a different camera. å Turn off or the memory card is removed while recording, deleting (formatting) or reading. å Samsung cannot be the case, you will need to format the memory card (see p.49) if you may cause damage to data in another digital camera...cloth. å Please keep the memory card in its case when not in this camera. å Do not use a memory card formatted by the Samsung warranty. å The memory card is insufficient memory available : A [Memory Full] message will appear and the camera will eventually reduce the memory...
...extremes in an environment with a different camera. å Turn off or the memory card is removed while recording, deleting (formatting) or reading. å Samsung cannot be the case, you will need to format the memory card (see p.49) if you may cause damage to data in another digital camera...cloth. å Please keep the memory card in its case when not in this camera. å Do not use a memory card formatted by the Samsung warranty. å The memory card is insufficient memory available : A [Memory Full] message will appear and the camera will eventually reduce the memory...

User Manual
Page 17
About 340 About 483 About 693 - - About 7'05" About 13'54" - - - By sliding the switch to the top of the SD/SDHC memory card before taking a picture. When using a 1GB SD memory, the specified shooting capacity will be as subject matter and memory card type. About 2284 About 2376 About 2907 - - *Movie clip - - - Still image About 339 About 490 About 696 - - About 783 About 975 About 1292 - - About 26'24" About 49'22" å The zoom button doesn't function during the movie recording. å The recording times can be cancelled. å Slide the switch to ...
About 340 About 483 About 693 - - About 7'05" About 13'54" - - - By sliding the switch to the top of the SD/SDHC memory card before taking a picture. When using a 1GB SD memory, the specified shooting capacity will be as subject matter and memory card type. About 2284 About 2376 About 2907 - - *Movie clip - - - Still image About 339 About 490 About 696 - - About 783 About 975 About 1292 - - About 26'24" About 49'22" å The zoom button doesn't function during the movie recording. å The recording times can be cancelled. å Slide the switch to ...

User Manual
Page 18
Select the [Language] menu by pressing the Up/Down/Left/Right button and press the OK button. Select the desired sub menu by pressing the Up/Down button and press the Right button. 2. Select the [Date&Time] menu by pressing the Up/Down button and press the OK button. Select the desired sub menu by pressing the Up/Down button and press the Right button. 2. Language :English Date & Time yyyy mm dd :08/12/01 2008 / 12 / 01 13:00 yyyy/mm/dd Exit Back Left/Right button : Selects world time/year/ month/ day/hour/ minute/ date type Up/Down button : Changes the value of each item. ...
Select the [Language] menu by pressing the Up/Down/Left/Right button and press the OK button. Select the desired sub menu by pressing the Up/Down button and press the Right button. 2. Select the [Date&Time] menu by pressing the Up/Down button and press the OK button. Select the desired sub menu by pressing the Up/Down button and press the Right button. 2. Language :English Date & Time yyyy mm dd :08/12/01 2008 / 12 / 01 13:00 yyyy/mm/dd Exit Back Left/Right button : Selects world time/year/ month/ day/hour/ minute/ date type Up/Down button : Changes the value of each item. ...

User Manual
Page 19
LCD monitor indicator Ê The LCD monitor displays information about the shooting functions and selections. [Image & Full Status] No. Description Icons 1 Recording mode 2 Optical / Digital Zoom bar / Digital Zoom rate 3 Voice Memo Number of available shots 4 remaining Remaining time 18 00001 00:00:00 Page p.20 p.26 p.44 p.16 p.16 No. p.14 p.30 p.32 p.28 p.42 p.37 p.39 p.39/ 43/45 p.50 p.25 p.41 p.41 p.40 p.40 p.39 p.37 p.36 p.35 Description 5 Memory card icon / Internal memory icon 6 Battery 7 Flash 8 Self-timer 9 Macro 10 Photo Style Selector 11 Face ...
LCD monitor indicator Ê The LCD monitor displays information about the shooting functions and selections. [Image & Full Status] No. Description Icons 1 Recording mode 2 Optical / Digital Zoom bar / Digital Zoom rate 3 Voice Memo Number of available shots 4 remaining Remaining time 18 00001 00:00:00 Page p.20 p.26 p.44 p.16 p.16 No. p.14 p.30 p.32 p.28 p.42 p.37 p.39 p.39/ 43/45 p.50 p.25 p.41 p.41 p.40 p.40 p.39 p.37 p.36 p.35 Description 5 Memory card icon / Internal memory icon 6 Battery 7 Flash 8 Self-timer 9 Macro 10 Photo Style Selector 11 Face ...

User Manual
Page 20
A menu for each camera mode appears. 2. Volume Start Sound Shutter Sound Beep AF Sound Self-Portrait Back Off :Medium Low:Off Med:1ium High:1 :On :On Set 19 Turn on the camera and press the MENU button. Use the up or down buttons to select a sub menu. Mode Functions Sound Display Settings Exit Auto Program DIS Photo Help Guide Scene Movie Change Mode Functions Sound Display Settings Exit Auto Program DIS Photo Help Guide Scene Movie Press the UP or DOWN button. Change 3. Use the left or right buttons to navigate through the menus. Change Mode Functions Sound ...
A menu for each camera mode appears. 2. Volume Start Sound Shutter Sound Beep AF Sound Self-Portrait Back Off :Medium Low:Off Med:1ium High:1 :On :On Set 19 Turn on the camera and press the MENU button. Use the up or down buttons to select a sub menu. Mode Functions Sound Display Settings Exit Auto Program DIS Photo Help Guide Scene Movie Change Mode Functions Sound Display Settings Exit Auto Program DIS Photo Help Guide Scene Movie Press the UP or DOWN button. Change 3. Use the left or right buttons to navigate through the menus. Change Mode Functions Sound ...

User Manual
Page 21
Auto Program DIS Photo Help Guide Scene Movie Exit Back 20 Mode Functions Sound Display Settings Exit Auto Program DIS Photo Help Guide Scene Movie Change Auto Program DIS Photo Help Guide Scene Movie Exit Back Auto Program DIS Photo Help Guide Scene Movie Exit Back Auto Program DIS Photo Help Guide Scene Movie Change How to insert the memory card. If the memory card is not inserted, an image will be displayed. 2. As this camera has a 9MB internal memory, you do not need to use the MENU button 1. Press the power button to capture an image clearly. å Avoid...
Auto Program DIS Photo Help Guide Scene Movie Exit Back 20 Mode Functions Sound Display Settings Exit Auto Program DIS Photo Help Guide Scene Movie Change Auto Program DIS Photo Help Guide Scene Movie Exit Back Auto Program DIS Photo Help Guide Scene Movie Exit Back Auto Program DIS Photo Help Guide Scene Movie Change How to insert the memory card. If the memory card is not inserted, an image will be displayed. 2. As this camera has a 9MB internal memory, you do not need to use the MENU button 1. Press the power button to capture an image clearly. å Avoid...

User Manual
Page 22
Press the Menu button to use the Program mode ( ) Selecting the automatic mode will not operate in dim conditions. 1. This mode will reduce the effect of camera shake and help you get a well-exposed image in the DIS mode. 2. Select the DIS mode by pressing the MENU button (p.20). 2. The submenus for the functions are as follows: Description EV White Balance ISO Face Detection Photo Size / Movie Size Quality / Frame Rate Page p.35 p.36 p.37 p.37 p.39 p.40 Description Metering Drive Focus Area Photo Style Selector Image Adjust Voice Page p.40 p.41 p.41 p.42 p.43 p.44 Ê Things to ...
Press the Menu button to use the Program mode ( ) Selecting the automatic mode will not operate in dim conditions. 1. This mode will reduce the effect of camera shake and help you get a well-exposed image in the DIS mode. 2. Select the DIS mode by pressing the MENU button (p.20). 2. The submenus for the functions are as follows: Description EV White Balance ISO Face Detection Photo Size / Movie Size Quality / Frame Rate Page p.35 p.36 p.37 p.37 p.39 p.40 Description Metering Drive Focus Area Photo Style Selector Image Adjust Voice Page p.40 p.41 p.41 p.42 p.43 p.44 Ê Things to ...

User Manual
Page 23
Available functions of the photo help guide å Function that can be used when focusing is difficult å Functions that can be used when the image is blurred å Function that can be used when filming in the dark å Function that can be used when adjusting the picture brightness å Function that can be used when focusing is difficult] Pressing the Up/Down button Photo Help Guide 2/2 When the subject is out of focus Pressing the OK button To focus on your subject, halfpress the shutter button: - Guide list Pressing the OK button [Function ...
Available functions of the photo help guide å Function that can be used when focusing is difficult å Functions that can be used when the image is blurred å Function that can be used when filming in the dark å Function that can be used when adjusting the picture brightness å Function that can be used when focusing is difficult] Pressing the Up/Down button Photo Help Guide 2/2 When the subject is out of focus Pressing the OK button To focus on your subject, halfpress the shutter button: - Guide list Pressing the OK button [Function ...