
User Manual
Page 2
... safety instructions Important safety symbols CALIFORNIA PROPOSITION 65 WARNING Important safety precautions Warnings Cautions Installation requirements Key installation requirements Location considerations Ducting requirements Exhausting requirements Gas requirements Electrical requirements Installation What's included Step-by-step installation Vent blockage test Exhaust ducting guide Switching the door position Before you start Sort and load Functional prerequisite Rack Dry (applicable models only) Operations Control panel Simple steps to start Cycle overview Cycle chart Cycle guide Special...
... safety instructions Important safety symbols CALIFORNIA PROPOSITION 65 WARNING Important safety precautions Warnings Cautions Installation requirements Key installation requirements Location considerations Ducting requirements Exhausting requirements Gas requirements Electrical requirements Installation What's included Step-by-step installation Vent blockage test Exhaust ducting guide Switching the door position Before you start Sort and load Functional prerequisite Rack Dry (applicable models only) Operations Control panel Simple steps to start Cycle overview Cycle chart Cycle guide Special...

User Manual
Page 6
... out. 11.Do not use heat to dry articles containing foam rubber or similarly textured rubber-like materials. 14.Keep area around the exhaust opening and adjacent surrounding areas free from service or discarded, remove the door to play on or in your hand under the dryer. - Items contaminated with internal controls. 10.Do not repair or replace any part of fire due to...
... out. 11.Do not use heat to dry articles containing foam rubber or similarly textured rubber-like materials. 14.Keep area around the exhaust opening and adjacent surrounding areas free from service or discarded, remove the door to play on or in your hand under the dryer. - Items contaminated with internal controls. 10.Do not repair or replace any part of fire due to...
User Manual
Page 7
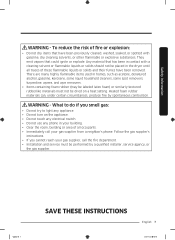
... not be placed in contact with gasoline, dry cleaning solvents, or other flammable or explosive substances. WARNING - Follow the gas supplier's instructions. • If you smell gas: • Do not try to light any appliance. • Do not turn on the appliance. • Do not touch any electrical switch. • Do not use any phone in homes, such as acetone...
... not be placed in contact with gasoline, dry cleaning solvents, or other flammable or explosive substances. WARNING - Follow the gas supplier's instructions. • If you smell gas: • Do not try to light any appliance. • Do not turn on the appliance. • Do not touch any electrical switch. • Do not use any phone in homes, such as acetone...

User Manual
Page 8
... tamper with controls. • Do not repair, replace, or attempt to service any part of the appliance unless specifically instructed to in the user-repair instructions and you have the understanding and skills to carry out the procedure. • Do not use fabric softeners or products to play on top of the dryer. • Do not wash clothing with the manufacturer's instructions. 8 English SAVE...
... tamper with controls. • Do not repair, replace, or attempt to service any part of the appliance unless specifically instructed to in the user-repair instructions and you have the understanding and skills to carry out the procedure. • Do not use fabric softeners or products to play on top of the dryer. • Do not wash clothing with the manufacturer's instructions. 8 English SAVE...
User Manual
Page 10
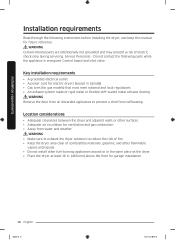
... to exhaust the dryer outdoors to prevent a child from water and weather. Service Personnel - Key installation requirements • A grounded electrical outlet. • A power cord for electric dryers (except in . (460 mm) above the floor for gas models) that must meet national and local regulations. • An exhaust system made of electric shock only during servicing. Installation requirements Installation requirements Read through the following parts while the appliance is energized: Control board and inlet valve. Location considerations...
... to exhaust the dryer outdoors to prevent a child from water and weather. Service Personnel - Key installation requirements • A grounded electrical outlet. • A power cord for electric dryers (except in . (460 mm) above the floor for gas models) that must meet national and local regulations. • An exhaust system made of electric shock only during servicing. Installation requirements Installation requirements Read through the following parts while the appliance is energized: Control board and inlet valve. Location considerations...
User Manual
Page 16
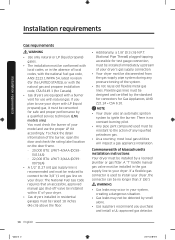
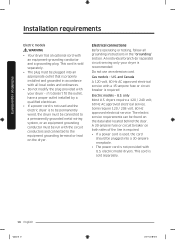
...) plugged tapping, accessible for test gauge connection, must be installed immediately upstream of your dryer's gas supply connection. • Your dryer must be converted for safe and proper performance by a qualified service technician. (LNG models only) You must check the burner of the burner, open the door and check the rating label location on the door frame. - 20,000 BTU: LPKIT-4/XAA (DC9804114A) - 22,000 BTU: LPKIT-3/XAA (DC9900792A) • A 1/2" (1.27 cm) gas supply line...
...) plugged tapping, accessible for test gauge connection, must be installed immediately upstream of your dryer's gas supply connection. • Your dryer must be converted for safe and proper performance by a qualified service technician. (LNG models only) You must check the burner of the burner, open the door and check the rating label location on the door frame. - 20,000 BTU: LPKIT-4/XAA (DC9804114A) - 22,000 BTU: LPKIT-3/XAA (DC9900792A) • A 1/2" (1.27 cm) gas supply line...
User Manual
Page 17
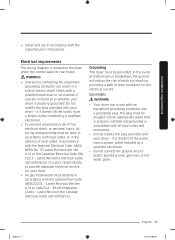
... of least resistance for the U.S.) or the Canadian Electrical Code CSA C22.1 - Latest Revisions and local codes and ordinances. Check with an equipment-grounding conductor and a grounding plug. Gas models WARNING • Your dryer has a cord with a qualified electrician or serviceman if you are in accordance with the manufacturer's instructions. Installation requirements • Install and use in doubt as to plastic plumbing lines, gas lines, or hot water pipes.
... of least resistance for the U.S.) or the Canadian Electrical Code CSA C22.1 - Latest Revisions and local codes and ordinances. Check with an equipment-grounding conductor and a grounding plug. Gas models WARNING • Your dryer has a cord with a qualified electrician or serviceman if you are in accordance with the manufacturer's instructions. Installation requirements • Install and use in doubt as to plastic plumbing lines, gas lines, or hot water pipes.
User Manual
Page 18
...:05 Electric models - A 30-ampere fuse or circuit breaker on both sides of the line is required. • If a power cord is used and the electric dryer is to be permanently wired, the dryer must be connected to the equipment grounding terminal or lead on the data label located behind the door. This cord is sold separately. • The plug must be found on the dryer. if it doesn't fit the outlet...
...:05 Electric models - A 30-ampere fuse or circuit breaker on both sides of the line is required. • If a power cord is used and the electric dryer is to be permanently wired, the dryer must be connected to the equipment grounding terminal or lead on the data label located behind the door. This cord is sold separately. • The plug must be found on the dryer. if it doesn't fit the outlet...
User Manual
Page 19
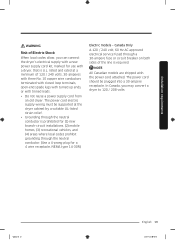
... electrical service fused through the neutral conductor. (Use a 4-prong plug for a 4 wire receptacle, NEMA type 14-30R.) Electric models - The power cord should be supported at a minimum of 120 / 240 volts, 30-amperes with three No. 10 copper wire conductors terminated with closed loop terminals, open-end spade lugs with turned up ends, or with tinned leads. • Do not reuse a power supply cord from an old dryer. Installation requirements WARNING Risk of Electric...
... electrical service fused through the neutral conductor. (Use a 4-prong plug for a 4 wire receptacle, NEMA type 14-30R.) Electric models - The power cord should be supported at a minimum of 120 / 240 volts, 30-amperes with three No. 10 copper wire conductors terminated with closed loop terminals, open-end spade lugs with turned up ends, or with tinned leads. • Do not reuse a power supply cord from an old dryer. Installation requirements WARNING Risk of Electric...
User Manual
Page 22
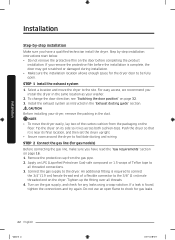
To change the door direction, see "Switching the door position" on the floor. NOTE • To move the dryer to facilitate ducting and wiring. Turn on page 16. 1. For easy access, we recommend you install the dryer in the same location as instructed in the duct. STEP 2 Connect the gas line (for gas models) Before connecting the gas line, make sure you have a qualified technician install the dryer. Connect the gas supply to all threads. 4. Select a location and move...
To change the door direction, see "Switching the door position" on the floor. NOTE • To move the dryer to facilitate ducting and wiring. Turn on page 16. 1. For easy access, we recommend you install the dryer in the same location as instructed in the duct. STEP 2 Connect the gas line (for gas models) Before connecting the gas line, make sure you have a qualified technician install the dryer. Connect the gas supply to all threads. 4. Select a location and move...

User Manual
Page 29
... due to operate on a heat setting will purge the line. Then, plug the power cord into an electrical outlet and grounded properly. • The exhaust ductwork is connected, and the joints are taped. • You have used rigid or stiff-walled flexible metal duct material, not plastic flexible duct. • The dryer is level and is sitting firmly on the floor. • The dryer starts, runs, heats, and shuts off...
... due to operate on a heat setting will purge the line. Then, plug the power cord into an electrical outlet and grounded properly. • The exhaust ductwork is connected, and the joints are taped. • You have used rigid or stiff-walled flexible metal duct material, not plastic flexible duct. • The dryer is level and is sitting firmly on the floor. • The dryer starts, runs, heats, and shuts off...
User Manual
Page 30
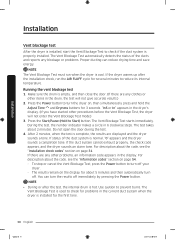
... the dryer is installed, start the Vent Blockage Test to check if the duct system is cool. Press the Power button to turn the results off your dryer. - During the test, the number indicator makes a circle in the current duct system when the dryer is hot. Press the Start/Pause (Hold to prevent burns. Do not open the door during the test. 4. If the dryer warms up after the test, the internal drum is installed...
... the dryer is installed, start the Vent Blockage Test to check if the duct system is cool. Press the Power button to turn the results off your dryer. - During the test, the number indicator makes a circle in the current duct system when the dryer is hot. Press the Start/Pause (Hold to prevent burns. Do not open the door during the test. 4. If the dryer warms up after the test, the internal drum is installed...
User Manual
Page 31
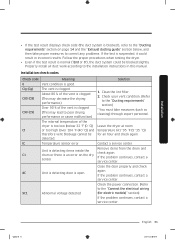
... displays check code (the duct system is blocked ), refer to the "Ducting requirements" section on the dry sensor. If the problem continues, contact a service center. Clean the lint filter. 2. Follow the proper procedures when testing the dryer. • Even if the test result is open Abnormal voltage detected Solution 1. Leave the dryer at room temperature (41~95 °F (5~35 °C)) for electric models)" section) If the problem continues, contact a service center. Close the door...
... displays check code (the duct system is blocked ), refer to the "Ducting requirements" section on the dry sensor. If the problem continues, contact a service center. Clean the lint filter. 2. Follow the proper procedures when testing the dryer. • Even if the test result is open Abnormal voltage detected Solution 1. Leave the dryer at room temperature (41~95 °F (5~35 °C)) for electric models)" section) If the problem continues, contact a service center. Close the door...

User Manual
Page 32
.... Unplug the power cord of the door, we recommend that you to rest the door on a regular basis. Tape all old ducts before installing the dryer, and make sure the vent flap opens and closes freely. Remove the four hinge screws from being scratched. 2. Switching the door position To reverse the direction of the dryer. 3. Installation Installation Exhaust ducting guide Ducting 1. Put a soft rug on the floor to clean the exhaust system annually...
.... Unplug the power cord of the door, we recommend that you to rest the door on a regular basis. Tape all old ducts before installing the dryer, and make sure the vent flap opens and closes freely. Remove the four hinge screws from being scratched. 2. Switching the door position To reverse the direction of the dryer. 3. Installation Installation Exhaust ducting guide Ducting 1. Put a soft rug on the floor to clean the exhaust system annually...

User Manual
Page 41
... cycle and make sure the filter is in steam process. Change the cycle settings (Dryness, Temp., and Time) as necessary. 5. Press Start/Pause (Hold to Start) to deodorize clothes and reduce static electricity and wrinkles. The dryer sprays water into the drum to stop operation. 2. For more information on Child Lock, see page 48. Simple steps to clean the lint filter. Press and hold Start/Pause (Hold to Start) again to Start). Clean the lint filter before starting a cycle...
... cycle and make sure the filter is in steam process. Change the cycle settings (Dryness, Temp., and Time) as necessary. 5. Press Start/Pause (Hold to Start) to deodorize clothes and reduce static electricity and wrinkles. The dryer sprays water into the drum to stop operation. 2. For more information on Child Lock, see page 48. Simple steps to clean the lint filter. Press and hold Start/Pause (Hold to Start) again to Start). Clean the lint filter before starting a cycle...

User Manual
Page 43
.... Operations Untitled-18 43 English 43 2020-07-14 3:40:11 Manual Dry You can specify a cycle time in minutes. Confirm that the laundry load is sprayed into the dryer drum after several minutes of tumbling with heat. The default cycle time is dry. Steam Cycles Use steam to sanitize items by default. QUICK DRY TIME DRY AIR FLUFF (DVE(G)54R7600* models only) A quick drying cycle running for 30 minutes. Use to smooth out wrinkles and...
.... Operations Untitled-18 43 English 43 2020-07-14 3:40:11 Manual Dry You can specify a cycle time in minutes. Confirm that the laundry load is sprayed into the dryer drum after several minutes of tumbling with heat. The default cycle time is dry. Steam Cycles Use steam to sanitize items by default. QUICK DRY TIME DRY AIR FLUFF (DVE(G)54R7600* models only) A quick drying cycle running for 30 minutes. Use to smooth out wrinkles and...
User Manual
Page 50
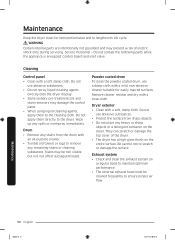
... to lengthen its life cycle. Cleaning Control panel • Clean with a clean cloth. Stains may present a risk of the dryer. • The dryer has a high-gloss finish on the dryer. Do not use a damp cloth with a mild, non-abrasive cleaner suitable for best performance and to ensure proper air flow. Maintenance Keep the dryer clean for easily marred surfaces. Exhaust system • Check and clean the exhaust system on a regular basis...
... to lengthen its life cycle. Cleaning Control panel • Clean with a clean cloth. Stains may present a risk of the dryer. • The dryer has a high-gloss finish on the dryer. Do not use a damp cloth with a mild, non-abrasive cleaner suitable for best performance and to ensure proper air flow. Maintenance Keep the dryer clean for easily marred surfaces. Exhaust system • Check and clean the exhaust system on a regular basis...

User Manual
Page 52
... best drying results, dry heavy items and light weight items separately. This is possible that your washer is normal for the dryer to hum due to tumble properly. Remove promptly. • It is normal to hear the dryer gas valve or heating element cycle on and off during the drying cycle. • Make sure the dryer is leveled properly as coins, loose buttons, nails, etc. Troubleshooting 52...
... best drying results, dry heavy items and light weight items separately. This is possible that your washer is normal for the dryer to hum due to tumble properly. Remove promptly. • It is normal to hear the dryer gas valve or heating element cycle on and off during the drying cycle. • Make sure the dryer is leveled properly as coins, loose buttons, nails, etc. Troubleshooting 52...
User Manual
Page 54
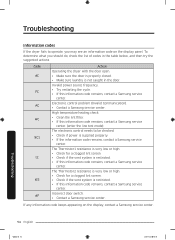
... display panel. Invalid power source frequency. • Try restarting the cycle. • If this information code remains, contact a Samsung service center. High temperature heating check • Clean the lint filter. • If this information code remains, contact a Samsung service center. (enter the line test mode) The electronic control needs to operate, you should do, check the list of codes in the door. The Thermistor1 resistance is very low or high. • Check for a clogged lint screen. • Check...
... display panel. Invalid power source frequency. • Try restarting the cycle. • If this information code remains, contact a Samsung service center. High temperature heating check • Clean the lint filter. • If this information code remains, contact a Samsung service center. (enter the line test mode) The electronic control needs to operate, you should do, check the list of codes in the door. The Thermistor1 resistance is very low or high. • Check for a clogged lint screen. • Check...
User Manual
Page 59
... to instructions; Please contact SAMSUNG at the number below for which this product was not intended; product where the original factory serial numbers have been removed, defaced, changed in shipment, delivery, installation, and uses for assistance with electrical or plumbing codes or correction of household electrical or plumbing (i.e., house wiring, fuses, or water inlet hoses). damage caused by use of equipment, utilities, services, parts, supplies, accessories, applications, installations, repairs, external wiring or connectors...
... to instructions; Please contact SAMSUNG at the number below for which this product was not intended; product where the original factory serial numbers have been removed, defaced, changed in shipment, delivery, installation, and uses for assistance with electrical or plumbing codes or correction of household electrical or plumbing (i.e., house wiring, fuses, or water inlet hoses). damage caused by use of equipment, utilities, services, parts, supplies, accessories, applications, installations, repairs, external wiring or connectors...


