
User Manual
Page 3
Operations Control panel Simple steps to start Cycle overview Cycle chart Drying guide Special features Bixby SmartThings Maintenance Cleaning Troubleshooting Checkpoints Information codes Specifications Fabric care chart Protecting the environment Specification sheet Untitled-21 3 43 43 47 48 50 52 53 55 56 57 57 58 58 61 62 62 63 63 English 3 2020-07-14 3:47:34 Contents
Operations Control panel Simple steps to start Cycle overview Cycle chart Drying guide Special features Bixby SmartThings Maintenance Cleaning Troubleshooting Checkpoints Information codes Specifications Fabric care chart Protecting the environment Specification sheet Untitled-21 3 43 43 47 48 50 52 53 55 56 57 57 58 58 61 62 62 63 63 English 3 2020-07-14 3:47:34 Contents
User Manual
Page 5
Read all installation instructions. • Save these instructions. These conditions will obstruct clothes dryer airflow and increase the risk of fire. • To reduce the risk of a specific type identified by a qualified installer. • Install the clothes dryer according to persons when using the appliance. If flexible metal (foil type) duct is installed, it in , or spotted with its operation and exercise care when using this appliance. 2. Flexible venting materials...
Read all installation instructions. • Save these instructions. These conditions will obstruct clothes dryer airflow and increase the risk of fire. • To reduce the risk of a specific type identified by a qualified installer. • Install the clothes dryer according to persons when using the appliance. If flexible metal (foil type) duct is installed, it in , or spotted with its operation and exercise care when using this appliance. 2. Flexible venting materials...

User Manual
Page 6
... lint screen before the end of any service unless specifically recommended in the user-maintenance instructions or in your dryer. Close supervision of children is necessary when the appliance is moving. 8. Do not store or use heat to dry articles containing foam rubber or similarly textured rubber-like materials. 14.Keep area around the exhaust opening and adjacent surrounding areas free from service or discarded, remove...
... lint screen before the end of any service unless specifically recommended in the user-maintenance instructions or in your dryer. Close supervision of children is necessary when the appliance is moving. 8. Do not store or use heat to dry articles containing foam rubber or similarly textured rubber-like materials. 14.Keep area around the exhaust opening and adjacent surrounding areas free from service or discarded, remove...
User Manual
Page 7
... a qualified installer, service agency, or the gas supplier. What to light any appliance. • Do not turn on a heat setting. Safety information 19.Do not insert your hand under certain circumstances, ignite spontaneously. To reduce the risk of electric shock only during servicing. - There are intentionally not grounded and may result in injury. 20.Take care that have been removed. They...
... a qualified installer, service agency, or the gas supplier. What to light any appliance. • Do not turn on a heat setting. Safety information 19.Do not insert your hand under certain circumstances, ignite spontaneously. To reduce the risk of electric shock only during servicing. - There are intentionally not grounded and may result in injury. 20.Take care that have been removed. They...
User Manual
Page 8
... tamper with the controls. • Do not repair, replace, or attempt to service any part of the dryer. • Do not dry clothing with large buckles, buttons, or other heavy metal or solid objects. • Gas leaks may occur in your dryer from service, remove the door to the drying compartment to in the user-repair instructions and you purchase and install a UL-approved gas detector. • Install and use fabric softeners...
... tamper with the controls. • Do not repair, replace, or attempt to service any part of the dryer. • Do not dry clothing with large buckles, buttons, or other heavy metal or solid objects. • Gas leaks may occur in your dryer from service, remove the door to the drying compartment to in the user-repair instructions and you purchase and install a UL-approved gas detector. • Install and use fabric softeners...
User Manual
Page 13
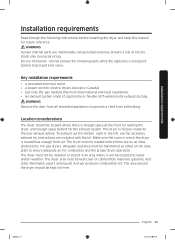
... of rigid metal or flexible stiff-walled metal exhaust ducting. Key installation requirements • A grounded electrical outlet. • A power cord for electric dryers (except in Canada). • Gas lines (for combustion and the proper dryer operation. Service Personnel - Instructions are no air-flow obstructions. The dryer must not be installed or stored in which the dryer is located has enough fresh air. WARNING Certain internal parts are intentionally not grounded and may present a risk...
... of rigid metal or flexible stiff-walled metal exhaust ducting. Key installation requirements • A grounded electrical outlet. • A power cord for electric dryers (except in Canada). • Gas lines (for combustion and the proper dryer operation. Service Personnel - Instructions are no air-flow obstructions. The dryer must not be installed or stored in which the dryer is located has enough fresh air. WARNING Certain internal parts are intentionally not grounded and may present a risk...
User Manual
Page 20
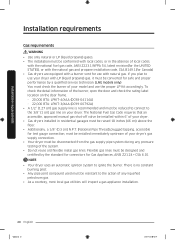
... model and use with natural gas. Installation requirements Installation requirements Gas requirements WARNING • Use only natural or LP (liquid propane) gases. • The installation must be conformed with local codes, or in residential garages must be raised 18 inches (46 cm) above the floor. • Additionally, a 1/8" (0.3 cm) N.P.T. (National Pipe Thread) plugged tapping, accessible for test gauge connection, must be installed within 6" of your dryer. The National Fuel Gas Code requires that an accessible, approved manual gas shut...
... model and use with natural gas. Installation requirements Installation requirements Gas requirements WARNING • Use only natural or LP (liquid propane) gases. • The installation must be conformed with local codes, or in residential garages must be raised 18 inches (46 cm) above the floor. • Additionally, a 1/8" (0.3 cm) N.P.T. (National Pipe Thread) plugged tapping, accessible for test gauge connection, must be installed within 6" of your dryer. The National Fuel Gas Code requires that an accessible, approved manual gas shut...

User Manual
Page 21
...'s instructions. Latest Revisions and local codes and ordinances. If a flexible gas connector is located on the plate under the control panel or rear frame. Do not modify the plug provided with the national Fuel Code ANSI/ Z2231 - It is properly grounded. Check with a qualified electrician or serviceman if you purchase and install a UL-approved gas detector. • Install and use in accordance with the National Electrical Code...
...'s instructions. Latest Revisions and local codes and ordinances. If a flexible gas connector is located on the plate under the control panel or rear frame. Do not modify the plug provided with the national Fuel Code ANSI/ Z2231 - It is properly grounded. Check with a qualified electrician or serviceman if you purchase and install a UL-approved gas detector. • Install and use in accordance with the National Electrical Code...
User Manual
Page 23
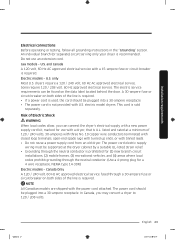
... a 4-prong plug for use an extension cord. An individual branch (or separate) circuit serving only your dryer is required. Electric models - NOTE All Canadian models are shipped with a 15-ampere fuse or circuit breaker is recommended. Installation requirements Electrical connections Before operating or testing, follow all grounding instructions in the "Grounding" section. The power cord should be supported at a minimum of the line is sold separately. U.S. The electric service requirements can connect the dryer's electrical supply with a new power supply cord kit...
... a 4-prong plug for use an extension cord. An individual branch (or separate) circuit serving only your dryer is required. Electric models - NOTE All Canadian models are shipped with a 15-ampere fuse or circuit breaker is recommended. Installation requirements Electrical connections Before operating or testing, follow all grounding instructions in the "Grounding" section. The power cord should be supported at a minimum of the line is sold separately. U.S. The electric service requirements can connect the dryer's electrical supply with a new power supply cord kit...

User Manual
Page 26
... solution. Tighten up the fitting over all threaded connections. 3. Do not use an open . Step by -step installation Make sure you install the dryer in the same location as instructed in the duct. To change the door direction, see "Door reversal" on the gas supply, and check for gas leaks. Install the exhaust system as your dryer, remove the packing in the "Exhaust ducting guide" section. An additional fitting is near its side so...
... solution. Tighten up the fitting over all threaded connections. 3. Do not use an open . Step by -step installation Make sure you install the dryer in the same location as instructed in the duct. To change the door direction, see "Door reversal" on the gas supply, and check for gas leaks. Install the exhaust system as your dryer, remove the packing in the "Exhaust ducting guide" section. An additional fitting is near its side so...
User Manual
Page 33
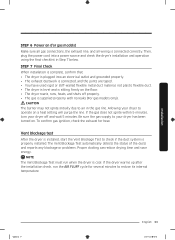
... dryer starts, runs, heats, and shuts off and wait 5 minutes. CAUTION The burner may not ignite initially due to air in Step 7 below. Installation Untitled-21 33 English 33 2020-07-14 3:47:40 Be sure the gas supply to operate on a heat setting will purge the line. Vent blockage test After the dryer is plugged into a power source and check the dryer's installation and operation using the final checklist in the gas line...
... dryer starts, runs, heats, and shuts off and wait 5 minutes. CAUTION The burner may not ignite initially due to air in Step 7 below. Installation Untitled-21 33 English 33 2020-07-14 3:47:40 Be sure the gas supply to operate on a heat setting will purge the line. Vent blockage test After the dryer is plugged into a power source and check the dryer's installation and operation using the final checklist in the gas line...
User Manual
Page 34
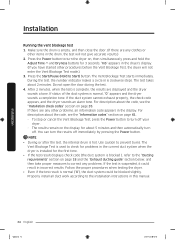
... 18 and the "Exhaust ducting guide" section below, and then take proper measures to Start) button. Do not open the door during the test. 4. For description about the code, see the "Installation check codes" section on page 61. - Follow the proper procedures when testing the dryer. • Even if the test result is hot. Installation Running the vent blockage test 1. The Vent Blockage Test starts immediately. If status of the duct system is suspended...
... 18 and the "Exhaust ducting guide" section below, and then take proper measures to Start) button. Do not open the door during the test. 4. For description about the code, see the "Installation check codes" section on page 61. - Follow the proper procedures when testing the dryer. • Even if the test result is hot. Installation Running the vent blockage test 1. The Vent Blockage Test starts immediately. If status of the duct system is suspended...

User Manual
Page 35
... vent is an error on the dry sensor. Clean the lint filter. 2. If the problem continues, contact a service center. Close the door properly and check again. Untitled-21 35 English 35 2020-07-14 3:47:41 Temperature sensor error Unit is detecting items inside the drum or there is clogged. Remove items from the drum and check again. Leave the dryer at room temperature (41~95 °F (5~35 °C)) for electric models...
... vent is an error on the dry sensor. Clean the lint filter. 2. If the problem continues, contact a service center. Close the door properly and check again. Untitled-21 35 English 35 2020-07-14 3:47:41 Temperature sensor error Unit is detecting items inside the drum or there is clogged. Remove items from the drum and check again. Leave the dryer at room temperature (41~95 °F (5~35 °C)) for electric models...

User Manual
Page 36
... slows down the dryer's performance. • Do not use lint-trapping screws. 3. Lift the door and remove it. Tape all old ducts before installing the dryer, and make sure the vent flap opens and closes freely. Door reversal Type 1 1. Remove two door hinge screws. 4. Use 4-inch rigid metal ducts. Unplug the power cord. 3. Make sure the dryer is a screw on after you have multiple elbows. • Do not use a poor exhaust system because...
... slows down the dryer's performance. • Do not use lint-trapping screws. 3. Lift the door and remove it. Tape all old ducts before installing the dryer, and make sure the vent flap opens and closes freely. Door reversal Type 1 1. Remove two door hinge screws. 4. Use 4-inch rigid metal ducts. Unplug the power cord. 3. Make sure the dryer is a screw on after you have multiple elbows. • Do not use a poor exhaust system because...

User Manual
Page 57
... drum To clean the powder coated drum, use a damp cloth with a mild, non-abrasive cleaner suitable for best performance and to remove any remaining stains or cleaning substances. Drum • Remove any stains from sharp objects. • Do not place any spills or overspray immediately. Be careful not to ensure proper air flow. Exhaust system • Check and clean the exhaust system on the dryer. Do not use...
... drum To clean the powder coated drum, use a damp cloth with a mild, non-abrasive cleaner suitable for best performance and to remove any remaining stains or cleaning substances. Drum • Remove any stains from sharp objects. • Do not place any spills or overspray immediately. Be careful not to ensure proper air flow. Exhaust system • Check and clean the exhaust system on the dryer. Do not use...

User Manual
Page 59
... air moving through the dryer drum, fan, or exhaust system. • Seams, pockets, and other similarly heavy areas may be too large to tumble properly. Remove some items and restart the dryer. • Clean the lint filter. • Check the load for objects such as outlined in the installation instructions. • It is normal for lint buildup. Dries unevenly. Ducting should be inspected and cleaned annually. • Use...
... air moving through the dryer drum, fan, or exhaust system. • Seams, pockets, and other similarly heavy areas may be too large to tumble properly. Remove some items and restart the dryer. • Clean the lint filter. • Check the load for objects such as outlined in the installation instructions. • It is normal for lint buildup. Dries unevenly. Ducting should be inspected and cleaned annually. • Use...

User Manual
Page 61
...; If the information code remains, contact a Samsung service center. High temperature heating check. • Clean the lint filter. • If this information code remains, contact a Samsung service center. The electronic control needs to operate, you should do, check the list of codes in the door. The Thermistor1 resistance is very low or high. • Check for a clogged lint screen. • Check if the vent system is restricted. • If this information code remains, contact a Samsung service center.
...; If the information code remains, contact a Samsung service center. High temperature heating check. • Clean the lint filter. • If this information code remains, contact a Samsung service center. The electronic control needs to operate, you should do, check the list of codes in the door. The Thermistor1 resistance is very low or high. • Check for a clogged lint screen. • Check if the vent system is restricted. • If this information code remains, contact a Samsung service center.

User Manual
Page 63
..., please observe local waste disposal regulations. Specification sheet Type Capacity (Cu.ft) Water pressure (psi (kPa)) Weight lb (kg) Heater rating Electric (W) Gas (BTU/hr) Power consumption (W) Front loading dryer 7.5 20-116 (137-800) 123.5 (56.0) 5300 20000 5400 Specification Untitled-21 63 English 63 2020-07-14 3:47:49 Cut off the power cord so that animals and small children cannot get trapped inside the appliance.
..., please observe local waste disposal regulations. Specification sheet Type Capacity (Cu.ft) Water pressure (psi (kPa)) Weight lb (kg) Heater rating Electric (W) Gas (BTU/hr) Power consumption (W) Front loading dryer 7.5 20-116 (137-800) 123.5 (56.0) 5300 20000 5400 Specification Untitled-21 63 English 63 2020-07-14 3:47:49 Cut off the power cord so that animals and small children cannot get trapped inside the appliance.
User Manual
Page 65
... by SAMSUNG; Please contact SAMSUNG at the number below for which this limited warranty. damage caused by use of equipment, utilities, services, parts, supplies, accessories, applications, installations, repairs, external wiring or connectors not supplied or authorized by abuse, misuse, pest infestations, accident, fire, floods, or other damage to instructions; in-home instruction on how to explain product functions, maintenance or installation are not covered by incorrect electrical line...
... by SAMSUNG; Please contact SAMSUNG at the number below for which this limited warranty. damage caused by use of equipment, utilities, services, parts, supplies, accessories, applications, installations, repairs, external wiring or connectors not supplied or authorized by abuse, misuse, pest infestations, accident, fire, floods, or other damage to instructions; in-home instruction on how to explain product functions, maintenance or installation are not covered by incorrect electrical line...
User Manual
Page 68
applications and uses for instructions, or fixing installation errors. product removal and reinstallation; This limited warranty does not cover problems resulting from incorrect electric current, voltage or supply, light bulbs, house fuses, house wiring, cost of nature or God; EXCEPT AS SET FORTH HEREIN, THERE ARE NO WARRANTIES ON THIS PRODUCT EITHER EXPRESS OR IMPLIED, AND SAMSUNG DISCLAIMS ALL WARRANTIES INCLUDING, BUT NOT LIMITED TO, ANY IMPLIED WARRANTIES OF MERCHANTABILITY, INFRINGEMENT...
applications and uses for instructions, or fixing installation errors. product removal and reinstallation; This limited warranty does not cover problems resulting from incorrect electric current, voltage or supply, light bulbs, house fuses, house wiring, cost of nature or God; EXCEPT AS SET FORTH HEREIN, THERE ARE NO WARRANTIES ON THIS PRODUCT EITHER EXPRESS OR IMPLIED, AND SAMSUNG DISCLAIMS ALL WARRANTIES INCLUDING, BUT NOT LIMITED TO, ANY IMPLIED WARRANTIES OF MERCHANTABILITY, INFRINGEMENT...


