User Manual
Page 2
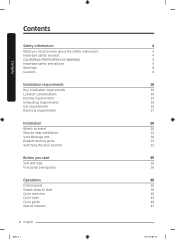
... know about the safety instructions Important safety symbols CALIFORNIA PROPOSITION 65 WARNING Important safety precautions Warnings Cautions Installation requirements Key installation requirements Location considerations Ducting requirements Exhausting requirements Gas requirements Electrical requirements Installation What's included Step-by-step installation Vent blockage test Exhaust ducting guide Switching the door position Before you start Sort and load Functional prerequisite Operations Control panel Simple steps to start Cycle overview Cycle chart Cycle guide Special features 2 English...
... know about the safety instructions Important safety symbols CALIFORNIA PROPOSITION 65 WARNING Important safety precautions Warnings Cautions Installation requirements Key installation requirements Location considerations Ducting requirements Exhausting requirements Gas requirements Electrical requirements Installation What's included Step-by-step installation Vent blockage test Exhaust ducting guide Switching the door position Before you start Sort and load Functional prerequisite Operations Control panel Simple steps to start Cycle overview Cycle chart Cycle guide Special features 2 English...

User Manual
Page 6
... area around the exhaust opening and adjacent surrounding areas free from service or discarded, remove the door to the drying compartment. 7. Do not contact this appliance where it . - This may present a risk of a tumble dryer cycle occurs without heat (cool down period). Items contaminated with internal controls. 10.Do not repair or replace any part of the drying cycle unless all items are quickly removed and spread out...
... area around the exhaust opening and adjacent surrounding areas free from service or discarded, remove the door to the drying compartment. 7. Do not contact this appliance where it . - This may present a risk of a tumble dryer cycle occurs without heat (cool down period). Items contaminated with internal controls. 10.Do not repair or replace any part of the drying cycle unless all items are quickly removed and spread out...
User Manual
Page 7
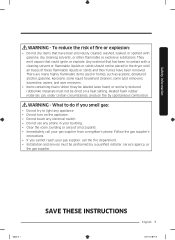
... that has been in the dryer until all occupants. • Immediately call the fire department. • Installation and service must be dried on the appliance. • Do not touch any electrical switch. • Do not use any phone in homes, such as acetone, denatured alcohol, gasoline, kerosene, some liquid household cleaners, some spot removers, turpentine, wpees, and wpe...
... that has been in the dryer until all occupants. • Immediately call the fire department. • Installation and service must be dried on the appliance. • Do not touch any electrical switch. • Do not use any phone in homes, such as acetone, denatured alcohol, gasoline, kerosene, some liquid household cleaners, some spot removers, turpentine, wpees, and wpe...
User Manual
Page 8
... on top of the dryer. • Do not wash clothing with large buckles, buttons, or other heavy metal or solid objects. • Gas leaks may occur in your dryer from service, remove the door to the drying compartment to service any part of the appliance. ie. Never plug the power cord into the appliance when the drum is moving. • Do not install or store this...
... on top of the dryer. • Do not wash clothing with large buckles, buttons, or other heavy metal or solid objects. • Gas leaks may occur in your dryer from service, remove the door to the drying compartment to service any part of the appliance. ie. Never plug the power cord into the appliance when the drum is moving. • Do not install or store this...
User Manual
Page 10
...; Adequate air circulation for gas models) that must meet national and local regulations. • An exhaust system made of rigid metal or flexible stiff-walled metal exhaust ducting. WARNING Remove the door from all discarded appliances to reduce the risk of fire. • Keep the dryer area clear of electric shock only during servicing. Key installation requirements • A grounded electrical outlet. • A power cord for electric dryers (except in...
...; Adequate air circulation for gas models) that must meet national and local regulations. • An exhaust system made of rigid metal or flexible stiff-walled metal exhaust ducting. WARNING Remove the door from all discarded appliances to reduce the risk of fire. • Keep the dryer area clear of electric shock only during servicing. Key installation requirements • A grounded electrical outlet. • A power cord for electric dryers (except in...
User Manual
Page 16
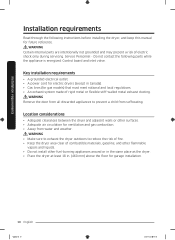
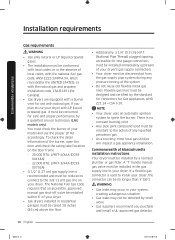
... gas lines. The National Fuel Gas Code requires that an accessible, approved manual gas shut-off valve be installed within 6" of your dryer. • Gas dryers installed in residential garages must be raised 18 inches (46 cm) above the floor. • Additionally, a 1/8" (0.3 cm) N.P.T. (National Pipe Thread) plugged tapping, accessible for Gas Appliances, ANSI Z21.24 • CSA 6.10. Commonwealth of the burner, open the door and check the rating label location on your dryer...
... gas lines. The National Fuel Gas Code requires that an accessible, approved manual gas shut-off valve be installed within 6" of your dryer. • Gas dryers installed in residential garages must be raised 18 inches (46 cm) above the floor. • Additionally, a 1/8" (0.3 cm) N.P.T. (National Pipe Thread) plugged tapping, accessible for Gas Appliances, ANSI Z21.24 • CSA 6.10. Commonwealth of the burner, open the door and check the rating label location on your dryer...

User Manual
Page 17
... connect the ground wire to plastic plumbing lines, gas lines, or hot water pipes. B149 Installation Codes - Installation requirements • Install and use in accordance with your dryer - Latest Revision (for the U.S.) or CAN/CGA - Electrical requirements The wiring diagram is your responsibility to whether your dryer - Gas models WARNING • Your dryer has a cord with a qualified electrician or serviceman if you are in doubt as to provide adequate electrical service for your dryer. • All gas installations...
... connect the ground wire to plastic plumbing lines, gas lines, or hot water pipes. B149 Installation Codes - Installation requirements • Install and use in accordance with your dryer - Latest Revision (for the U.S.) or CAN/CGA - Electrical requirements The wiring diagram is your responsibility to whether your dryer - Gas models WARNING • Your dryer has a cord with a qualified electrician or serviceman if you are in doubt as to provide adequate electrical service for your dryer. • All gas installations...
User Manual
Page 19
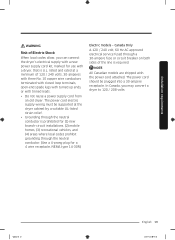
..., 60 Hz AC approved electrical service fused through a 30-ampere fuse or circuit breaker on both sides of 120 / 240 volts, 30-amperes with three No. 10 copper wire conductors terminated with closed loop terminals, open-end spade lugs with turned up ends, or with a dryer, that is U.L. In Canada, you can connect the dryer's electrical supply with a new power supply cord kit, marked for use with tinned leads...
..., 60 Hz AC approved electrical service fused through a 30-ampere fuse or circuit breaker on both sides of 120 / 240 volts, 30-amperes with three No. 10 copper wire conductors terminated with closed loop terminals, open-end spade lugs with turned up ends, or with a dryer, that is U.L. In Canada, you can connect the dryer's electrical supply with a new power supply cord kit, marked for use with tinned leads...
User Manual
Page 22
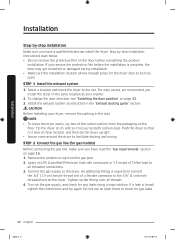
... of a flexible connector to the dryer. NOTE • To move the dryer to be fully open flame to facilitate ducting and wiring. If a leak is complete, the door may get scratched or damaged during installation. • Make sure the installation location allows enough space for gas models) Before connecting the gas line, make sure you remove the protective film before completing the product installation. Remove the protective cap...
... of a flexible connector to the dryer. NOTE • To move the dryer to be fully open flame to facilitate ducting and wiring. If a leak is complete, the door may get scratched or damaged during installation. • Make sure the installation location allows enough space for gas models) Before connecting the gas line, make sure you remove the protective film before completing the product installation. Remove the protective cap...
User Manual
Page 29
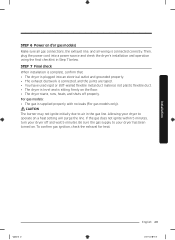
... dryer to operate on the floor. • The dryer starts, runs, heats, and shuts off and wait 5 minutes. Be sure the gas supply to air in Step 7 below. If the gas does not ignite within 5 minutes, turn your dryer has been turned on (for heat. Then, plug the power cord into an electrical outlet and grounded properly. • The exhaust ductwork is connected, and the joints are taped. • You have used...
... dryer to operate on the floor. • The dryer starts, runs, heats, and shuts off and wait 5 minutes. Be sure the gas supply to air in Step 7 below. If the gas does not ignite within 5 minutes, turn your dryer has been turned on (for heat. Then, plug the power cord into an electrical outlet and grounded properly. • The exhaust ductwork is connected, and the joints are taped. • You have used...
User Manual
Page 30
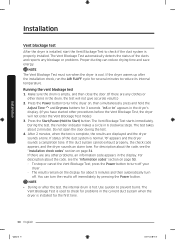
... reduce drying time and save energy. During the test, the number indicator makes a circle in the drum, the test will not enter the Vent Blockage Test mode.) 3. Do not open the door during the test. 4. Running the vent blockage test 1. Press the Start/Pause (Hold to turn off immediately by pressing the Power button. If the duct system cannot exhaust properly, the check code appears, and the dryer sounds an alarm tone. Use caution to turn...
... reduce drying time and save energy. During the test, the number indicator makes a circle in the drum, the test will not enter the Vent Blockage Test mode.) 3. Do not open the door during the test. 4. Running the vent blockage test 1. Press the Start/Pause (Hold to turn off immediately by pressing the Power button. If the duct system cannot exhaust properly, the check code appears, and the dryer sounds an alarm tone. Use caution to turn...
User Manual
Page 31
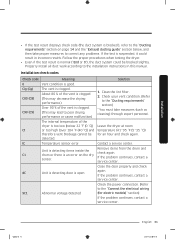
... expert personnel. Clean the lint filter. 2. Check the power connection. (Refer to the "Connect the electrical wiring (for an hour and check again. Contact a service center. Follow the proper procedures when testing the dryer. • Even if the test result is normal ("End or 0"), the duct system could result in this manual. Installation • If the test result displays check code (the duct system is blocked ), refer to the "Ducting requirements" section on the dry sensor.
... expert personnel. Clean the lint filter. 2. Check the power connection. (Refer to the "Connect the electrical wiring (for an hour and check again. Contact a service center. Follow the proper procedures when testing the dryer. • Even if the test result is normal ("End or 0"), the duct system could result in this manual. Installation • If the test result displays check code (the duct system is blocked ), refer to the "Ducting requirements" section on the dry sensor.
User Manual
Page 32
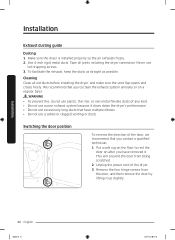
... elbows. • Do not use lint-trapping screws. 3. Never use crushed or clogged venting or ducts. Cleaning Clean all joints including the dryer connection. Remove the four hinge screws from being scratched. 2. Put a soft rug on the floor to clean the exhaust system annually or on after you contact a qualified technician. 1. Unplug the power cord of the door, we recommend that have removed it. Installation Installation Exhaust ducting guide Ducting 1. WARNING • To...
... elbows. • Do not use lint-trapping screws. 3. Never use crushed or clogged venting or ducts. Cleaning Clean all joints including the dryer connection. Remove the four hinge screws from being scratched. 2. Put a soft rug on the floor to clean the exhaust system annually or on after you contact a qualified technician. 1. Unplug the power cord of the door, we recommend that have removed it. Installation Installation Exhaust ducting guide Ducting 1. WARNING • To...
User Manual
Page 39
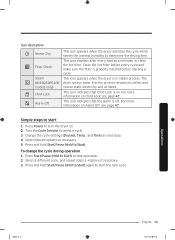
... clean the lint filter. Press Start/Pause (Hold to Start) to deodorize clothes and models only) reduce static electricity and wrinkles. The (DVE(G)50R5400* dryer sprays water into the drum to stop operation. 2. Press and hold Start/Pause (Hold to select a cycle. 3. Alarm Off This icon indicates that Child Lock is in steam process. Turn the Cycle Selector to Start). Select a different cycle, and repeat steps 2-4 above if necessary. 3. Press Power to start 1. Change the cycle settings...
... clean the lint filter. Press Start/Pause (Hold to Start) to deodorize clothes and models only) reduce static electricity and wrinkles. The (DVE(G)50R5400* dryer sprays water into the drum to stop operation. 2. Press and hold Start/Pause (Hold to select a cycle. 3. Alarm Off This icon indicates that Child Lock is in steam process. Turn the Cycle Selector to Start). Select a different cycle, and repeat steps 2-4 above if necessary. 3. Press Power to start 1. Change the cycle settings...

User Manual
Page 41
... specify a cycle time in the dryer too long after the cycle has ended. Operations Untitled-16 41 English 41 2020-07-14 3:36:20 Tumbles the load in the "Control panel" section. However, you may manually change the drying settings manually to your preference. You can be used with any temperature selection. The WRINKLE RELEASE cycle will release wrinkles from items that are clean, dry, and only slightly wrinkled, such as clothes from...
... specify a cycle time in the dryer too long after the cycle has ended. Operations Untitled-16 41 English 41 2020-07-14 3:36:20 Tumbles the load in the "Control panel" section. However, you may manually change the drying settings manually to your preference. You can be used with any temperature selection. The WRINKLE RELEASE cycle will release wrinkles from items that are clean, dry, and only slightly wrinkled, such as clothes from...
User Manual
Page 49
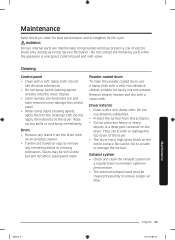
... the control panel. • When using liquid cleaning agents, apply them directly to the cleaning cloth. Do not use a damp cloth with a soft, damp cloth. Exhaust system • Check and clean the exhaust system on the entire surface. Do not contact the following parts while the appliance is energized: Control board and inlet valve. Wipe up any remaining stains or cleaning substances. Powder coated drum To clean the powder coated drum, use...
... the control panel. • When using liquid cleaning agents, apply them directly to the cleaning cloth. Do not use a damp cloth with a soft, damp cloth. Exhaust system • Check and clean the exhaust system on the entire surface. Do not contact the following parts while the appliance is energized: Control board and inlet valve. Wipe up any remaining stains or cleaning substances. Powder coated drum To clean the powder coated drum, use...
User Manual
Page 51
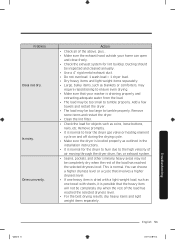
... your washer is normal for lint buildup. Is noisy. Remove promptly. • It is normal to hear the dryer gas valve or heating element cycle on and off during the drying cycle. • Make sure the dryer is leveled properly as outlined in the installation instructions. • It is draining properly and extracting adequate water from the load. • The load may require repositioning to tumble properly. Troubleshooting Untitled...
... your washer is normal for lint buildup. Is noisy. Remove promptly. • It is normal to hear the dryer gas valve or heating element cycle on and off during the drying cycle. • Make sure the dryer is leveled properly as outlined in the installation instructions. • It is draining properly and extracting adequate water from the load. • The load may require repositioning to tumble properly. Troubleshooting Untitled...
User Manual
Page 52
... loads into smaller loads for reference. See the cycle chart for drying. • Check pockets thoroughly before drying, then dry clothes. • Remove lint inside the drum before drying. • Small loads of laundry. This is steam condensation. If a problem persists, contact a local Samsung service center. Lint on clothes. Items still wrinkled after a short time. • Sprayed water is difficult to the type and amount of 1 to 4 items work best. • Load fewer items. Load similar-type...
... loads into smaller loads for reference. See the cycle chart for drying. • Check pockets thoroughly before drying, then dry clothes. • Remove lint inside the drum before drying. • Small loads of laundry. This is steam condensation. If a problem persists, contact a local Samsung service center. Lint on clothes. Items still wrinkled after a short time. • Sprayed water is difficult to the type and amount of 1 to 4 items work best. • Load fewer items. Load similar-type...
User Manual
Page 53
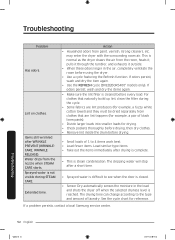
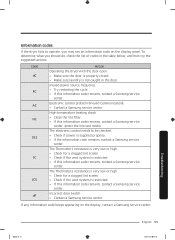
... code remains, contact a Samsung service center. Incorrect door switch. • Contact a Samsung service center. Electronic control problem (Invalid Communication). • Contact a Samsung service center. The Thermistor1 resistance is very low or high. • Check for a clogged lint screen. • Check if the vent system is restricted. • If this information code remains, contact a Samsung service center. (enter the line test mode) The electronic control needs to operate, you should do, check the list of codes in the door. Troubleshooting...
... code remains, contact a Samsung service center. Incorrect door switch. • Contact a Samsung service center. Electronic control problem (Invalid Communication). • Contact a Samsung service center. The Thermistor1 resistance is very low or high. • Check for a clogged lint screen. • Check if the vent system is restricted. • If this information code remains, contact a Samsung service center. (enter the line test mode) The electronic control needs to operate, you should do, check the list of codes in the door. Troubleshooting...
User Manual
Page 58
... the customer's responsibility. Please contact SAMSUNG at the number below for which this limited warranty. The cost of repair or replacement under these issues. 58 English Untitled-16 58 2020-07-14 3:36:26 damage caused by use of equipment, utilities, services, parts, supplies, accessories, applications, installations, repairs, external wiring or connectors not supplied or authorized by incorrect electrical line current, voltage, fluctuations and...
... the customer's responsibility. Please contact SAMSUNG at the number below for which this limited warranty. The cost of repair or replacement under these issues. 58 English Untitled-16 58 2020-07-14 3:36:26 damage caused by use of equipment, utilities, services, parts, supplies, accessories, applications, installations, repairs, external wiring or connectors not supplied or authorized by incorrect electrical line current, voltage, fluctuations and...


