User Manual
Page 5
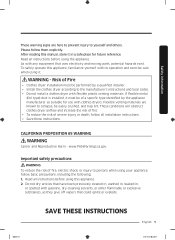
... trap lint. To safely operate this manual, store it must be of severe injury or death, follow them explicitly. www.P65Warnings.ca.gov. Important safety precautions WARNING To reduce the risk of Fire • Clothes dryer installation must be performed by the appliance manufacturer as they give off vapors that uses electricity and moving parts, potential hazards exist. Read all instructions...
... trap lint. To safely operate this manual, store it must be of severe injury or death, follow them explicitly. www.P65Warnings.ca.gov. Important safety precautions WARNING To reduce the risk of Fire • Clothes dryer installation must be performed by the appliance manufacturer as they give off vapors that uses electricity and moving parts, potential hazards exist. Read all instructions...
User Manual
Page 6
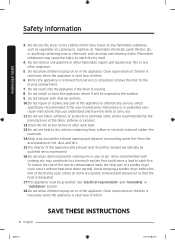
... controls. 10.Do not repair or replace any part of the appliance or attempt any service unless specifically recommended in the user-maintenance instructions or in your dryer. Do not install or store this or any flammable substance, such as vegetable oil, cooking oil, machine oil, flammable chemicals, paint thinner, etc., or anything containing wax or chemicals, such as mops and cleaning cloths...
... controls. 10.Do not repair or replace any part of the appliance or attempt any service unless specifically recommended in the user-maintenance instructions or in your dryer. Do not install or store this or any flammable substance, such as vegetable oil, cooking oil, machine oil, flammable chemicals, paint thinner, etc., or anything containing wax or chemicals, such as mops and cleaning cloths...

User Manual
Page 7
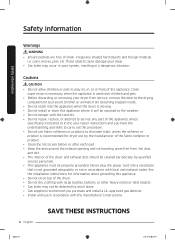
... be dried on the appliance. • Do not touch any electrical switch. • Do not use any appliance. • Do not turn on a heat setting. WARNING - Any material that have been removed. Heated foam rubber materials can, under the dryer. - Untitled-4 7 SAVE THESE INSTRUCTIONS English 7 2020-07-14 12:33:00 This may result in injury. 21.The control board and inlet valve...
... be dried on the appliance. • Do not touch any electrical switch. • Do not use any appliance. • Do not turn on a heat setting. WARNING - Any material that have been removed. Heated foam rubber materials can, under the dryer. - Untitled-4 7 SAVE THESE INSTRUCTIONS English 7 2020-07-14 12:33:00 This may result in injury. 21.The control board and inlet valve...
User Manual
Page 8
... dry clothing with large buckles, buttons, or other heavy metal or solid objects. • Gas leaks may occur in front of small, irregularly shaped hard objects and foreign material, i.e. Never plug the power cord into the appliance when the drum is used near children and pets. • Before discarding or removing your system, resulting in a dangerous situation. See the installation instructions for dryer use...
... dry clothing with large buckles, buttons, or other heavy metal or solid objects. • Gas leaks may occur in front of small, irregularly shaped hard objects and foreign material, i.e. Never plug the power cord into the appliance when the drum is used near children and pets. • Before discarding or removing your system, resulting in a dangerous situation. See the installation instructions for dryer use...
User Manual
Page 11
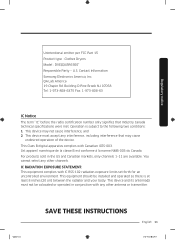
... Industry Canada technical specifications were met. Contact Information Samsung Electronics America, Inc. QA Lab America 19 Chapin Rd. For products sold in conjunction with any other antenna or transmitter. Untitled-4 11 SAVE THESE INSTRUCTIONS English 11 2020-07-14 12:33:00 Unintentional emitter per FCC Part 15 Product type : Clothes Dryers Model : DVE(G)45R6300* Responsible Party - U.S. Operation is at...
... Industry Canada technical specifications were met. Contact Information Samsung Electronics America, Inc. QA Lab America 19 Chapin Rd. For products sold in conjunction with any other antenna or transmitter. Untitled-4 11 SAVE THESE INSTRUCTIONS English 11 2020-07-14 12:33:00 Unintentional emitter per FCC Part 15 Product type : Clothes Dryers Model : DVE(G)45R6300* Responsible Party - U.S. Operation is at...
User Manual
Page 13
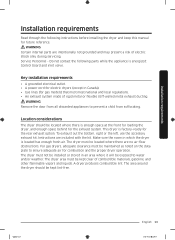
Installation requirements Installation requirements Read through the following parts while the appliance is factory-ready for the rear exhaust option. Instructions are intentionally not grounded and may present a risk of electric shock only during servicing. For gas dryers, adequate clearance must be kept lint-free. This dryer is energized: Control board and inlet valve. A dryer produces combustible lint. Do not contact the following instructions before installing the dryer and keep this manual for gas models) that...
Installation requirements Installation requirements Read through the following parts while the appliance is factory-ready for the rear exhaust option. Instructions are intentionally not grounded and may present a risk of electric shock only during servicing. For gas dryers, adequate clearance must be kept lint-free. This dryer is energized: Control board and inlet valve. A dryer produces combustible lint. Do not contact the following instructions before installing the dryer and keep this manual for gas models) that...
User Manual
Page 20
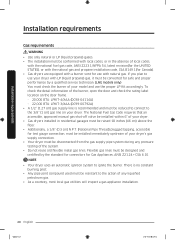
..., open the door and check the rating label location on your dryer. • Gas dryers installed in the absence of local codes, with the national fuel gas code, ANSI Z223.1/NFPA 54, latest revision(for the UNITED STATES), or with the natural gas and propane installation code, CSA B149.1(for Canada). • Gas dryers are equipped with a burner vent for use your dryer with natural gas. The National Fuel Gas Code requires that an accessible, approved manual gas shut-off valve be installed...
..., open the door and check the rating label location on your dryer. • Gas dryers installed in the absence of local codes, with the national fuel gas code, ANSI Z223.1/NFPA 54, latest revision(for the UNITED STATES), or with the natural gas and propane installation code, CSA B149.1(for Canada). • Gas dryers are equipped with a burner vent for use your dryer with natural gas. The National Fuel Gas Code requires that an accessible, approved manual gas shut-off valve be installed...
User Manual
Page 21
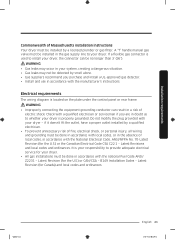
...) and local codes and ordinances. Electrical requirements The wiring diagram is your responsibility to your dryer - Untitled-4 21 English 21 2020-07-14 12:33:02 WARNING • Gas leaks may not be done in accordance with the national Fuel Code ANSI/ Z2231 - It is located on the plate under the control panel or rear frame. Installation requirements Commonwealth of Massachusetts installation instructions Your dryer must be...
...) and local codes and ordinances. Electrical requirements The wiring diagram is your responsibility to your dryer - Untitled-4 21 English 21 2020-07-14 12:33:02 WARNING • Gas leaks may not be done in accordance with the national Fuel Code ANSI/ Z2231 - It is located on the plate under the control panel or rear frame. Installation requirements Commonwealth of Massachusetts installation instructions Your dryer must be...

User Manual
Page 23
...:02 Installation requirements Electrical connections Before operating or testing, follow all grounding instructions in the "Grounding" section. An individual branch (or separate) circuit serving only your dryer is sold separately. Do not use with U.S. Gas models - Electric models - only Most U.S. Some require 120 / 208 volt, 60 Hz approved electrical service. The electric service requirements can connect the dryer's electrical supply with a new power supply cord kit, marked for a 4 wire receptacle, NEMA type 14-30R.) Electric models - This cord is recommended. The power cord...
...:02 Installation requirements Electrical connections Before operating or testing, follow all grounding instructions in the "Grounding" section. An individual branch (or separate) circuit serving only your dryer is sold separately. Do not use with U.S. Gas models - Electric models - only Most U.S. Some require 120 / 208 volt, 60 Hz approved electrical service. The electric service requirements can connect the dryer's electrical supply with a new power supply cord kit, marked for a 4 wire receptacle, NEMA type 14-30R.) Electric models - This cord is recommended. The power cord...
User Manual
Page 26
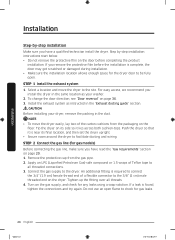
... the floor. Do not use an open . STEP 1 Install the exhaust system 1. Turn on the gas supply, and check for gas models) Before connecting the gas line, make sure you install the dryer in the same location as instructed in the duct. NOTE • To move the dryer to check for the dryer door to all threads. 4. STEP 2 Connect the gas line (for any leaks using a soap solution. If a leak is required to connect the 3/4" (1.9 cm) female...
... the floor. Do not use an open . STEP 1 Install the exhaust system 1. Turn on the gas supply, and check for gas models) Before connecting the gas line, make sure you install the dryer in the same location as instructed in the duct. NOTE • To move the dryer to check for the dryer door to all threads. 4. STEP 2 Connect the gas line (for any leaks using a soap solution. If a leak is required to connect the 3/4" (1.9 cm) female...
User Manual
Page 33
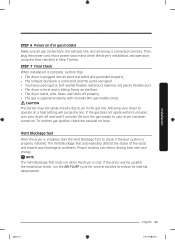
... ducting can reduce drying time and save energy. Installation Untitled-4 33 English 33 2020-07-14 12:33:05 NOTE The Vent Blockage Test must run the AIR FLUFF cycle for heat. STEP 7 Final Check When installation is complete, confirm that: • The dryer is plugged into a power source and check the dryer's installation and operation using the final checklist in the gas line. Then, plug the power cord into an electrical outlet and grounded properly. • The exhaust...
... ducting can reduce drying time and save energy. Installation Untitled-4 33 English 33 2020-07-14 12:33:05 NOTE The Vent Blockage Test must run the AIR FLUFF cycle for heat. STEP 7 Final Check When installation is complete, confirm that: • The dryer is plugged into a power source and check the dryer's installation and operation using the final checklist in the gas line. Then, plug the power cord into an electrical outlet and grounded properly. • The exhaust...
User Manual
Page 34
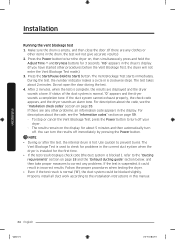
... be blocked slightly. Installation Running the vent blockage test 1. Make sure the drum is complete, the results are any clothes or other procedures before the Vent Blockage Test, the dryer will not give accurate results.) 2. During the test, the number indicator makes a circle in the display. If the duct system cannot exhaust properly, the check code appears, and the dryer sounds an alarm tone. Use caution to the installation instructions...
... be blocked slightly. Installation Running the vent blockage test 1. Make sure the drum is complete, the results are any clothes or other procedures before the Vent Blockage Test, the dryer will not give accurate results.) 2. During the test, the number indicator makes a circle in the display. If the duct system cannot exhaust properly, the check code appears, and the dryer sounds an alarm tone. Use caution to the installation instructions...
User Manual
Page 35
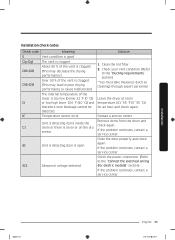
... 12:33:05 Unit is detecting door is an error on the dry sensor. Contact a service center. If the problem continues, contact a service center. Close the door properly and check again. The vent is good. Installation Installation check codes Check code 0 Clg (Cg) C80 (C8) C90 (C9) Ct tC C1 dC 9C1 Meaning Vent condition is clogged. Clean the lint filter. 2. Check the power connection. (Refer to the "Connect the electrical wiring (for an hour and...
... 12:33:05 Unit is detecting door is an error on the dry sensor. Contact a service center. If the problem continues, contact a service center. Close the door properly and check again. The vent is good. Installation Installation check codes Check code 0 Clg (Cg) C80 (C8) C90 (C9) Ct tC C1 dC 9C1 Meaning Vent condition is clogged. Clean the lint filter. 2. Check the power connection. (Refer to the "Connect the electrical wiring (for an hour and...

User Manual
Page 36
...-foil, or non-metal flexible ducts of the hinge that you clean the exhaust system annually or on after you unscrew the hinge screws. Remove two door hinge screws. 4. Use 4-inch rigid metal ducts. WARNING • To prevent fire, do not use lint-trapping screws. 3. Unplug the power cord. 3. Cleaning Clean all joints including the dryer connection. We recommend that will prevent the door from being scratched. 2. Installation Exhaust ducting guide Ducting 1.
...-foil, or non-metal flexible ducts of the hinge that you clean the exhaust system annually or on after you unscrew the hinge screws. Remove two door hinge screws. 4. Use 4-inch rigid metal ducts. WARNING • To prevent fire, do not use lint-trapping screws. 3. Unplug the power cord. 3. Cleaning Clean all joints including the dryer connection. We recommend that will prevent the door from being scratched. 2. Installation Exhaust ducting guide Ducting 1.
User Manual
Page 53
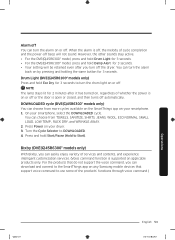
.... • For the DVE(G)45R6300* model, press and hold Drum Light for 3 seconds. • Your setting will not sound. Alarm off You can turn the alarm on or off . NOTE The lamp stays lit for 3 seconds. DOWNLOADED cycle (DVE(G)45R6300* models only) You can choose from TOWELS, SANITIZE, SHIRTS, JEANS, WOOL, ECO NORMAL, SMALL LOAD, LOW TEMP., RACK DRY, and WRINKLE AWAY. 2.
.... • For the DVE(G)45R6300* model, press and hold Drum Light for 3 seconds. • Your setting will not sound. Alarm off You can turn the alarm on or off . NOTE The lamp stays lit for 3 seconds. DOWNLOADED cycle (DVE(G)45R6300* models only) You can choose from TOWELS, SANITIZE, SHIRTS, JEANS, WOOL, ECO NORMAL, SMALL LOAD, LOW TEMP., RACK DRY, and WRINKLE AWAY. 2.
User Manual
Page 55
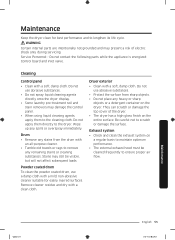
Service Personnel - Remove cleaner residue and dry with a soft, damp cloth. Dryer exterior • Clean with a clean cloth. Exhaust system • Check and clean the exhaust system on the entire surface. Cleaning Control panel • Clean with a mild, non-abrasive cleaner suitable for best performance and to remove any remaining stains or cleaning substances. Do not apply them to ensure proper air flow. They can scratch or damage the top cover of...
Service Personnel - Remove cleaner residue and dry with a soft, damp cloth. Dryer exterior • Clean with a clean cloth. Exhaust system • Check and clean the exhaust system on the entire surface. Cleaning Control panel • Clean with a mild, non-abrasive cleaner suitable for best performance and to remove any remaining stains or cleaning substances. Do not apply them to ensure proper air flow. They can scratch or damage the top cover of...

User Manual
Page 57
... the dryer. • Clean the lint filter. • Check the load for the dryer to hum due to tumble properly. Troubleshooting Untitled-4 57 English 57 2020-07-14 12:33:10 Remove promptly. • It is normal to hear the dryer gas valve or heating element cycle on and off during the drying cycle. • Make sure the dryer is dried with a light weight load, such as coins, loose buttons, nails, etc. Problem...
... the dryer. • Clean the lint filter. • Check the load for the dryer to hum due to tumble properly. Troubleshooting Untitled-4 57 English 57 2020-07-14 12:33:10 Remove promptly. • It is normal to hear the dryer gas valve or heating element cycle on and off during the drying cycle. • Make sure the dryer is dried with a light weight load, such as coins, loose buttons, nails, etc. Problem...
User Manual
Page 59
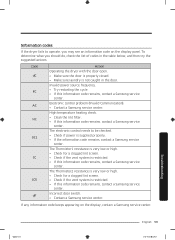
... display, contact a Samsung service center. High temperature heating check. • Clean the lint filter. • If this information code remains, contact a Samsung service center. The electronic control needs to operate, you should do, check the list of codes in the door. If any information code keeps appearing on the display panel. Code dC FC AC HC 9C1 tC tC5 dF Action Operating the dryer with the door open. • Make sure the door is properly closed...
... display, contact a Samsung service center. High temperature heating check. • Clean the lint filter. • If this information code remains, contact a Samsung service center. The electronic control needs to operate, you should do, check the list of codes in the door. If any information code keeps appearing on the display panel. Code dC FC AC HC 9C1 tC tC5 dF Action Operating the dryer with the door open. • Make sure the door is properly closed...
User Manual
Page 63
... other damage to instructions; and service to use of these excluded circumstances shall be readily determined; product where the original factory serial numbers have been removed, defaced, changed in any of this product and shall not cover the following: damage that occurs in shipment, delivery, installation, and uses for assistance with electrical or plumbing codes or correction of repair or replacement under these issues...
... other damage to instructions; and service to use of these excluded circumstances shall be readily determined; product where the original factory serial numbers have been removed, defaced, changed in any of this product and shall not cover the following: damage that occurs in shipment, delivery, installation, and uses for assistance with electrical or plumbing codes or correction of repair or replacement under these issues...
User Manual
Page 66
... in materials and workmanship encountered in normal, noncommercial use of products, equipment, systems, utilities, services, parts, supplies, accessories, applications, installations, repairs, external wiring or connectors not supplied or authorized by pest infestations. This limited warranty does not cover problems resulting from incorrect electric current, voltage or supply, light bulbs, house fuses, house wiring, cost of nature or God; SAMSUNG SHALL NOT BE LIABLE FOR LOSS OF REVENUE...
... in materials and workmanship encountered in normal, noncommercial use of products, equipment, systems, utilities, services, parts, supplies, accessories, applications, installations, repairs, external wiring or connectors not supplied or authorized by pest infestations. This limited warranty does not cover problems resulting from incorrect electric current, voltage or supply, light bulbs, house fuses, house wiring, cost of nature or God; SAMSUNG SHALL NOT BE LIABLE FOR LOSS OF REVENUE...


