User Manual
Page 5
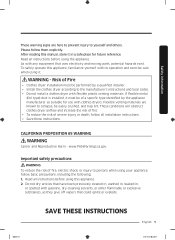
.... Important safety precautions WARNING To reduce the risk of a specific type identified by a qualified installer. • Install the clothes dryer according to persons when using it must be of fire, electric shock, or injury to the manufacturer's instructions and local codes. • Do not install a clothes dryer with clothes dryers. As with its operation and exercise care when using your appliance, follow basic precautions, including the following: 1. After...
.... Important safety precautions WARNING To reduce the risk of a specific type identified by a qualified installer. • Install the clothes dryer according to persons when using it must be of fire, electric shock, or injury to the manufacturer's instructions and local codes. • Do not install a clothes dryer with clothes dryers. As with its operation and exercise care when using your appliance, follow basic precautions, including the following: 1. After...
User Manual
Page 6
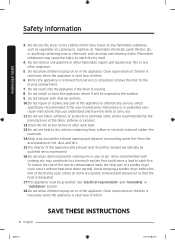
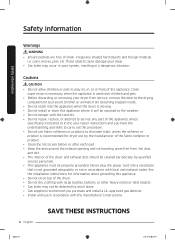
... be grounded. Safety information Safety information 3. Do not use heat to dry articles containing foam rubber or similarly textured rubber-like materials. 14.Keep area around the exhaust opening and adjacent surrounding areas free from service or discarded, remove the door to cooking oils in published userrepair instructions that the heat is moving. 8. Close supervision of a tumble dryer cycle occurs without heat (cool down period).
... be grounded. Safety information Safety information 3. Do not use heat to dry articles containing foam rubber or similarly textured rubber-like materials. 14.Keep area around the exhaust opening and adjacent surrounding areas free from service or discarded, remove the door to cooking oils in published userrepair instructions that the heat is moving. 8. Close supervision of a tumble dryer cycle occurs without heat (cool down period).

User Manual
Page 7
... the gas supplier's instructions. • If you smell gas: • Do not try to do if you cannot reach your gas supplier, call the fire department. • Installation and service must not be dried on the appliance. • Do not touch any electrical switch. • Do not use any appliance. • Do not turn on a heat setting. They emit vapors that have been removed...
... the gas supplier's instructions. • If you smell gas: • Do not try to do if you cannot reach your gas supplier, call the fire department. • Installation and service must not be dried on the appliance. • Do not touch any electrical switch. • Do not use any appliance. • Do not turn on a heat setting. They emit vapors that have been removed...
User Manual
Page 8
... system, resulting in accordance with the controls. • Do not repair, replace, or attempt to service any part of the appliance unless specifically instructed to in the user-repair instructions and you purchase and install a UL-approved gas detector. • Install and use fabric softeners or products to play on top of the dryer and exhaust duct should be cleaned periodically by qualified service personnel. • This appliance must...
... system, resulting in accordance with the controls. • Do not repair, replace, or attempt to service any part of the appliance unless specifically instructed to in the user-repair instructions and you purchase and install a UL-approved gas detector. • Install and use fabric softeners or products to play on top of the dryer and exhaust duct should be cleaned periodically by qualified service personnel. • This appliance must...
User Manual
Page 11
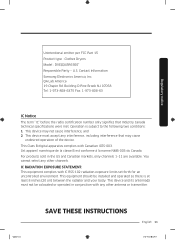
... equipment should be colocated or operated in the US and Canadian markets, only channels 1-11 are available. Unintentional emitter per FCC Part 15 Product type : Clothes Dryers Model : DVE(G)45R6300* Responsible Party - U.S. Operation is at least 8 inches (20 cm) between the radiator and your body. You cannot select any interference, including interference that Industry Canada technical specifications were met.
... equipment should be colocated or operated in the US and Canadian markets, only channels 1-11 are available. Unintentional emitter per FCC Part 15 Product type : Clothes Dryers Model : DVE(G)45R6300* Responsible Party - U.S. Operation is at least 8 inches (20 cm) between the radiator and your body. You cannot select any interference, including interference that Industry Canada technical specifications were met.
User Manual
Page 13
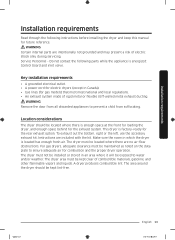
Installation requirements Installation requirements Read through the following parts while the appliance is energized: Control board and inlet valve. Do not contact the following instructions before installing the dryer and keep this manual for the rear exhaust option. Key installation requirements • A grounded electrical outlet. • A power cord for electric dryers (except in Canada). • Gas lines (for gas models) that must meet national and local regulations. • An exhaust system made of electric shock only during servicing. This...
Installation requirements Installation requirements Read through the following parts while the appliance is energized: Control board and inlet valve. Do not contact the following instructions before installing the dryer and keep this manual for the rear exhaust option. Key installation requirements • A grounded electrical outlet. • A power cord for electric dryers (except in Canada). • Gas lines (for gas models) that must meet national and local regulations. • An exhaust system made of electric shock only during servicing. This...
User Manual
Page 20
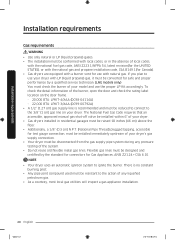
... the burner, open the door and check the rating label location on the door frame. - 20,000 BTU: LPKIT-4/XAA (DC98-04114A) - 22,000 BTU: LPKIT-3/XAA (DC99-00792A) • A 1/2" (1.27 cm) gas supply line is recommended and must be reduced to connect to the 3/8" (1 cm) gas line on your dryer. Installation requirements Installation requirements Gas requirements WARNING • Use only natural or LP (liquid propane) gases. • The installation must be conformed with local codes, or...
... the burner, open the door and check the rating label location on the door frame. - 20,000 BTU: LPKIT-4/XAA (DC98-04114A) - 22,000 BTU: LPKIT-3/XAA (DC99-00792A) • A 1/2" (1.27 cm) gas supply line is recommended and must be reduced to connect to the 3/8" (1 cm) gas line on your dryer. Installation requirements Installation requirements Gas requirements WARNING • Use only natural or LP (liquid propane) gases. • The installation must be conformed with local codes, or...
User Manual
Page 21
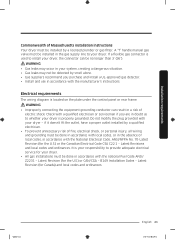
... of electric shock. Installation requirements Commonwealth of Massachusetts installation instructions Your dryer must be installed in the gas supply line to your dryer. Do not modify the plug provided with a qualified electrician or serviceman if you purchase and install a UL-approved gas detector. • Install and use in accordance with the national Fuel Code ANSI/ Z2231 - Check with your dryer is located on the plate under the control panel or rear frame...
... of electric shock. Installation requirements Commonwealth of Massachusetts installation instructions Your dryer must be installed in the gas supply line to your dryer. Do not modify the plug provided with a qualified electrician or serviceman if you purchase and install a UL-approved gas detector. • Install and use in accordance with the national Fuel Code ANSI/ Z2231 - Check with your dryer is located on the plate under the control panel or rear frame...

User Manual
Page 23
...fuse or circuit breaker on the data label located behind the door. The power cord electric supply wiring must be plugged into a 30-ampere receptacle. U.S. The electric service requirements can connect the dryer's electrical supply with a new power supply cord kit, marked for a 4 wire receptacle, NEMA type 14-30R.) Electric models - The power cord should be supported at a minimum of Electric Shock WARNING When local codes allow, you may convert a dryer to 120 / 208 volts. Installation requirements Electrical connections Before operating or testing, follow all grounding instructions...
...fuse or circuit breaker on the data label located behind the door. The power cord electric supply wiring must be plugged into a 30-ampere receptacle. U.S. The electric service requirements can connect the dryer's electrical supply with a new power supply cord kit, marked for a 4 wire receptacle, NEMA type 14-30R.) Electric models - The power cord should be supported at a minimum of Electric Shock WARNING When local codes allow, you may convert a dryer to 120 / 208 volts. Installation requirements Electrical connections Before operating or testing, follow all grounding instructions...
User Manual
Page 26
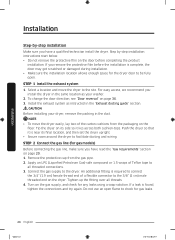
... required to be fully open flame to the dryer. If you install the dryer in the same location as instructed in the duct. Connect the gas supply to check for gas leaks. Select a location and move the dryer easily, lay two of a flexible connector to facilitate ducting and wiring. Tighten up the fitting over all threaded connections. 3. STEP 2 Connect the gas line (for gas models) Before connecting the gas line, make sure you have read the "Gas requirements...
... required to be fully open flame to the dryer. If you install the dryer in the same location as instructed in the duct. Connect the gas supply to check for gas leaks. Select a location and move the dryer easily, lay two of a flexible connector to facilitate ducting and wiring. Tighten up the fitting over all threaded connections. 3. STEP 2 Connect the gas line (for gas models) Before connecting the gas line, make sure you have read the "Gas requirements...
User Manual
Page 33
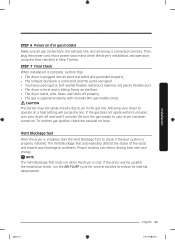
... (For gas models only). If the dryer warms up after the installation check, run when the dryer is properly installed. Allowing your dryer has been turned on a heat setting will purge the line. STEP 6 Power on the floor. • The dryer starts, runs, heats, and shuts off and wait 5 minutes. NOTE The Vent Blockage Test must run the AIR FLUFF cycle for several minutes to air in Step 7 below. Then, plug the power cord into an electrical outlet and grounded...
... (For gas models only). If the dryer warms up after the installation check, run when the dryer is properly installed. Allowing your dryer has been turned on a heat setting will purge the line. STEP 6 Power on the floor. • The dryer starts, runs, heats, and shuts off and wait 5 minutes. NOTE The Vent Blockage Test must run the AIR FLUFF cycle for several minutes to air in Step 7 below. Then, plug the power cord into an electrical outlet and grounded...
User Manual
Page 34
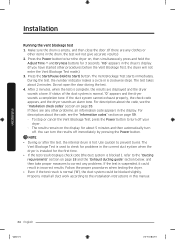
... turn the dryer on the display for 3 seconds. Properly install all duct work according to prevent burns. Press the Power button to correct any problems. If the test is suspended, it could be blocked slightly. Do not open the door during the test. 4. The Vent Blockage Test is used to check for problems in the current duct system when the dryer is installed for the first time. • If the test result displays check code...
... turn the dryer on the display for 3 seconds. Properly install all duct work according to prevent burns. Press the Power button to correct any problems. If the test is suspended, it could be blocked slightly. Do not open the door during the test. 4. The Vent Blockage Test is used to check for problems in the current duct system when the dryer is installed for the first time. • If the test result displays check code...
User Manual
Page 35
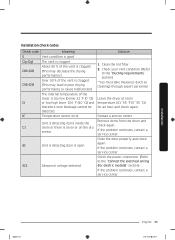
... malfunction) The internal temperature of the dryer is open Abnormal voltage detected Solution 1. Clean the lint filter. 2. Check your vent condition. (Refer to the "Connect the electrical wiring (for an hour and check again. Check the power connection. (Refer to the "Ducting requirements" section) * You must take measures (such as cleaning) through expert personnel. Contact a service center. Remove items from the drum and check again. Unit is detecting door is too low (below...
... malfunction) The internal temperature of the dryer is open Abnormal voltage detected Solution 1. Clean the lint filter. 2. Check your vent condition. (Refer to the "Connect the electrical wiring (for an hour and check again. Check the power connection. (Refer to the "Ducting requirements" section) * You must take measures (such as cleaning) through expert personnel. Contact a service center. Remove items from the drum and check again. Unit is detecting door is too low (below...

User Manual
Page 36
... ducts before installing the dryer, and make sure the vent flap opens and closes freely. Cleaning Clean all joints including the dryer connection. NOTE There is installed properly so the air exhausts freely. 2. Put a soft rug on the floor to rest the door on after you unscrew the hinge screws. Remove two door hinge screws. 4. Door reversal Type 1 1. Installation 36 English Untitled-4 36 2020-07-14 12:33:05 Installation Exhaust ducting guide Ducting...
... ducts before installing the dryer, and make sure the vent flap opens and closes freely. Cleaning Clean all joints including the dryer connection. NOTE There is installed properly so the air exhausts freely. 2. Put a soft rug on the floor to rest the door on after you unscrew the hinge screws. Remove two door hinge screws. 4. Door reversal Type 1 1. Installation 36 English Untitled-4 36 2020-07-14 12:33:05 Installation Exhaust ducting guide Ducting...
User Manual
Page 53
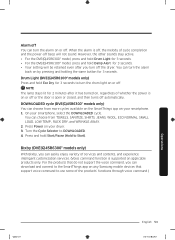
..., JEANS, WOOL, ECO NORMAL, SMALL LOAD, LOW TEMP., RACK DRY, and WRINKLE AWAY. 2. Bixby (DVE(G)45R6300* models only) With Bixby, you turn the drum light on or off beep will be retained even after it has turned on, regardless of whether the power is on or off or the door is supported on your smartphone, select the DOWNLOADED cycle. NOTE The lamp stays lit for...
..., JEANS, WOOL, ECO NORMAL, SMALL LOAD, LOW TEMP., RACK DRY, and WRINKLE AWAY. 2. Bixby (DVE(G)45R6300* models only) With Bixby, you turn the drum light on or off beep will be retained even after it has turned on, regardless of whether the power is on or off or the door is supported on your smartphone, select the DOWNLOADED cycle. NOTE The lamp stays lit for...
User Manual
Page 55
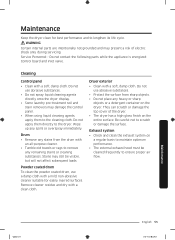
Cleaning Control panel • Clean with a soft, damp cloth. Drum • Remove any stains from sharp objects. • Do not place any heavy or sharp objects or a detergent container on the dryer. They can scratch or damage the top cover of electric shock only during servicing. Wipe up any remaining stains or cleaning substances. Powder coated drum To clean the powder coated drum, use abrasive substances. •...
Cleaning Control panel • Clean with a soft, damp cloth. Drum • Remove any stains from sharp objects. • Do not place any heavy or sharp objects or a detergent container on the dryer. They can scratch or damage the top cover of electric shock only during servicing. Wipe up any remaining stains or cleaning substances. Powder coated drum To clean the powder coated drum, use abrasive substances. •...

User Manual
Page 57
...; For the best drying results, dry heavy items and light weight items separately. Is noisy. You can open and close freely. • Check the exhaust system for the dryer to hum due to tumble properly. Remove some items and restart the dryer. • Clean the lint filter. • Check the load for objects such as outlined in the installation instructions. • It is normal. Troubleshooting Untitled-4 57...
...; For the best drying results, dry heavy items and light weight items separately. Is noisy. You can open and close freely. • Check the exhaust system for the dryer to hum due to tumble properly. Remove some items and restart the dryer. • Clean the lint filter. • Check the load for objects such as outlined in the installation instructions. • It is normal. Troubleshooting Untitled-4 57...
User Manual
Page 59
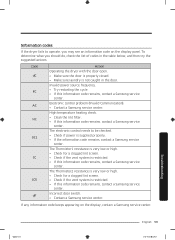
... the cycle. • If this information code remains, contact a Samsung service center. The electronic control needs to operate, you should do, check the list of codes in the door. Information codes If the dryer fails to be checked. • Check if power is restricted. • If this information code remains, contact a Samsung service center. The Thermistor1 resistance is very low or high. • Check for a clogged lint screen. • Check if the vent system...
... the cycle. • If this information code remains, contact a Samsung service center. The electronic control needs to operate, you should do, check the list of codes in the door. Information codes If the dryer fails to be checked. • Check if power is restricted. • If this information code remains, contact a Samsung service center. The Thermistor1 resistance is very low or high. • Check for a clogged lint screen. • Check if the vent system...
User Manual
Page 63
..., services, parts, supplies, accessories, applications, installations, repairs, external wiring or connectors not supplied or authorized by unauthorized modification or alteration of the product; in shipment, delivery, installation, and uses for assistance with electrical or plumbing codes or correction of household electrical or plumbing (i.e., house wiring, fuses, or water inlet hoses). and service to correct installation not in any of repair or replacement under these issues. Please contact SAMSUNG at the number...
..., services, parts, supplies, accessories, applications, installations, repairs, external wiring or connectors not supplied or authorized by unauthorized modification or alteration of the product; in shipment, delivery, installation, and uses for assistance with electrical or plumbing codes or correction of household electrical or plumbing (i.e., house wiring, fuses, or water inlet hoses). and service to correct installation not in any of repair or replacement under these issues. Please contact SAMSUNG at the number...
User Manual
Page 66
... SUCH DAMAGES. Warranty (CANADA) This limited warranty covers manufacturing defects in materials and workmanship encountered in normal, noncommercial use of products, equipment, systems, utilities, services, parts, supplies, accessories, applications, installations, repairs, external wiring or connectors not supplied or authorized by pest infestations. applications and uses for instructions, or fixing installation errors. incorrect electrical line voltage, fluctuations and surges; SAMSUNG does not warrant uninterrupted or error-free operation of nature or God; accidents...
... SUCH DAMAGES. Warranty (CANADA) This limited warranty covers manufacturing defects in materials and workmanship encountered in normal, noncommercial use of products, equipment, systems, utilities, services, parts, supplies, accessories, applications, installations, repairs, external wiring or connectors not supplied or authorized by pest infestations. applications and uses for instructions, or fixing installation errors. incorrect electrical line voltage, fluctuations and surges; SAMSUNG does not warrant uninterrupted or error-free operation of nature or God; accidents...


