
User Manual
Page 6
.... 2. Do not use the dryer to dry clothes which have traces of any service unless specifically recommended in the user-maintenance instructions or in published user-repair instructions that you understand and have been previously cleaned in, washed in, soaked in "Installation" section. Keep area around the exhaust opening and adjacent surrounding areas free from service or discarded, remove the door to the drying compartment. 7. Do not use heat to dry articles containing foam...
.... 2. Do not use the dryer to dry clothes which have traces of any service unless specifically recommended in the user-maintenance instructions or in published user-repair instructions that you understand and have been previously cleaned in, washed in, soaked in "Installation" section. Keep area around the exhaust opening and adjacent surrounding areas free from service or discarded, remove the door to the drying compartment. 7. Do not use heat to dry articles containing foam...

User Manual
Page 8
... the appliance when the drum is moving. • Do not install or store this appliance where it will be exposed to the weather. • Do not tamper with the controls. • Do not repair, replace, or attempt to play on the appliance. • Do not touch any electrical switch. • Do not use any part of small, irregularly shaped...
... the appliance when the drum is moving. • Do not install or store this appliance where it will be exposed to the weather. • Do not tamper with the controls. • Do not repair, replace, or attempt to play on the appliance. • Do not touch any electrical switch. • Do not use any part of small, irregularly shaped...
User Manual
Page 9
... reaction in hot water with local and national codes. Never remove these items from the dryer hot or interrupt the drying cycle until the items have been spotted or soaked with the manufacturer's instructions. • Do not place items in your dryer can be cleaned periodically by smell alone. • Gas suppliers recommend you purchase and install a UL-approved gas detector. • Install and use by...
... reaction in hot water with local and national codes. Never remove these items from the dryer hot or interrupt the drying cycle until the items have been spotted or soaked with the manufacturer's instructions. • Do not place items in your dryer can be cleaned periodically by smell alone. • Gas suppliers recommend you purchase and install a UL-approved gas detector. • Install and use by...
User Manual
Page 11
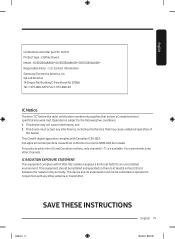
.... English Unintentional emitter per FCC Part 15 Product type : Clothes Dryers Model : DVE(G)50A8800*/DVE(G)50A8600*/DVE(G)45A6400* Responsible Party - U.S. Building D Pine Brook NJ 07058 Tel: 1-973-808-6375 Fax: 1-973-808-63 IC Notice The term "IC" before the radio certification number only signifies that may not cause interference, and 2. Operation is at least 8 inches (20...
.... English Unintentional emitter per FCC Part 15 Product type : Clothes Dryers Model : DVE(G)50A8800*/DVE(G)50A8600*/DVE(G)45A6400* Responsible Party - U.S. Building D Pine Brook NJ 07058 Tel: 1-973-808-6375 Fax: 1-973-808-63 IC Notice The term "IC" before the radio certification number only signifies that may not cause interference, and 2. Operation is at least 8 inches (20...
User Manual
Page 13
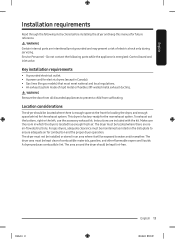
... exhaust kit. The dryer area must be kept lint-free. The area around the dryer should be installed or stored in Canada). • Gas lines (for gas models) that must not be located where there is located has enough fresh air. Do not contact the following instructions before installing the dryer and keep this manual for future reference. A dryer produces combustible lint. This dryer is energized: Control board and inlet valve. Instructions are no air-flow...
... exhaust kit. The dryer area must be kept lint-free. The area around the dryer should be installed or stored in Canada). • Gas lines (for gas models) that must not be located where there is located has enough fresh air. Do not contact the following instructions before installing the dryer and keep this manual for future reference. A dryer produces combustible lint. This dryer is energized: Control board and inlet valve. Instructions are no air-flow...

User Manual
Page 20
..., accessible for test gauge connection, must be installed immediately upstream of your model and use with natural gas. NOTE • Your dryer uses an automatic ignition system to use your dryer with LP (liquid propane) gas, it must be converted for safe and proper performance by a qualified service technician. (LNG models only) You must check the burner of your dryer's gas supply connection. • Your dryer must be installed by the standard for connectors...
..., accessible for test gauge connection, must be installed immediately upstream of your model and use with natural gas. NOTE • Your dryer uses an automatic ignition system to use your dryer with LP (liquid propane) gas, it must be converted for safe and proper performance by a qualified service technician. (LNG models only) You must check the burner of your dryer's gas supply connection. • Your dryer must be installed by the standard for connectors...

User Manual
Page 21
...; Do not modify the plug provided with your dryer - Gas models WARNING • Your dryer has a cord with the National Electrical Code, ANSI/NFPA No. 70-Latest Revision (for the electrical current. This cord is sold separately. • The plug must be run with the circuit conductors and connected to the equipment grounding terminal or lead on the plate under the control panel or rear frame. WARNING •...
...; Do not modify the plug provided with your dryer - Gas models WARNING • Your dryer has a cord with the National Electrical Code, ANSI/NFPA No. 70-Latest Revision (for the electrical current. This cord is sold separately. • The plug must be run with the circuit conductors and connected to the equipment grounding terminal or lead on the plate under the control panel or rear frame. WARNING •...
User Manual
Page 22
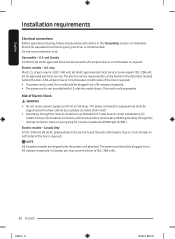
... fuse or circuit breaker on the data label located behind the door. only Most U.S. Some require 120 / 208 volt, 60 Hz approved electrical service. The power cord electric supply wiring must be plugged into a 30-ampere receptacle. Do not use an extension cord. Electric models - This cord is prohibited for a 4 wire receptacle, NEMA type 14-30R.) Electric models - dryers require a 120 / 240 volt, 60 Hz AC approved electrical service. electric model dryers. English Installation requirements Electrical connections Before operating or testing, follow all grounding instructions...
... fuse or circuit breaker on the data label located behind the door. only Most U.S. Some require 120 / 208 volt, 60 Hz approved electrical service. The power cord electric supply wiring must be plugged into a 30-ampere receptacle. Do not use an extension cord. Electric models - This cord is prohibited for a 4 wire receptacle, NEMA type 14-30R.) Electric models - dryers require a 120 / 240 volt, 60 Hz AC approved electrical service. electric model dryers. English Installation requirements Electrical connections Before operating or testing, follow all grounding instructions...

User Manual
Page 25
... change the door direction, see "Door reversal" on page 34. 3. NOTE • To move the dryer to the site. Tip the dryer on its side so it is near its final location, and then set the dryer upright. • Secure room around the dryer to facilitate ducting and wiring. Turn on the gas supply, and check for gas leaks. Install the exhaust system as your dryer, remove the packing in the "Exhaust ducting guide...
... change the door direction, see "Door reversal" on page 34. 3. NOTE • To move the dryer to the site. Tip the dryer on its side so it is near its final location, and then set the dryer upright. • Secure room around the dryer to facilitate ducting and wiring. Turn on the gas supply, and check for gas leaks. Install the exhaust system as your dryer, remove the packing in the "Exhaust ducting guide...
User Manual
Page 32
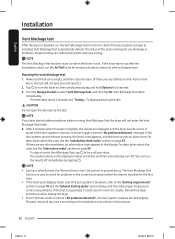
... temperature. English Installation Vent blockage test After the dryer is installed, run the Vent Blockage Test function to check if the duct system is cool. For description about the code, see the "Installation check codes" section on , then simultaneously tap and hold Options for the first time. • If the test result displays check code (the duct system is hot. You can reduce drying time and save energy. Properly install all duct work according to the installation instructions in the drum...
... temperature. English Installation Vent blockage test After the dryer is installed, run the Vent Blockage Test function to check if the duct system is cool. For description about the code, see the "Installation check codes" section on , then simultaneously tap and hold Options for the first time. • If the test result displays check code (the duct system is hot. You can reduce drying time and save energy. Properly install all duct work according to the installation instructions in the drum...

User Manual
Page 34
... use excessively long ducts that will prevent the door from being scratched. 2. Use 4-inch rigid metal ducts. Cleaning Clean all joints including the dryer connection. Door reversal Type 1 1. Put a soft rug on the floor to rest the door on a regular basis. Unplug the power cord. 3. Lift the door and remove it . Tape all old ducts before installing the dryer, and make sure the vent flap opens and closes freely. Never use crushed or clogged venting...
... use excessively long ducts that will prevent the door from being scratched. 2. Use 4-inch rigid metal ducts. Cleaning Clean all joints including the dryer connection. Door reversal Type 1 1. Put a soft rug on the floor to rest the door on a regular basis. Unplug the power cord. 3. Lift the door and remove it . Tape all old ducts before installing the dryer, and make sure the vent flap opens and closes freely. Never use crushed or clogged venting...
User Manual
Page 55
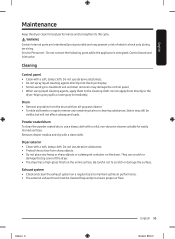
... following parts while the appliance is energized: Control board and inlet valve. Do not apply them to the dryer. Drum • Remove any remaining stains or cleaning substances. Dryer exterior • Clean with a soft, damp cloth. Do not use abrasive substances. • Do not spray liquid cleaning agents directly onto the dryer display. • Some laundry pre-treatment soil and stain removers may damage the control panel...
... following parts while the appliance is energized: Control board and inlet valve. Do not apply them to the dryer. Drum • Remove any remaining stains or cleaning substances. Dryer exterior • Clean with a soft, damp cloth. Do not use abrasive substances. • Do not spray liquid cleaning agents directly onto the dryer display. • Some laundry pre-treatment soil and stain removers may damage the control panel...

User Manual
Page 57
... air dry process in . • Make sure the door is properly closed. • Check the fuse or reset the circuit breaker. • If you opened the door during a cycle, tap and hold • Clean the filter. • Make sure Child Lock is draining properly and extracting adequate water from the load. • The load may be inspected and cleaned annually. • Use a 4" rigid metal exhaust duct. • Do not overload. 1 wash load = 1 dryer load. • Dry...
... air dry process in . • Make sure the door is properly closed. • Check the fuse or reset the circuit breaker. • If you opened the door during a cycle, tap and hold • Clean the filter. • Make sure Child Lock is draining properly and extracting adequate water from the load. • The load may be inspected and cleaned annually. • Use a 4" rigid metal exhaust duct. • Do not overload. 1 wash load = 1 dryer load. • Dry...

User Manual
Page 58
... are dry. There is clean before • The load is steam condensation. Accordingly, make sure to open a window and ventilate the area. • Do not attempt to hear the dryer gas valve or heating element cycle on them immediately. • Check the lint filter. The clothes have lint on and off before putting items into the dryer. English Troubleshooting Problem Action The dryer is normal. • Sort heavy and light items...
... are dry. There is clean before • The load is steam condensation. Accordingly, make sure to open a window and ventilate the area. • Do not attempt to hear the dryer gas valve or heating element cycle on them immediately. • Check the lint filter. The clothes have lint on and off before putting items into the dryer. English Troubleshooting Problem Action The dryer is normal. • Sort heavy and light items...

User Manual
Page 59
... Problem Extended time. High temperature heating check. Contact a Samsung service center. • Clean the lint filter. • If this information code remains, contact a Samsung service center. • Check if power cord is connected properly. • Check if the electrical outlet is restricted. • If this information code remains, contact a Samsung service center. Information code Door is very low or high. The Thermistor1 resistance is open FC AC HC 9C1 tC Meaning Operating the dryer with the door open. The drying time can change...
... Problem Extended time. High temperature heating check. Contact a Samsung service center. • Clean the lint filter. • If this information code remains, contact a Samsung service center. • Check if power cord is connected properly. • Check if the electrical outlet is restricted. • If this information code remains, contact a Samsung service center. Information code Door is very low or high. The Thermistor1 resistance is open FC AC HC 9C1 tC Meaning Operating the dryer with the door open. The drying time can change...
User Manual
Page 60
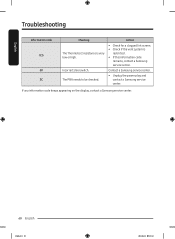
The PBA needs to be checked. Contact a Samsung service center. • Unplug the power plug and contact a Samsung service center. Action • Check for a clogged lint screen. • Check if the vent system is very low or high. If any information code keeps appearing on the display, contact a Samsung service center. 60 English Untitled-11 60 2021-04-26 3:35:18 English Troubleshooting Information code tC5 dF 3C Meaning The Thermistor2 resistance is restricted. • If this information code remains, contact a Samsung service center. Incorrect door switch.
The PBA needs to be checked. Contact a Samsung service center. • Unplug the power plug and contact a Samsung service center. Action • Check for a clogged lint screen. • Check if the vent system is very low or high. If any information code keeps appearing on the display, contact a Samsung service center. 60 English Untitled-11 60 2021-04-26 3:35:18 English Troubleshooting Information code tC5 dF 3C Meaning The Thermistor2 resistance is restricted. • If this information code remains, contact a Samsung service center. Incorrect door switch.

User Manual
Page 61
... Any bleach (when needed) Only non-chlorine (color-safe) bleach (when needed) Tumble dry Normal Permanent press/Wrinkle resistant/ Wrinkle control Gentle/Delicates Special instructions Line dry/Hang to dry Drip dry Dry flat Heat setting High Medium Low Any heat No heat / Air Iron dry or steam temperatures High Medium Low English 61 Untitled-11 61 2021-04-26 3:35:20 English Specifications Fabric care chart The following symbols provide garment care direction.
... Any bleach (when needed) Only non-chlorine (color-safe) bleach (when needed) Tumble dry Normal Permanent press/Wrinkle resistant/ Wrinkle control Gentle/Delicates Special instructions Line dry/Hang to dry Drip dry Dry flat Heat setting High Medium Low Any heat No heat / Air Iron dry or steam temperatures High Medium Low English 61 Untitled-11 61 2021-04-26 3:35:20 English Specifications Fabric care chart The following symbols provide garment care direction.

User Manual
Page 62
... trapped inside the appliance. If you decide to dry Drip dry Dry flat Protecting the environment This appliance is manufactured from recyclable materials. Specification sheet Type Capacity (Cu.ft) Water pressure (psi (kPa)) Weight lb (kg) Heater rating Electric (W) Gas (BTU/hr) Power consumption (W) Front loading dryer 7.5 20-116 (137-800) 123.5 (56.0) 5300 20000 5400 62 English Untitled-11 62 2021-04-26 3:35:20 Remove the door...
... trapped inside the appliance. If you decide to dry Drip dry Dry flat Protecting the environment This appliance is manufactured from recyclable materials. Specification sheet Type Capacity (Cu.ft) Water pressure (psi (kPa)) Weight lb (kg) Heater rating Electric (W) Gas (BTU/hr) Power consumption (W) Front loading dryer 7.5 20-116 (137-800) 123.5 (56.0) 5300 20000 5400 62 English Untitled-11 62 2021-04-26 3:35:20 Remove the door...
User Manual
Page 63
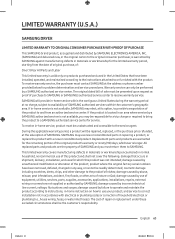
... that have been installed, operated, and maintained according to the instructions attached to or furnished with a new or reconditioned product. All replaced parts and products are warranted for the remaining portion of the original product's warranty or ninety (90) days, whichever is not available, SAMSUNG may use of equipment, utilities, services, parts, supplies, accessories, applications, installations, repairs, external wiring or connectors not supplied or...
... that have been installed, operated, and maintained according to the instructions attached to or furnished with a new or reconditioned product. All replaced parts and products are warranted for the remaining portion of the original product's warranty or ninety (90) days, whichever is not available, SAMSUNG may use of equipment, utilities, services, parts, supplies, accessories, applications, installations, repairs, external wiring or connectors not supplied or...
User Manual
Page 65
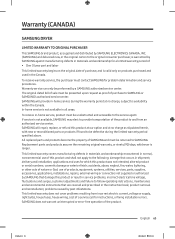
... electric current, voltage or supply, light bulbs, house fuses, house wiring, cost of a service call for a limited warranty period of: • One (1) year part and labor This limited warranty begins on products purchased and used in the Canada. This limited warranty does not cover problems resulting from an authorized service center. cosmetic damage or exterior finish; SAMSUNG does not warrant uninterrupted or error-free operation of nature or God; SAMSUNG...
... electric current, voltage or supply, light bulbs, house fuses, house wiring, cost of a service call for a limited warranty period of: • One (1) year part and labor This limited warranty begins on products purchased and used in the Canada. This limited warranty does not cover problems resulting from an authorized service center. cosmetic damage or exterior finish; SAMSUNG does not warrant uninterrupted or error-free operation of nature or God; SAMSUNG...


