
User Manual
Page 6
... interior of the appliance and exhaust duct should be exposed to the weather. 9. Do not dry articles that have traces of any service unless specifically recommended in the user-maintenance instructions or in , or spotted with internal controls. 10. Do not store or use the dryer to dry clothes which have been previously cleaned in, washed in, soaked in published user repair instructions that could ignite or...
... interior of the appliance and exhaust duct should be exposed to the weather. 9. Do not dry articles that have traces of any service unless specifically recommended in the user-maintenance instructions or in , or spotted with internal controls. 10. Do not store or use the dryer to dry clothes which have been previously cleaned in, washed in, soaked in published user repair instructions that could ignite or...
User Manual
Page 7
... information 16. Avoid stopping a tumble dryer before the end of the drying cycle unless all traces of fire or explosion: • Do not dry items that could cause a load to contaminated loads, the final part of fire due to catch fire. See Electrical requirements and Grounding in injury. 21. Close supervision of electric shock only during servicing. • Do not contact...
... information 16. Avoid stopping a tumble dryer before the end of the drying cycle unless all traces of fire or explosion: • Do not dry items that could cause a load to contaminated loads, the final part of fire due to catch fire. See Electrical requirements and Grounding in injury. 21. Close supervision of electric shock only during servicing. • Do not contact...

User Manual
Page 8
... not allow children or pets to light any appliance. • Do not turn on , in, or in front of the appliance unless specifically instructed to in a dangerous situation. Safety information Safety information WARNING - These objects could damage your dryer. • Gas leaks may occur in your dryer from service, remove the door to the drying compartment to carry out the procedure...
... not allow children or pets to light any appliance. • Do not turn on , in, or in front of the appliance unless specifically instructed to in a dangerous situation. Safety information Safety information WARNING - These objects could damage your dryer. • Gas leaks may occur in your dryer from service, remove the door to the drying compartment to carry out the procedure...
User Manual
Page 9
... by smell alone. • Gas suppliers recommend you purchase and install a UL-approved gas detector. • Install and use in accordance with the manufacturer's instructions. • Do not place items in your dryer can ignite spontaneoulsy. Even after each load. • Keep the area around the exhaust opening and surrounding areas free from the dryer hot or interrupt the drying cycle until the items have...
... by smell alone. • Gas suppliers recommend you purchase and install a UL-approved gas detector. • Install and use in accordance with the manufacturer's instructions. • Do not place items in your dryer can ignite spontaneoulsy. Even after each load. • Keep the area around the exhaust opening and surrounding areas free from the dryer hot or interrupt the drying cycle until the items have...
User Manual
Page 15
... following parts while the appliance is energized: Control board and inlet valve. This dryer is located has enough fresh air. The dryer must be kept lint-free. The area around the dryer should be exposed to water and/or weather. To exhaust out the bottom, right or the left, use the accessory exhaust kit. Do not contact the following instructions before installing the dryer and keep this manual for gas models) that...
... following parts while the appliance is energized: Control board and inlet valve. This dryer is located has enough fresh air. The dryer must be kept lint-free. The area around the dryer should be exposed to water and/or weather. To exhaust out the bottom, right or the left, use the accessory exhaust kit. Do not contact the following instructions before installing the dryer and keep this manual for gas models) that...
User Manual
Page 20
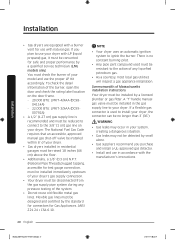
... a courtesy, most local gas utilities will inspect a gas appliance installation. The National Fuel Gas Code requires that an accessible, approved manual gas shut-off valve be installed within 6" of your dryer. • Gas dryers installed in the gas supply line to your dryer. To check the detail information of the burner, open the door and check the rating label location on your dryer. WARNING • Gas leaks may occur in accordance with the manufacturer's instructions. 20 English FlexDry_DM9900M_DC68...
... a courtesy, most local gas utilities will inspect a gas appliance installation. The National Fuel Gas Code requires that an accessible, approved manual gas shut-off valve be installed within 6" of your dryer. • Gas dryers installed in the gas supply line to your dryer. To check the detail information of the burner, open the door and check the rating label location on your dryer. WARNING • Gas leaks may occur in accordance with the manufacturer's instructions. 20 English FlexDry_DM9900M_DC68...

User Manual
Page 21
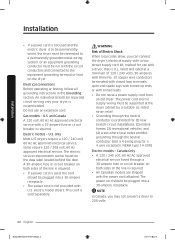
... - It is located on the plate under the control panel or rear frame. Installation Electrical requirements The wiring diagram is your responsibility to provide adequate electrical service for your dryer. • All gas installations must be done in accordance with the national Fuel Code ANSI/Z2231 - Latest Revisions and local codes and ordinances. The plug must be grounded. if it doesn't fit the outlet, have a proper outlet installed by a qualified...
... - It is located on the plate under the control panel or rear frame. Installation Electrical requirements The wiring diagram is your responsibility to provide adequate electrical service for your dryer. • All gas installations must be done in accordance with the national Fuel Code ANSI/Z2231 - Latest Revisions and local codes and ordinances. The plug must be grounded. if it doesn't fit the outlet, have a proper outlet installed by a qualified...
User Manual
Page 22
... conductor. (Use a 4-prong plug for use an extension cord. Installation Installation • If a power cord is not used , the cord should be found on the data label located behind the door. Gas models - only Most U.S. The electric service requirements can connect the dryer's electrical supply with a new power supply cord kit, marked for a 4 wire receptacle, NEMA type 14-30R.) Electric models - A 30-ampere fuse or circuit breaker on the dryer. The power cord should be supported at a minimum of the line is required. • All Canadian models are...
... conductor. (Use a 4-prong plug for use an extension cord. Installation Installation • If a power cord is not used , the cord should be found on the data label located behind the door. Gas models - only Most U.S. The electric service requirements can connect the dryer's electrical supply with a new power supply cord kit, marked for a 4 wire receptacle, NEMA type 14-30R.) Electric models - A 30-ampere fuse or circuit breaker on the dryer. The power cord should be supported at a minimum of the line is required. • All Canadian models are...

User Manual
Page 23
... fitting over all threaded connections. 3. Install the exhaust system as your dryer, remove the packing in the Exhaust ducting guide section. To change the door direction, see Door reversal. 3. Tip the dryer on the gas supply, and check for gas leaks. Step by -step installation Make sure you install the dryer in the same location as instructed in the duct. Select a location and move the dryer easily, lay two of a flexible connector to connect the 3/4" (1.9 cm) female...
... fitting over all threaded connections. 3. Install the exhaust system as your dryer, remove the packing in the Exhaust ducting guide section. To change the door direction, see Door reversal. 3. Tip the dryer on the gas supply, and check for gas leaks. Step by -step installation Make sure you install the dryer in the same location as instructed in the duct. Select a location and move the dryer easily, lay two of a flexible connector to connect the 3/4" (1.9 cm) female...

User Manual
Page 30
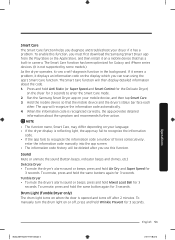
... or problems. Proper ducting can reduce drying time and save energy. If "C1" is properly installed. Press POWER to reduce its internal temperature. During the test, the number indicator makes a circle in the drum, the test will not enter the Vent Blockage Test mode.) 3. Do not open the door during the test. 4. If status of the ducts and reports any clothes or other procedures before the Vent Blockage Test, the dryer will...
... or problems. Proper ducting can reduce drying time and save energy. If "C1" is properly installed. Press POWER to reduce its internal temperature. During the test, the number indicator makes a circle in the drum, the test will not enter the Vent Blockage Test mode.) 3. Do not open the door during the test. 4. If status of the ducts and reports any clothes or other procedures before the Vent Blockage Test, the dryer will...
User Manual
Page 31
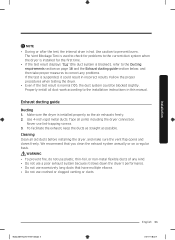
... use lint-trapping screws. 3. Exhaust ducting guide Ducting 1. To facilitate the exhaust, keep the ducts as straight as possible. Properly install all duct work according to the installation instructions in incorrect results. Never use crushed or clogged venting or ducts. Use 4-inch rigid metal ducts. Follow the proper procedures when testing the dryer. • Even if the test result is suspended, it slows down the dryer's performance. • Do not use excessively long ducts that you clean...
... use lint-trapping screws. 3. Exhaust ducting guide Ducting 1. To facilitate the exhaust, keep the ducts as straight as possible. Properly install all duct work according to the installation instructions in incorrect results. Never use crushed or clogged venting or ducts. Use 4-inch rigid metal ducts. Follow the proper procedures when testing the dryer. • Even if the test result is suspended, it slows down the dryer's performance. • Do not use excessively long ducts that you clean...

User Manual
Page 46
... a cycle time in minutes. • If TIME DRY is selected, the Eco Dry function is dry. • Use to sanitize items by applying steam and high-temperature heat to four items. With this cycle. Before removing the laundry, confirm that the laundry load is sprayed into the dryer drum after several minutes of tumbling with heat. Operations Steam Dry cycles Cycle REFRESH WRINKLE AWAY STEAM SANITIZE Manual Dry cycles Cycle TIME DRY AIR FLUFF Description • Use to smooth out wrinkles and...
... a cycle time in minutes. • If TIME DRY is selected, the Eco Dry function is dry. • Use to sanitize items by applying steam and high-temperature heat to four items. With this cycle. Before removing the laundry, confirm that the laundry load is sprayed into the dryer drum after several minutes of tumbling with heat. Operations Steam Dry cycles Cycle REFRESH WRINKLE AWAY STEAM SANITIZE Manual Dry cycles Cycle TIME DRY AIR FLUFF Description • Use to smooth out wrinkles and...

User Manual
Page 49
... dryer's control panel for more than 5 seconds until the 'AP' message appears on your smartphone. 2. If 'Dryer' is subject to change without notice. 1. Getting started Using Samsung Smart Home, you can control your dryer from your smart device remotely. For improved performance, the content and design of the controls available on your dryer and you can monitor (gas models) or control (electric models) your dryer remotely. • For gas models...
... dryer's control panel for more than 5 seconds until the 'AP' message appears on your smartphone. 2. If 'Dryer' is subject to change without notice. 1. Getting started Using Samsung Smart Home, you can control your dryer from your smart device remotely. For improved performance, the content and design of the controls available on your dryer and you can monitor (gas models) or control (electric models) your dryer remotely. • For gas models...
User Manual
Page 51
... mute the dryer's alarm sound or beeps, press and hold Air Dry and Super Speed for 3 seconds. When the information code is not supported by some models.) As the dryer operates, it runs a self-diagnosis function in camera. Smart Care The Smart Care function helps you must first download the Samsung Smart Dryer app from the Play Store or the Apple Store, and then install it...
... mute the dryer's alarm sound or beeps, press and hold Air Dry and Super Speed for 3 seconds. When the information code is not supported by some models.) As the dryer operates, it runs a self-diagnosis function in camera. Smart Care The Smart Care function helps you must first download the Samsung Smart Dryer app from the Play Store or the Apple Store, and then install it...
User Manual
Page 52
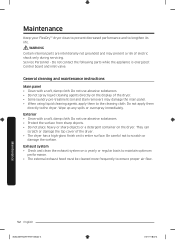
... FlexDry_DM9900M_DC68-03381F-07_EN.indd 52 2019-06-03 2:28:42 General cleaning and maintenance instructions Main panel • Clean with a soft, damp cloth. Wipe up any spills or overspray immediately. Do not apply them to scratch or damage the surface. Be careful not to the cleaning cloth. Exterior • Clean with a soft, damp cloth. Service Personnel - Exhaust system • Check and clean the exhaust system on the dryer.
... FlexDry_DM9900M_DC68-03381F-07_EN.indd 52 2019-06-03 2:28:42 General cleaning and maintenance instructions Main panel • Clean with a soft, damp cloth. Wipe up any spills or overspray immediately. Do not apply them to scratch or damage the surface. Be careful not to the cleaning cloth. Exterior • Clean with a soft, damp cloth. Service Personnel - Exhaust system • Check and clean the exhaust system on the dryer.

User Manual
Page 56
... metal exhaust duct. • Do not overload. 1 wash load = 1 dryer load. • Dry heavy items and light weight items separately. • Large, bulky items, such as blankets or comforters, may require repositioning to ensure even drying. • The load may have moved into a live electrical outlet. • Check your home's circuit breakers or fuses. • Press and hold START/PAUSE again if the door was opened during a cycle. • Clean the lint filter...
... metal exhaust duct. • Do not overload. 1 wash load = 1 dryer load. • Dry heavy items and light weight items separately. • Large, bulky items, such as blankets or comforters, may require repositioning to ensure even drying. • The load may have moved into a live electrical outlet. • Check your home's circuit breakers or fuses. • Press and hold START/PAUSE again if the door was opened during a cycle. • Clean the lint filter...
User Manual
Page 60
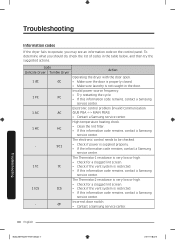
... control panel. The Thermistor2 resistance is very low or high. • Check for a clogged lint screen. • Check if the vent system is restricted. • If this information code remains, contact a Samsung service center. High temperature heating check. • Clean the lint filter. • If this information code remains, contact a Samsung service center. Incorrect door switch. • Contact a Samsung service center. The Thermistor1 resistance is very low or high. • Check for a clogged lint screen. • Check...
... control panel. The Thermistor2 resistance is very low or high. • Check for a clogged lint screen. • Check if the vent system is restricted. • If this information code remains, contact a Samsung service center. High temperature heating check. • Clean the lint filter. • If this information code remains, contact a Samsung service center. Incorrect door switch. • Contact a Samsung service center. The Thermistor1 resistance is very low or high. • Check for a clogged lint screen. • Check...
User Manual
Page 62
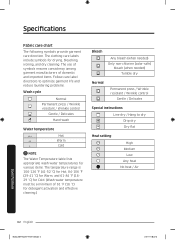
The clothing care labels include symbols for detergent activation and effective cleaning.) Bleach Any bleach (when needed) Only non-chlorine (color-safe) bleach (when needed) Tumble dry Normal Permanent press / Wrinkle resistant / Wrinkle control Gentle / Delicates Special instructions Line dry / Hang to optimize garment life and reduce laundering problems. Wash cycle Normal Permanent press / Wrinkle resistant / Wrinkle control Gentle / Delicates Hand wash Water temperature Hot Warm Cold NOTE The Water Temperature table lists appropriate...
The clothing care labels include symbols for detergent activation and effective cleaning.) Bleach Any bleach (when needed) Only non-chlorine (color-safe) bleach (when needed) Tumble dry Normal Permanent press / Wrinkle resistant / Wrinkle control Gentle / Delicates Special instructions Line dry / Hang to optimize garment life and reduce laundering problems. Wash cycle Normal Permanent press / Wrinkle resistant / Wrinkle control Gentle / Delicates Hand wash Water temperature Hot Warm Cold NOTE The Water Temperature table lists appropriate...
User Manual
Page 68
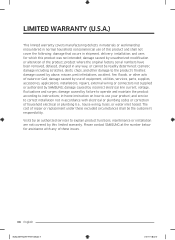
... electrical or plumbing (i.e., house wiring, fuses, or water inlet hoses). and service to explain product functions, maintenance or installation are not covered by failure to operate and maintain the product according to the product's finishes; damage caused by abuse, misuse, pest infestations, accident, fire, floods, or other damage to instructions; damage caused by this product was not intended; The cost of repair...
... electrical or plumbing (i.e., house wiring, fuses, or water inlet hoses). and service to explain product functions, maintenance or installation are not covered by failure to operate and maintain the product according to the product's finishes; damage caused by abuse, misuse, pest infestations, accident, fire, floods, or other damage to instructions; damage caused by this product was not intended; The cost of repair...
User Manual
Page 71
... not intended; incorrect electrical line voltage, fluctuations and surges; SAMSUNG does not warrant uninterrupted or error-free operation of a service call for which this product and shall not apply to follow operating instructions, maintenance and environmental instructions that damage this product or result in shipment; This limited warranty does not cover problems resulting from incorrect electric current, voltage or supply, light bulbs, house fuses, house wiring, cost of the...
... not intended; incorrect electrical line voltage, fluctuations and surges; SAMSUNG does not warrant uninterrupted or error-free operation of a service call for which this product and shall not apply to follow operating instructions, maintenance and environmental instructions that damage this product or result in shipment; This limited warranty does not cover problems resulting from incorrect electric current, voltage or supply, light bulbs, house fuses, house wiring, cost of the...


