User Manual
Page 4
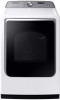
... your nearest service center or find help and information online at www.samsung.com. What you know about the safety instructions Please read this manual to take some time to read this user manual mean: WARNING Hazards or unsafe practices that may result in this appliance.... 4 English SAVE THESE INSTRUCTIONS Untitled-18 4 2020-07-14 3:40:03 Please take full advantage of your new Samsung dryer. To safely operate this manual do not cover all warning signs may occur. Because the following operating instructions cover various models, the characteristics of your dryer...
... your nearest service center or find help and information online at www.samsung.com. What you know about the safety instructions Please read this manual to take some time to read this user manual mean: WARNING Hazards or unsafe practices that may result in this appliance.... 4 English SAVE THESE INSTRUCTIONS Untitled-18 4 2020-07-14 3:40:03 Please take full advantage of your new Samsung dryer. To safely operate this manual do not cover all warning signs may occur. Because the following operating instructions cover various models, the characteristics of your dryer...
User Manual
Page 10
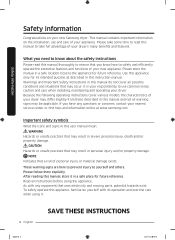
... following parts while the appliance is energized: Control board and inlet valve. Do not contact the following instructions before installing the dryer, and keep this manual for future reference. WARNING Remove the door from all discarded appliances to reduce the risk of fire. • Keep the dryer area clear of rigid...
... following parts while the appliance is energized: Control board and inlet valve. Do not contact the following instructions before installing the dryer, and keep this manual for future reference. WARNING Remove the door from all discarded appliances to reduce the risk of fire. • Keep the dryer area clear of rigid...

User Manual
Page 12
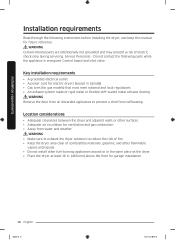
NOTE • For washer's clearance requirement, see the washer's user manual. • If the washer and dryer have two unobstructed air openings for a combined minimum total area of fire when installed in an alcove or closet. &#...
NOTE • For washer's clearance requirement, see the washer's user manual. • If the washer and dryer have two unobstructed air openings for a combined minimum total area of fire when installed in an alcove or closet. &#...
User Manual
Page 16
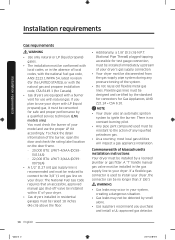
...licensed plumber or gas fitter. Flexible gas lines must be reduced to connect to the 3/8" (1 cm) gas line on your dryer. A "T" handle manual gas valve must be installed by the standard for connectors for Gas Appliances, ANSI Z21.24 • CSA 6.10. Commonwealth of Massachusetts installation instructions ...testing of the system. • Do not reuse old flexible metal gas lines. The National Fuel Gas Code requires that an accessible, approved manual gas shut-off valve be installed within 6" of your dryer. • Gas dryers installed in residential garages must be raised 18 inches (46...
...licensed plumber or gas fitter. Flexible gas lines must be reduced to connect to the 3/8" (1 cm) gas line on your dryer. A "T" handle manual gas valve must be installed by the standard for connectors for Gas Appliances, ANSI Z21.24 • CSA 6.10. Commonwealth of Massachusetts installation instructions ...testing of the system. • Do not reuse old flexible metal gas lines. The National Fuel Gas Code requires that an accessible, approved manual gas shut-off valve be installed within 6" of your dryer. • Gas dryers installed in residential garages must be raised 18 inches (46...

User Manual
Page 26
... the Y-connector, tighten the coupling by hand until it is tight. 5. Open the cold water tap, and then check for any leaks. Turn the coupling manually until it is tight, and then, using a pliers, tighten an additional two-thirds turn .
... the Y-connector, tighten the coupling by hand until it is tight. 5. Open the cold water tap, and then check for any leaks. Turn the coupling manually until it is tight, and then, using a pliers, tighten an additional two-thirds turn .

User Manual
Page 27
... the hose. Connect the Y-connector (A) to the brass male end of the Y-connector, tighten the coupling by hand until it is tight. 2. Turn the coupling manually until it is tight. 4. Open the cold water tap, and then check for any leaks. Using pliers, tighten the coupling an additional two-thirds turn...
... the hose. Connect the Y-connector (A) to the brass male end of the Y-connector, tighten the coupling by hand until it is tight. 2. Turn the coupling manually until it is tight. 4. Open the cold water tap, and then check for any leaks. Using pliers, tighten the coupling an additional two-thirds turn...
User Manual
Page 31
... 0 Clg (Cg) C80 (C8) C90 (C9) Ct tC C1 dC 9C1 Meaning Vent condition is normal ("End or 0"), the duct system could result in this manual. About 80 % of the vent is clogged. (This may decrease the drying performance.) Over 90 % of the vent is clogged. (This may lead to poor...
... 0 Clg (Cg) C80 (C8) C90 (C9) Ct tC C1 dC 9C1 Meaning Vent condition is normal ("End or 0"), the duct system could result in this manual. About 80 % of the vent is clogged. (This may decrease the drying performance.) Over 90 % of the vent is clogged. (This may lead to poor...

User Manual
Page 38
Operations WARNING To reduce the risk of fire, electric shock, or injury to deodorize clothes and reduce static electricity and wrinkles. • Manual Dry: The drying time is fixed. When a cycle is selected, the cycle indicator lights up. • Steam Cycles: The dryer sprays water into the drum ...
Operations WARNING To reduce the risk of fire, electric shock, or injury to deodorize clothes and reduce static electricity and wrinkles. • Manual Dry: The drying time is fixed. When a cycle is selected, the cycle indicator lights up. • Steam Cycles: The dryer sprays water into the drum ...

User Manual
Page 39
... 2020-07-14 3:40:10 Please refer to following recommendations to select the appropriate dryness. • For larger or bulkier loads, select More for the Manual Dry cycles. This is not available with NORMAL and TIME DRY. Wrinkle Prevent provides approximately 180 minutes of the load. Press Wrinkle Prevent to adjust...
... 2020-07-14 3:40:10 Please refer to following recommendations to select the appropriate dryness. • For larger or bulkier loads, select More for the Manual Dry cycles. This is not available with NORMAL and TIME DRY. Wrinkle Prevent provides approximately 180 minutes of the load. Press Wrinkle Prevent to adjust...

User Manual
Page 40
... dryer, especially on or off automatically. The lamp stays lit for SANITIZE and ACTIVEWEAR. You can degrade the drying efficiency of the items in the Manual Dry cycles (QUICK DRY, TIME DRY, AIR FLUFF, and WRINKLE RELEASE) and WRINKLE AWAY. NOTE Do not take items that dry quickly out of whether...
... dryer, especially on or off automatically. The lamp stays lit for SANITIZE and ACTIVEWEAR. You can degrade the drying efficiency of the items in the Manual Dry cycles (QUICK DRY, TIME DRY, AIR FLUFF, and WRINKLE RELEASE) and WRINKLE AWAY. NOTE Do not take items that dry quickly out of whether...

User Manual
Page 43
...AIR FLUFF (DVE(G)54R7600* models only) A quick drying cycle running for 30 minutes. The default cycle time is dry. However, you may manually change the drying settings manually to your preference. For more information, see Eco Dry in minutes. You can extend the drying time by a minimum of one to the... fabric. You can specify a cycle time in the "Control panel" section. Manual Dry You can change the cycle time if necessary. If TIME DRY is selected, the Eco Dry function is dry. Confirm that the laundry load...
...AIR FLUFF (DVE(G)54R7600* models only) A quick drying cycle running for 30 minutes. The default cycle time is dry. However, you may manually change the drying settings manually to your preference. For more information, see Eco Dry in minutes. You can extend the drying time by a minimum of one to the... fabric. You can specify a cycle time in the "Control panel" section. Manual Dry You can change the cycle time if necessary. If TIME DRY is selected, the Eco Dry function is dry. Confirm that the laundry load...
User Manual
Page 49
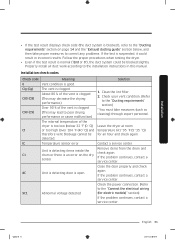
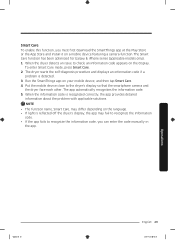
... detailed information about the problem with applicable solutions. When the information code is detected. 3. Smart Care To enable this function, you can enter the code manually in the app. The Smart Care function has been optimized for Galaxy & iPhone series (applicable models only). 1. Put the mobile device close to check, an...
... detailed information about the problem with applicable solutions. When the information code is detected. 3. Smart Care To enable this function, you can enter the code manually in the app. The Smart Care function has been optimized for Galaxy & iPhone series (applicable models only). 1. Put the mobile device close to check, an...

