
User Manual
Page 2
... safety instructions Important safety symbols CALIFORNIA PROPOSITION 65 WARNING Important safety precautions Warnings Cautions Installation requirements Key installation requirements Location considerations Ducting requirements Exhausting requirements Gas requirements Electrical requirements Installation What's included Step-by-step installation Vent blockage test Exhaust ducting guide Switching the door position Before you start Sort and load Functional prerequisite Rack Dry (applicable models only) Operations Control panel Simple steps to start Cycle overview Cycle chart Cycle guide Special...
... safety instructions Important safety symbols CALIFORNIA PROPOSITION 65 WARNING Important safety precautions Warnings Cautions Installation requirements Key installation requirements Location considerations Ducting requirements Exhausting requirements Gas requirements Electrical requirements Installation What's included Step-by-step installation Vent blockage test Exhaust ducting guide Switching the door position Before you start Sort and load Functional prerequisite Rack Dry (applicable models only) Operations Control panel Simple steps to start Cycle overview Cycle chart Cycle guide Special...

User Manual
Page 6
... replace any part of the appliance and exhaust duct should be exposed to the drying compartment. 7. Do not reach into the appliance if the drum is removed from the accumulation of lint, dust, and dirt. 15.The interior of the appliance or attempt any service unless specifically recommended in the user-maintenance instructions or in your hand under the dryer. - See "Electrical requirements" and "Grounding" in "Installation...
... replace any part of the appliance and exhaust duct should be exposed to the drying compartment. 7. Do not reach into the appliance if the drum is removed from the accumulation of lint, dust, and dirt. 15.The interior of the appliance or attempt any service unless specifically recommended in the user-maintenance instructions or in your hand under the dryer. - See "Electrical requirements" and "Grounding" in "Installation...
User Manual
Page 7
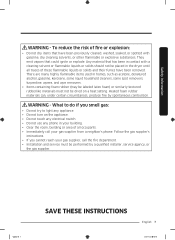
...or explosion: • Do not dry items that have been removed. Heated foam rubber materials can, under certain circumstances, produce fire by a qualified installer, service agency, or the gas supplier. What to light any phone in homes, such as...removers, turpentine, wpees, and wpe removers. • Items containing foam rubber (may be labeled latex foam) or similarly textured rubberlike materials must be dried on the appliance. • Do not touch any electrical switch. • Do not use any appliance. • Do not turn on a heat setting. Untitled-18 7 SAVE THESE INSTRUCTIONS...
...or explosion: • Do not dry items that have been removed. Heated foam rubber materials can, under certain circumstances, produce fire by a qualified installer, service agency, or the gas supplier. What to light any phone in homes, such as...removers, turpentine, wpees, and wpe removers. • Items containing foam rubber (may be labeled latex foam) or similarly textured rubberlike materials must be dried on the appliance. • Do not touch any electrical switch. • Do not use any appliance. • Do not turn on a heat setting. Untitled-18 7 SAVE THESE INSTRUCTIONS...

User Manual
Page 8
... with controls. • Do not repair, replace, or attempt to service any part of the appliance unless specifically instructed to in the user-repair instructions and you purchase and install a UL-approved gas detector. • Install and use by the manufacturer of the fabric softener or product. • Clean the lint screen before or after each load. • Keep the area around the exhaust opening and surrounding areas free from lint, dust...
... with controls. • Do not repair, replace, or attempt to service any part of the appliance unless specifically instructed to in the user-repair instructions and you purchase and install a UL-approved gas detector. • Install and use by the manufacturer of the fabric softener or product. • Clean the lint screen before or after each load. • Keep the area around the exhaust opening and surrounding areas free from lint, dust...
User Manual
Page 10
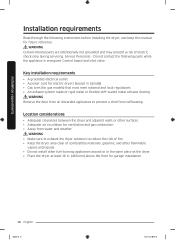
... to exhaust the dryer outdoors to prevent a child from water and weather. Do not contact the following instructions before installing the dryer, and keep this manual for garage installation. 10 English Untitled-18 10 2020-07-14 3:40:04 Service Personnel - Key installation requirements • A grounded electrical outlet. • A power cord for electric dryers (except in . (460 mm) above the floor for future reference. Installation requirements Installation requirements Read through the following parts...
... to exhaust the dryer outdoors to prevent a child from water and weather. Do not contact the following instructions before installing the dryer, and keep this manual for garage installation. 10 English Untitled-18 10 2020-07-14 3:40:04 Service Personnel - Key installation requirements • A grounded electrical outlet. • A power cord for electric dryers (except in . (460 mm) above the floor for future reference. Installation requirements Installation requirements Read through the following parts...
User Manual
Page 16
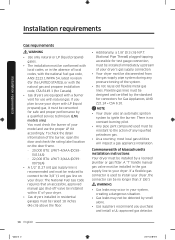
... STATES), or with the natural gas and propane installation code, CSA B149.1 (for Canada). • Gas dryers are equipped with a burner vent for use the proper LP Kit accordingly. A "T" handle manual gas valve must be installed in your dryer's gas supply connection. • Your dryer must be disconnected from the gas supply pipe system during any pressure testing of Massachusetts installation instructions Your dryer must be installed by a qualified service technician. (LNG models only) You must...
... STATES), or with the natural gas and propane installation code, CSA B149.1 (for Canada). • Gas dryers are equipped with a burner vent for use the proper LP Kit accordingly. A "T" handle manual gas valve must be installed in your dryer's gas supply connection. • Your dryer must be disconnected from the gas supply pipe system during any pressure testing of Massachusetts installation instructions Your dryer must be installed by a qualified service technician. (LNG models only) You must...
User Manual
Page 17
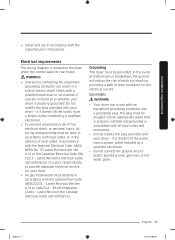
... Canadian Electrical Code CSA C22.1 - Do not modify the plug provided with your dryer is located on the plate under the control panel or rear frame. Latest Revisions and local codes and ordinances. Latest Revision (for the U.S.) or CAN/CGA - if it doesn't fit the outlet, have a proper outlet installed by a qualified electrician. • Do not connect the ground wire to plastic plumbing lines, gas lines, or hot water...
... Canadian Electrical Code CSA C22.1 - Do not modify the plug provided with your dryer is located on the plate under the control panel or rear frame. Latest Revisions and local codes and ordinances. Latest Revision (for the U.S.) or CAN/CGA - if it doesn't fit the outlet, have a proper outlet installed by a qualified electrician. • Do not connect the ground wire to plastic plumbing lines, gas lines, or hot water...
User Manual
Page 18
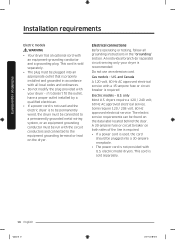
... "Grounding" section. Electric models - Some require 120 / 208 volt, 60 Hz approved electrical service. electric model dryers. if it doesn't fit the outlet, have a proper outlet installed by a qualified electrician. • If a power cord is not used , the cord should be run with a 15-ampere fuse or circuit breaker is sold separately. • The plug must be plugged into an appropriate outlet that is to be permanently wired, the dryer must be connected to a permanently...
... "Grounding" section. Electric models - Some require 120 / 208 volt, 60 Hz approved electrical service. electric model dryers. if it doesn't fit the outlet, have a proper outlet installed by a qualified electrician. • If a power cord is not used , the cord should be run with a 15-ampere fuse or circuit breaker is sold separately. • The plug must be plugged into an appropriate outlet that is to be permanently wired, the dryer must be connected to a permanently...
User Manual
Page 19
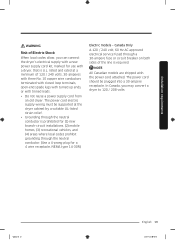
... for use with a dryer, that is required. In Canada, you can connect the dryer's electrical supply with a new power supply cord kit, marked for (1) new branch-circuit installations, (2) mobile homes, (3) recreational vehicles, and (4) areas where local codes prohibit grounding through a 30-ampere fuse or circuit breaker on both sides of 120 / 240 volts, 30-amperes with three No. 10 copper wire conductors terminated with closed loop terminals, open-end...
... for use with a dryer, that is required. In Canada, you can connect the dryer's electrical supply with a new power supply cord kit, marked for (1) new branch-circuit installations, (2) mobile homes, (3) recreational vehicles, and (4) areas where local codes prohibit grounding through a 30-ampere fuse or circuit breaker on both sides of 120 / 240 volts, 30-amperes with three No. 10 copper wire conductors terminated with closed loop terminals, open-end...
User Manual
Page 22
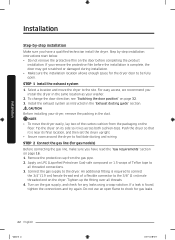
... you install the dryer in the same location as instructed in the duct. To change the door direction, see "Switching the door position" on its final location, and then set the dryer upright. • Secure room around the dryer to facilitate ducting and wiring. Install the exhaust system as your dryer, remove the packing in the "Exhaust ducting guide" section. Tip the dryer on page 32. 3. CAUTION Before installing your washer. 2. Apply an LPG (Liquefied Petroleum Gas...
... you install the dryer in the same location as instructed in the duct. To change the door direction, see "Switching the door position" on its final location, and then set the dryer upright. • Secure room around the dryer to facilitate ducting and wiring. Install the exhaust system as your dryer, remove the packing in the "Exhaust ducting guide" section. Tip the dryer on page 32. 3. CAUTION Before installing your washer. 2. Apply an LPG (Liquefied Petroleum Gas...

User Manual
Page 29
... gas line. Be sure the gas supply to your dryer has been turned on the floor. • The dryer starts, runs, heats, and shuts off and wait 5 minutes. Allowing your dryer off properly. For gas models: • The gas is connected correctly. To confirm gas ignition, check the exhaust for gas models) Make sure all gas connections, the exhaust line, and all wiring is supplied properly with no leaks (For gas models only). Then, plug the power cord into an electrical outlet...
... gas line. Be sure the gas supply to your dryer has been turned on the floor. • The dryer starts, runs, heats, and shuts off and wait 5 minutes. Allowing your dryer off properly. For gas models: • The gas is connected correctly. To confirm gas ignition, check the exhaust for gas models) Make sure all gas connections, the exhaust line, and all wiring is supplied properly with no leaks (For gas models only). Then, plug the power cord into an electrical outlet...
User Manual
Page 30
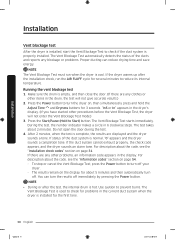
... Power button. Do not open the door during the test. 4. Running the vent blockage test 1. The Vent Blockage Test starts immediately. To stop or cancel the Vent Blockage Test, press the Power button to Start) button. Use caution to check if the duct system is properly installed. Installation Installation Vent blockage test After the dryer is installed, start the Vent Blockage Test to prevent burns. If the dryer warms up after the test, the internal drum is hot. For description about the code, see the "Installation check codes...
... Power button. Do not open the door during the test. 4. Running the vent blockage test 1. The Vent Blockage Test starts immediately. To stop or cancel the Vent Blockage Test, press the Power button to Start) button. Use caution to check if the duct system is properly installed. Installation Installation Vent blockage test After the dryer is installed, start the Vent Blockage Test to prevent burns. If the dryer warms up after the test, the internal drum is hot. For description about the code, see the "Installation check codes...
User Manual
Page 31
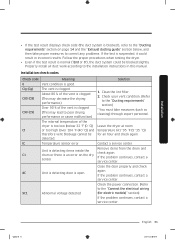
... install all duct work according to the installation instructions in incorrect results. Leave the dryer at room temperature (41~95 °F (5~35 °C)) for electric models)" section) If the problem continues, contact a service center. Check the power connection. (Refer to the "Ducting requirements" section) * You must take proper measures to correct any problems. If the test is suspended, it could be detected. The vent is open Abnormal voltage detected Solution 1. Temperature sensor error...
... install all duct work according to the installation instructions in incorrect results. Leave the dryer at room temperature (41~95 °F (5~35 °C)) for electric models)" section) If the problem continues, contact a service center. Check the power connection. (Refer to the "Ducting requirements" section) * You must take proper measures to correct any problems. If the test is suspended, it could be detected. The vent is open Abnormal voltage detected Solution 1. Temperature sensor error...

User Manual
Page 32
... any kind. • Do not use a poor exhaust system because it slows down the dryer's performance. • Do not use excessively long ducts that you have multiple elbows. • Do not use lint-trapping screws. 3. Switching the door position To reverse the direction of the dryer. 3. Installation Installation Exhaust ducting guide Ducting 1. Cleaning Clean all joints including the dryer connection. Unplug the power cord of the door, we recommend that have removed it up slightly. 32 English Untitled...
... any kind. • Do not use a poor exhaust system because it slows down the dryer's performance. • Do not use excessively long ducts that you have multiple elbows. • Do not use lint-trapping screws. 3. Switching the door position To reverse the direction of the dryer. 3. Installation Installation Exhaust ducting guide Ducting 1. Cleaning Clean all joints including the dryer connection. Unplug the power cord of the door, we recommend that have removed it up slightly. 32 English Untitled...

User Manual
Page 41
... the status of the duct. This icon indicates that Child Lock is properly inserted before starting a cycle. Simple steps to stop operation. 2. Icon description Sensor Dry Filter Check Vent Sensor Steam Child Lock Alarm Off This icon appears when the dryer operates the cycle which senses the internal humidity to clean the lint filter. This icon displays after every load as a reminder to determine the drying time. Clean the lint filter before every cycle and make sure the...
... the status of the duct. This icon indicates that Child Lock is properly inserted before starting a cycle. Simple steps to stop operation. 2. Icon description Sensor Dry Filter Check Vent Sensor Steam Child Lock Alarm Off This icon appears when the dryer operates the cycle which senses the internal humidity to clean the lint filter. This icon displays after every load as a reminder to determine the drying time. Clean the lint filter before every cycle and make sure the...

User Manual
Page 43
... the dryer drum after several minutes of tumbling with heat. Operations Untitled-18 43 English 43 2020-07-14 3:40:11 However, you may manually change the drying settings manually to your preference. You can make items soft and reduce smells. Confirm that the laundry load is dry. For more information, see Eco Dry in room temperature air. QUICK DRY TIME DRY AIR FLUFF (DVE(G)54R7600* models only) A quick drying cycle running...
... the dryer drum after several minutes of tumbling with heat. Operations Untitled-18 43 English 43 2020-07-14 3:40:11 However, you may manually change the drying settings manually to your preference. You can make items soft and reduce smells. Confirm that the laundry load is dry. For more information, see Eco Dry in room temperature air. QUICK DRY TIME DRY AIR FLUFF (DVE(G)54R7600* models only) A quick drying cycle running...
User Manual
Page 50
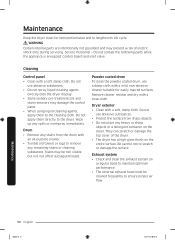
... cleaning cloth. Dryer exterior • Clean with a soft, damp cloth. Maintenance Keep the dryer clean for easily marred surfaces. Be careful not to maintain optimum performance. • The external exhaust hood must be still visible but will not affect subsequent loads. WARNING Certain internal parts are intentionally not grounded and may damage the control panel. • When using liquid cleaning agents, apply them directly to ensure proper air flow...
... cleaning cloth. Dryer exterior • Clean with a soft, damp cloth. Maintenance Keep the dryer clean for easily marred surfaces. Be careful not to maintain optimum performance. • The external exhaust hood must be still visible but will not affect subsequent loads. WARNING Certain internal parts are intentionally not grounded and may damage the control panel. • When using liquid cleaning agents, apply them directly to ensure proper air flow...

User Manual
Page 52
... buttons, nails, etc. You can open and close freely. • Check the exhaust system for objects such as one heavy item is dried with sheets, it is draining properly and extracting adequate water from the load. • The load may be too small to tumble properly. Troubleshooting Problem Does not dry. Remove some items and restart the dryer. • Clean the lint filter. • Check the load for lint buildup. Dries...
... buttons, nails, etc. You can open and close freely. • Check the exhaust system for objects such as one heavy item is dried with sheets, it is draining properly and extracting adequate water from the load. • The load may be too small to tumble properly. Troubleshooting Problem Does not dry. Remove some items and restart the dryer. • Clean the lint filter. • Check the load for lint buildup. Dries...
User Manual
Page 54
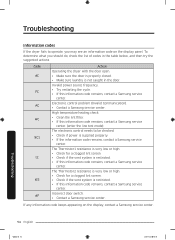
... the information code remains, contact a Samsung service center. Electronic control problem (Invalid Communication). • Contact a Samsung service center. Incorrect door switch. • Contact a Samsung service center. Troubleshooting 54 English Untitled-18 54 2020-07-14 3:40:13 High temperature heating check • Clean the lint filter. • If this information code remains, contact a Samsung service center. (enter the line test mode) The electronic control needs to operate, you should do, check the list of codes in the door. Invalid power source...
... the information code remains, contact a Samsung service center. Electronic control problem (Invalid Communication). • Contact a Samsung service center. Incorrect door switch. • Contact a Samsung service center. Troubleshooting 54 English Untitled-18 54 2020-07-14 3:40:13 High temperature heating check • Clean the lint filter. • If this information code remains, contact a Samsung service center. (enter the line test mode) The electronic control needs to operate, you should do, check the list of codes in the door. Invalid power source...
User Manual
Page 59
... factory serial numbers have been removed, defaced, changed in any of these excluded circumstances shall be readily determined; damage caused by use of equipment, utilities, services, parts, supplies, accessories, applications, installations, repairs, external wiring or connectors not supplied or authorized by unauthorized modification or alteration of the product; damage caused by this product was not intended; The cost of repair or replacement under...
... factory serial numbers have been removed, defaced, changed in any of these excluded circumstances shall be readily determined; damage caused by use of equipment, utilities, services, parts, supplies, accessories, applications, installations, repairs, external wiring or connectors not supplied or authorized by unauthorized modification or alteration of the product; damage caused by this product was not intended; The cost of repair or replacement under...


