
User Manual
Page 2
... safety instructions Important safety symbols CALIFORNIA PROPOSITION 65 WARNING Important safety precautions Warnings Cautions Installation requirements Key installation requirements Location considerations Ducting requirements Mobile home installation Exhausting requirements Gas requirements Electrical requirements Installation What's included Step-by-step installation Vent blockage test Exhaust ducting guide Switching the door position Before you start Sort and load Functional prerequisite Operations Control panel Simple steps to start Cycle overview Cycle chart Cycle guide Special features...
... safety instructions Important safety symbols CALIFORNIA PROPOSITION 65 WARNING Important safety precautions Warnings Cautions Installation requirements Key installation requirements Location considerations Ducting requirements Mobile home installation Exhausting requirements Gas requirements Electrical requirements Installation What's included Step-by-step installation Vent blockage test Exhaust ducting guide Switching the door position Before you start Sort and load Functional prerequisite Operations Control panel Simple steps to start Cycle overview Cycle chart Cycle guide Special features...
User Manual
Page 6
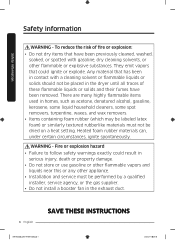
..., dry cleaning solvents, or other appliance. • Installation and service must not be placed in serious injury, death or property damage. • Do not store or use gasoline or other flammable vapors and liquids near this or any other flammable or explosive substances. They emit vapors that has been in the exhaust duct. 6 English SAVE THESE INSTRUCTIONS DV3000A...
..., dry cleaning solvents, or other appliance. • Installation and service must not be placed in serious injury, death or property damage. • Do not store or use gasoline or other flammable vapors and liquids near this or any other flammable or explosive substances. They emit vapors that has been in the exhaust duct. 6 English SAVE THESE INSTRUCTIONS DV3000A...

User Manual
Page 8
... spotted with internal controls. 10.Do not repair or replace any part of the appliance or attempt any other flammable or explosive substances, as mops and cleaning cloths. Do not allow children to catch fire by the manufacturer of fire, electric shock, or injury to persons when using this or any service unless specifically recommended in the user-maintenance instructions or in the...
... spotted with internal controls. 10.Do not repair or replace any part of the appliance or attempt any other flammable or explosive substances, as mops and cleaning cloths. Do not allow children to catch fire by the manufacturer of fire, electric shock, or injury to persons when using this or any service unless specifically recommended in the user-maintenance instructions or in the...

User Manual
Page 9
... quickly removed and spread out so that could cause a load to play on or in your dryer. Avoid stopping a tumble dryer before the end of the drying cycle unless all items are free from the accumulation of lint, dust, and dirt. 15.The interior of the appliance and exhaust duct should be grounded. ie. These objects could damage your dryer. • Gas...
... quickly removed and spread out so that could cause a load to play on or in your dryer. Avoid stopping a tumble dryer before the end of the drying cycle unless all items are free from the accumulation of lint, dust, and dirt. 15.The interior of the appliance and exhaust duct should be grounded. ie. These objects could damage your dryer. • Gas...

User Manual
Page 10
... the dryer and exhaust duct should be cleaned periodically by qualified service personnel. • This appliance must be detected by the manufacturer of the fabric softener or product. • Clean the lint screen before or after being washed, these items may not be properly grounded. Never plug the power cord into the appliance when the drum is moving. • Do not install or...
... the dryer and exhaust duct should be cleaned periodically by qualified service personnel. • This appliance must be detected by the manufacturer of the fabric softener or product. • Clean the lint screen before or after being washed, these items may not be properly grounded. Never plug the power cord into the appliance when the drum is moving. • Do not install or...
User Manual
Page 12
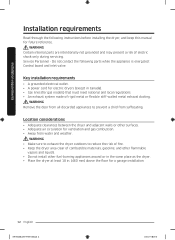
... installation requirements • A grounded electrical outlet. • A power cord for electric dryers (except in . (460 mm) above the floor for future reference. Do not contact the following instructions before installing the dryer, and keep this manual for a garage installation. 12 English DV3000A(SEM)_DC68-03784P-00_EN.indd 12 2020-12-07 4:50:49 Service Personnel - WARNING Remove the door from water and weather. Installation requirements Installation requirements Read through the following parts...
... installation requirements • A grounded electrical outlet. • A power cord for electric dryers (except in . (460 mm) above the floor for future reference. Do not contact the following instructions before installing the dryer, and keep this manual for a garage installation. 12 English DV3000A(SEM)_DC68-03784P-00_EN.indd 12 2020-12-07 4:50:49 Service Personnel - WARNING Remove the door from water and weather. Installation requirements Installation requirements Read through the following parts...
User Manual
Page 18
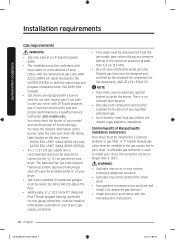
... dryer, the connector can be converted for safe and proper performance by a qualified service technician. (LNG models only) You must check the burner of the burner, open the door and check the rating label located on the door frame. - 20,000 BTU: LPKIT-4/XAA (DC98-04114A) - 22,000 BTU: LPKIT-3/XAA (DC99-00792A) • A 1/2" (1.27 cm) gas supply line is used must be resistant to the action of local codes...
... dryer, the connector can be converted for safe and proper performance by a qualified service technician. (LNG models only) You must check the burner of the burner, open the door and check the rating label located on the door frame. - 20,000 BTU: LPKIT-4/XAA (DC98-04114A) - 22,000 BTU: LPKIT-3/XAA (DC99-00792A) • A 1/2" (1.27 cm) gas supply line is used must be resistant to the action of local codes...
User Manual
Page 19
... connect the ground wire to plastic plumbing lines, gas lines, or hot water pipes. DV3000A(SEM)_DC68-03784P-00_EN.indd 19 English 19 2020-12-07 4:50:51 Check with a qualified electrician or serviceman if you are in accordance with your dryer - B149 Installation Codes - Gas models WARNING • Your dryer has a cord with the National Fuel Code ANSI/Z2231 - The plug must be plugged into an appropriate outlet...
... connect the ground wire to plastic plumbing lines, gas lines, or hot water pipes. DV3000A(SEM)_DC68-03784P-00_EN.indd 19 English 19 2020-12-07 4:50:51 Check with a qualified electrician or serviceman if you are in accordance with your dryer - B149 Installation Codes - Gas models WARNING • Your dryer has a cord with the National Fuel Code ANSI/Z2231 - The plug must be plugged into an appropriate outlet...
User Manual
Page 21
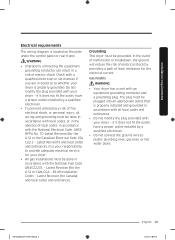
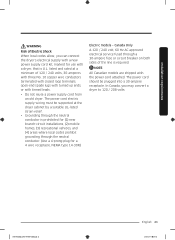
... copper wire conductors terminated with closed loop terminals, open-end spade lugs with turned up ends, or with a new power supply cord kit, marked for a 4 wire receptacle, NEMA type 14-30R.) Electric models - listed and rated at the dryer cabinet by a suitable UL-listed strain relief. • Grounding through the neutral conductor. (Use a 4-prong plug for use with the power cord attached. Installation requirements WARNING Risk of Electric Shock When local codes allow, you may convert a dryer to...
... copper wire conductors terminated with closed loop terminals, open-end spade lugs with turned up ends, or with a new power supply cord kit, marked for a 4 wire receptacle, NEMA type 14-30R.) Electric models - listed and rated at the dryer cabinet by a suitable UL-listed strain relief. • Grounding through the neutral conductor. (Use a 4-prong plug for use with the power cord attached. Installation requirements WARNING Risk of Electric Shock When local codes allow, you may convert a dryer to...

User Manual
Page 24
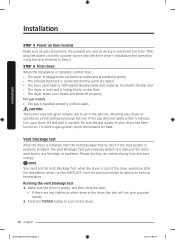
.... Connect the gas supply to the 3/8" (1 cm) male threaded end on the dryer. Turn on page 18. 1. Installation Installation Step-by step installation instructions start below. • Do not remove the protective film on the door before the installation is near its final location, and then set the dryer upright. • Secure room around the dryer to be fully open flame to check for the dryer door to facilitate ducting and wiring...
.... Connect the gas supply to the 3/8" (1 cm) male threaded end on the dryer. Turn on page 18. 1. Installation Installation Step-by step installation instructions start below. • Do not remove the protective film on the door before the installation is near its final location, and then set the dryer upright. • Secure room around the dryer to be fully open flame to check for the dryer door to facilitate ducting and wiring...
User Manual
Page 28
...; The dryer starts, runs, heats, and shuts off and wait 5 minutes. Vent blockage test After the dryer is plugged into a power source and check the dryer's installation and operation using the final checklist in Step 6. NOTE You must run the AIR FLUFF cycle for heat. Press the POWER button to turn your dryer to reduce its internal temperature. For gas models: • The gas is connected correctly. To confirm gas ignition, check the exhaust for several minutes to operate on the dryer. 28...
...; The dryer starts, runs, heats, and shuts off and wait 5 minutes. Vent blockage test After the dryer is plugged into a power source and check the dryer's installation and operation using the final checklist in Step 6. NOTE You must run the AIR FLUFF cycle for heat. Press the POWER button to turn your dryer to reduce its internal temperature. For gas models: • The gas is connected correctly. To confirm gas ignition, check the exhaust for several minutes to operate on the dryer. 28...
User Manual
Page 29
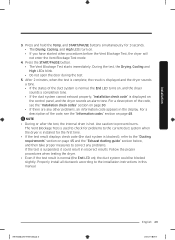
... first time. • If the test result displays check code (the duct system is suspended, it could be blocked slightly. Use caution to the "Ducting requirements" section on the control panel, and the dryer sounds an alarm tone. DV3000A(SEM)_DC68-03784P-00_EN.indd 29 English 29 2020-12-07 4:50:56 During the test, the Drying, Cooling and High LEDs blink. • Do not open the door...
... first time. • If the test result displays check code (the duct system is suspended, it could be blocked slightly. Use caution to the "Ducting requirements" section on the control panel, and the dryer sounds an alarm tone. DV3000A(SEM)_DC68-03784P-00_EN.indd 29 English 29 2020-12-07 4:50:56 During the test, the Drying, Cooling and High LEDs blink. • Do not open the door...

User Manual
Page 32
... Cleaning Clean all joints, including the dryer connection. This will prEvent the door from the door, and then remove the door by lifting it . To facilitate the exhaust, keep the ducts as straight as possible. Use 4-inch rigid metal ducts. Switching the door position To reverse the direction of the dryer. 3. It is installed properly, so the air exhausts freely. 2. Installation Installation Exhaust ducting guide Ducting 1. We recommend that you have multiple elbows. • Do not use lint-trapping...
... Cleaning Clean all joints, including the dryer connection. This will prEvent the door from the door, and then remove the door by lifting it . To facilitate the exhaust, keep the ducts as straight as possible. Use 4-inch rigid metal ducts. Switching the door position To reverse the direction of the dryer. 3. It is installed properly, so the air exhausts freely. 2. Installation Installation Exhaust ducting guide Ducting 1. We recommend that you have multiple elbows. • Do not use lint-trapping...
User Manual
Page 37
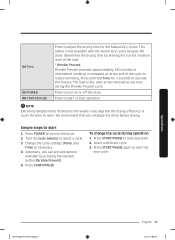
... the Sensor Dry cycles because the dryer determines the drying time by the washer may degrade the drying efficiency or cause the door to adjust the drying time for 3 seconds to select a cycle. 3. Press START/PAUSE again to turn on the dryer. 2. Operations DV3000A(SEM)_DC68-03784P-00_EN.indd 37 English 37 2020-12-07 4:50:59 Press POWER to start 1. and Time) as necessary. 4. Change the cycle settings (Temp. To change the cycle...
... the Sensor Dry cycles because the dryer determines the drying time by the washer may degrade the drying efficiency or cause the door to adjust the drying time for 3 seconds to select a cycle. 3. Press START/PAUSE again to turn on the dryer. 2. Operations DV3000A(SEM)_DC68-03784P-00_EN.indd 37 English 37 2020-12-07 4:50:59 Press POWER to start 1. and Time) as necessary. 4. Change the cycle settings (Temp. To change the cycle...

User Manual
Page 38
... manually select the drying settings to dry large or bulkier fabrics. Operations 38 English DV3000A(SEM)_DC68-03784P-00_EN.indd 38 2020-12-07 4:50:59 Operations Cycle overview Sensor Dry Sensor Dry cycles sense moisture in the load and stop the dryer when the load reaches the dryness level you may manually change the cycle time if necessary. Tumbles the load in room temperature air. Cycle VERY DRY MORE DRY NORMAL DRY DAMP DRY Description Use this cycle...
... manually select the drying settings to dry large or bulkier fabrics. Operations 38 English DV3000A(SEM)_DC68-03784P-00_EN.indd 38 2020-12-07 4:50:59 Operations Cycle overview Sensor Dry Sensor Dry cycles sense moisture in the load and stop the dryer when the load reaches the dryness level you may manually change the cycle time if necessary. Tumbles the load in room temperature air. Cycle VERY DRY MORE DRY NORMAL DRY DAMP DRY Description Use this cycle...
User Manual
Page 43
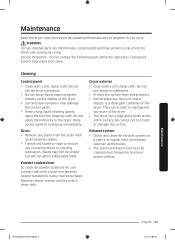
... the top cover of electric shock only during servicing. Cleaning Control panel • Clean with a soft, damp cloth. Wipe up any heavy or sharp objects or a detergent container on the display of the dryer. • Soil and stain removers may damage the control panel. • When using liquid cleaning agents, apply them directly to scratch or damage the surface. Exhaust system • Check and clean the exhaust system on...
... the top cover of electric shock only during servicing. Cleaning Control panel • Clean with a soft, damp cloth. Wipe up any heavy or sharp objects or a detergent container on the display of the dryer. • Soil and stain removers may damage the control panel. • When using liquid cleaning agents, apply them directly to scratch or damage the surface. Exhaust system • Check and clean the exhaust system on...

User Manual
Page 45
... the installation instructions. • It is noisy. The dryer is normal for the dryer to hum due to the high velocity of air moving through the dryer drum, fan, or exhaust system. Remove some items and restart the dryer. • Clean the lint filter. • Check the load for lint buildup. Remove promptly. • It is normal to hear the dryer gas valve or heating element cycle on and off during the drying cycle. •...
... the installation instructions. • It is noisy. The dryer is normal for the dryer to hum due to the high velocity of air moving through the dryer drum, fan, or exhaust system. Remove some items and restart the dryer. • Clean the lint filter. • Check the load for lint buildup. Remove promptly. • It is normal to hear the dryer gas valve or heating element cycle on and off during the drying cycle. •...
User Manual
Page 48
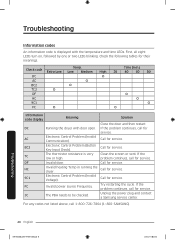
Electronic Control Problem (Button Key Input Check). Invalid door. Clean the screen or vent. If the problem continues, call 1-800-726-7864 (1-800-SAMSUNG). Try restarting the cycle. Troubleshooting Information codes An information code is very low or high. The PBA needs to be checked. Call for service. Call for service. Unplug the power plug and contact a Samsung service center. For any codes not listed above, call for service. Time (min.) Check code Extra Low Low Medium High 20...
Electronic Control Problem (Button Key Input Check). Invalid door. Clean the screen or vent. If the problem continues, call 1-800-726-7864 (1-800-SAMSUNG). Try restarting the cycle. Troubleshooting Information codes An information code is very low or high. The PBA needs to be checked. Call for service. Call for service. Unplug the power plug and contact a Samsung service center. For any codes not listed above, call for service. Time (min.) Check code Extra Low Low Medium High 20...
User Manual
Page 53
... serial numbers have been removed, defaced, changed in accordance with any way, or cannot be the customer's responsibility. Please contact SAMSUNG at the number below for which this limited warranty. in shipment, delivery, installation, and uses for assistance with electrical or plumbing codes or correction of household electrical or plumbing (i.e., house wiring, fuses, or water inlet hoses). The cost of repair or replacement under these issues. This limited warranty covers...
... serial numbers have been removed, defaced, changed in accordance with any way, or cannot be the customer's responsibility. Please contact SAMSUNG at the number below for which this limited warranty. in shipment, delivery, installation, and uses for assistance with electrical or plumbing codes or correction of household electrical or plumbing (i.e., house wiring, fuses, or water inlet hoses). The cost of repair or replacement under these issues. This limited warranty covers...
User Manual
Page 56
..., noncommercial use of products, equipment, systems, utilities, services, parts, supplies, accessories, applications, installations, repairs, external wiring or connectors not supplied or authorized by pest infestations. product removal and reinstallation; This limited warranty does not cover problems resulting from incorrect electric current, voltage or supply, light bulbs, house fuses, house wiring, cost of a service call for which this product and shall not apply to follow operating instructions, maintenance and environmental instructions that...
..., noncommercial use of products, equipment, systems, utilities, services, parts, supplies, accessories, applications, installations, repairs, external wiring or connectors not supplied or authorized by pest infestations. product removal and reinstallation; This limited warranty does not cover problems resulting from incorrect electric current, voltage or supply, light bulbs, house fuses, house wiring, cost of a service call for which this product and shall not apply to follow operating instructions, maintenance and environmental instructions that...


