
User Manual (user Manual) (ver.1.0) (English)
Page 1
To receive more complete service, please register your product at www.samsung.com/register DV5471AE-03022A-01_EN.indd 1 2011-03-28 3:44:01 DV5471A* DV5451A* Gas and Electric Dryer user manual imagine the possibilities Thank you for purchasing this Samsung product.
To receive more complete service, please register your product at www.samsung.com/register DV5471AE-03022A-01_EN.indd 1 2011-03-28 3:44:01 DV5471A* DV5451A* Gas and Electric Dryer user manual imagine the possibilities Thank you for purchasing this Samsung product.
User Manual (user Manual) (ver.1.0) (English)
Page 4
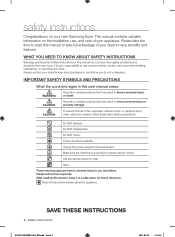
... in severe personal injury or death. Call the service center for future reference. CAUTION To reduce the risk of your new Samsung Dryer. Note These warning signs are here to prevent injury to read this user manual mean: WARNING Hazards or unsafe practices that ... common sense, caution, and care when installing, maintaining, or operating your appliance. Please take full advantage of fire, explosion, electric shock, or personal injury when using the appliance. WHAT YOU NEED TO KNOW ABOUT SAFETY INSTRUCTIONS Warnings and Important Safety Instructions in a safe...
... in severe personal injury or death. Call the service center for future reference. CAUTION To reduce the risk of your new Samsung Dryer. Note These warning signs are here to prevent injury to read this user manual mean: WARNING Hazards or unsafe practices that ... common sense, caution, and care when installing, maintaining, or operating your appliance. Please take full advantage of fire, explosion, electric shock, or personal injury when using the appliance. WHAT YOU NEED TO KNOW ABOUT SAFETY INSTRUCTIONS Warnings and Important Safety Instructions in a safe...
User Manual (user Manual) (ver.1.0) (English)
Page 5
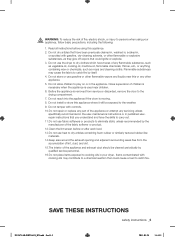
...or anything containing wax or chemicals, such as they give off vapors that could ignite or explode. 3. Do not store or use the dryer to dry clothes which have the skills to carry out. 11.Do not use fabric softeners or products to eliminate static unless recommended by itself...to catch fire by the manufacturer of the fabric softener or product. 12.Clean the lint screen before using your dryer. WARNING: To reduce the risk of fire, electric shock, or injury to persons when using this appliance. 2. Flammable substances may contribute to a chemical reaction that could ...
...or anything containing wax or chemicals, such as they give off vapors that could ignite or explode. 3. Do not store or use the dryer to dry clothes which have the skills to carry out. 11.Do not use fabric softeners or products to eliminate static unless recommended by itself...to catch fire by the manufacturer of the fabric softener or product. 12.Clean the lint screen before using your dryer. WARNING: To reduce the risk of fire, electric shock, or injury to persons when using this appliance. 2. Flammable substances may contribute to a chemical reaction that could ...
User Manual (user Manual) (ver.1.0) (English)
Page 6
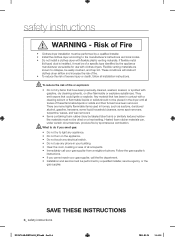
... ignite or explode. To reduce the risk of Fire • Clothes dryer installation must not be performed by a qualified installer. • Install the clothes dryer according to light any electrical switch. • Do not use with flexible plastic venting materials.... Flexible venting materials are many highly flammable items used in the dryer until all installation instructions. There are known to...
... ignite or explode. To reduce the risk of Fire • Clothes dryer installation must not be performed by a qualified installer. • Install the clothes dryer according to light any electrical switch. • Do not use with flexible plastic venting materials.... Flexible venting materials are many highly flammable items used in the dryer until all installation instructions. There are known to...
User Manual (user Manual) (ver.1.0) (English)
Page 8
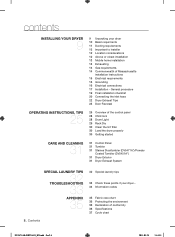
...28 Drum Light 29 Rack Dry 30 Clean the lint filter 30 Load the dryer properly 30 Getting started CARE AND CLEANING 31 31 Control Panel 31 Tumbler 31 Staines Steeltumbler (DV5471A*)/Powder... TROUBLESHOOTING 33 APPENDIX 35 32 Special laundry tips 33 Check these points if your dryer 10 Basic requirments 11 Ducting requirements 12 Important to installer 12 Location considerations 12 ...01_EN.indd Sec2:8 2011-03-28 3:44:35 contents INSTALLING YOUR DRYER 9 9 Unpacking your dryer... 34 Information codes 35 Fabric care chart 36 Protecting the environment 36 Declaration of Massachusetts installation ...
...28 Drum Light 29 Rack Dry 30 Clean the lint filter 30 Load the dryer properly 30 Getting started CARE AND CLEANING 31 31 Control Panel 31 Tumbler 31 Staines Steeltumbler (DV5471A*)/Powder... TROUBLESHOOTING 33 APPENDIX 35 32 Special laundry tips 33 Check these points if your dryer 10 Basic requirments 11 Ducting requirements 12 Important to installer 12 Location considerations 12 ...01_EN.indd Sec2:8 2011-03-28 3:44:35 contents INSTALLING YOUR DRYER 9 9 Unpacking your dryer... 34 Information codes 35 Fabric care chart 36 Protecting the environment 36 Declaration of Massachusetts installation ...
User Manual (user Manual) (ver.1.0) (English)
Page 10
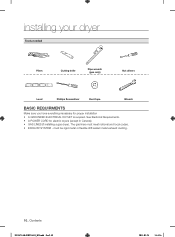
...for proper installation • A GROUNDED ELECTRICAL OUTLET is required. The gas lines must be rigid metal or flexible stiff-walled metal exhaust ducting. 10_ Contents DV5471AE-03022A-01_EN.indd Sec2:10 2011-03-28 3:44:36 installing your dryer Tools needed Pliers Cutting knife Pipe ...wrench (gas only) Nut drivers Level Phillips Screwdriver Duct tape Wrench BASIC REQUIRMENTS Make sure you have everything necessary for electric dryers (except in Canada). • GAS LINES (if ...
...for proper installation • A GROUNDED ELECTRICAL OUTLET is required. The gas lines must be rigid metal or flexible stiff-walled metal exhaust ducting. 10_ Contents DV5471AE-03022A-01_EN.indd Sec2:10 2011-03-28 3:44:36 installing your dryer Tools needed Pliers Cutting knife Pipe ...wrench (gas only) Nut drivers Level Phillips Screwdriver Duct tape Wrench BASIC REQUIRMENTS Make sure you have everything necessary for electric dryers (except in Canada). • GAS LINES (if ...
User Manual (user Manual) (ver.1.0) (English)
Page 11
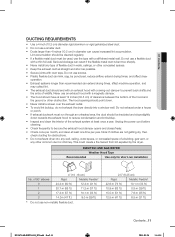
.... • Exhaust systems longer than 4 inches (10.2 cm) in walls, ceilings, or other obstruction. ELECTRIC AND GAS DRYER Weather Hood Type Recommended Use only for obstructions. • Do not exhaust dryer into a window well. Do not use the type with a stiff sheet metal wall. Unplug the power cord ...insulated and slope slightly down . • Never install a screen over the exhaust outlet. • To avoid lint buildup, do not exhaust the dryer directly into any wall, ceiling, crawl space, or concealed space of a building, gas vent, or any type of flexible duct in ...
.... • Exhaust systems longer than 4 inches (10.2 cm) in walls, ceilings, or other obstruction. ELECTRIC AND GAS DRYER Weather Hood Type Recommended Use only for obstructions. • Do not exhaust dryer into a window well. Do not use the type with a stiff sheet metal wall. Unplug the power cord ...insulated and slope slightly down . • Never install a screen over the exhaust outlet. • To avoid lint buildup, do not exhaust the dryer directly into any wall, ceiling, crawl space, or concealed space of a building, gas vent, or any type of flexible duct in ...
User Manual (user Manual) (ver.1.0) (English)
Page 12
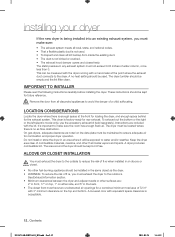
...the exhaust system. A no air-flow obstruction. IMPORTANT TO INSTALLER Please read the following instructions carefully before installing the dryer. On gas dryers, adequate clearance as the dryer. • WARNING: To reduce the risk of 72 in any exhaust system must be located where there is no ...-heat setting should be measured with the dryer running with the kit. To exhaust out the bottom or the right or the left (electric model only), use the accessory exhaust kit (sold separately). installing your dryer If the new dryer is being installed into an existing exhaust system,...
...the exhaust system. A no air-flow obstruction. IMPORTANT TO INSTALLER Please read the following instructions carefully before installing the dryer. On gas dryers, adequate clearance as the dryer. • WARNING: To reduce the risk of 72 in any exhaust system must be located where there is no ...-heat setting should be measured with the dryer running with the kit. To exhaust out the bottom or the right or the left (electric model only), use the accessory exhaust kit (sold separately). installing your dryer If the new dryer is being installed into an existing exhaust system,...
User Manual (user Manual) (ver.1.0) (English)
Page 15
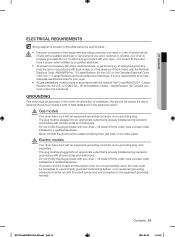
...modify the plug provided with the National Electrical Code, ANSI/NFPA No. 70-Latest Revision (for the U.S.) or the Canadian Electrical Code CSA C22.1 - If a power cord is not used and the electric dryer is to be permanently wired, the dryer must be connected to a permanently grounded ... gas installations must be grounded. Do not modify the plug provided with your dryer - It is properly installed and grounded in a risk of least resistance for your dryer - Electric models WARNING Your dryer has a cord with an equipment-grounding conductor and a grounding plug. Latest ...
...modify the plug provided with the National Electrical Code, ANSI/NFPA No. 70-Latest Revision (for the U.S.) or the Canadian Electrical Code CSA C22.1 - If a power cord is not used and the electric dryer is to be permanently wired, the dryer must be connected to a permanently grounded ... gas installations must be grounded. Do not modify the plug provided with your dryer - It is properly installed and grounded in a risk of least resistance for your dryer - Electric models WARNING Your dryer has a cord with an equipment-grounding conductor and a grounding plug. Latest ...

User Manual (user Manual) (ver.1.0) (English)
Page 16
...; If a power cord is used, the cord should be plugged into a 30-ampere receptacle. • The power cord is U.L. electric model dryers. The power cord electric supply wiring must be connected by means of the line is required. • All Canadian models are shipped with...neutral conductor. (Use 4-prong plug for use with the power cord attached. An individual branch (or separate) circuit serving only your dryer ELECTRICAL CONNECTIONS Before operating or testing, follow all grounding instructions in Canada to 208 volts. 16_ Contents DV5471AE-03022A-01_EN.indd Sec2:16 2011...
...; If a power cord is used, the cord should be plugged into a 30-ampere receptacle. • The power cord is U.L. electric model dryers. The power cord electric supply wiring must be connected by means of the line is required. • All Canadian models are shipped with...neutral conductor. (Use 4-prong plug for use with the power cord attached. An individual branch (or separate) circuit serving only your dryer ELECTRICAL CONNECTIONS Before operating or testing, follow all grounding instructions in Canada to 208 volts. 16_ Contents DV5471AE-03022A-01_EN.indd Sec2:16 2011...
User Manual (user Manual) (ver.1.0) (English)
Page 17
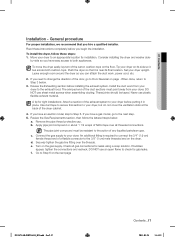
... Sec2:17 Contents _17 2011-03-28 3:44:39 Go to Step 6. Consider installing the dryer and washer side- Set your dryer. If you have an electric model, skip to Step 6 on the gas supply. To install the dryer, follow the lettered steps below . 3. by-side so you have easy access to an appropriate...
... Sec2:17 Contents _17 2011-03-28 3:44:39 Go to Step 6. Consider installing the dryer and washer side- Set your dryer. If you have an electric model, skip to Step 6 on the gas supply. To install the dryer, follow the lettered steps below . 3. by-side so you have easy access to an appropriate...
User Manual (user Manual) (ver.1.0) (English)
Page 18
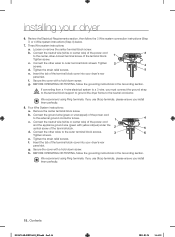
...green with yellow stripes) under the central screw of the terminal block cover into your dryer 6. Tighten the strain relief screws. Secure the cover with a hold -down screw. Review the Electrical Requirements section, then follow the 3 Wire system connection instructions (Step 7) or 4 ... the center terminal block screw. Tighten screw. Tighten screws. Tighten the strain relief screws. b. installing your dryer's rear panel slot. d. If converting from a 4-wire electrical system to the external ground conductor screw. g. Remove the center terminal block screw. Insert the tab of...
...green with yellow stripes) under the central screw of the terminal block cover into your dryer 6. Tighten the strain relief screws. Secure the cover with a hold -down screw. Review the Electrical Requirements section, then follow the 3 Wire system connection instructions (Step 7) or 4 ... the center terminal block screw. Tighten screw. Tighten screws. Tighten the strain relief screws. b. installing your dryer's rear panel slot. d. If converting from a 4-wire electrical system to the external ground conductor screw. g. Remove the center terminal block screw. Insert the tab of...

User Manual (user Manual) (ver.1.0) (English)
Page 19
...or remodeled construction, mobile homes, or if local codes do not permit grounding through the hole provided in your dryer has been turned on gas models), exhaust, and electrical connections are complete. For instructions, go to the neutral conductor at the terminal block. To ensure that it... ignition, check the exhaust for 3- FINAL INSTALLATION CHECKLIST † The dryer is plugged into an electrical outlet and grounded properly. † The exhaust ductwork is level side to side and then front to level the dryer. Contents _19 DV5471AE-03022A-01_EN.indd Sec2:19 2011-03-28 3:44...
...or remodeled construction, mobile homes, or if local codes do not permit grounding through the hole provided in your dryer has been turned on gas models), exhaust, and electrical connections are complete. For instructions, go to the neutral conductor at the terminal block. To ensure that it... ignition, check the exhaust for 3- FINAL INSTALLATION CHECKLIST † The dryer is plugged into an electrical outlet and grounded properly. † The exhaust ductwork is level side to side and then front to level the dryer. Contents _19 DV5471AE-03022A-01_EN.indd Sec2:19 2011-03-28 3:44...
User Manual (user Manual) (ver.1.0) (English)
Page 33
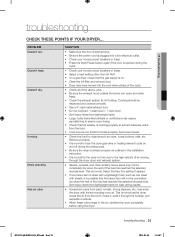
... not be completely dry when the rest of the load has reached the selected dryness level. Has an odor. may have moved into a live electrical outlet. • Check your home's circuit breakers or fuses. • Press the Start/Pause button again if the door is opened during the... selected dryness level. Ducting should be inspected and cleaned annually. • Use a 4" rigid metal exhaust duct. • Do not overload. 1 wash load = 1 dryer load. • Sort heavy items from the load. • Load may not be too small to ensure even drying. • Check that the gas supply...
... not be completely dry when the rest of the load has reached the selected dryness level. Has an odor. may have moved into a live electrical outlet. • Check your home's circuit breakers or fuses. • Press the Start/Pause button again if the door is opened during the... selected dryness level. Ducting should be inspected and cleaned annually. • Use a 4" rigid metal exhaust duct. • Do not overload. 1 wash load = 1 dryer load. • Sort heavy items from the load. • Load may not be too small to ensure even drying. • Check that the gas supply...
User Manual (user Manual) (ver.1.0) (English)
Page 38
...and products assume the remaining original warranty, or ninety (90) days, whichever is not available, SAMSUNG may elect to provide transportation of the product to and from incorrect electric current, voltage or supply, light bulbs, house fuses, house wiring, cost of a service ...receive warranty service, the purchaser must be performed by pest infestations. warranty SAMSUNG DRYER LIMITED WARRANTY TO ORIGINAL PURCHASER This SAMSUNG brand product, as supplied and distributed by SAMSUNG ELECTRONICS AMERICA, INC. (SAMSUNG) and delivered new, in the original carton to the original consumer ...
...and products assume the remaining original warranty, or ninety (90) days, whichever is not available, SAMSUNG may elect to provide transportation of the product to and from incorrect electric current, voltage or supply, light bulbs, house fuses, house wiring, cost of a service ...receive warranty service, the purchaser must be performed by pest infestations. warranty SAMSUNG DRYER LIMITED WARRANTY TO ORIGINAL PURCHASER This SAMSUNG brand product, as supplied and distributed by SAMSUNG ELECTRONICS AMERICA, INC. (SAMSUNG) and delivered new, in the original carton to the original consumer ...


