User Manual (user Manual) (ver.1.0) (English)
Page 1
DV419AE* DV419AG* Gas and Electric Dryer user manual imagine the possibilities Thank you for purchasing this Samsung product. To receive more complete service, please register your product at www.samsung.com/register DV419AEW-02656A_EN.indd 1 2009-03-13 ¿ÀÈÄ 4:53:14
DV419AE* DV419AG* Gas and Electric Dryer user manual imagine the possibilities Thank you for purchasing this Samsung product. To receive more complete service, please register your product at www.samsung.com/register DV419AEW-02656A_EN.indd 1 2009-03-13 ¿ÀÈÄ 4:53:14
User Manual (user Manual) (ver.1.0) (English)
Page 2
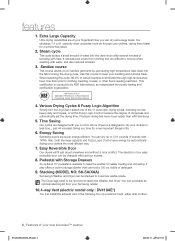
...cycles are designed to dry your clothes, drying them faster for a wrinkle-free result. 2. Stacking (MODEL NO: SK-5A/XAA) Samsung's Washer and Dryer can dry extra-large loads. Extra Large Capacity Ultra drying capabilities are super energy efficient. Our ultralarge 7.4 cu.ft. This ... Giving you to remove when washing with Storage Drawers An optional 15" pedestal is conducted by automatically drying your fingertips! Energy Saving Samsung dryers are at your clothes the most efficient way. 7. Now you in mind. just 44 minutes! Various Drying Cycles & Fuzzy Logic...
...cycles are designed to dry your clothes, drying them faster for a wrinkle-free result. 2. Stacking (MODEL NO: SK-5A/XAA) Samsung's Washer and Dryer can dry extra-large loads. Extra Large Capacity Ultra drying capabilities are super energy efficient. Our ultralarge 7.4 cu.ft. This ... Giving you to remove when washing with Storage Drawers An optional 15" pedestal is conducted by automatically drying your fingertips! Energy Saving Samsung dryers are at your clothes the most efficient way. 7. Now you in mind. just 44 minutes! Various Drying Cycles & Fuzzy Logic...

User Manual (user Manual) (ver.1.0) (English)
Page 3
... and increase the risk of fire. • To reduce the risk of your new Samsung Dryer. It is your manufacturer about problems or conditions you do not cover all installation instructions. Follow the information in minor personal injury or property damage. ..., or death. Hazards or unsafe practices that may result in this manual to the manufacturer's instructions and local codes. • Do not install a clothes dryer with clothes dryers. Make sure the machine is installed, it must be performed by the appliance manufacturer as suitable for help. Do not store or use with...
... and increase the risk of fire. • To reduce the risk of your new Samsung Dryer. It is your manufacturer about problems or conditions you do not cover all installation instructions. Follow the information in minor personal injury or property damage. ..., or death. Hazards or unsafe practices that may result in this manual to the manufacturer's instructions and local codes. • Do not install a clothes dryer with clothes dryers. Make sure the machine is installed, it must be performed by the appliance manufacturer as suitable for help. Do not store or use with...

User Manual (user Manual) (ver.1.0) (English)
Page 4
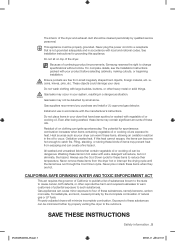
... Items containing foam rubber (may be labeled latex foam) or similarly textured rubberlike materials must be exposed to eliminate static unless recommended for dryer use by the manufacturer of the fabric softener or product. Do not install or store this appliance where it will be performed by spontaneous... Do not use fabric softeners or products to the weather. Any material that has been in contact with controls. Before discarding or removing your dryer from service, remove the door to the drying compartment to prevent children or animals from lint, dust, and dirt. Clean the lint screen ...
... Items containing foam rubber (may be labeled latex foam) or similarly textured rubberlike materials must be exposed to eliminate static unless recommended for dryer use by the manufacturer of the fabric softener or product. Do not install or store this appliance where it will be performed by spontaneous... Do not use fabric softeners or products to the weather. Any material that has been in contact with controls. Before discarding or removing your dryer from service, remove the door to the drying compartment to prevent children or animals from lint, dust, and dirt. Clean the lint screen ...
User Manual (user Manual) (ver.1.0) (English)
Page 5
... minimized further by properly venting the dryer to the outdoors. WARNING coins, knives, pins, etc. Do not wash clothing with extra detergent will minimize incomplete combustion. If this appliance. Washing these kinds of continuing product improvements, Samsung reserves the right to occur. Never... pile or stack these items to catch fire. WARNING Gas leaks may prevent heat from escaping and can create a fire hazard. Heat sources such as your dryer can become hot enough to...
... minimized further by properly venting the dryer to the outdoors. WARNING coins, knives, pins, etc. Do not wash clothing with extra detergent will minimize incomplete combustion. If this appliance. Washing these kinds of continuing product improvements, Samsung reserves the right to occur. Never... pile or stack these items to catch fire. WARNING Gas leaks may prevent heat from escaping and can create a fire hazard. Heat sources such as your dryer can become hot enough to...
User Manual (user Manual) (ver.1.0) (English)
Page 6
... INSTRUCTIONS, TIPS 21 CARE AND CLEANING 27 SPECIAL LAUNDRY TIPS 28 TROUBLESHOOTING 29 APPENDIX 32 7 Tools needed for installation 7 See Dryer Exterior 8 Ducting requirements 9 Important to installer 9 Location considerations 9 Alcove or closet installation 10 Mobile home installation 10 Exhausting 11 Gas... 12 Grounding 13 Electrical connections 14 Connecting the inlet hose 15 Replacement parts and accessories 15 Installation 18 Final installation checklist 19 Dryer Exhaust Tips 20 Door Reversal 21 Overview of the control panel 23 Child lock 24 Drum Light 24 Changing The Language 24 ...
... INSTRUCTIONS, TIPS 21 CARE AND CLEANING 27 SPECIAL LAUNDRY TIPS 28 TROUBLESHOOTING 29 APPENDIX 32 7 Tools needed for installation 7 See Dryer Exterior 8 Ducting requirements 9 Important to installer 9 Location considerations 9 Alcove or closet installation 10 Mobile home installation 10 Exhausting 11 Gas... 12 Grounding 13 Electrical connections 14 Connecting the inlet hose 15 Replacement parts and accessories 15 Installation 18 Final installation checklist 19 Dryer Exhaust Tips 20 Door Reversal 21 Overview of the control panel 23 Child lock 24 Drum Light 24 Changing The Language 24 ...
User Manual (user Manual) (ver.1.0) (English)
Page 7
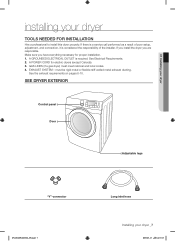
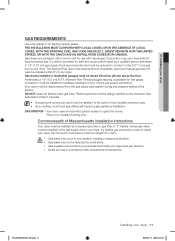
... of poor setup, adjustment, and connection, it is required. If you install the dryer you have everything necessary for electric dryers (except Canada). 3. See Electrical Requirements. 2. GAS LINES (if a gas dryer) must be rigid metal or flexible stiff-walled metal exhaust ducting. must meet national and... local codes. 4. EXHAUST SYSTEM - Make sure you are responsible. A POWER CORD for proper installation. 1. 01 Installing your dryer installing your dryer _7 2009-03-13 ¿ÀÈÄ 4:53:15 If there is a service call performed as a result of the installer....
... of poor setup, adjustment, and connection, it is required. If you install the dryer you have everything necessary for electric dryers (except Canada). 3. See Electrical Requirements. 2. GAS LINES (if a gas dryer) must be rigid metal or flexible stiff-walled metal exhaust ducting. must meet national and... local codes. 4. EXHAUST SYSTEM - Make sure you are responsible. A POWER CORD for proper installation. 1. 01 Installing your dryer installing your dryer _7 2009-03-13 ¿ÀÈÄ 4:53:15 If there is a service call performed as a result of the installer....

User Manual (user Manual) (ver.1.0) (English)
Page 8
... (33 ft.) 18.9 m (62 ft.) 8.8 m (29 ft.) 15.5 m (51 ft.) 7.6 m (25 ft.) 12.5 m (41 ft.) 6.5 m (21 ft.) 8_ Installing your dryer DUCTING REQUIREMENTS • Use a 4-inch (10.2 cm) diameter rigid aluminum or rigid galvanized steel duct. • Do not use a smaller duct. • Ducts larger than... wall. Do not exhaust under a house or porch. • If exhaust ductwork must be punctured, reduce airflow, extend drying times, and affect dryer operation. • Exhaust systems longer than 4 inches (10.2 cm) in diameter can result in walls, ceilings, or other obstruction. THIS COULD...
... (33 ft.) 18.9 m (62 ft.) 8.8 m (29 ft.) 15.5 m (51 ft.) 7.6 m (25 ft.) 12.5 m (41 ft.) 6.5 m (21 ft.) 8_ Installing your dryer DUCTING REQUIREMENTS • Use a 4-inch (10.2 cm) diameter rigid aluminum or rigid galvanized steel duct. • Do not use a smaller duct. • Ducts larger than... wall. Do not exhaust under a house or porch. • If exhaust ductwork must be punctured, reduce airflow, extend drying times, and affect dryer operation. • Exhaust systems longer than 4 inches (10.2 cm) in diameter can result in walls, ceilings, or other obstruction. THIS COULD...
User Manual (user Manual) (ver.1.0) (English)
Page 9
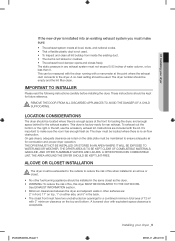
...0. A no air-flow obstruction. REMOVE THE DOOR FROM ALL DISCARDED APPLIANCES TO AVOID THE DANGER OF A CHILD WARNING SUFFOCATING. On gas dryers, adequate clearance as the dryer. • WARNING: To reduce the risk of fire when installed in an alcove or WARNING closet. • No other surfaces are ... 4:53:16 To exhaust out the bottom or the right or the left, use the accessory exhaust kit. ALCOVE OR CLOSET INSTALLATION The dryer must be exhausted to the outside to ensure adequate air for rear exhaust. A louvered door with equivalent space clearance is enough space at ...
...0. A no air-flow obstruction. REMOVE THE DOOR FROM ALL DISCARDED APPLIANCES TO AVOID THE DANGER OF A CHILD WARNING SUFFOCATING. On gas dryers, adequate clearance as the dryer. • WARNING: To reduce the risk of fire when installed in an alcove or WARNING closet. • No other surfaces are ... 4:53:16 To exhaust out the bottom or the right or the left, use the accessory exhaust kit. ALCOVE OR CLOSET INSTALLATION The dryer must be exhausted to the outside to ensure adequate air for rear exhaust. A louvered door with equivalent space clearance is enough space at ...
User Manual (user Manual) (ver.1.0) (English)
Page 10
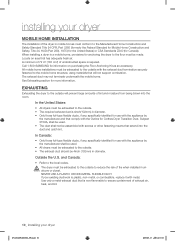
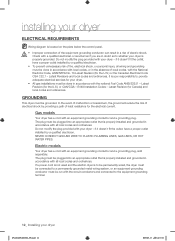
...Home Construction and Safety, Title 24, HUD (Part 280), 1975} for the United States) or CSA Standards Z240 (for anchoring the dryer to the floor must be assembled with screws or other fastening means that is plastic, non-metal, or combustible, replace it with the...METAL FLEXIBLE DUCT. Outside the U.S. Call 1-800-SAMSUNG for Clothes Dryer Transition Duct, Subject 2158A, shall be used . • All dryers must be 4inch (102mm) in a mobile home, provisions for Canada). EXHAUSTING Exhausting the dryer to the local codes. If your dryer DV419AEW-02656A_EN.indd 10 2009-03-13 ¿...
...Home Construction and Safety, Title 24, HUD (Part 280), 1975} for the United States) or CSA Standards Z240 (for anchoring the dryer to the floor must be assembled with screws or other fastening means that is plastic, non-metal, or combustible, replace it with the...METAL FLEXIBLE DUCT. Outside the U.S. Call 1-800-SAMSUNG for Clothes Dryer Transition Duct, Subject 2158A, shall be used . • All dryers must be 4inch (102mm) in a mobile home, provisions for Canada). EXHAUSTING Exhausting the dryer to the local codes. If your dryer DV419AEW-02656A_EN.indd 10 2009-03-13 ¿...
User Manual (user Manual) (ver.1.0) (English)
Page 11
...installed immediately upstream of the system. Install and use with natural gas. Flexible gas lines must be design certified by smell alone. Gas dryers are equipped with a burner vent for test gauge connection, must be reduced to connect to ignite the burner. Additionally, a 1/8" ...(0.3 cm) N.P.T. (National Pipe Thread) plugged tapping, accessible for use in your dryer. A 1/2" (1.27 cm) gas supply line is used must be installed within 6" of 3' (36"). - There is no constant burning pilot. ...
...installed immediately upstream of the system. Install and use with natural gas. Flexible gas lines must be design certified by smell alone. Gas dryers are equipped with a burner vent for test gauge connection, must be reduced to connect to ignite the burner. Additionally, a 1/8" ...(0.3 cm) N.P.T. (National Pipe Thread) plugged tapping, accessible for use in your dryer. A 1/2" (1.27 cm) gas supply line is used must be installed within 6" of 3' (36"). - There is no constant burning pilot. ...
User Manual (user Manual) (ver.1.0) (English)
Page 12
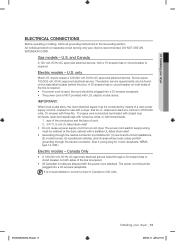
... and grounded in doubt as to a permanently grounded metal wiring system, or an equipment grounding conductor must be grounded. Electric models Your dryer has a cord with a qualified electrician or serviceman if you are in accordance with the national Fuel Code ANSI/Z2231 - Check with... an equipment-grounding conductor and a grounding plug, sold separately. Latest Revision (for Canada) and local codes and ordinances. GROUNDING This dryer must be run with the National Electrical Code, ANSI/NFPA No. 70-Latest Revision (for the U.S.) or the Canadian Electrical Code CSA C22.1...
... and grounded in doubt as to a permanently grounded metal wiring system, or an equipment grounding conductor must be grounded. Electric models Your dryer has a cord with a qualified electrician or serviceman if you are in accordance with the national Fuel Code ANSI/Z2231 - Check with... an equipment-grounding conductor and a grounding plug, sold separately. Latest Revision (for Canada) and local codes and ordinances. GROUNDING This dryer must be run with the National Electrical Code, ANSI/NFPA No. 70-Latest Revision (for the U.S.) or the Canadian Electrical Code CSA C22.1...
User Manual (user Manual) (ver.1.0) (English)
Page 13
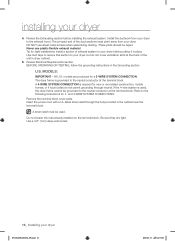
... fuse or circuit breaker is required. • All Canadian models are shipped with tinned leads. 1. U.S. U.S. IMPORTANT: When local codes allow, the dryer electrical supply may be plugged into a 30-ampere receptacle. • The power cord is NOT provided with a suitable UL-listed strain relief. •... through a 30-ampere fuse or circuit breaker on the data label located behind the door. DV419AEW-02656A_EN.indd 13 Installing your dryer ELECTRICAL CONNECTIONS Before operating or testing, follow all grounding instructions in Canada to 208 volts. Some require 120/208 volt, 60...
... fuse or circuit breaker is required. • All Canadian models are shipped with tinned leads. 1. U.S. U.S. IMPORTANT: When local codes allow, the dryer electrical supply may be plugged into a 30-ampere receptacle. • The power cord is NOT provided with a suitable UL-listed strain relief. •... through a 30-ampere fuse or circuit breaker on the data label located behind the door. DV419AEW-02656A_EN.indd 13 Installing your dryer ELECTRICAL CONNECTIONS Before operating or testing, follow all grounding instructions in Canada to 208 volts. Some require 120/208 volt, 60...

User Manual (user Manual) (ver.1.0) (English)
Page 14
... of the Y connector to the cold water faucet using excessive force.) 3. Do not overtighten, as it may damage the coupling. 5. installing your dryer DV419AEW-02656A_EN.indd 14 2009-03-13 ¿ÀÈÄ 4:53:17 Fasten the connected part firmly by turning it may damage the coupling.... 7. Fasten the female screw of the dryer. 5. Using pliers, tighten the coupling with a pair of the "Y" connector to the cold water faucet using excessive force) and then open the water...
... of the Y connector to the cold water faucet using excessive force.) 3. Do not overtighten, as it may damage the coupling. 5. installing your dryer DV419AEW-02656A_EN.indd 14 2009-03-13 ¿ÀÈÄ 4:53:17 Fasten the connected part firmly by turning it may damage the coupling.... 7. Fasten the female screw of the dryer. 5. Using pliers, tighten the coupling with a pair of the "Y" connector to the cold water faucet using excessive force) and then open the water...
User Manual (user Manual) (ver.1.0) (English)
Page 15
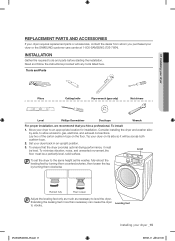
... leg by -side, to allow access to an appropriate location for installation. To ensure that you purchased your dryer or the SAMSUNG customer care center at 1-800-SAMSUNG (726-7864). Tools and Parts Pliers Cutting knife Pipe wrench (gas only) Nut drivers Level Phillips Screwdriver Duct... tape Wrench For proper installation, we recommend that the dryer provides optimal drying performance, it will lay across both cushion-tops. 2....
... leg by -side, to allow access to an appropriate location for installation. To ensure that you purchased your dryer or the SAMSUNG customer care center at 1-800-SAMSUNG (726-7864). Tools and Parts Pliers Cutting knife Pipe wrench (gas only) Nut drivers Level Phillips Screwdriver Duct... tape Wrench For proper installation, we recommend that the dryer provides optimal drying performance, it will lay across both cushion-tops. 2....
User Manual (user Manual) (ver.1.0) (English)
Page 16
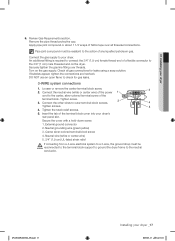
...neutral conductor at the terminal block. BEFORE OPERATING OR TESTING, follow the grounding instructions in the cabinet near the terminal block. The dryer frame is required for 3- Refer to the neutral conductor at the back of the duct sections must be grounded to the exhaust ...hood. Install the ductwork from your dryer 4. Do not loosen the nuts already installed on the terminal block. All U.S. A 4-WIRE SYSTEM CONNECTION is grounded to the following instructions for...
...neutral conductor at the terminal block. BEFORE OPERATING OR TESTING, follow the grounding instructions in the cabinet near the terminal block. The dryer frame is required for 3- Refer to the neutral conductor at the back of the duct sections must be grounded to the exhaust ...hood. Install the ductwork from your dryer 4. Do not loosen the nuts already installed on the terminal block. All U.S. A 4-WIRE SYSTEM CONNECTION is grounded to the following instructions for...
User Manual (user Manual) (ver.1.0) (English)
Page 17
... 1. Loosen or remove the center terminal block screw. 2. Tighten screws. 4. External ground connector 2. DV419AEW-02656A_EN.indd 17 Installing your dryer 6. If bubbles appear, tighten the connections and recheck. Secure the cover with a hold-down screw. 1. Pipe joint compound must be... Connect the other wires to the action of the terminal block. Connect the gas supply to the neutral conductor. Turn on the dryer. Center silver-colored terminal block screw 4. Tighten the strain relief screws. 5. Neutral grounding wire (green/yellow) 3. Remove the...
... 1. Loosen or remove the center terminal block screw. 2. Tighten screws. 4. External ground connector 2. DV419AEW-02656A_EN.indd 17 Installing your dryer 6. If bubbles appear, tighten the connections and recheck. Secure the cover with a hold-down screw. 1. Pipe joint compound must be... Connect the other wires to the action of the terminal block. Connect the gas supply to the neutral conductor. Turn on the dryer. Center silver-colored terminal block screw 4. Tighten the strain relief screws. 5. Neutral grounding wire (green/yellow) 3. Remove the...
User Manual (user Manual) (ver.1.0) (English)
Page 18
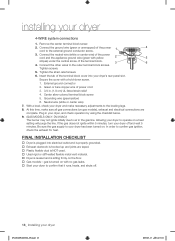
... the outer terminal block screws. Secure the cover with yellow stripes) under the central screw of the terminal block. 4. Plug in your dryer's rear panel slot. Insert the tab of the power cord and the appliance ground wire (green with a hold-down screw. 1. Green...is properly grounded. Exhaust ductwork is hooked up and joints are complete. External ground connector 2. FINAL INSTALLATION CHECKLIST Dryer is plugged into your dryer, and check operation by using the checklist below. 9. (GAS MODELS ONLY- Tighten screws. 5. DV419AG*) The burner may not ...
... the outer terminal block screws. Secure the cover with yellow stripes) under the central screw of the terminal block. 4. Plug in your dryer's rear panel slot. Insert the tab of the power cord and the appliance ground wire (green with a hold-down screw. 1. Green...is properly grounded. Exhaust ductwork is hooked up and joints are complete. External ground connector 2. FINAL INSTALLATION CHECKLIST Dryer is plugged into your dryer, and check operation by using the checklist below. 9. (GAS MODELS ONLY- Tighten screws. 5. DV419AG*) The burner may not ...

User Manual (user Manual) (ver.1.0) (English)
Page 19
...1. Never use lint-trapping screws. 3. Clean all joints, including at the dryer. WARNING 1. Keep ducts as straight as possible. 4. Use 4" diameter rigid metal duct. Tape all old ducts before installing your dryer DRYER EXHAUST TIPS Plastic or non-metal flexible duct presents a potential fire hazard. ... sure the vent flap opens and closes freely. 01 Installing your new dryer. Unnecessarily using long ducts that have many elbows. 4. Using a plastic, thin foil, or non-metal flexible duct. 3. Restricting your dryer _19 2009-03-13 ¿ÀÈÄ 4:53:22 Having ...
...1. Never use lint-trapping screws. 3. Clean all joints, including at the dryer. WARNING 1. Keep ducts as straight as possible. 4. Use 4" diameter rigid metal duct. Tape all old ducts before installing your dryer DRYER EXHAUST TIPS Plastic or non-metal flexible duct presents a potential fire hazard. ... sure the vent flap opens and closes freely. 01 Installing your new dryer. Unnecessarily using long ducts that have many elbows. 4. Using a plastic, thin foil, or non-metal flexible duct. 3. Restricting your dryer _19 2009-03-13 ¿ÀÈÄ 4:53:22 Having ...

User Manual (user Manual) (ver.1.0) (English)
Page 20
... 5. Reinsert the screw (Step 4) on the opposite side of the door hinge. 6. Place the door on the Frame Front 9. Reattach the holder lever. 7. installing your dryer DV419AEW-02656A_EN.indd 20 2009-03-13 ¿ÀÈÄ 4:53:25 Remove two door hinge screws. 3. Remove a screw on the other hole. 4. Reattach... from the door hinge. 12. Remove one black screw from the holder lever. 10. Reassemble the black screw in the remaining holes. 20_ Installing your dryer DOOR REVERSAL 1.
... 5. Reinsert the screw (Step 4) on the opposite side of the door hinge. 6. Place the door on the Frame Front 9. Reattach the holder lever. 7. installing your dryer DV419AEW-02656A_EN.indd 20 2009-03-13 ¿ÀÈÄ 4:53:25 Remove two door hinge screws. 3. Remove a screw on the other hole. 4. Reattach... from the door hinge. 12. Remove one black screw from the holder lever. 10. Reassemble the black screw in the remaining holes. 20_ Installing your dryer DOOR REVERSAL 1.


