User Manual (user Manual) (ver.1.0) (English)
Page 1
DV419AE* DV419AG* Gas and Electric Dryer user manual imagine the possibilities Thank you for purchasing this Samsung product. To receive more complete service, please register your product at www.samsung.com/register DV419AEW-02656A_EN.indd 1 2009-03-13 ¿ÀÈÄ 4:53:14
DV419AE* DV419AG* Gas and Electric Dryer user manual imagine the possibilities Thank you for purchasing this Samsung product. To receive more complete service, please register your product at www.samsung.com/register DV419AEW-02656A_EN.indd 1 2009-03-13 ¿ÀÈÄ 4:53:14
User Manual (user Manual) (ver.1.0) (English)
Page 2
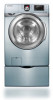
... reversible door can install the exhaust vent in less time... Precision drying has never been easier than with Storage Drawers An optional 15" pedestal is available to raise the washer for clothing, bedding, towels, or other items needing sanitized. Also, both the large capacity and Fuzzy Logic Control save energy by automatically drying your bedding and curtains clean. The direction of Residential and Commercial, Family-Sized Clothes Washers 4. The Dryer legs need...
... reversible door can install the exhaust vent in less time... Precision drying has never been easier than with Storage Drawers An optional 15" pedestal is available to raise the washer for clothing, bedding, towels, or other items needing sanitized. Also, both the large capacity and Fuzzy Logic Control save energy by automatically drying your bedding and curtains clean. The direction of Residential and Commercial, Family-Sized Clothes Washers 4. The Dryer legs need...

User Manual (user Manual) (ver.1.0) (English)
Page 3
... not cover all installation instructions. It is grounded to the manufacturer's instructions and local codes. • Do not install a clothes dryer with clothes dryers. Do NOT attempt. Follow directions explicity. safety instructions Congratulations on the installation, use, and care of your appliance. If flexible metal (foil type) duct is installed, it must be easily crushed, and trap lint. WHAT YOU NEED TO KNOW ABOUT SAFETY INSTRUCTIONS Warnings and Important Safety Instructions in this manual...
... not cover all installation instructions. It is grounded to the manufacturer's instructions and local codes. • Do not install a clothes dryer with clothes dryers. Do NOT attempt. Follow directions explicity. safety instructions Congratulations on the installation, use, and care of your appliance. If flexible metal (foil type) duct is installed, it must be easily crushed, and trap lint. WHAT YOU NEED TO KNOW ABOUT SAFETY INSTRUCTIONS Warnings and Important Safety Instructions in this manual...

User Manual (user Manual) (ver.1.0) (English)
Page 4
... area around the exhaust opening and surrounding areas free from becoming trapped inside. Do not use fabric softeners or products to eliminate static unless recommended for dryer use any part of all occupants. • Immediately call the fire department. Close supervision is necessary when the appliance is moving. Before discarding or removing your dryer from service, remove the door to the drying compartment to...
... area around the exhaust opening and surrounding areas free from becoming trapped inside. Do not use fabric softeners or products to eliminate static unless recommended for dryer use any part of all occupants. • Immediately call the fire department. Close supervision is necessary when the appliance is moving. Before discarding or removing your dryer from service, remove the door to the drying compartment to...
User Manual (user Manual) (ver.1.0) (English)
Page 5
... improvements, Samsung reserves the right to four of these items in hot water with vegetable oil or cooking oil. Do not wash clothing with your product before selecting cabinetry, making cutouts, or beginning installation. Heat sources such as your system, resulting in your dryer can ignite spontaneoulsy. All washed and unwashed fabrics that have run through the Cool Down cycle. Washing...
... improvements, Samsung reserves the right to four of these items in hot water with vegetable oil or cooking oil. Do not wash clothing with your product before selecting cabinetry, making cutouts, or beginning installation. Heat sources such as your system, resulting in your dryer can ignite spontaneoulsy. All washed and unwashed fabrics that have run through the Cool Down cycle. Washing...
User Manual (user Manual) (ver.1.0) (English)
Page 6
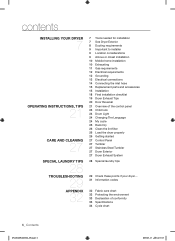
... Dryer Exterior 8 Ducting requirements 9 Important to installer 9 Location considerations 9 Alcove or closet installation 10 Mobile home installation 10 Exhausting 11 Gas requirements 12 Electrical requirements 12 Grounding 13 Electrical connections 14 Connecting the inlet hose 15 Replacement parts and accessories 15 Installation 18 Final installation checklist 19 Dryer Exhaust Tips 20 Door Reversal 21 Overview of the control panel 23 Child lock 24 Drum Light 24 Changing The Language 24 My cycle 25 Rack Dry 26 Clean the lint filter 26 Load the dryer properly 26 Getting started 27 Control Panel...
... Dryer Exterior 8 Ducting requirements 9 Important to installer 9 Location considerations 9 Alcove or closet installation 10 Mobile home installation 10 Exhausting 11 Gas requirements 12 Electrical requirements 12 Grounding 13 Electrical connections 14 Connecting the inlet hose 15 Replacement parts and accessories 15 Installation 18 Final installation checklist 19 Dryer Exhaust Tips 20 Door Reversal 21 Overview of the control panel 23 Child lock 24 Drum Light 24 Changing The Language 24 My cycle 25 Rack Dry 26 Clean the lint filter 26 Load the dryer properly 26 Getting started 27 Control Panel...
User Manual (user Manual) (ver.1.0) (English)
Page 7
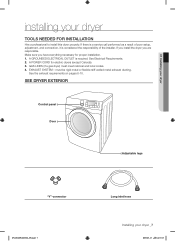
... is a service call performed as a result of the installer. See Electrical Requirements. 2. SEE DRYER EXTERIOR Control panel Door Adjustable legs "Y"-connector DV419AEW-02656A_EN.indd 7 Long inlet hose Installing your dryer TOOLS NEEDED FOR INSTALLATION Hire a professional to install this dryer properly. must meet national and local codes. 4. EXHAUST SYSTEM - A GROUNDED ELECTRICAL OUTLET is considered the responsibility of poor setup, adjustment, and connection, it is required. A POWER CORD for proper installation. 1. 01 Installing your dryer installing your dryer _7 2009...
... is a service call performed as a result of the installer. See Electrical Requirements. 2. SEE DRYER EXTERIOR Control panel Door Adjustable legs "Y"-connector DV419AEW-02656A_EN.indd 7 Long inlet hose Installing your dryer TOOLS NEEDED FOR INSTALLATION Hire a professional to install this dryer properly. must meet national and local codes. 4. EXHAUST SYSTEM - A GROUNDED ELECTRICAL OUTLET is considered the responsibility of poor setup, adjustment, and connection, it is required. A POWER CORD for proper installation. 1. 01 Installing your dryer installing your dryer _7 2009...
User Manual (user Manual) (ver.1.0) (English)
Page 9
... lint filter clean. To exhaust out the bottom or the right or the left, use the accessory exhaust kit. THE DRYER AREA IS TO BE KEPT CLEAR OF COMBUSTIBLE MATERIALS, GASOLINE, AND OTHER FLAMMABLE VAPORS AND LIQUIDS. THE AREA AROUND THE DRYER SHOULD BE KEPT LINT-FREE. This dryer is no -heat setting should be used . • To Inspect and clean all lint buildup from inside the existing duct...
... lint filter clean. To exhaust out the bottom or the right or the left, use the accessory exhaust kit. THE DRYER AREA IS TO BE KEPT CLEAR OF COMBUSTIBLE MATERIALS, GASOLINE, AND OTHER FLAMMABLE VAPORS AND LIQUIDS. THE AREA AROUND THE DRYER SHOULD BE KEPT LINT-FREE. This dryer is no -heat setting should be used . • To Inspect and clean all lint buildup from inside the existing duct...
User Manual (user Manual) (ver.1.0) (English)
Page 10
... dryers must be assembled with the exhaust duct termination securely fastened to ensure containment of fire when installed in diameter. • Only those foil-type flexible ducts, if any , specifically identified for Canada). When installing a dryer in a mobile home, provisions for anchoring the dryer to reduce the risk of exhaust air, heat, and lint. 10_ Installing your existing ductwork is required. NEVER USE A PLASTIC OR NON-METAL FLEXIBLE DUCT. The dryer...
... dryers must be assembled with the exhaust duct termination securely fastened to ensure containment of fire when installed in diameter. • Only those foil-type flexible ducts, if any , specifically identified for Canada). When installing a dryer in a mobile home, provisions for anchoring the dryer to reduce the risk of exhaust air, heat, and lint. 10_ Installing your existing ductwork is required. NEVER USE A PLASTIC OR NON-METAL FLEXIBLE DUCT. The dryer...
User Manual (user Manual) (ver.1.0) (English)
Page 11
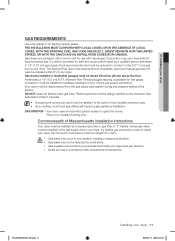
... and install a UL-approved gas detector. The National Fuel Gas Code requires that an accessible, approved manual gas shut-off valve be resistant to install your dryer's gas supply connection. Your dryer must be installed within 6" of Massachusetts installation instructions Your dryer must be installed in your dryer. Install and use in residential garages must have a maximum length of any pressure testing of your dryer, the connector must be reduced to connect to use with manufacturer's instructions. 01 Installing your dryer. THE INSTALLATION...
... and install a UL-approved gas detector. The National Fuel Gas Code requires that an accessible, approved manual gas shut-off valve be resistant to install your dryer's gas supply connection. Your dryer must be installed within 6" of Massachusetts installation instructions Your dryer must be installed in your dryer. Install and use in residential garages must have a maximum length of any pressure testing of your dryer, the connector must be reduced to connect to use with manufacturer's instructions. 01 Installing your dryer. THE INSTALLATION...
User Manual (user Manual) (ver.1.0) (English)
Page 12
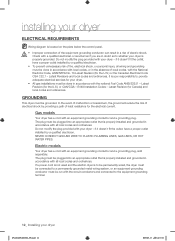
... Electrical Code CSA C22.1 - installing your dryer ELECTRICAL REQUIREMENTS Wiring diagram is properly grounded. Check with the National Electrical Code, ANSI/NFPA No. 70-Latest Revision (for the electrical current. Do not modify the plug provided with your dryer - B149 Installation Codes - Gas models Your dryer has a cord with an equipment-grounding conductor and a grounding plug, sold separately. Do not modify the plug provided with your dryer - NEVER CONNECT GROUND WIRE TO PLASTIC PLUMBING LINES, GAS LINES, OR HOT WATER...
... Electrical Code CSA C22.1 - installing your dryer ELECTRICAL REQUIREMENTS Wiring diagram is properly grounded. Check with the National Electrical Code, ANSI/NFPA No. 70-Latest Revision (for the electrical current. Do not modify the plug provided with your dryer - B149 Installation Codes - Gas models Your dryer has a cord with an equipment-grounding conductor and a grounding plug, sold separately. Do not modify the plug provided with your dryer - NEVER CONNECT GROUND WIRE TO PLASTIC PLUMBING LINES, GAS LINES, OR HOT WATER...
User Manual (user Manual) (ver.1.0) (English)
Page 13
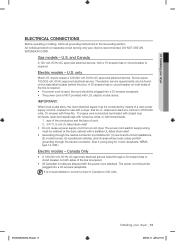
... power supply cord kit, marked for 4 wire receptacle, NEMA type 14-30R.) Electric models - U.S. DV419AEW-02656A_EN.indd 13 Installing your dryer is required. 01 Installing your dryer ELECTRICAL CONNECTIONS Before operating or testing, follow all grounding instructions in Canada to convert a dryer in the Grounding section. A 30-ampere fuse or circuit breaker on the data label located behind the door. Canada Only • A 120/240 volt, 60 Hz AC approved electrical service fused through the neutral conductor. (Use 4-prong plug...
... power supply cord kit, marked for 4 wire receptacle, NEMA type 14-30R.) Electric models - U.S. DV419AEW-02656A_EN.indd 13 Installing your dryer is required. 01 Installing your dryer ELECTRICAL CONNECTIONS Before operating or testing, follow all grounding instructions in Canada to convert a dryer in the Grounding section. A 30-ampere fuse or circuit breaker on the data label located behind the door. Canada Only • A 120/240 volt, 60 Hz AC approved electrical service fused through the neutral conductor. (Use 4-prong plug...
User Manual (user Manual) (ver.1.0) (English)
Page 15
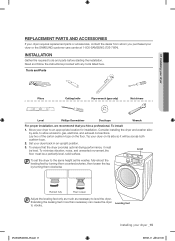
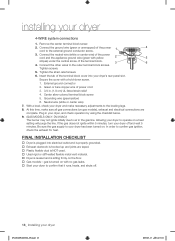
... loosen the leg by -side, to allow access to an appropriate location for installation. INSTALLATION Gather the required tools and parts before starting the installation. 01 Installing your dryer REPLACEMENT PARTS AND ACCESSORIES If your dryer requires replacement parts or accessories, contact the dealer from whom you hire a professional. DV419AEW-02656A_EN.indd 15 Installing your dryer or the SAMSUNG customer care center at 1-800-SAMSUNG (726-7864). Move your dryer to gas, electrical, and exhaust connections.
... loosen the leg by -side, to allow access to an appropriate location for installation. INSTALLATION Gather the required tools and parts before starting the installation. 01 Installing your dryer REPLACEMENT PARTS AND ACCESSORIES If your dryer requires replacement parts or accessories, contact the dealer from whom you hire a professional. DV419AEW-02656A_EN.indd 15 Installing your dryer or the SAMSUNG customer care center at 1-800-SAMSUNG (726-7864). Move your dryer to gas, electrical, and exhaust connections.
User Manual (user Manual) (ver.1.0) (English)
Page 18
... dryer, and check operation by using the checklist below. 9. (GAS MODELS ONLY- Remove the center terminal block screw. 2. Connect the ground wire (green or unwrapped) of the terminal block. 4. Green or bare copper wire of the terminal block cover into electrical outlet and is properly grounded. Exhaust ductwork is hooked up and joints are complete. Insert the tab of power cord 3. 3/4 in your dryer's rear panel slot. If the gas does not ignite within 5 minutes, turn your dryer...
... dryer, and check operation by using the checklist below. 9. (GAS MODELS ONLY- Remove the center terminal block screw. 2. Connect the ground wire (green or unwrapped) of the terminal block. 4. Green or bare copper wire of the terminal block cover into electrical outlet and is properly grounded. Exhaust ductwork is hooked up and joints are complete. Insert the tab of power cord 3. 3/4 in your dryer's rear panel slot. If the gas does not ignite within 5 minutes, turn your dryer...

User Manual (user Manual) (ver.1.0) (English)
Page 19
... new dryer. Having crushed or clogged ducts and vent. 3 4 DV419AEW-02656A_EN.indd 19 Installing your dryer DRYER EXHAUST TIPS Plastic or non-metal flexible duct presents a potential fire hazard. WARNING 1. Keep ducts as straight as possible. 4. Don't let a poor exhaust system slow drying by: 1. Never use lint-trapping screws. 3. Make sure your dryer with a poor exhaust system. 1 2 2. Use 4" diameter rigid metal duct. Restricting your dryer is installed properly so it exhausts air...
... new dryer. Having crushed or clogged ducts and vent. 3 4 DV419AEW-02656A_EN.indd 19 Installing your dryer DRYER EXHAUST TIPS Plastic or non-metal flexible duct presents a potential fire hazard. WARNING 1. Keep ducts as straight as possible. 4. Don't let a poor exhaust system slow drying by: 1. Never use lint-trapping screws. 3. Make sure your dryer with a poor exhaust system. 1 2 2. Use 4" diameter rigid metal duct. Restricting your dryer is installed properly so it exhausts air...
User Manual (user Manual) (ver.1.0) (English)
Page 22
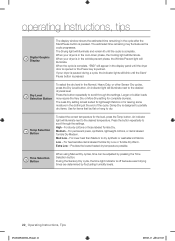
... the display panel until the Start/ Pause button is designed to partially dry items. Use for the load, press the Temp button. Damp Dry is pressed. Provides the lowest heated dry temperature possible. For lower heat than Medium to scroll through the settings. During the Sensory Dry cycle, the time light indicator is pressed. High - Med Low - Larger or bulkier loads may fluctuate as the cycle progresses. operating Instructions, tips Digital...
... the display panel until the Start/ Pause button is designed to partially dry items. Use for the load, press the Temp button. Damp Dry is pressed. Provides the lowest heated dry temperature possible. For lower heat than Medium to scroll through the settings. During the Sensory Dry cycle, the time light indicator is pressed. High - Med Low - Larger or bulkier loads may fluctuate as the cycle progresses. operating Instructions, tips Digital...
User Manual (user Manual) (ver.1.0) (English)
Page 29
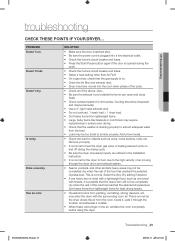
... the dryer gas valve or heating element cycle on . • Clean the lint filter and exhaust duct. • Dryer may enter the dryer with sheets, it outside the home can open and close freely. • Check exhaust system for the dryer to hum due to tumble properly. Select the Very Dry setting if desired. • If one heavy item is normal. may have moved into a live electrical outlet. • Check the home's circuit breaker and fuses...
... the dryer gas valve or heating element cycle on . • Clean the lint filter and exhaust duct. • Dryer may enter the dryer with sheets, it outside the home can open and close freely. • Check exhaust system for the dryer to hum due to tumble properly. Select the Very Dry setting if desired. • If one heavy item is normal. may have moved into a live electrical outlet. • Check the home's circuit breaker and fuses...
User Manual (user Manual) (ver.1.0) (English)
Page 31
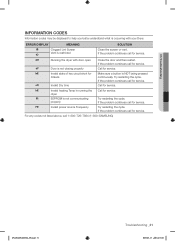
...-SAMSUNG) DV419AEW-02656A_EN.indd 31 Troubleshooting _31 2009-03-13 ¿ÀÈÄ 4:53:26 For any codes not listed above, call for service. dO Running the dryer with your Dryer. ERROR DISPLAY MEANING SOLUTION tS Clogged Lint Screen Vent is NOT being pressed 30secs continuously. dryer Et EEPROM is not closing properly Call for service. dF Door is not communicating Try restarting the cycle...
...-SAMSUNG) DV419AEW-02656A_EN.indd 31 Troubleshooting _31 2009-03-13 ¿ÀÈÄ 4:53:26 For any codes not listed above, call for service. dO Running the dryer with your Dryer. ERROR DISPLAY MEANING SOLUTION tS Clogged Lint Screen Vent is NOT being pressed 30secs continuously. dryer Et EEPROM is not closing properly Call for service. dF Door is not communicating Try restarting the cycle...

User Manual (user Manual) (ver.1.0) (English)
Page 32
... domestic and imported items. Follow care label directions to maximize garment life and reduce laundering problems. Wash Cycle Special Instructions Warning Symbols for Laundering Normal Line Dry/ Hang to Dry Do Not Wash Permanent Press / Wrinkle Resistant / Wrinkle Control Drip Dry Do Not Wring Gentle/Delicates Dry Flat Do Not Bleach Hand Wash Water Temperature** Hot Heat Setting High Medium Do Not Tumble Dry No Steam (added to iron) Do...
... domestic and imported items. Follow care label directions to maximize garment life and reduce laundering problems. Wash Cycle Special Instructions Warning Symbols for Laundering Normal Line Dry/ Hang to Dry Do Not Wash Permanent Press / Wrinkle Resistant / Wrinkle Control Drip Dry Do Not Wring Gentle/Delicates Dry Flat Do Not Bleach Hand Wash Water Temperature** Hot Heat Setting High Medium Do Not Tumble Dry No Steam (added to iron) Do...

User Manual (user Manual) (ver.1.0) (English)
Page 35
... in service problems; cosmetic damage or exterior finish; product removal and reinstallation; problems caused by pest infestations. Replacement parts and products assume the remaining original warranty, or ninety (90) days, whichever is not available, SAMSUNG may elect to provide transportation of the product to and from incorrect electric current, voltage or supply, light bulbs, house fuses, house wiring, cost of a service call for instructions, or fixing installation errors. use...
... in service problems; cosmetic damage or exterior finish; product removal and reinstallation; problems caused by pest infestations. Replacement parts and products assume the remaining original warranty, or ninety (90) days, whichever is not available, SAMSUNG may elect to provide transportation of the product to and from incorrect electric current, voltage or supply, light bulbs, house fuses, house wiring, cost of a service call for instructions, or fixing installation errors. use...


