User Manual (user Manual) (ver.1.0) (English)
Page 3
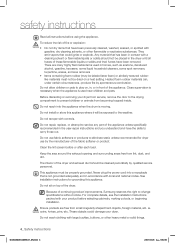
... pwer plug from a neighbor's phone. Make sure the machine is your responsibility to light any appliance. • Do not turn on the appliance. • Do not touch any electrical switch. • Do not use common sense, caution, and care when installing, maintaining, or operating your building. • Clear the room, building or area of your new Samsung Dryer. Do NOT disassemble. safety instructions...
... pwer plug from a neighbor's phone. Make sure the machine is your responsibility to light any appliance. • Do not turn on the appliance. • Do not touch any electrical switch. • Do not use common sense, caution, and care when installing, maintaining, or operating your building. • Clear the room, building or area of your new Samsung Dryer. Do NOT disassemble. safety instructions...
User Manual (user Manual) (ver.1.0) (English)
Page 4
... or solids should be dried on a heat setting. The interior of the dryer and exhaust duct should not be properly grounded. Because of continuing product improvements, Samsung reserves the right to play on top of the dryer. ie. These objects could ignite or explode. Do not allow children or pets to change specifications without notice. Clean the lint screen before using the appliance. This appliance...
... or solids should be dried on a heat setting. The interior of the dryer and exhaust duct should not be properly grounded. Because of continuing product improvements, Samsung reserves the right to play on top of the dryer. ie. These objects could ignite or explode. Do not allow children or pets to change specifications without notice. Clean the lint screen before using the appliance. This appliance...

User Manual (user Manual) (ver.1.0) (English)
Page 6
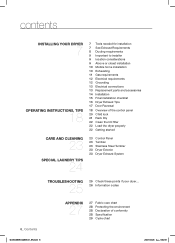
...7 OPERATING INSTRUCTIONS, TIPS 18 7 Tools needed for installation 7 See Exhaust Requirements 8 Ducting requirements 9 Important to installer 9 location considerations 9 Alcove or closet installation 10 Mobile home installation 10 Exhausting 11 Gas requirements 12 Electrical requirements 12 Grounding 13 Electrical connections 13 Replacement parts and accessories 14 Installation 15 Final installation checklist 16 Dryer Exhaust Tips 17 Door Reversal 18 Overview of the control panel 20 Child lock 21 Rack Dry 22 Clean the lint filter 22 Load the dryer properly 22 Getting started CARE AND CLEANING...
...7 OPERATING INSTRUCTIONS, TIPS 18 7 Tools needed for installation 7 See Exhaust Requirements 8 Ducting requirements 9 Important to installer 9 location considerations 9 Alcove or closet installation 10 Mobile home installation 10 Exhausting 11 Gas requirements 12 Electrical requirements 12 Grounding 13 Electrical connections 13 Replacement parts and accessories 14 Installation 15 Final installation checklist 16 Dryer Exhaust Tips 17 Door Reversal 18 Overview of the control panel 20 Child lock 21 Rack Dry 22 Clean the lint filter 22 Load the dryer properly 22 Getting started CARE AND CLEANING...
User Manual (user Manual) (ver.1.0) (English)
Page 7
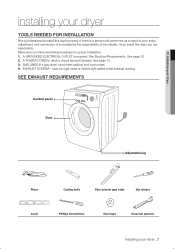
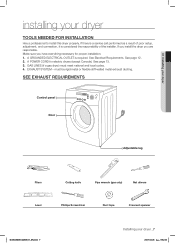
... ELECTRICAL OUTLET is considered the responsibility of poor setup, adjustment, and connection, it is required. A POWER CORD for proper installation. 1. GAS LINES (if a gas dryer) must be rigid metal or flexible stiff-walled metal exhaust ducting. SEE EXHAUST REQUIREMENTS Control panel Door Adjustable leg Pliers Cutting knife Pipe wrench (gas only) Nut drivers Level Phillips Screwdriver Duct tape Crescent spanner Installing your dryer TOOLS NEEDED FOR INSTALLATION Hire a professional to install this dryer properly. 01 Installing your dryer installing your dryer _7...
... ELECTRICAL OUTLET is considered the responsibility of poor setup, adjustment, and connection, it is required. A POWER CORD for proper installation. 1. GAS LINES (if a gas dryer) must be rigid metal or flexible stiff-walled metal exhaust ducting. SEE EXHAUST REQUIREMENTS Control panel Door Adjustable leg Pliers Cutting knife Pipe wrench (gas only) Nut drivers Level Phillips Screwdriver Duct tape Crescent spanner Installing your dryer TOOLS NEEDED FOR INSTALLATION Hire a professional to install this dryer properly. 01 Installing your dryer installing your dryer _7...
User Manual (user Manual) (ver.1.0) (English)
Page 9
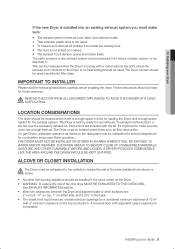
... of water column, or be empty and the lint filter clean. The Dryer tumbler should be used . • To Inspect and clean all local, state, and national codes. • That a flexible plastic duct is installed into an existing exhaust system you must not exceed 0.83 inches of fire when installed in any exhaust system must make sure the room has enough fresh air. REMOVE THE DOOR...
... of water column, or be empty and the lint filter clean. The Dryer tumbler should be used . • To Inspect and clean all local, state, and national codes. • That a flexible plastic duct is installed into an existing exhaust system you must not exceed 0.83 inches of fire when installed in any exhaust system must make sure the room has enough fresh air. REMOVE THE DOOR...
User Manual (user Manual) (ver.1.0) (English)
Page 12
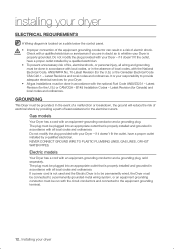
... the circuit conductors and connected to a permanently grounded metal wiring system, or an equipment grounding conductor must be run with your Dryer - If a power cord is not used and the Electric Dryer is to be permanently wired, the Dryer must be connected to the equipment grounding terminal. 12_ Installing your Dryer - GROUNDING This Dryer must be grounded. Latest Revision (for Canada) and local codes and ordinances. Gas models Your Dryer has a cord...
... the circuit conductors and connected to a permanently grounded metal wiring system, or an equipment grounding conductor must be run with your Dryer - If a power cord is not used and the Electric Dryer is to be permanently wired, the Dryer must be connected to the equipment grounding terminal. 12_ Installing your Dryer - GROUNDING This Dryer must be grounded. Latest Revision (for Canada) and local codes and ordinances. Gas models Your Dryer has a cord...
User Manual (user Manual) (ver.1.0) (English)
Page 13
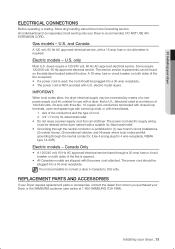
... copper wire conductors terminated with closed loop terminals, open-end spade lugs with turned up ends, or with U.S. electric model dryers. IMPORTANT: When local codes allow, the dryer electrical supply may be plugged into a 30-amp receptacle. • The power cord is U.L. size of the conductors and the type of a new power supply cord kit, marked for use with a dryer, that is NOT provided with tinned leads. 1. REPLACEMENT PARTS AND ACCESSORIES If your Dryer requires replacement parts...
... copper wire conductors terminated with closed loop terminals, open-end spade lugs with turned up ends, or with U.S. electric model dryers. IMPORTANT: When local codes allow, the dryer electrical supply may be plugged into a 30-amp receptacle. • The power cord is U.L. size of the conductors and the type of a new power supply cord kit, marked for use with a dryer, that is NOT provided with tinned leads. 1. REPLACEMENT PARTS AND ACCESSORIES If your Dryer requires replacement parts...
User Manual (user Manual) (ver.1.0) (English)
Page 15
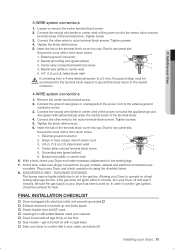
... gas leaks. Start your Dryer's rear panel slot. Installing your dryer 3-WIRE system connections 1. Tighten the strain relief screws. 5. External ground connector 2. At this time, make necessary adjustments to air in . (1.9 cm) UL-listed strain relief 4. Connect the ground wire (green or unwrapped) of power cord 3. 3/4 in the gas line. Plug in your Dryer has been turned on gas models), exhaust and electrical connections are complete. Connect the other wires to the neutral conductor. 4-WIRE system connections 1. Center silver-colored terminal block...
... gas leaks. Start your Dryer's rear panel slot. Installing your dryer 3-WIRE system connections 1. Tighten the strain relief screws. 5. External ground connector 2. At this time, make necessary adjustments to air in . (1.9 cm) UL-listed strain relief 4. Connect the ground wire (green or unwrapped) of power cord 3. 3/4 in the gas line. Plug in your Dryer has been turned on gas models), exhaust and electrical connections are complete. Connect the other wires to the neutral conductor. 4-WIRE system connections 1. Center silver-colored terminal block...
User Manual (user Manual) (ver.1.0) (English)
Page 18
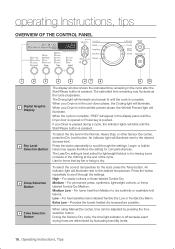
... to scroll through the settings. For lower heat than Medium to dry. 3 Temp Selection Button To select the correct temperature for leaving some moisture in the wrinkle prevent phase, the Wrinkle Prevent light will blink until the Dryer door is opened or Power key is pressed. Provides the lowest heated dry temperature possible. 4 Time Selection Button When using Manual Dry cycles, time can be adjusted by fluctuating humidity levels. 18_ Operating Instructions, Tips Larger or...
... to scroll through the settings. For lower heat than Medium to dry. 3 Temp Selection Button To select the correct temperature for leaving some moisture in the wrinkle prevent phase, the Wrinkle Prevent light will blink until the Dryer door is opened or Power key is pressed. Provides the lowest heated dry temperature possible. 4 Time Selection Button When using Manual Dry cycles, time can be adjusted by fluctuating humidity levels. 18_ Operating Instructions, Tips Larger or...
User Manual (user Manual) (ver.1.0) (English)
Page 25
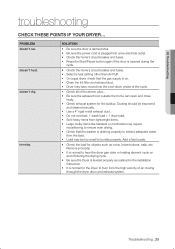
... the dryer gas valve or heating element cycle on . • Clean the lint filter and exhaust duct. • Dryer may require repositioning to ensure even drying. • Check that the gas supply is on and off during the drying cycle. • Be sure the Dryer is noisy. SOLUTION • Be sure the door is latched shut. • Be sure the power cord is plugged into a live electrical outlet. • Check the home's circuit breaker and fuses. • Press the Start/Pause button...
... the dryer gas valve or heating element cycle on . • Clean the lint filter and exhaust duct. • Dryer may require repositioning to ensure even drying. • Check that the gas supply is on and off during the drying cycle. • Be sure the Dryer is noisy. SOLUTION • Be sure the door is latched shut. • Be sure the power cord is plugged into a live electrical outlet. • Check the home's circuit breaker and fuses. • Press the Start/Pause button...
User Manual (user Manual) (ver.1.0) (English)
Page 30
...: damage that are covered and prescribed in the instruction book; applications and uses for which this product and shall not apply to and from incorrect electric current, voltage or supply, light bulbs, house fuses, house wiring, cost of nature or God; SAMSUNG does not warrant uninterrupted or error-free operation of products, equipment, systems, utilities, services, parts, supplies, accessories, applications, installations, repairs, external wiring or connectors not supplied or...
...: damage that are covered and prescribed in the instruction book; applications and uses for which this product and shall not apply to and from incorrect electric current, voltage or supply, light bulbs, house fuses, house wiring, cost of nature or God; SAMSUNG does not warrant uninterrupted or error-free operation of products, equipment, systems, utilities, services, parts, supplies, accessories, applications, installations, repairs, external wiring or connectors not supplied or...
User Manual (user Manual) (ver.1.0) (English)
Page 3
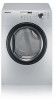
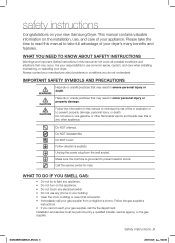
... liquids near this manual to read this manual do not understand. Follow directions explicity. This manual contains valuable information on your new Samsung Dryer. Call the service center for help. Make sure the machine is your responsibility to prevent property damage, personal injury, or death. safety instructions Congratulations on the installation, use common sense, caution, and care when installing, maintaining, or operating your dryer.
... liquids near this manual to read this manual do not understand. Follow directions explicity. This manual contains valuable information on your new Samsung Dryer. Call the service center for help. Make sure the machine is your responsibility to prevent property damage, personal injury, or death. safety instructions Congratulations on the installation, use common sense, caution, and care when installing, maintaining, or operating your dryer.
User Manual (user Manual) (ver.1.0) (English)
Page 4
... and national codes. Do not use fabric softeners or products to change specifications without notice. There are free from small irregularly shaped hard objects, foreign material, etc. Never plug the power cord into the appliance when the drum is used in accordance with controls. Ensure pockets are many highly flammable items used near children and pets. Do not wash clothing with your dryer. Close...
... and national codes. Do not use fabric softeners or products to change specifications without notice. There are free from small irregularly shaped hard objects, foreign material, etc. Never plug the power cord into the appliance when the drum is used in accordance with controls. Ensure pockets are many highly flammable items used near children and pets. Do not wash clothing with your dryer. Close...
User Manual (user Manual) (ver.1.0) (English)
Page 6
...7 OPERATING INSTRUCTIONS, TIPS 18 7 Tools needed for installation 7 See Exhaust Requirements 8 Ducting requirements 9 Important to installer 9 location considerations 9 Alcove or closet installation 10 Mobile home installation 10 Exhausting 11 Gas requirements 12 Electrical requirements 12 Grounding 13 Electrical connections 13 Replacement parts and accessories 14 Installation 15 Final installation checklist 16 Dryer Exhaust Tips 17 Door Reversal 18 Overview of the control panel 20 Child lock 21 Rack Dry 22 Clean the lint filter 22 Load the dryer properly 22 Getting started CARE AND CLEANING...
...7 OPERATING INSTRUCTIONS, TIPS 18 7 Tools needed for installation 7 See Exhaust Requirements 8 Ducting requirements 9 Important to installer 9 location considerations 9 Alcove or closet installation 10 Mobile home installation 10 Exhausting 11 Gas requirements 12 Electrical requirements 12 Grounding 13 Electrical connections 13 Replacement parts and accessories 14 Installation 15 Final installation checklist 16 Dryer Exhaust Tips 17 Door Reversal 18 Overview of the control panel 20 Child lock 21 Rack Dry 22 Clean the lint filter 22 Load the dryer properly 22 Getting started CARE AND CLEANING...
User Manual (user Manual) (ver.1.0) (English)
Page 7
... there is a service call performed as a result of poor setup, adjustment, and connection, it is required. Make sure you are responsible. must meet national and local codes. 4. SEE EXHAUST REQUIREMENTS Control panel Door Adjustable leg Pliers Cutting knife Pipe wrench (gas only) Nut drivers Level Phillips Screwdriver Duct tape Crescent spanner DV203AEW-02486A-01_EN.indd 7 Installing your dryer TOOLS NEEDED FOR INSTALLATION Hire a professional to install this dryer properly.
... there is a service call performed as a result of poor setup, adjustment, and connection, it is required. Make sure you are responsible. must meet national and local codes. 4. SEE EXHAUST REQUIREMENTS Control panel Door Adjustable leg Pliers Cutting knife Pipe wrench (gas only) Nut drivers Level Phillips Screwdriver Duct tape Crescent spanner DV203AEW-02486A-01_EN.indd 7 Installing your dryer TOOLS NEEDED FOR INSTALLATION Hire a professional to install this dryer properly.

User Manual (user Manual) (ver.1.0) (English)
Page 9
... Dryer is no -heat setting should be empty and the lint filter clean. It's important to ensure adequate air for rear exhaust. The Dryer tumbler should be used . • To Inspect and clean all lint buildup from inside the existing duct. • The duct is installed into an existing exhaust system you must be exhausted to the outside to the Dryer. These instructions should be installed in ² with the kit. THE DRYER...
... Dryer is no -heat setting should be empty and the lint filter clean. It's important to ensure adequate air for rear exhaust. The Dryer tumbler should be used . • To Inspect and clean all lint buildup from inside the existing duct. • The duct is installed into an existing exhaust system you must be exhausted to the outside to the Dryer. These instructions should be installed in ² with the kit. THE DRYER...

User Manual (user Manual) (ver.1.0) (English)
Page 13
... the power cord attached. 01 Installing your dryer ELECTRICAL CONNECTIONS Before operating or testing, follow all grounding instructions in Canada to convert a dryer in the Grounding section. U.S. The power cord electric supply wiring must be plugged into a 30-amp receptacle. • The power cord is required. • All Canadian models are shipped with U.S. only Most U.S. Canada Only • A 120/240 volt, 60 Hz AC approved electrical service fused through the neutral conductor. (Use 4-prong plug for...
... the power cord attached. 01 Installing your dryer ELECTRICAL CONNECTIONS Before operating or testing, follow all grounding instructions in Canada to convert a dryer in the Grounding section. U.S. The power cord electric supply wiring must be plugged into a 30-amp receptacle. • The power cord is required. • All Canadian models are shipped with U.S. only Most U.S. Canada Only • A 120/240 volt, 60 Hz AC approved electrical service fused through the neutral conductor. (Use 4-prong plug for...

User Manual (user Manual) (ver.1.0) (English)
Page 15
... your Dryer, and check operation by using the checklist below. 8. (GAS MODELS ONLY : DV203AGW, DV203AGS) The burner may not ignite initially due to the outer terminal block screws. Connect the other wires to the external ground conductor screw. 3. Plug in your Dryer has been turned on. Allowing your Dryer and make sure all legs firmly on gas models), exhaust and electrical connections are complete. FINAL INSTALLATION CHECKLIST Dryer is turned on a heat setting will...
... your Dryer, and check operation by using the checklist below. 8. (GAS MODELS ONLY : DV203AGW, DV203AGS) The burner may not ignite initially due to the outer terminal block screws. Connect the other wires to the external ground conductor screw. 3. Plug in your Dryer has been turned on. Allowing your Dryer and make sure all legs firmly on gas models), exhaust and electrical connections are complete. FINAL INSTALLATION CHECKLIST Dryer is turned on a heat setting will...

User Manual (user Manual) (ver.1.0) (English)
Page 25
...; 9:53:08 Remove promptly. • It is normal to hear the dryer gas valve or heating element cycle on . • Clean the lint filter and exhaust duct. • Dryer may have moved into a live electrical outlet. • Check the home's circuit breaker and fuses. • Press the Start/Pause button again if the door is opened during the cycle. • Check the home's circuit breaker and fuses. • Select a heat setting other than Air Fluff. • On a gas dryer, check that the washer is draining...
...; 9:53:08 Remove promptly. • It is normal to hear the dryer gas valve or heating element cycle on . • Clean the lint filter and exhaust duct. • Dryer may have moved into a live electrical outlet. • Check the home's circuit breaker and fuses. • Press the Start/Pause button again if the door is opened during the cycle. • Check the home's circuit breaker and fuses. • Select a heat setting other than Air Fluff. • On a gas dryer, check that the washer is draining...
User Manual (user Manual) (ver.1.0) (English)
Page 30
... must be unobstructed and accessible to and from incorrect electric current, voltage or supply, light bulbs, house fuses, house wiring, cost of a service call for instructions, or fixing installation errors. This limited warranty covers manufacturing defects in materials and workmanship encountered in normal, noncommercial use of products, equipment, systems, utilities, services, parts, supplies, accessories, applications, installations, repairs, external wiring or connectors not supplied or authorized by SAMSUNG against manufacturing defects in...
... must be unobstructed and accessible to and from incorrect electric current, voltage or supply, light bulbs, house fuses, house wiring, cost of a service call for instructions, or fixing installation errors. This limited warranty covers manufacturing defects in materials and workmanship encountered in normal, noncommercial use of products, equipment, systems, utilities, services, parts, supplies, accessories, applications, installations, repairs, external wiring or connectors not supplied or authorized by SAMSUNG against manufacturing defects in...


