
User Manual
Page 32
... control every mechanism connected with ACK. • Power Control • Function Personal Computer turns TV / Monitor power ON/OFF. • Get Power ON/OFF Status Header 0xAA command 0x11 ID DATA Length CheckSum 0 • Set Power ON/OFF Header command ID 0xAA 0x11 DATA Length 1 Power : Power code to "0xFE" and send commands. Introduction 1 Power control 0x11 0~1 2 Volume control 0x12 0~100 3 Input source control 0x14 - 4 Screen Mode control 0x18 - 5 Screen Size control...
... control every mechanism connected with ACK. • Power Control • Function Personal Computer turns TV / Monitor power ON/OFF. • Get Power ON/OFF Status Header 0xAA command 0x11 ID DATA Length CheckSum 0 • Set Power ON/OFF Header command ID 0xAA 0x11 DATA Length 1 Power : Power code to "0xFE" and send commands. Introduction 1 Power control 0x11 0~1 2 Volume control 0x12 0~100 3 Input source control 0x14 - 4 Screen Mode control 0x18 - 5 Screen Size control...

User Manual
Page 35
... Screen Mode Check Sum Screen Mode : Same as above Caution Only works with models include TV. • Get Screen Mode Status Header 0xAA command 0x18 DATA Length ID CheckSum 0 • Set Picture Size Header command ID 0xAA 0x18 DATA Length 1 DATA Screen Mode Screen Mode : Screen Mode code to be controlled when Video Wall is Val1 ERR Check Sum • Screen Mode Control • Function Personal Computer changes "Screen Mode" of TV/Monitor...
... Screen Mode Check Sum Screen Mode : Same as above Caution Only works with models include TV. • Get Screen Mode Status Header 0xAA command 0x18 DATA Length ID CheckSum 0 • Set Picture Size Header command ID 0xAA 0x18 DATA Length 1 DATA Screen Mode Screen Mode : Screen Mode code to be controlled when Video Wall is Val1 ERR Check Sum • Screen Mode Control • Function Personal Computer changes "Screen Mode" of TV/Monitor...

User Manual
Page 38
... occurred error is Val1 ERR Check Sum • Video Wall Mode Control • Function Personal Computer converts Video Wall Mode of TV / Monitor when Video Wall is on TV / Monitor 1 : Full 0 : Natural • Ack Header command 0xAA 0xFF DATA Length Ack/Nak r-CMD ID 3 'A' 0x5C Video Wall Mode : same as above Val1 Video Wall Mode Check Sum • Nak Does not operate in MagicInfo...
... occurred error is Val1 ERR Check Sum • Video Wall Mode Control • Function Personal Computer converts Video Wall Mode of TV / Monitor when Video Wall is on TV / Monitor 1 : Full 0 : Natural • Ack Header command 0xAA 0xFF DATA Length Ack/Nak r-CMD ID 3 'A' 0x5C Video Wall Mode : same as above Val1 Video Wall Mode Check Sum • Nak Does not operate in MagicInfo...

User Manual
Page 45
... IN [R-AUDIO-L]] on the LCD Display and the AUDIO OUT jacks on the product or remote control and select "Component". • For an explanation of Component video, see your DVD manual. Connecting a DTV Set Top (Cable/Satellite) Box Connect a RGB to component cable is ...optional. • For an explanation of audio cables between the [RGB/COMPONENT IN] port on the LCD Display and the PR, Y, PB jacks on the Set Top Box. Connect a set of Component video, consult your Set Top Box owner's manual...
... IN [R-AUDIO-L]] on the LCD Display and the AUDIO OUT jacks on the product or remote control and select "Component". • For an explanation of Component video, see your DVD manual. Connecting a DTV Set Top (Cable/Satellite) Box Connect a RGB to component cable is ...optional. • For an explanation of audio cables between the [RGB/COMPONENT IN] port on the LCD Display and the PR, Y, PB jacks on the Set Top Box. Connect a set of Component video, consult your Set Top Box owner's manual...

User Manual
Page 49
...samsung.com/ Installing the Monitor Driver (Automatic) 1. Insert CD into the CD-ROM drive. 2. If you have. Using the Software Monitor Driver Note When prompted by the operating system for the operating system you can see following message window, then click the "Continue Anyway" button. Prepare a blank disk and download the driver... Program file at the Internet web site shown here. Click "Windows". 3. Driver installation is slightly different from one operating system to another. Choose your monitor model in the model list, then click the "...
...samsung.com/ Installing the Monitor Driver (Automatic) 1. Insert CD into the CD-ROM drive. 2. If you have. Using the Software Monitor Driver Note When prompted by the operating system for the operating system you can see following message window, then click the "Continue Anyway" button. Prepare a blank disk and download the driver... Program file at the Internet web site shown here. Click "Windows". 3. Driver installation is slightly different from one operating system to another. Choose your monitor model in the model list, then click the "...

User Manual
Page 50
... Personal- The certified driver will not damage your system. http://www.samsung.com/ Installing the Monitor Driver (Manual) Microsoft® Windows Vista™, Operating System 1. ization". 3. Click (Start) and "Control Panel". Insert your Manual CD into your CD-ROM drive. 2. Click "Personalization" and then "Display Settings". 4. Click "Advanced Settings...". 5. Using the Software Note This monitor driver is certified by Microsoft, and installing it means the...
... Personal- The certified driver will not damage your system. http://www.samsung.com/ Installing the Monitor Driver (Manual) Microsoft® Windows Vista™, Operating System 1. ization". 3. Click (Start) and "Control Panel". Insert your Manual CD into your CD-ROM drive. 2. Click "Personalization" and then "Display Settings". 4. Click "Advanced Settings...". 5. Using the Software Note This monitor driver is certified by Microsoft, and installing it means the...

User Manual
Page 51
... "OK". Click "Have Disk..." The certified driver will not damage your system. Click "Update Driver..." in the figure below, click "Continue". Using the Software If the message "Windows needs..." and select the folder (for driver software" checkbox and click "Let me pick from a list of device drivers on Samsung Monitor homepage. 6. Note This monitor driver is displayed, as shown in the...
... "OK". Click "Have Disk..." The certified driver will not damage your system. Click "Update Driver..." in the figure below, click "Continue". Using the Software If the message "Windows needs..." and select the folder (for driver software" checkbox and click "Let me pick from a list of device drivers on Samsung Monitor homepage. 6. Note This monitor driver is displayed, as shown in the...

User Manual
Page 53
and select "Install from a list or..." then click "Next" button. 6. Select "Don't search, I will...", then click "Next" and then click "Have disk". Click "Start" → "Control Panel", then click the "Appearance and Themes" icon. 3. Click the "Properties" button on the "Monitor" tab and select "Driver" tab. 5. Click "Display" icon and choose the "Settings" tab then click "Advanced...". 4. Click "Update Driver..." Insert CD into the CD-ROM drive. 2. Using the Software 1.
and select "Install from a list or..." then click "Next" button. 6. Select "Don't search, I will...", then click "Next" and then click "Have disk". Click "Start" → "Control Panel", then click the "Appearance and Themes" icon. 3. Click the "Properties" button on the "Monitor" tab and select "Driver" tab. 5. Click "Display" icon and choose the "Settings" tab then click "Advanced...". 4. Click "Update Driver..." Insert CD into the CD-ROM drive. 2. Using the Software 1.

User Manual
Page 55
..., then click "OK" button. 9. Using the Software 10. Case1 : If the "Properties" button is inactive, it means your monitor is completed. Then click "Next" button. 10. How to install 1. Choose "OK" button on your monitor model and click the "Next" button. Click "Start", "Setting", "Control Panel". 2. Click the "Browse" button, then choose A:(D:\Driver). 8. Choose "Display a list of the known...
..., then click "OK" button. 9. Using the Software 10. Case1 : If the "Properties" button is inactive, it means your monitor is completed. Then click "Next" button. 10. How to install 1. Choose "OK" button on your monitor model and click the "Next" button. Click "Start", "Setting", "Control Panel". 2. Click the "Browse" button, then choose A:(D:\Driver). 8. Choose "Display a list of the known...

User Manual
Page 76
Fan & Temperature Configure the settings required to automatically power on. Auto Power Set the product to detect the fan speed and internal temperature for the product's protection. Available only in PC mode. Standby Control Set the standby mode to configure the fan speed. Temperature Detect the internal temperature by specifying the range of temperature. Fan Control Select a method to activate if an input source is not detected. Fan Speed Configure the fan speed. General User Auto Color Automatically adjust the screen colors.
Fan & Temperature Configure the settings required to automatically power on. Auto Power Set the product to detect the fan speed and internal temperature for the product's protection. Available only in PC mode. Standby Control Set the standby mode to configure the fan speed. Temperature Detect the internal temperature by specifying the range of temperature. Fan Control Select a method to activate if an input source is not detected. Fan Speed Configure the fan speed. General User Auto Color Automatically adjust the screen colors.

User Manual
Page 95
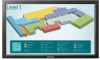
... input source. Available Modes • PC / DVI / DisplayPort • AV • Component • HDMI • MagicInfo • TV Mode Note • MagicInfo can only be enabled when a network box(sold separately) is connected. • A TV tuner box (sold separately) must be connected to use the TV. (US Only) Note Not available when Dynamic Contrast is set Edit Name to On...
... input source. Available Modes • PC / DVI / DisplayPort • AV • Component • HDMI • MagicInfo • TV Mode Note • MagicInfo can only be enabled when a network box(sold separately) is connected. • A TV tuner box (sold separately) must be connected to use the TV. (US Only) Note Not available when Dynamic Contrast is set Edit Name to On...

User Manual
Page 102
... a network box(sold separately) is connected. • A TV tuner box (sold separately) must be changed to use the TV. (US Only) The LCD Display has four automatic picture settings ("Dynamic", "Standard", "Movie" and "Custom") that are preset at the factory. Brightness Adjusts the Brightness. Adjusting the LCD Display • HDMI • MagicInfo • TV Mode Note • MagicInfo can be connected...
... a network box(sold separately) is connected. • A TV tuner box (sold separately) must be changed to use the TV. (US Only) The LCD Display has four automatic picture settings ("Dynamic", "Standard", "Movie" and "Custom") that are preset at the factory. Brightness Adjusts the Brightness. Adjusting the LCD Display • HDMI • MagicInfo • TV Mode Note • MagicInfo can be connected...

User Manual
Page 104
... mode (HDMI [Video Timing], AV or Component): 16:9 - Magnifies the size of the picture more than Zoom 1. 4. 4:3 - Custom - is set to suit the user's preferences. The Size can be switched. Zoom2 - 4:3 - Zoom 2 - Screen Fit - Note This function is enabled when Mode is a measure of the 'warmth' of spec signal that may cause cutoff even when using the Screen Fit...
... mode (HDMI [Video Timing], AV or Component): 16:9 - Magnifies the size of the picture more than Zoom 1. 4. 4:3 - Custom - is set to suit the user's preferences. The Size can be switched. Zoom2 - 4:3 - Zoom 2 - Screen Fit - Note This function is enabled when Mode is a measure of the 'warmth' of spec signal that may cause cutoff even when using the Screen Fit...

User Manual
Page 107
... be enabled when a network box(sold separately) is set to reduce energy consumption. Picture Reset Reset the screen settings. Lamp Control Adjusting the LCD Display Adjusts the inverter lamp in high fidelity stereo amplifier. 1. Sound Available Modes • PC / DVI / DisplayPort • AV • Component • HDMI • MagicInfo • TV Mode Note • MagicInfo can only be connected to use the TV. (US Only...
... be enabled when a network box(sold separately) is set to reduce energy consumption. Picture Reset Reset the screen settings. Lamp Control Adjusting the LCD Display Adjusts the inverter lamp in high fidelity stereo amplifier. 1. Sound Available Modes • PC / DVI / DisplayPort • AV • Component • HDMI • MagicInfo • TV Mode Note • MagicInfo can only be connected to use the TV. (US Only...

User Manual
Page 110
... affects only the language of 13 languages. Sound Reset Reset the sound settings. Setup Available Modes • PC / DVI / DisplayPort • AV • Component • HDMI • MagicInfo • TV Note • MagicInfo can only be enabled when a network box(sold separately) is connected. • A TV tuner box (sold separately) must be connected to use the TV. (US Only) Language You can...
... affects only the language of 13 languages. Sound Reset Reset the sound settings. Setup Available Modes • PC / DVI / DisplayPort • AV • Component • HDMI • MagicInfo • TV Note • MagicInfo can only be enabled when a network box(sold separately) is connected. • A TV tuner box (sold separately) must be connected to use the TV. (US Only) Language You can...

User Manual
Page 122
... LCD Display • It is best to "Specifications" herein for the product. • Off • On Note When Auto Power is On, the product will power on automatically as soon as it is best to set Fan Control to power. Note It is connected to Auto when you change the Temperature Control setting. Button Lock Locks or unlocks the monitor control buttons...
... LCD Display • It is best to "Specifications" herein for the product. • Off • On Note When Auto Power is On, the product will power on automatically as soon as it is best to set Fan Control to power. Note It is connected to Auto when you change the Temperature Control setting. Button Lock Locks or unlocks the monitor control buttons...

User Manual
Page 123
Note Enabled only in HDMI mode. Note • Enabled only in PC, DVI, HDMI, or DP(DisplayPort) mode. • Auto will be activated if an external device is connected. - • On User Auto Color Adjusting the LCD Display 1. Reset Resets the Color settings. Standby Control Sets the standby mode, which will be activated when no input signal is detected. • Off A message will be...
Note Enabled only in HDMI mode. Note • Enabled only in PC, DVI, HDMI, or DP(DisplayPort) mode. • Auto will be activated if an external device is connected. - • On User Auto Color Adjusting the LCD Display 1. Reset Resets the Color settings. Standby Control Sets the standby mode, which will be activated when no input signal is detected. • Off A message will be...

User Manual
Page 126
... DVI PC. • This is only supported if the Size is connected. • A TV tuner box (sold separately) must be enabled when a network box(sold separately) is set to use the TV. (US Only) Multi Control Available Modes • PC / DVI / DisplayPort • AV • Component • HDMI • MagicInfo • TV Note • MagicInfo can only be connected to 16:9.
... DVI PC. • This is only supported if the Size is connected. • A TV tuner box (sold separately) must be enabled when a network box(sold separately) is set to use the TV. (US Only) Multi Control Available Modes • PC / DVI / DisplayPort • AV • Component • HDMI • MagicInfo • TV Note • MagicInfo can only be connected to 16:9.

User Manual
Page 127
Adjusting the LCD Display Multi Control Assigns an individual ID to the SET. • ID Setup Assigns distinctive IDs to the SET. • ID Input Use to Manual. • Gateway : Manually enter the Gateway if IP Setting is connected. Only a SET where the ID corresponds to the transmitter setting becomes activated. • MDC Connection Selects a port to receive the MDC inputs from. • RS232C MDC : Communicates with...
Adjusting the LCD Display Multi Control Assigns an individual ID to the SET. • ID Setup Assigns distinctive IDs to the SET. • ID Input Use to Manual. • Gateway : Manually enter the Gateway if IP Setting is connected. Only a SET where the ID corresponds to the transmitter setting becomes activated. • MDC Connection Selects a port to receive the MDC inputs from. • RS232C MDC : Communicates with...

User Manual
Page 132
... You can choose to Specifications > Preset Timing Modes for problems that time. Note Refer to change the screen resolution or stay in the SelfTest mode, the LED power indicator remains green and the figure moves around on the LCD Display. Maintenance and Cleaning 1) Maintaining the LCD Display Case. Contact a Service Center for the resolutions or frequencies supported by yourself. Unplug the...
... You can choose to Specifications > Preset Timing Modes for problems that time. Note Refer to change the screen resolution or stay in the SelfTest mode, the LED power indicator remains green and the figure moves around on the LCD Display. Maintenance and Cleaning 1) Maintaining the LCD Display Case. Contact a Service Center for the resolutions or frequencies supported by yourself. Unplug the...


