

User Manual (ENGLISH)
Page 12
... (RS232C Serial PORT) MDC(Multiple Display Control) Program Port DVI / PC / HDMI IN [DVI/PC/HDMI AUDIO IN] (PC/DVI/HDMI Audio Connection Terminal (Input)) DVI / PC / HDMI IN [HDMI] Connect the HDMI terminal at the back of your LCD Display to the HDMI terminal of your digital output device using a HDMI cable. POWER IN The power cord plugs into the LCD Display and the wall plug. DVI / PC / HDMI IN...
... (RS232C Serial PORT) MDC(Multiple Display Control) Program Port DVI / PC / HDMI IN [DVI/PC/HDMI AUDIO IN] (PC/DVI/HDMI Audio Connection Terminal (Input)) DVI / PC / HDMI IN [HDMI] Connect the HDMI terminal at the back of your LCD Display to the HDMI terminal of your digital output device using a HDMI cable. POWER IN The power cord plugs into the LCD Display and the wall plug. DVI / PC / HDMI IN...

User Manual (ENGLISH)
Page 16
...information services via teletext. - Changing the SOURCE is displayed on both the remote control and the LCD Display except for external devices that are connected to the monitor at the bottom centre of the screen. TV/DTV 8. INFO 11.COLOR BUTTONS 12. Selects the TV and DTV mode ...Custom ) MDC Quick Launch Button. DTV menu display Electronic Program Guide (EPG) display. TTX/MIX Introduction Adjusts the audio volume. The audio resumes if MUTE or - Teletext Buttons 13.STILL 14.AUTO 15. The LCD Display has a built-in PC mode. This is only allowed for the Power and ...
...information services via teletext. - Changing the SOURCE is displayed on both the remote control and the LCD Display except for external devices that are connected to the monitor at the bottom centre of the screen. TV/DTV 8. INFO 11.COLOR BUTTONS 12. Selects the TV and DTV mode ...Custom ) MDC Quick Launch Button. DTV menu display Electronic Program Guide (EPG) display. TTX/MIX Introduction Adjusts the audio volume. The audio resumes if MUTE or - Teletext Buttons 13.STILL 14.AUTO 15. The LCD Display has a built-in PC mode. This is only allowed for the Power and ...

User Manual (ENGLISH)
Page 30
... a local SAMSUNG Electronics Service Center to buy optional items. Connecting to Other devices Using a Power cord with a DVD disc or tape inserted. 3. When un-wiring the earth lead, make sure to disconnect the AC power in correctly, before connecting the AC power. Note The LCD Display has AV connection terminals to the contents under Adjusting Your LCD Display. Select AV using the...
... a local SAMSUNG Electronics Service Center to buy optional items. Connecting to Other devices Using a Power cord with a DVD disc or tape inserted. 3. When un-wiring the earth lead, make sure to disconnect the AC power in correctly, before connecting the AC power. Note The LCD Display has AV connection terminals to the contents under Adjusting Your LCD Display. Select AV using the...

User Manual (ENGLISH)
Page 34
... site shown here. Follow the directions appropriate for the monitor driver, insert the CDROM included with this monitor. Internet web site : http://www.samsung.com/ (Worldwide) Installing the Monitor Driver (Automatic) 1. If you have. Choose your monitor model in the model list, then click the "OK" button. 4. Click "Windows". 3. Using the Software Monitor Driver Note When prompted by the operating system for the...
... site shown here. Follow the directions appropriate for the monitor driver, insert the CDROM included with this monitor. Internet web site : http://www.samsung.com/ (Worldwide) Installing the Monitor Driver (Automatic) 1. If you have. Choose your monitor model in the model list, then click the "OK" button. 4. Click "Windows". 3. Using the Software Monitor Driver Note When prompted by the operating system for the...

User Manual (ENGLISH)
Page 35
... be used as is completed. Then, double-click on Samsung Monitor homepage. Click "Personalization" and then "Display Settings". 4. Click (Start) and "Control Panel". Insert your Manual CD into your system. Click "Advanced Settings...". 5. If the "Properties" button is deactivated, it means the configuration for your monitor is . The monitor can be posted on "Appearance and Personal- http://www.samsung.com/ Installing the Monitor Driver (Manual...
... be used as is completed. Then, double-click on Samsung Monitor homepage. Click "Personalization" and then "Display Settings". 4. Click (Start) and "Control Panel". Insert your Manual CD into your system. Click "Advanced Settings...". 5. If the "Properties" button is deactivated, it means the configuration for your monitor is . The monitor can be posted on "Appearance and Personal- http://www.samsung.com/ Installing the Monitor Driver (Manual...

User Manual (ENGLISH)
Page 36
... "Continue". Check the "Browse my computer for example, D:\Drive) where the driver setup file is located, and click "OK". Click "Have Disk..." Click "Update Driver..." is under certifying MS logo, and this installation doesn't damage your system. and select the folder (for driver software" checkbox and click "Let me pick from a list of device drivers on Samsung Monitor homepage. 6.
... "Continue". Check the "Browse my computer for example, D:\Drive) where the driver setup file is located, and click "OK". Click "Have Disk..." Click "Update Driver..." is under certifying MS logo, and this installation doesn't damage your system. and select the folder (for driver software" checkbox and click "Let me pick from a list of device drivers on Samsung Monitor homepage. 6.

User Manual (ENGLISH)
Page 38
Click "Display" icon and choose the "Settings" tab then click "Advanced...". 4. Select "Don't search, I will..." Using the Software 1. and select "Install from a list or..." Insert CD into the CD-ROM drive. 2. Click the "Properties" button on the "Monitor" tab and select "Driver" tab. 5. Click "Start" → "Control Panel" then click the "Appearance and Themes" icon. 3. Click "Update Driver..." then click "Next" button. 6. then click "Next" and then click "Have disk".
Click "Display" icon and choose the "Settings" tab then click "Advanced...". 4. Select "Don't search, I will..." Using the Software 1. and select "Install from a list or..." Insert CD into the CD-ROM drive. 2. Click the "Properties" button on the "Monitor" tab and select "Driver" tab. 5. Click "Start" → "Control Panel" then click the "Appearance and Themes" icon. 3. Click "Update Driver..." then click "Next" button. 6. then click "Next" and then click "Have disk".

User Manual (ENGLISH)
Page 40
... then click on your monitor model and click the "Next" button then click "Next" button. 10. Click "Start", "Setting", "Control Panel". 2. Select the "Settings" tab and click "Advanced Properties" button. Using the Software 10. Monitor driver installation is properly configured. Microsoft® Windows® 2000 Operating System When you can see "Digital Signature Not Found" on "Update Driver..." Click the "Browse...
... then click on your monitor model and click the "Next" button then click "Next" button. 10. Click "Start", "Setting", "Control Panel". 2. Select the "Settings" tab and click "Advanced Properties" button. Using the Software 10. Monitor driver installation is properly configured. Microsoft® Windows® 2000 Operating System When you can see "Digital Signature Not Found" on "Update Driver..." Click the "Browse...

User Manual (ENGLISH)
Page 42
...-screens display", user may select the monitor related to acknowledge the mounted-touchscreen. Execute X-Window after the select-dialog box pops up your monitor. Using the Software 10. IRTOUCH IRTouch Screen Control Panel Double click the mark on the center of touchscreen and continue automatically the next one; The control panel provides adjustment and configuration with USB and IR touchscreen of serial...
...-screens display", user may select the monitor related to acknowledge the mounted-touchscreen. Execute X-Window after the select-dialog box pops up your monitor. Using the Software 10. IRTOUCH IRTouch Screen Control Panel Double click the mark on the center of touchscreen and continue automatically the next one; The control panel provides adjustment and configuration with USB and IR touchscreen of serial...

User Manual (ENGLISH)
Page 45
... use the touchscreen. Instructions see Attachment : Setting of Mouse Double Click. "Serial Port Settings". The "area" is for either fast or slow. The "Double Click Settings" property can be utilized in strong light, rain and snow condition. Doubleclick should be set selectively. The higher the value (unit: pixel), the wider the effective area. 9. So the function of error...
... use the touchscreen. Instructions see Attachment : Setting of Mouse Double Click. "Serial Port Settings". The "area" is for either fast or slow. The "Double Click Settings" property can be utilized in strong light, rain and snow condition. Doubleclick should be set selectively. The higher the value (unit: pixel), the wider the effective area. 9. So the function of error...

User Manual (ENGLISH)
Page 56
... MagicInfo model. Time 1. The Input source of the selected display randomly. The Image Size Control feature is available only for the displays whose power status is set to adjust Image Size for TV, AV, and S-Video.) 4) The screen modes can only be adjusted when a TV (PAL only) is connected and the Image Size item is ON. Click Select All or use...
... MagicInfo model. Time 1. The Input source of the selected display randomly. The Image Size Control feature is available only for the displays whose power status is set to adjust Image Size for TV, AV, and S-Video.) 4) The screen modes can only be adjusted when a TV (PAL only) is connected and the Image Size item is ON. Click Select All or use...

User Manual (ENGLISH)
Page 60
... to "CUSTOM." 1) Picture - Settings Picture PC When each function is displayed in this screen will automatically change the mode to Settings Control. Adjusts the Brightness Sensor for the selected display. The Input source of the selected display. 4) Sharpness - Adjusts Brightness of TV works only on the slide bar. Available only for TV, AV, S-Video, Component, HDMI, DTV. 2) Contrast - Changing...
... to "CUSTOM." 1) Picture - Settings Picture PC When each function is displayed in this screen will automatically change the mode to Settings Control. Adjusts the Brightness Sensor for the selected display. The Input source of the selected display. 4) Sharpness - Adjusts Brightness of TV works only on the slide bar. Available only for TV, AV, S-Video, Component, HDMI, DTV. 2) Contrast - Changing...

User Manual (ENGLISH)
Page 61
... Color Tone is displayed in this screen will automatically change the mode to Settings Control. This feature is available only for the selected display. When selected, each function is selected, the set value of TV works only on the slide bar. The Input source of the selected function is set and displays it on TV model. 1. Click Settings of the selected...
... Color Tone is displayed in this screen will automatically change the mode to Settings Control. This feature is available only for the selected display. When selected, each function is selected, the set value of TV works only on the slide bar. The Input source of the selected function is set and displays it on TV model. 1. Click Settings of the selected...

User Manual (ENGLISH)
Page 67
... turn off the remote Function, disconnect the RS-232C cable, or exit the program in Power Control Info Grid) - Check the displays to data conflict. - Settings Value Display In Multiple Display Mode When there are more than one displays have been set but different time is a number between 0 and 25 . 2. Check if the Display Set ID is showing. - If more than one displays connected, the settings...
... turn off the remote Function, disconnect the RS-232C cable, or exit the program in Power Control Info Grid) - Check the displays to data conflict. - Settings Value Display In Multiple Display Mode When there are more than one displays have been set but different time is a number between 0 and 25 . 2. Check if the Display Set ID is showing. - If more than one displays connected, the settings...

User Manual (ENGLISH)
Page 69
...; , → ENTER MagicBright is installed. HDMI Picture [PC / DVI / MagicInfo Mode] Available Modes • PC / DVI • AV • HDMI • MagicInfo Note The TV menu is available when a TV tuner box is a feature providing the optimum viewing environment depending on the contents of the four settings by simply pressing the MagicBright control button. Each mode has its own pre...
...; , → ENTER MagicBright is installed. HDMI Picture [PC / DVI / MagicInfo Mode] Available Modes • PC / DVI • AV • HDMI • MagicInfo Note The TV menu is available when a TV tuner box is a feature providing the optimum viewing environment depending on the contents of the four settings by simply pressing the MagicBright control button. Each mode has its own pre...

User Manual (ENGLISH)
Page 91
... each mode set in the timer. Scroll 2. Bar 3. Eraser Period MENU ENTER → [Setup ENTER → [Safety Screen] → → ENTER → [Timer ENTER → [Period] → , → ENTER Use this function to erase any residual image, the operation will be performed for the set the execution period for Screen Burn Protection. Off 2. Adjusting the LCD Display You...
... each mode set in the timer. Scroll 2. Bar 3. Eraser Period MENU ENTER → [Setup ENTER → [Safety Screen] → → ENTER → [Timer ENTER → [Period] → , → ENTER Use this function to erase any residual image, the operation will be performed for the set the execution period for Screen Burn Protection. Off 2. Adjusting the LCD Display You...

User Manual (ENGLISH)
Page 109
... Messages You can choose to Specifications > Preset Timing Modes for the resolutions or frequencies supported by yourself. Note Refer to change the screen resolution or stay in the Self-Test mode, the LED power indicator remains green and the figure moves around on the screen. 4. Contact a Service Center for problems that time. then turn on the LCD Display. However, you will see...
... Messages You can choose to Specifications > Preset Timing Modes for the resolutions or frequencies supported by yourself. Note Refer to change the screen resolution or stay in the Self-Test mode, the LED power indicator remains green and the figure moves around on the screen. 4. Contact a Service Center for problems that time. then turn on the LCD Display. However, you will see...

User Manual (ENGLISH)
Page 121
... big difference in luminance. - Apply the Screen Scroll function on instruction guide. Select method • Instruction Guide : OSD Menu -> Set Up -> Safety Screen -> Screen Scroll • Time Interval : 1 ~ 10 hours ( Recommend : 1 ) • Time Period : 1 ~ 5 second ( Recommend : 5 ) ference in use. • The best way to protect your monitor from Image retention is to turn Power off, or set your PC, or System to operate...
... big difference in luminance. - Apply the Screen Scroll function on instruction guide. Select method • Instruction Guide : OSD Menu -> Set Up -> Safety Screen -> Screen Scroll • Time Interval : 1 ~ 10 hours ( Recommend : 1 ) • Time Period : 1 ~ 5 second ( Recommend : 5 ) ference in use. • The best way to protect your monitor from Image retention is to turn Power off, or set your PC, or System to operate...

User Manual (ENGLISH)
Page 122
... ~ 50 second ( Recommend : 50 ) Note ( Please check CD's User Guide at "OSD Function", some model's will not available ) Apply the Screen Pixel function on Product • Apply the Screen Erasing function - Symptom: Dot with Black Color move up and down . - Select method • Instruction Guide : OSD Menu -> Set Up -> Safety Screen -> Pixel • Time Interval : 1 ~ 10 hours ( Recommend : 1 ) •...
... ~ 50 second ( Recommend : 50 ) Note ( Please check CD's User Guide at "OSD Function", some model's will not available ) Apply the Screen Pixel function on Product • Apply the Screen Erasing function - Symptom: Dot with Black Color move up and down . - Select method • Instruction Guide : OSD Menu -> Set Up -> Safety Screen -> Pixel • Time Interval : 1 ~ 10 hours ( Recommend : 1 ) •...
User Manual (ENGLISH)
Page 123
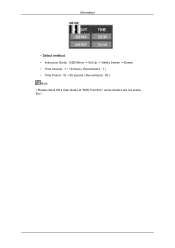
Select method • Instruction Guide : OSD Menu -> Set Up -> Safety Screen -> Eraser • Time Interval : 1 ~ 10 hours ( Recommend : 1 ) • Time Period : 10 ~ 50 second ( Recommend : 50 ) Note ( Please check CD's User Guide at "OSD Function", some model's will not available ) Information -
Select method • Instruction Guide : OSD Menu -> Set Up -> Safety Screen -> Eraser • Time Interval : 1 ~ 10 hours ( Recommend : 1 ) • Time Period : 10 ~ 50 second ( Recommend : 50 ) Note ( Please check CD's User Guide at "OSD Function", some model's will not available ) Information -


