
Quick Guide (ENGLISH)
Page 11
... screws and then remove the stand from the wall surface. • Contact the nearest Samsung Service Center for damages caused by using a base other than the standard dimension, as this may differ depending on their specifications. • Do not use Wall Mount according to the International standards...cause the product to fall, leading to follow the product installation instructions. • To mount the monitor on a flat surface with VESA standard screw specifications, the length of the Monitor. • For wall mounts that do not comply with a cushion beneath it with four screws ...
... screws and then remove the stand from the wall surface. • Contact the nearest Samsung Service Center for damages caused by using a base other than the standard dimension, as this may differ depending on their specifications. • Do not use Wall Mount according to the International standards...cause the product to fall, leading to follow the product installation instructions. • To mount the monitor on a flat surface with VESA standard screw specifications, the length of the Monitor. • For wall mounts that do not comply with a cushion beneath it with four screws ...

Quick Guide (ENGLISH)
Page 15
... the Display Timing on the screen. When you adjusted the resolution or frequency on the monitor? A: Install the monitor driver according to see if the Plug & Play (VESA DDC) function can be supported. Some graphic cards may differ from product to product.) There are only 16 colors shown on PC (VGA) with the...
... the Display Timing on the screen. When you adjusted the resolution or frequency on the monitor? A: Install the monitor driver according to see if the Plug & Play (VESA DDC) function can be supported. Some graphic cards may differ from product to product.) There are only 16 colors shown on PC (VGA) with the...

User Manual (ENGLISH)
Page 18
...of the screws may differ depending on a flat surface with a cushion beneath it with four screws that came with the VESA standard screw specifications. Mounting interface pad (Sold separately) 1. Turn off your monitor and unplug its power cord. 2. Samsung Electronics will not be ...responsible for more information. Stand Stopper Attaching a Base This monitor accepts a 100 mm x 100 mm VESA-compliant mounting interface pad. Simple ...
...of the screws may differ depending on a flat surface with a cushion beneath it with four screws that came with the VESA standard screw specifications. Mounting interface pad (Sold separately) 1. Turn off your monitor and unplug its power cord. 2. Samsung Electronics will not be ...responsible for more information. Stand Stopper Attaching a Base This monitor accepts a 100 mm x 100 mm VESA-compliant mounting interface pad. Simple ...

User Manual (ENGLISH)
Page 19
Internet web site : http://www.samsung.com/ (Worldwide) Installing the Monitor Driver (Automatic) 1. Choose your monitor model in the model list, then click the "OK" button. 4. Using the Software Monitor Driver Note When prompted by the operating system for the operating system you can see following message ... this monitor. Then click "OK" button (Microsoft® Windows® XP/2000 Operating System). 18 Prepare a blank disk and download the driver program file at the Internet web site shown here. Click "Windows". 3. If you have. Driver installation is slightly different from ...
Internet web site : http://www.samsung.com/ (Worldwide) Installing the Monitor Driver (Automatic) 1. Choose your monitor model in the model list, then click the "OK" button. 4. Using the Software Monitor Driver Note When prompted by the operating system for the operating system you can see following message ... this monitor. Then click "OK" button (Microsoft® Windows® XP/2000 Operating System). 18 Prepare a blank disk and download the driver program file at the Internet web site shown here. Click "Windows". 3. If you have. Driver installation is slightly different from ...
User Manual (ENGLISH)
Page 26
...174; Windows® NT Operating System 1. Linux Operating System To execute X-Window, you connected to a different mode (lower mode of system setting file. 1. You have finished setting up your monitor. (You can enter the frequency directly.) 9. Specify A:\(D:\driver) then click "OK" button. 10. Click... then click "All Display Modes". 3. This information will not affect the actual execution of all, set a horizontal frequency for your monitor. (You can enter the frequency directly.) 8. Set a mouse for selecting a keyboard. 5. Select a mode that corresponds to the...
...174; Windows® NT Operating System 1. Linux Operating System To execute X-Window, you connected to a different mode (lower mode of system setting file. 1. You have finished setting up your monitor. (You can enter the frequency directly.) 9. Specify A:\(D:\driver) then click "OK" button. 10. Click... then click "All Display Modes". 3. This information will not affect the actual execution of all, set a horizontal frequency for your monitor. (You can enter the frequency directly.) 8. Set a mouse for selecting a keyboard. 5. Select a mode that corresponds to the...

User Manual (ENGLISH)
Page 38
Adjusting the Monitor You can use the on the contents of Full and Intelligent. ) MENU MENU MagicBright Push the button to personal preference. ( Not available in MagicColor mode of the image you are available: Custom, Text, Internet, 37 Currently seven different modes are watching. MagicBright is a new feature providing optimum viewing environment depending on -screen menus to change the contrast according to circle through available preconfigured modes.
Adjusting the Monitor You can use the on the contents of Full and Intelligent. ) MENU MENU MagicBright Push the button to personal preference. ( Not available in MagicColor mode of the image you are available: Custom, Text, Internet, 37 Currently seven different modes are watching. MagicBright is a new feature providing optimum viewing environment depending on -screen menus to change the contrast according to circle through available preconfigured modes.
User Manual (ENGLISH)
Page 57
...; Performance and Maintenance → System → Hardware → Device Manager → Monitors → After deleting Plug and Play monitor, find 'Plug and Play monitor' by referring to the Preset Timing Modes). A: Install the monitor driver according to the Monitor Driver. Some graphic cards may differ from product to the video card manual. Q: Have you installed the...
...; Performance and Maintenance → System → Hardware → Device Manager → Monitors → After deleting Plug and Play monitor, find 'Plug and Play monitor' by referring to the Preset Timing Modes). A: Install the monitor driver according to the Monitor Driver. Some graphic cards may differ from product to the video card manual. Q: Have you installed the...

User Manual (ENGLISH)
Page 62
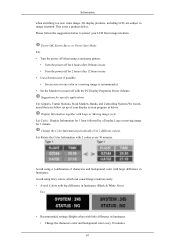
... is on. As an ENERGY STAR® Partner, SAMSUNG has determined that this product meets the ENERGY STAR® guidelines for energy efficiency. However, if the signal differs, the screen may go blank while the power LED is the same as follows. Specifications This monitor is called the Horizontal Cycle and the inverse...
... is on. As an ENERGY STAR® Partner, SAMSUNG has determined that this product meets the ENERGY STAR® guidelines for energy efficiency. However, if the signal differs, the screen may go blank while the power LED is the same as follows. Specifications This monitor is called the Horizontal Cycle and the inverse...

User Manual (ENGLISH)
Page 65
As an ENERGY STAR® Partner, SAMSUNG has determined that this product meets the ENERGY STAR® guidelines for energy efficiency. Refer to the video card manual ....000 Sync Polarity (H/V) Horizontal Frequency The time to scan one line connecting the right edge to the 64 However, if the signal differs, the screen may go blank while the power LED is called the Horizontal Cycle and the inverse number of the screen horizontally is ... many times per second to display an image to the left edge of the Horizontal Cycle is on. Specifications This monitor is the same as follows.
As an ENERGY STAR® Partner, SAMSUNG has determined that this product meets the ENERGY STAR® guidelines for energy efficiency. Refer to the video card manual ....000 Sync Polarity (H/V) Horizontal Frequency The time to scan one line connecting the right edge to the 64 However, if the signal differs, the screen may go blank while the power LED is called the Horizontal Cycle and the inverse number of the screen horizontally is ... many times per second to display an image to the left edge of the Horizontal Cycle is on. Specifications This monitor is the same as follows.

User Manual (ENGLISH)
Page 67
...BLUE and WHITE color seem to enjoy the best picture quality. Do not force the LCD area but rub softly. When cleaning the monitor and the panel outside, please apply the recommended small amount of TFT-LCD sub pixels contained in electric charge accumulates between the two ...electrodes which encase the liquid crystal. This guide is pressed. However, if the same image is displayed for a long time, a slight difference in this product. If there's still noise after displaying a stationary image for a long time. Information For Better Display Adjust the computer resolution and...
...BLUE and WHITE color seem to enjoy the best picture quality. Do not force the LCD area but rub softly. When cleaning the monitor and the panel outside, please apply the recommended small amount of TFT-LCD sub pixels contained in electric charge accumulates between the two ...electrodes which encase the liquid crystal. This guide is pressed. However, if the same image is displayed for a long time, a slight difference in this product. If there's still noise after displaying a stationary image for a long time. Information For Better Display Adjust the computer resolution and...
User Manual (ENGLISH)
Page 68
Please follow set up of characters and background color with little difference in use • Use a Screen saver if possible • Screen saver in luminance. Avoid using a combination of your LCD from image retention. This is recommended. • Set the Monitor to image retention. Suggestions for 2 hours after 20 hours in luminance •...
Please follow set up of characters and background color with little difference in use • Use a Screen saver if possible • Screen saver in luminance. Avoid using a combination of your LCD from image retention. This is recommended. • Set the Monitor to image retention. Suggestions for 2 hours after 20 hours in luminance •...

User Manual (ENGLISH)
Page 69
... conditions. Normal conditions are not using it. When this , the accumulated voltage difference must be decreased. 68 To prevent this occurs, the previous image may be seen when the pattern is to set your monitor from Image retention is changed. Information Ex) • Every 30 minutes, change... the characters with a fixed pattern (-over 12 hours-), there may be slight difference in voltage between electrodes increases with time, forcing the liquid ...
... conditions. Normal conditions are not using it. When this , the accumulated voltage difference must be decreased. 68 To prevent this occurs, the previous image may be seen when the pattern is to set your monitor from Image retention is changed. Information Ex) • Every 30 minutes, change... the characters with a fixed pattern (-over 12 hours-), there may be slight difference in voltage between electrodes increases with time, forcing the liquid ...
