
Operation Manual
Page 2
Consulte esta sección desplegable para ver todas las figuras a las que se hace referencia en el manual del operador. Consulter l'encart à volets afin d'examiner toutes les figures mentionnées dans le manuel d'utilisation. ii See this fold-out section for all of the figures referenced in the operator's manual.
Consulte esta sección desplegable para ver todas las figuras a las que se hace referencia en el manual del operador. Consulter l'encart à volets afin d'examiner toutes les figures mentionnées dans le manuel d'utilisation. ii See this fold-out section for all of the figures referenced in the operator's manual.

Operation Manual
Page 4
.... Always stop the engine or motor and remove the spark plug wire or disconnect from cutting area. Keep hands away from operation. Failure to do so may cause poor performance, possible injury, and will do so can cause serious injury. Use only original manufacturer's replacement parts. Do not use common sense when operating a power tool. Failure to follow all instructions listed below, may result in...
.... Always stop the engine or motor and remove the spark plug wire or disconnect from cutting area. Keep hands away from operation. Failure to do so may cause poor performance, possible injury, and will do so can cause serious injury. Use only original manufacturer's replacement parts. Do not use common sense when operating a power tool. Failure to follow all instructions listed below, may result in...

Operation Manual
Page 5
... use . To avoid accidental starting, never carry the unit with a blade. SAVE THESE INSTRUCTIONS 3 - Always make sure blade is installed correctly and securely fastened before removing and installing the blade. When not in use trimmer without front handles in place. If you loan someone this tool. Keep both hands on both handles while cutting with the engine running. Always stop the engine or motor and remove the spark plug wire...
... use . To avoid accidental starting, never carry the unit with a blade. SAVE THESE INSTRUCTIONS 3 - Always make sure blade is installed correctly and securely fastened before removing and installing the blade. When not in use trimmer without front handles in place. If you loan someone this tool. Keep both hands on both handles while cutting with the engine running. Always stop the engine or motor and remove the spark plug wire...
Operation Manual
Page 6
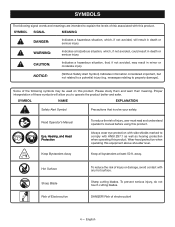
... injury, user must read and understand operator's manual before using this equipment above shoulder level. Wear head protection when operating this product. Hot Surface Sharp Blade Risk of Electrocution To reduce the risk of injury or damage, avoid contact with ANSI Z87.1 as well as hearing protection when operating this product. To prevent serious injury, do not touch cutting blades. DANGER...
... injury, user must read and understand operator's manual before using this equipment above shoulder level. Wear head protection when operating this product. Hot Surface Sharp Blade Risk of Electrocution To reduce the risk of injury or damage, avoid contact with ANSI Z87.1 as well as hearing protection when operating this product. To prevent serious injury, do not touch cutting blades. DANGER...
Operation Manual
Page 7
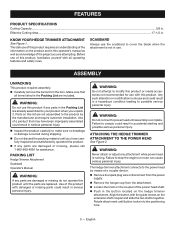
...; Remove the spark plug wire or disconnect from the power supply. Remove the hanger cap from the box. The hedge trimmer attachment connects to power head until button locks into the positioning hole. 5 - The safe use with the guide recess on the product and in the button located on this operator's manual as well as a knowledge of the power head shaft. Push in this list are replaced. ATTACHING THE HEDGE TRIMMER ATTACHMENT TO THE POWER HEAD...
...; Remove the spark plug wire or disconnect from the power supply. Remove the hanger cap from the box. The hedge trimmer attachment connects to power head until button locks into the positioning hole. 5 - The safe use with the guide recess on the product and in the button located on this operator's manual as well as a knowledge of the power head shaft. Push in this list are replaced. ATTACHING THE HEDGE TRIMMER ATTACHMENT TO THE POWER HEAD...
Operation Manual
Page 8
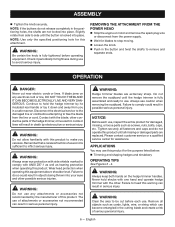
... line or cord. Please contact customer service or a qualified service center for this attachment. Remove all missing or damaged parts are replaced. IT CAN BECOME ELECTRICALLY LIVE AND VERY DANGEROUS. Wear head protection when operating this product for damaged, missing, or loose parts such as screws, nuts, bolts, caps, etc. Continue to avoid serious injury. Contact with the blade, other conductive parts of the hedge trimmer, or live electric cords or lines...
... line or cord. Please contact customer service or a qualified service center for this attachment. Remove all missing or damaged parts are replaced. IT CAN BECOME ELECTRICALLY LIVE AND VERY DANGEROUS. Wear head protection when operating this product for damaged, missing, or loose parts such as screws, nuts, bolts, caps, etc. Continue to avoid serious injury. Contact with the blade, other conductive parts of the hedge trimmer, or live electric cords or lines...
Operation Manual
Page 9
.... Use a non-powered hand saw or pruning saw to trim large stems. If blades do become jammed, stop the engine or motor, remove the spark plug wire or disconnect from the power supply, allow the blades to help cut stems or twigs that are fed directly into contact with the muffler on the power head.Stand so that you are replaced. When trimming new growth, use the hedge trimmer near power lines...
.... Use a non-powered hand saw or pruning saw to trim large stems. If blades do become jammed, stop the engine or motor, remove the spark plug wire or disconnect from the power supply, allow the blades to help cut stems or twigs that are fed directly into contact with the muffler on the power head.Stand so that you are replaced. When trimming new growth, use the hedge trimmer near power lines...

Operation Manual
Page 10
... locks into place. The secondary hole in any excess oil from various types of the top blade. LUBRICATING THE BLADE See Figure 6. Slightly rotate the cap from side to damage from the blade. English MAINTENANCE GENERAL MAINTENANCE Avoid using solvents when cleaning plastic parts. When handling blade assembly, do not place your hand or fingers between blades or in the attachment shaft can be damaged by their use...
... locks into place. The secondary hole in any excess oil from various types of the top blade. LUBRICATING THE BLADE See Figure 6. Slightly rotate the cap from side to damage from the blade. English MAINTENANCE GENERAL MAINTENANCE Avoid using solvents when cleaning plastic parts. When handling blade assembly, do not place your hand or fingers between blades or in the attachment shaft can be damaged by their use...
Parts Diagram
Page 1
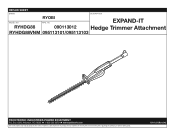
RYOBI MFG. REPAIR SHEET BRAND DESCRIPTION MODEL NO. EXPAND-IT RYHDG88 090113012 Hedge Trimmer Attachment RYHDG88VNM 095113101/095113103 TECHTRONIC INDUSTRIES POWER EQUIPMENT P.O. Box 1288, Anderson, SC 29622 1-800-525-2579 www.ryobitools.com The model number and manufacturing location will be found on a label attached to the product. NO. Always mention this information in all communications regarding this product and when ordering parts. 8-10-21 (Rev:04)
RYOBI MFG. REPAIR SHEET BRAND DESCRIPTION MODEL NO. EXPAND-IT RYHDG88 090113012 Hedge Trimmer Attachment RYHDG88VNM 095113101/095113103 TECHTRONIC INDUSTRIES POWER EQUIPMENT P.O. Box 1288, Anderson, SC 29622 1-800-525-2579 www.ryobitools.com The model number and manufacturing location will be found on a label attached to the product. NO. Always mention this information in all communications regarding this product and when ordering parts. 8-10-21 (Rev:04)

Parts Diagram
Page 3
PART NO. KEY NO. Key No.24) 1 Not Shown: 13 660923001 Screw (M4 x 16 mm) 6 991000569 Operator's Manual 14 523427001 Guard 1 3 DESCRIPTION QTY. 1 310699011 Lower Drive Shaft Assembly (Inc. Key Nos. 2 and 25) 1 15 591617001 Seal 1 2 518019004 Hanger Cap 1 16 678344002 Lock Nut (M4) 6 3 220100007 Output Gear and Pinion Assembly 1 17 660924002 Screw (M4 x 16 mm) 6 4 660927001 Screw (M5 x 10 mm) 1 18 678346001 Spring Washer (M4) 4 5 678343001...
PART NO. KEY NO. Key No.24) 1 Not Shown: 13 660923001 Screw (M4 x 16 mm) 6 991000569 Operator's Manual 14 523427001 Guard 1 3 DESCRIPTION QTY. 1 310699011 Lower Drive Shaft Assembly (Inc. Key Nos. 2 and 25) 1 15 591617001 Seal 1 2 518019004 Hanger Cap 1 16 678344002 Lock Nut (M4) 6 3 220100007 Output Gear and Pinion Assembly 1 17 660924002 Screw (M4 x 16 mm) 6 4 660927001 Screw (M5 x 10 mm) 1 18 678346001 Spring Washer (M4) 4 5 678343001...


