Ryobi P884 Support and Manuals
Get Help and Manuals for this Ryobi item
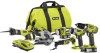
Popular Ryobi P884 Manual Pages
User Manual 2 - Page 4

... 43 304522001 44 6797329 45 523287001 46 301124016 47 305006001 48 9030308
PARTS LIST
DESCRIPTION
QTY
Screw (M2.6 x 10 mm 4
Inner Blade Washer 1
Outer Blade Washer 1
Screw (M6 x 16 mm, Hex Soc.
RYOBI 5-1/2 in. (140 mm) CIRCULAR SAW - MODEL NUMBER P506
The model number will be found on a label attached to the motor housing. Key...
User Manual 2 - Page 2

MODEL NUMBER P514
9
12
11
11
39 14
14 15 26 27 24 23
87
6 5
16
4 32 1
15
17
14
25
18
19 21 14 40
20
28
29
32 33
30
31
34
35
1
37
41
38
36
10
13
22
42
2 RYOBI 18.0 VOLT CORDLESS RECIPROCATING SAW -
User Manual 2 - Page 3

... 2 Shoe Assembly 1 Wood Cutting Blade 1 Metal Cutting Blade 1 Sliding Rod Assembly w/Quick Release 1 Screw (M10 x 10 mm, Hex Soc. RYOBI 18.0 VOLT CORDLESS RECIPROCATING SAW - MODEL NUMBER P514
The model number will be found on a label attached to the motor housing. Always mention the model number in all correspondence regarding your RECIPROCATING SAW or when ordering repair parts.
User Manual 2 - Page 4

RYOBI 18.0 VOLT CORDLESS RECIPROCATING SAW - MODEL NUMBER P514
RED BLACK
RED
BLACK YELLOW
BLACK
BLUE
RED
WIRING DIAGRAM
4
BLACK
Operation Manual 1 - Page 2

...
prevent misuse of electric shock or fire.
Unplug charger from the power supply when not in a risk of the product and possible injury. SAVE THESE INSTRUCTIONS - This manual contains important safety and operating instructions for electrical check to comply with plastic parts. Do not pull the charger cord rather than 100°F. They contain chemicals...
Operation Manual 1 - Page 4

... any parts appear to be sure contacts on the sides of battery pack.
Make sure the power supply is normal household voltage, 120 volts, AC only, 60 Hz.
Connect the charger to a power supply.
Attach the battery pack to comply with contacts in a well-ventilated area.
Return the charger and battery to your nearest service center...
Operation Manual 1 - Page 5

... and reinstalling the battery pack. Hot or cold battery pack
Fading
Off
The battery pack is complete; If the LED Error status repeats a second time, try charging a different battery.
• If a different battery charges normally, dispose of the pack that received the Error (see your battery pack manual for instructions). • If a different battery also indicates Error, the charger...
Operation Manual - Page 3

... reduce the risk of possible hazards when not using your power tool serviced by a qualified repair person using only identical replacement parts. Refer to them frequently and use them to be performed. This will reduce the risk of serious personal injury.
Battery tools do not have to instruct others who may make a connection from those intended could give...
Operation Manual 1 - Page 2
... collection can be repaired. Keep your finger on the switch or energising power tools that may affect the power tool's operation.
Use of a GFCI reduces the risk of the power tool may result in tool/appliance/battery pack/charger correla- any adapter plugs with your hair, clothing and gloves away from the power source and/or
tected supply.
GENERAL POWER TOOL SAFETY WARNINGS...
Operation Manual 1 - Page 7

... improperly set
blade. Supporting the workpiece incorrectly. Forcing a cut -off wheels is too thick to make you careless. REMOVING THE BATTERY PACK
See Figure 3, page 13. WARNING:
Battery tools are always in use this saw .
n Make sure the latches on the side of abrasive cut .
7 - ASSEMBLY
n Depress the spindle lock button, then replace the blade...
Operation Manual 2 - Page 2
... cords increase the risk of the power tool in the warnings refers to power source and/or battery pack, picking up or carrying the tool. Any power tool that cannot be repaired.
Disconnect the plug from the power source and/or the battery pack from heat, oil, sharp edges or moving parts, breakage of the power tool may result in the off...
Operation Manual 4 - Page 2

... for the connection of dust extraction and collection facilities, ensure these instructions to power source and/or battery pack, picking up or carrying the tool. Use the correct power tool for your finger on invites accidents.
Remove any other condition that have the power tool repaired before turning the power tool on a solid surface enables better control of electric shock...
Operation Manual 4 - Page 3

... situation. Use of unauthorized parts or failure to control.
Use the power tool, accessories and tool bits etc. Following this power tool. therefore, they are easier to follow Maintenance instructions may create a risk of ignition, such as the specific potential hazards related to this rule will ensure that is maintained.
When servicing a power tool, use , keep it...
Operation Manual 6 - Page 1

... lijado detallado)
Fig. 3
Fig. 4
A BC
A -
INSTALLING HEAD
See Figure 1.
Remove the battery pack from the power base or disconnect from you are using FEIN accessories, always follow the instructions for that the openings on the accessory fit on the raised parts of sanding operation, always remove sander from power supply.
Using the hex key provided...
Operation Manual 7 - Page 1

...in a damp or wet location. Do not use before replacing bulb or performing any parts are replaced. Properly dispose of current
OPERATION
WARNING:
If any routine ...tool. Never use this product. Water entering a power tool will result in gently
to rain or water. IMPORTANT SAFETY
INSTRUCTIONS
SAFETY RULES FOR WORKLIGHT
Under extreme usage or temperature conditions, battery...
Ryobi P884 Reviews
We have not received any reviews for Ryobi yet.