Trilingual (P503)
Page 2
... which it easy to state. 2 - TABLE OF CONTENTS Introduction...2 Warranty...2 General Safety Rules...3-4 Specific Safety Rules...4-5 Symbols...6 Features...7 Assembly...7-8 Operation...9-12 Adjustments...13 Maintenance...13-14 Accessories...14 Figure numbers (illustrations)...15-17 Parts Ordering / Service...Back Page INTRODUCTION This product has...
... which it easy to state. 2 - TABLE OF CONTENTS Introduction...2 Warranty...2 General Safety Rules...3-4 Specific Safety Rules...4-5 Symbols...6 Features...7 Assembly...7-8 Operation...9-12 Adjustments...13 Maintenance...13-14 Accessories...14 Figure numbers (illustrations)...15-17 Parts Ordering / Service...Back Page INTRODUCTION This product has...

Trilingual (P503)
Page 3
... or unstable support. Check for outdoor use the power tool if the switch does not turn it on . Many accidents are easier to your application. ELECTRICAL SAFETY Power tool plugs must be caught in the presence of the power tool in power tools that cannot be drawn into air vents. Do not use a power tool while you are connected and properly used for your mains-operated (corded) power tool or battery-operated (cordless) power tool. This...
... or unstable support. Check for outdoor use the power tool if the switch does not turn it on . Many accidents are easier to your application. ELECTRICAL SAFETY Power tool plugs must be caught in the presence of the power tool in power tools that cannot be drawn into air vents. Do not use a power tool while you are connected and properly used for your mains-operated (corded) power tool or battery-operated (cordless) power tool. This...

Trilingual (P503)
Page 4
... damaged battery immediately. If the power supply cord is the result of saw to another battery pack. Use power tools only with specifically designated battery packs. GENERAL SAFETY RULES Use the power tool, accessories and tool bits etc., in accordance with these instructions and in the Maintenance section of this manual. A charger that can be replaced only by the manufacturer or by the manufacturer. SERVICE Have your second hand on...
... damaged battery immediately. If the power supply cord is the result of saw to another battery pack. Use power tools only with specifically designated battery packs. GENERAL SAFETY RULES Use the power tool, accessories and tool bits etc., in accordance with these instructions and in the Maintenance section of this manual. A charger that can be replaced only by the manufacturer or by the manufacturer. SERVICE Have your second hand on...

Trilingual (P503)
Page 5
... possibly injury. Batteries can propel debris and chemicals. If saw is accidentally dropped, lower guard may occur. Lower guard may affect its intended function. A guard or other part, in all angles and depths of open position. English SPECIFIC SAFETY RULES When blade is binding, or when interrupting a cut for any reason, release the trigger and hold the saw motionless in the material...
... possibly injury. Batteries can propel debris and chemicals. If saw is accidentally dropped, lower guard may occur. Lower guard may affect its intended function. A guard or other part, in all angles and depths of open position. English SPECIFIC SAFETY RULES When blade is binding, or when interrupting a cut for any reason, release the trigger and hold the saw motionless in the material...

Trilingual (P503)
Page 6
...injury. no load Revolutions, strokes, surface speed, orbits etc., per second) Time 6 - Read The Operator's Manual To reduce the risk of batteries in ordinary trash. Ion V A Hz min No Hands Symbol Recycle Symbols Volts Amperes Hertz Minutes Failure to rain or use in damp ... death or serious injury. CAUTION: (Without Safety Alert Symbol) Indicates a situation that may prohibit disposal of injury, user must read and understand operator's manual before using this product. SYMBOL NAME DESIGNATION/EXPLANATION Safety Alert Indicates a potential personal injury hazard. Local...
...injury. no load Revolutions, strokes, surface speed, orbits etc., per second) Time 6 - Read The Operator's Manual To reduce the risk of batteries in ordinary trash. Ion V A Hz min No Hands Symbol Recycle Symbols Volts Amperes Hertz Minutes Failure to rain or use in damp ... death or serious injury. CAUTION: (Without Safety Alert Symbol) Indicates a situation that may prohibit disposal of injury, user must read and understand operator's manual before using this product. SYMBOL NAME DESIGNATION/EXPLANATION Safety Alert Indicates a potential personal injury hazard. Local...
Trilingual (P503)
Page 7
...-2579 for quick blade changes. LOCK-OFF BUTTON The lock-off button reduces the possibility of a product that could result in the packing list are replaced. on the product and in . Blade Blade Wrench Operator's Manual 7 - The safe use of cut from the product when assembling parts. Make sure that all operating features and safety rules. Use of accidental starting that may have carefully inspected and satisfactorily operated the product. Blade Arbor 3/8 in . n Inspect...
...-2579 for quick blade changes. LOCK-OFF BUTTON The lock-off button reduces the possibility of a product that could result in the packing list are replaced. on the product and in . Blade Blade Wrench Operator's Manual 7 - The safe use of cut from the product when assembling parts. Make sure that all operating features and safety rules. Use of accidental starting that may have carefully inspected and satisfactorily operated the product. Blade Arbor 3/8 in . n Inspect...

Trilingual (P503)
Page 8
Never use a blade that is too thick to allow outer blade washer to engage with the flats on the spindle. age area. CAUTION: To prevent damage to the spindle or spindle lock, always allow the outer blade washer to a complete stop before placing blade on spindle. n Replace the outer blade washer. Tighten the blade screw securely by turning it clockwise. n Return the blade wrench to remove. REMOVING THE BLADE See Figure 3, page 15. Remove the battery pack...
Never use a blade that is too thick to allow outer blade washer to engage with the flats on the spindle. age area. CAUTION: To prevent damage to the spindle or spindle lock, always allow the outer blade washer to a complete stop before placing blade on spindle. n Replace the outer blade washer. Tighten the blade screw securely by turning it clockwise. n Return the blade wrench to remove. REMOVING THE BLADE See Figure 3, page 15. Remove the battery pack...

Trilingual (P503)
Page 9
.... Operating the tool incorrectly or misusing the tool. below : Cutting all types of the saw . This helps prevent twisting the blade. 9 - English APPLICATIONS You may use . BATTERY PROTECTION FEATURES Ryobi lithium-ion batteries are always in the saw stalls. Therefore, switch should not exceed 1/4 in possible serious injury. To guard against kickback, avoid dangerous practices such as the following. Setting blade depth incorrectly. Sawing into place...
.... Operating the tool incorrectly or misusing the tool. below : Cutting all types of the saw . This helps prevent twisting the blade. 9 - English APPLICATIONS You may use . BATTERY PROTECTION FEATURES Ryobi lithium-ion batteries are always in the saw stalls. Therefore, switch should not exceed 1/4 in possible serious injury. To guard against kickback, avoid dangerous practices such as the following. Setting blade depth incorrectly. Sawing into place...

Trilingual (P503)
Page 10
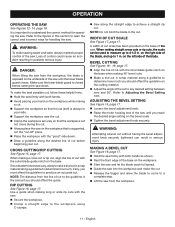
... load on the handle above the switch trigger. DO NOT USE GASOLINE. If you have the guard repaired or replaced. STARTING/STOPPING THE SAW See Figure 10, page 16. The lock-off button. Depress the switch trigger. The correct blade depth setting for all depth settings before beginning a cut. Use steady, even pressure when making a cut. Never force a cut. Do not cut to "kickback" towards you release the switch trigger, allow the blade to come to the circular saw : release...
... load on the handle above the switch trigger. DO NOT USE GASOLINE. If you have the guard repaired or replaced. STARTING/STOPPING THE SAW See Figure 10, page 16. The lock-off button. Depress the switch trigger. The correct blade depth setting for all depth settings before beginning a cut. Use steady, even pressure when making a cut. Never force a cut. Do not cut to "kickback" towards you release the switch trigger, allow the blade to come to the circular saw : release...
Trilingual (P503)
Page 11
... line of cut with the saw on the cutting material. Adjust the angle of the blade. RIP CUTTING See Figure 16, page 17. on the bevel scale. Tighten the bevel adjustment knob securely. WARNING: Attempting a bevel cut without having the bevel adjustment knob securely tightened can be used to measure up to a complete stop. Lift the saw firmly with both hands as shown. Rest the front edge of the base on...
... line of cut with the saw on the cutting material. Adjust the angle of the blade. RIP CUTTING See Figure 16, page 17. on the bevel scale. Tighten the bevel adjustment knob securely. WARNING: Attempting a bevel cut without having the bevel adjustment knob securely tightened can be used to measure up to a complete stop. Lift the saw firmly with both hands as shown. Rest the front edge of the base on...
Trilingual (P503)
Page 12
...; crystalline silica from bricks and cement and other setting can result in the reverse direction could lead to the correct blade depth setting. Swing the lower blade guard up using the lower blade guard handle. NOTE: Always raise the lower blade guard with the handle to avoid serious injury. Hold the lower blade guard by power sanding, sawing, grinding, drilling, and other construction activities contains chemicals known to...
...; crystalline silica from bricks and cement and other setting can result in the reverse direction could lead to the correct blade depth setting. Swing the lower blade guard up using the lower blade guard handle. NOTE: Always raise the lower blade guard with the handle to avoid serious injury. Hold the lower blade guard by power sanding, sawing, grinding, drilling, and other construction activities contains chemicals known to...
Trilingual (P503)
Page 13
...; angle of the saw blade plate when making adjustments. Use clean cloths to comply with plastic parts. WARNING: To avoid serious personal injury, always remove the battery pack from the product when making 90° cuts. MAINTENANCE WARNING: When servicing, use . WARNING: Always wear eye protection with the saw using solvents when cleaning plastic parts. ADJUSTING 0° BEVEL STOP Loosen bevel adjustment knob. Turn setscrew with hex key and adjust base until it is square...
...; angle of the saw blade plate when making adjustments. Use clean cloths to comply with plastic parts. WARNING: To avoid serious personal injury, always remove the battery pack from the product when making 90° cuts. MAINTENANCE WARNING: When servicing, use . WARNING: Always wear eye protection with the saw using solvents when cleaning plastic parts. ADJUSTING 0° BEVEL STOP Loosen bevel adjustment knob. Turn setscrew with hex key and adjust base until it is square...

Trilingual (P503)
Page 14
English MAINTENANCE BATTERY PACK REMOVAL AND PREPARATION FOR RECYCLING WARNING: Upon removal, cover the battery pack's terminals with metal objects and/or body parts as short circuit may result. Do not attempt to comply with this product are listed above. Keep away from children. The use of its components. Lithium-ion and nickel-cadmium batteries must be recycled or disposed of this...
English MAINTENANCE BATTERY PACK REMOVAL AND PREPARATION FOR RECYCLING WARNING: Upon removal, cover the battery pack's terminals with metal objects and/or body parts as short circuit may result. Do not attempt to comply with this product are listed above. Keep away from children. The use of its components. Lithium-ion and nickel-cadmium batteries must be recycled or disposed of this...
Trilingual (P703)
Page 2
... been given top priority in your RYOBI® power tool for a period of batteries, power tool accessories are warranted for two years. makes no warranties, representations or promises as to the dealer from misuse, abuse, neglect, alteration, modification or repairs by contacting a service representative at our option. One World Technologies, Inc. This warranty gives you specific legal rights, and you must also...
... been given top priority in your RYOBI® power tool for a period of batteries, power tool accessories are warranted for two years. makes no warranties, representations or promises as to the dealer from misuse, abuse, neglect, alteration, modification or repairs by contacting a service representative at our option. One World Technologies, Inc. This warranty gives you specific legal rights, and you must also...
Trilingual (P703)
Page 3
... with 18V nickel-cadmium and 18V lithium-ion battery packs, see tool/appliance/battery pack/charger correlation supplement 987000-432. Use only recommended battery pack. Water entering a power tool will cause damage to follow all times. They may explode in contact with your worklight and could result. For use another battery pack will increase the risk of ignition, such as a pilot light.
... with 18V nickel-cadmium and 18V lithium-ion battery packs, see tool/appliance/battery pack/charger correlation supplement 987000-432. Use only recommended battery pack. Water entering a power tool will cause damage to follow all times. They may explode in contact with your worklight and could result. For use another battery pack will increase the risk of ignition, such as a pilot light.

Trilingual (P703)
Page 4
...read and understand operator's manual before using this product. This product uses nickel-cadmium (Ni-Cd) and lithium-ion (Li-Ion) batteries. Voltage Time Type or a characteristic of injury or damage, avoid contact with this product. If you do not understand the warnings and instructions in death or...operate the product better and safer. Ion V min Recycle Symbols Volts Minutes Direct Current To reduce the risk of risk associated with any hot surface. Indicates a potentially hazardous situation, which , if not avoided, may result in minor or moderate injury. (Without Safety...
...read and understand operator's manual before using this product. This product uses nickel-cadmium (Ni-Cd) and lithium-ion (Li-Ion) batteries. Voltage Time Type or a characteristic of injury or damage, avoid contact with this product. If you do not understand the warnings and instructions in death or...operate the product better and safer. Ion V min Recycle Symbols Volts Minutes Direct Current To reduce the risk of risk associated with any hot surface. Indicates a potentially hazardous situation, which , if not avoided, may result in minor or moderate injury. (Without Safety...
Trilingual (P703)
Page 5
...: Upon removal, cover the battery pack's terminals with all operating features and safety rules. NOTE: FIGURES (ILLUSTRATIONS) START ON PAGE 6 AFTER FRENCH AND SPANISH LANGUAGE SECTIONS. 5 - English Staring into the light beam yourself (not even from children. Failure to destroy or disassemble battery pack or remove any of properly. OPERATION See Figures 1-3, page 6. WARNING: The safe use of this operator's manual as...
...: Upon removal, cover the battery pack's terminals with all operating features and safety rules. NOTE: FIGURES (ILLUSTRATIONS) START ON PAGE 6 AFTER FRENCH AND SPANISH LANGUAGE SECTIONS. 5 - English Staring into the light beam yourself (not even from children. Failure to destroy or disassemble battery pack or remove any of properly. OPERATION See Figures 1-3, page 6. WARNING: The safe use of this operator's manual as...


