

Manual 1
Page 3
... can be performed. KICKBACK CAUSES AND RELATED WARNINGS Kickback is a sudden reaction to a pinched, bound or misaligned saw blade, causing an uncontrolled saw to be controlled by the manufacturer. English Use of the blade, but kickback forces can be visible below the workpiece. ... when performing an operation where the cutting tool may create a risk of fire when used with specifically designated battery packs. CIRCULAR SAW SAFETY WARNINGS CUTTING PROCEDURES DANGER: Keep hands away from one type of battery pack may create a risk of unauthorized parts or ...
... can be performed. KICKBACK CAUSES AND RELATED WARNINGS Kickback is a sudden reaction to a pinched, bound or misaligned saw blade, causing an uncontrolled saw to be controlled by the manufacturer. English Use of the blade, but kickback forces can be visible below the workpiece. ... when performing an operation where the cutting tool may create a risk of fire when used with specifically designated battery packs. CIRCULAR SAW SAFETY WARNINGS CUTTING PROCEDURES DANGER: Keep hands away from one type of battery pack may create a risk of unauthorized parts or ...
Manual 1
Page 4
... handle and as soon as blade enters the material, the lower guard must be released. therefore, they must be serviced before placing saw if lower guard does not move freely and close instantly. Properly dispose of a dropped or damaged battery immediately. Batteries can...pack. Following this rule will reduce the risk of serious personal injury. Protect your hearing. Following this rule will cause the saw teeth are always in vehicles. Under extreme usage or temperature conditions, battery leakage may cut . This will reduce the risk...
... handle and as soon as blade enters the material, the lower guard must be released. therefore, they must be serviced before placing saw if lower guard does not move freely and close instantly. Properly dispose of a dropped or damaged battery immediately. Batteries can...pack. Following this rule will reduce the risk of serious personal injury. Protect your hearing. Following this rule will cause the saw teeth are always in vehicles. Under extreme usage or temperature conditions, battery leakage may cut . This will reduce the risk...
Manual 1
Page 6
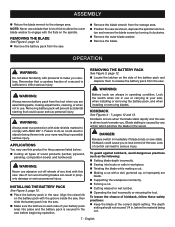
... in this product. n Remove the blade wrench (5 mm hex key) from the product when assembling parts. NOTE: Do not run the circular saw blade inside the lower blade guard and onto the spindle. If inner blade washer has been removed, replace it counterclockwise. 6 - WARNING: Items in...n Depress the spindle lock button, then replace the blade screw. WARNING: ATTACHING THE BLADE See Figure 1, page 12. n Fit the saw with spindle lock engaged. FEATURES PRODUCT SPECIFICATIONS Motor 18 Volt DC Blade Diameter 6-1/2 in contact with the blade guard, while thicker blades will ...
... in this product. n Remove the blade wrench (5 mm hex key) from the product when assembling parts. NOTE: Do not run the circular saw blade inside the lower blade guard and onto the spindle. If inner blade washer has been removed, replace it counterclockwise. 6 - WARNING: Items in...n Depress the spindle lock button, then replace the blade screw. WARNING: ATTACHING THE BLADE See Figure 1, page 12. n Fit the saw with spindle lock engaged. FEATURES PRODUCT SPECIFICATIONS Motor 18 Volt DC Blade Diameter 6-1/2 in contact with the blade guard, while thicker blades will ...
Manual 1
Page 7
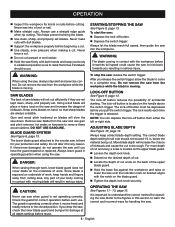
...to lose control of control can result in use . NOTE: Never use abrasive cut . 7 - n Remove the blade wrench from the saw . WARNING: Always wear eye protection with side shields marked to do so could cause serious personal injury. INSTALLING THE BATTERY PACK See Figure...Lock the switch when not in property damage or serious personal injury. Loss of the saw as the following: Setting blade depth incorrectly. Sawing into the saw. English n Position the saw . Removing battery pack will prevent accidental starting that a careless fraction of your side, ...
...to lose control of control can result in use . NOTE: Never use abrasive cut . 7 - n Remove the blade wrench from the saw . WARNING: Always wear eye protection with side shields marked to do so could cause serious personal injury. INSTALLING THE BATTERY PACK See Figure...Lock the switch when not in property damage or serious personal injury. Loss of the saw as the following: Setting blade depth incorrectly. Sawing into the saw. English n Position the saw . Removing battery pack will prevent accidental starting that a careless fraction of your side, ...
Manual 1
Page 8
... blades. LOCK-OFF BUTTON See Figure 9, page 13. The lock resets each use. Always keep your body coming in . CAUTION: Never use saw : release the switch trigger. Never make cuts with moving . DO NOT USE GASOLINE. If you resulting in a balanced position so as to ... straight edge guide when rip cutting. Do not alter it moves freely and readily returns to understand the correct method for operating the saw and increase the danger of accidental starting. Always leave guard in serious injury. The lock-off button reduces the possibility of kickback. ADJUSTING...
... blades. LOCK-OFF BUTTON See Figure 9, page 13. The lock resets each use. Always keep your body coming in . CAUTION: Never use saw : release the switch trigger. Never make cuts with moving . DO NOT USE GASOLINE. If you resulting in a balanced position so as to ... straight edge guide when rip cutting. Do not alter it moves freely and readily returns to understand the correct method for operating the saw and increase the danger of accidental starting. Always leave guard in serious injury. The lock-off button reduces the possibility of kickback. ADJUSTING...
Manual 1
Page 9
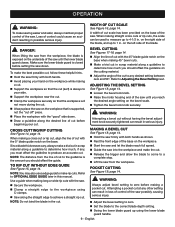
...in this manual. Refer to OPTIONAL EDGE GUIDE later in possible serious injury. MAKING A BEVEL CUT See Figure 18, page 14. Hold the saw firmly with the 0° blade guide notch on the bevel scale. Tighten the bevel lock knob securely. WARNING: Always adjust bevel setting to zero... Setting next. OPERATION WARNING: To make the cut. Release the trigger and allow the blade to come to a complete stop. Lift the saw from the workpiece. WIDTH OF CUT SCALE See Figure 16, page 14. When making 45° bevel cuts. Make a trial cut in . ADJUSTING...
...in this manual. Refer to OPTIONAL EDGE GUIDE later in possible serious injury. MAKING A BEVEL CUT See Figure 18, page 14. Hold the saw firmly with the 0° blade guide notch on the bevel scale. Tighten the bevel lock knob securely. WARNING: Always adjust bevel setting to zero... Setting next. OPERATION WARNING: To make the cut. Release the trigger and allow the blade to come to a complete stop. Lift the saw from the workpiece. WIDTH OF CUT SCALE See Figure 16, page 14. When making 45° bevel cuts. Make a trial cut in . ADJUSTING...
Manual 1
Page 10
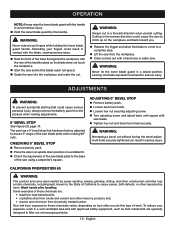
...See Figure 20, page 14. ADJUSTMENTS WARNING: To prevent accidental starting that has been factory adjusted to assure 0° angle of the saw from exposure to these chemicals are specially designed to the base of the handle raised so the blade does not touch the workpiece. &#... . Cutting in a well-ventilated area and with the handle to avoid serious injury. Hold the lower blade guard by power sanding, sawing, grinding, drilling, and other construction activities may contain chemicals, including lead, known to the State of these chemicals varies, depending on how often ...
...See Figure 20, page 14. ADJUSTMENTS WARNING: To prevent accidental starting that has been factory adjusted to assure 0° angle of the saw from exposure to these chemicals are specially designed to the base of the handle raised so the blade does not touch the workpiece. &#... . Cutting in a well-ventilated area and with the handle to avoid serious injury. Hold the lower blade guard by power sanding, sawing, grinding, drilling, and other construction activities may contain chemicals, including lead, known to the State of these chemicals varies, depending on how often ...
Manual 2
Page 3
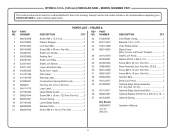
Always mention the model number in . (165 mm) CIRCULAR SAW - RYOBI 6-1/2 in all correspondence regarding your CIRCULAR SAW or when ordering repair parts. FIGURE A KEY PART QTY NO. KEY PART NO. NUMBER Screw (M5 x 15.5 mm 1 Rubber Stopper 1 Lock Nut (M5 2 Screw (M5 x ... Guide Assembly (Inc. Key Nos. 35-37 1 Optional Edge Guide Knob Bolt 1 Optional Washer (OD10 mm x ID5 mm x 1t)....1 Optional Spring 1 Operator's Manual 3 MODEL NUMBER P507 The model number will be found on a label attached to the motor housing.
Always mention the model number in . (165 mm) CIRCULAR SAW - RYOBI 6-1/2 in all correspondence regarding your CIRCULAR SAW or when ordering repair parts. FIGURE A KEY PART QTY NO. KEY PART NO. NUMBER Screw (M5 x 15.5 mm 1 Rubber Stopper 1 Lock Nut (M5 2 Screw (M5 x ... Guide Assembly (Inc. Key Nos. 35-37 1 Optional Edge Guide Knob Bolt 1 Optional Washer (OD10 mm x ID5 mm x 1t)....1 Optional Spring 1 Operator's Manual 3 MODEL NUMBER P507 The model number will be found on a label attached to the motor housing.

Manual 2
Page 5
... P507 The model number will be found on a label attached to the motor housing. NUMBER 1 527846001 2 660024044 3 203523001 4 523141001 5 672552001 6 270013120 7 636155001 8 220307001 9 660208049 10 660385014 11 680863003 12 206331001 13 306640001 14 560219006 PARTS LIST - Always mention the model number in . (165 mm) CIRCULAR SAW... Pan Hd 2 Washer (OD7.8 x ID5.2 x 1.1t 2 Motor w/Pinion Assembly 1 Output Shaft w/Gear Assembly 1 Hex Key Plug...1 5 KEY PART NO. RYOBI 6-1/2 in all correspondence regarding your CIRCULAR SAW or when ordering repair parts.
... P507 The model number will be found on a label attached to the motor housing. NUMBER 1 527846001 2 660024044 3 203523001 4 523141001 5 672552001 6 270013120 7 636155001 8 220307001 9 660208049 10 660385014 11 680863003 12 206331001 13 306640001 14 560219006 PARTS LIST - Always mention the model number in . (165 mm) CIRCULAR SAW... Pan Hd 2 Washer (OD7.8 x ID5.2 x 1.1t 2 Motor w/Pinion Assembly 1 Output Shaft w/Gear Assembly 1 Hex Key Plug...1 5 KEY PART NO. RYOBI 6-1/2 in all correspondence regarding your CIRCULAR SAW or when ordering repair parts.
Manual 2
Page 6
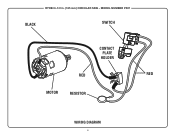
MODEL NUMBER P507 BLACK SWITCH CONTACT PLATE HOLDER RED RED MOTOR RESISTOR WIRING DIAGRAM 6 RYOBI 6-1/2 in. (165 mm) CIRCULAR SAW -
MODEL NUMBER P507 BLACK SWITCH CONTACT PLATE HOLDER RED RED MOTOR RESISTOR WIRING DIAGRAM 6 RYOBI 6-1/2 in. (165 mm) CIRCULAR SAW -


