
Operation Manual
Page 8
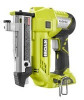
...you , squeeze magazine release button located at the rear of the magazine and slide the magazine cover open. Place pin nails in the channel with nail tips pointing down to reactivate nailer. Remember that a careless fraction of a second is sufficient to do so could result in place. ... on operator preference. Failure to inflict severe injury. n A lign belt clip and screw with right or left or right side of the nailer, depending on the magazine of the battery pack snap into place over the nose and push down and resting on the left side screw hole...
...you , squeeze magazine release button located at the rear of the magazine and slide the magazine cover open. Place pin nails in the channel with nail tips pointing down to reactivate nailer. Remember that a careless fraction of a second is sufficient to do so could result in place. ... on operator preference. Failure to inflict severe injury. n A lign belt clip and screw with right or left or right side of the nailer, depending on the magazine of the battery pack snap into place over the nose and push down and resting on the left side screw hole...
Operation Manual
Page 9
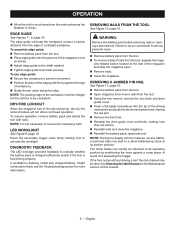
.../or if the tool is flashing, install fully charged battery. DIAGNOSTIC FEEDBACK The LED worklight provides feedback to its bottom position. REMOVING A JAMMED PIN NAIL See Figure 11, page 12. Remove battery pack from the tool. Open magazine and remove nails from the tool,... and slide the magazine open. Remove nails. Close the magazine. NOTE: The guiding edge of workpiece. Guide the pin nailer along the edge. If light continues to flash, see the Troubleshooting section for the nail line to activate the worklight. To assemble edge guide: ...
.../or if the tool is flashing, install fully charged battery. DIAGNOSTIC FEEDBACK The LED worklight provides feedback to its bottom position. REMOVING A JAMMED PIN NAIL See Figure 11, page 12. Remove battery pack from the tool. Open magazine and remove nails from the tool,... and slide the magazine open. Remove nails. Close the magazine. NOTE: The guiding edge of workpiece. Guide the pin nailer along the edge. If light continues to flash, see the Troubleshooting section for the nail line to activate the worklight. To assemble edge guide: ...
Parts Diagram
Page 3
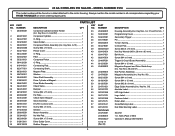
...Label 1 Fastener Label 1 Data Label 1 Scale Marking Label 1 Nail Slide Warning Label 1 Seal Kit 1 in all correspondence regarding your RYOBI PIN NAILER or when ordering repair parts. 23 GA CORDLESS PIN NAILER - NUMBER 1 204690001 2 639415001 3 564427001 4 533235001 5 204691001 6 660204008 7 533271001 8 564430001 9 525502001 10 533231001 11 564432001 12...mm 1 Screw (M4 x 12 mm 1 Screw (M2.6 x 6 mm 1 Edge Guide Assembly (Inc. Always mention the model number in . MODEL NUMBER P318 The model number will be found on a label attached to the motor housing.
...Label 1 Fastener Label 1 Data Label 1 Scale Marking Label 1 Nail Slide Warning Label 1 Seal Kit 1 in all correspondence regarding your RYOBI PIN NAILER or when ordering repair parts. 23 GA CORDLESS PIN NAILER - NUMBER 1 204690001 2 639415001 3 564427001 4 533235001 5 204691001 6 660204008 7 533271001 8 564430001 9 525502001 10 533231001 11 564432001 12...mm 1 Screw (M4 x 12 mm 1 Screw (M2.6 x 6 mm 1 Edge Guide Assembly (Inc. Always mention the model number in . MODEL NUMBER P318 The model number will be found on a label attached to the motor housing.


