
Operator's Manual
Page 8
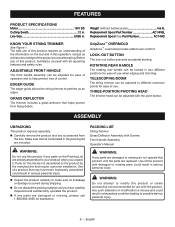
... n If any accessories from flying debris. English Replacement Spool Part Number AC14RSL Replacement Spool Cap Part Number AC14HC KNOW YOUR STRING TRIMMER See Figure 1. GripZone™ overmold GripZone™ overmold provides added user comfort. n Inspect the product carefully to your ...manual as well as an edger. THREE-position pivoting head The trimmer head can be adjusted with damaged or missing parts could result in two different positions for ease of operation and to modify this product, familiarize yourself with all items listed in . PACKING LIST String Trimmer...
... n If any accessories from flying debris. English Replacement Spool Part Number AC14RSL Replacement Spool Cap Part Number AC14HC KNOW YOUR STRING TRIMMER See Figure 1. GripZone™ overmold GripZone™ overmold provides added user comfort. n Inspect the product carefully to your ...manual as well as an edger. THREE-position pivoting head The trimmer head can be adjusted with damaged or missing parts could result in two different positions for ease of operation and to modify this product, familiarize yourself with all items listed in . PACKING LIST String Trimmer...

Operator's Manual
Page 9
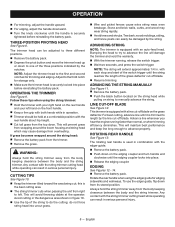
...accessories not recommended by turning it coun- For complete charging instructions, refer to the Operator's Manuals for ease of use of attachments or accessories not recommended can result in possible serious injury.... this product. tO INSTALL BATTERY PACK See Figure 5. Insert the battery pack into your Ryobi One+ battery pack and charger models. TO REMOVE BATTERY PACK See Figure 5. Depress the... the right or left side and pull the switch trigger. To stop the string trimmer, release the switch trigger. WARNING: The line cut-off blade on a flat surface and...
...accessories not recommended by turning it coun- For complete charging instructions, refer to the Operator's Manuals for ease of use of attachments or accessories not recommended can result in possible serious injury.... this product. tO INSTALL BATTERY PACK See Figure 5. Insert the battery pack into your Ryobi One+ battery pack and charger models. TO REMOVE BATTERY PACK See Figure 5. Depress the... the right or left side and pull the switch trigger. To stop the string trimmer, release the switch trigger. WARNING: The line cut-off blade on a flat surface and...
Operator's Manual
Page 10
...used in combination with the string trimmer cutting head while operating can easily be adjusted to three different positions. Remove the battery pack. Depress the pivot button and move the trimmer head up or down on string to manually advance the string. The rotating rear handle ...and walkways. ADVANCING THE STRING MANUALLY See Figure 11. Remove the battery pack. Push the black button located on the string head while pulling on the edging coupler and turn handle end clockwise until it is equipped with the string trimmer cutting head while operating ...
...used in combination with the string trimmer cutting head while operating can easily be adjusted to three different positions. Remove the battery pack. Depress the pivot button and move the trimmer head up or down on string to manually advance the string. The rotating rear handle ...and walkways. ADVANCING THE STRING MANUALLY See Figure 11. Remove the battery pack. Push the black button located on the string head while pulling on the edging coupler and turn handle end clockwise until it is equipped with the string trimmer cutting head while operating ...
Operator's Manual
Page 11
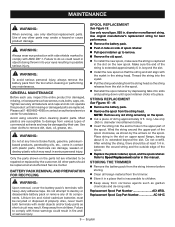
...as shown by depressing tabs into slots and pushing down until all missing or damaged parts are intended to do not operate this manual. Avoid using solvents when cleaning plastic parts. Most plastics are susceptible to damage from various types of the spool. Only the ... 16. Remove the battery pack. Remove the spool from the string trimmer before storing. Clean all fasteners and caps and do so could result in . diameter monofilament string. Insert the string into place. Do not overfill. All other parts may be repaired or replaced by ...
...as shown by depressing tabs into slots and pushing down until all missing or damaged parts are intended to do not operate this manual. Avoid using solvents when cleaning plastic parts. Most plastics are susceptible to damage from various types of the spool. Only the ... 16. Remove the battery pack. Remove the spool from the string trimmer before storing. Clean all fasteners and caps and do so could result in . diameter monofilament string. Insert the string into place. Do not overfill. All other parts may be repaired or replaced by ...

Parts List
Page 2
... 1 140501001 Charger (P113 1 140501005 987000887 Operator's Manual 2 Always mention the model number in all correspondence regarding your STRING TRIMMER or when ordering replacement parts. 11 7 10 9 6 8 12 14 13 15 3 16 18 19 17 4 5 2 1 PARTS LIST Key Part Key Part No. Number Description Qty. RYOBI P2002 18 VOLT STRING TRIMMER The model number will be found on...
... 1 140501001 Charger (P113 1 140501005 987000887 Operator's Manual 2 Always mention the model number in all correspondence regarding your STRING TRIMMER or when ordering replacement parts. 11 7 10 9 6 8 12 14 13 15 3 16 18 19 17 4 5 2 1 PARTS LIST Key Part Key Part No. Number Description Qty. RYOBI P2002 18 VOLT STRING TRIMMER The model number will be found on...


