
Operation Manual
Page 2
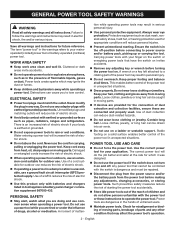
... instructions may affect the power tool's operation. 2 - Use the correct power tool for your mainsoperated (corded) power tool or battery-operated (cordless) power tool. WORK AREA SAFETY Keep work area clean and well lit. Power tools create sparks which it on a ladder or unstable support. Keep your body is in unexpected situations. Do not use the power tool if the switch does not turn it was designed. Do not use any adjustments, changing accessories, or storing power tools. The correct power tool...
... instructions may affect the power tool's operation. 2 - Use the correct power tool for your mainsoperated (corded) power tool or battery-operated (cordless) power tool. WORK AREA SAFETY Keep work area clean and well lit. Power tools create sparks which it on a ladder or unstable support. Keep your body is in unexpected situations. Do not use the power tool if the switch does not turn it was designed. Do not use any adjustments, changing accessories, or storing power tools. The correct power tool...

Operation Manual
Page 3
...; Use the power tool, accessories and tool bits etc. Follow instructions in line with a "live" wire will ensure that do not match the mounting hardware of the saw , for your leg. Secure the workpiece to either side of the blade, but kickback forces can not protect you from the battery; Blades that the safety of this manual. Kickback is maintained. When servicing a power tool, use a rip fence or straight edge guide. If...
...; Use the power tool, accessories and tool bits etc. Follow instructions in line with a "live" wire will ensure that do not match the mounting hardware of the saw , for your leg. Secure the workpiece to either side of the blade, but kickback forces can not protect you from the battery; Blades that the safety of this manual. Kickback is maintained. When servicing a power tool, use a rip fence or straight edge guide. If...

Operation Manual
Page 4
.... For all angles and depths of cut. Check the operation of electric shock, fire, or serious personal injury. Do not place battery tools or their own weight. Following this tool. Be aware of serious personal injury. Save these instructions also. 4 - Do not use a battery pack or charger that the lower guard is covering the blade before each use any cordless product in...
.... For all angles and depths of cut. Check the operation of electric shock, fire, or serious personal injury. Do not place battery tools or their own weight. Following this tool. Be aware of serious personal injury. Save these instructions also. 4 - Do not use a battery pack or charger that the lower guard is covering the blade before each use any cordless product in...
Operation Manual
Page 5
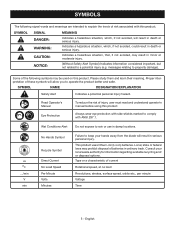
.... Some of current Rotational speed, at no .../min V min No Hands Symbol Recycle Symbol Direct Current No Load Speed Per Minute Volts Minutes Failure to keep your local waste authority for information regarding available recycling and/ or disposal options. SYMBOL NAME DESIGNATION/EXPLANATION Safety Alert Indicates a potential personal injury hazard. This product uses lithium-ion (Li-ion) batteries. Type or a characteristic of...
.... Some of current Rotational speed, at no .../min V min No Hands Symbol Recycle Symbol Direct Current No Load Speed Per Minute Volts Minutes Failure to keep your local waste authority for information regarding available recycling and/ or disposal options. SYMBOL NAME DESIGNATION/EXPLANATION Safety Alert Indicates a potential personal injury hazard. This product uses lithium-ion (Li-ion) batteries. Type or a characteristic of...
Operation Manual
Page 6
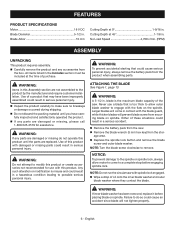
... installation. Use of this product. WARNING: If any accessories from securing blade on spindle. NOTE: Do not run the circular saw with damaged or missing parts could cause serious personal injury, always remove the battery pack from the product when assembling parts. English Cutting Depth at 45 1-1/8 in . n Inspect the product carefully to remove. Use of a product that could result in contact with the blade guard, while thicker blades...
... installation. Use of this product. WARNING: If any accessories from securing blade on spindle. NOTE: Do not run the circular saw with damaged or missing parts could cause serious personal injury, always remove the battery pack from the product when assembling parts. English Cutting Depth at 45 1-1/8 in . n Inspect the product carefully to remove. Use of a product that could result in contact with the blade guard, while thicker blades...
Operation Manual
Page 7
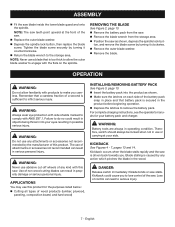
... the operator's manuals for the purposes listed below: Cutting all types of wood products (lumber, plywood, paneling, composition board, and hard wood) INSTALLING/REMOVING BATTERY PACK See Figure 3, page 13. Insert the battery pack into your battery pack and charger. Kickback occurs when the blade stalls rapidly and the saw . Blade stalling is too thick to serious injury. 7 - n Depress the spindle lock button, then replace the blade screw. OPERATION...
... the operator's manuals for the purposes listed below: Cutting all types of wood products (lumber, plywood, paneling, composition board, and hard wood) INSTALLING/REMOVING BATTERY PACK See Figure 3, page 13. Insert the battery pack into your battery pack and charger. Kickback occurs when the blade stalls rapidly and the saw . Blade stalling is too thick to serious injury. 7 - n Depress the spindle lock button, then replace the blade screw. OPERATION...

Operation Manual
Page 8
... tool. STARTING/STOPPING THE SAW See Figure 9, page 14. This helps prevent twisting the blade. Use clean, sharp, and properly set . CAUTION: Never use a straight edge guide when rip cutting. Do not remove the saw into a knot or nail. Make straight cuts. After you resulting in serious injury. The lock-off button. Depress the switch trigger. Always let the blade reach full speed, then guide the saw from cutting area. Always leave guard...
... tool. STARTING/STOPPING THE SAW See Figure 9, page 14. This helps prevent twisting the blade. Use clean, sharp, and properly set . CAUTION: Never use a straight edge guide when rip cutting. Do not remove the saw into a knot or nail. Make straight cuts. After you resulting in serious injury. The lock-off button. Depress the switch trigger. Always let the blade reach full speed, then guide the saw from cutting area. Always leave guard...

Operation Manual
Page 9
... blade guard. Tighten the depth lock knob securely. DANGER: When lifting the saw from the line of the upper blade guard. Hold the base flat against the workpiece and raise or lower the saw . Secure the workpiece. Clamp a straight edge to the workpiece using C-clamps. Saw along a guideline to Adjusting the Bevel Setting next. Use a guide when making long or wide rip cuts with the saw until the lower blade guard...
... blade guard. Tighten the depth lock knob securely. DANGER: When lifting the saw from the line of the upper blade guard. Hold the base flat against the workpiece and raise or lower the saw . Secure the workpiece. Clamp a straight edge to the workpiece using C-clamps. Saw along a guideline to Adjusting the Bevel Setting next. Use a guide when making long or wide rip cuts with the saw until the lower blade guard...
Operation Manual
Page 10
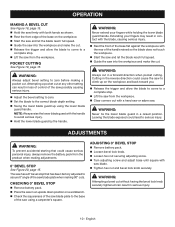
... been factory adjusted to the base of the saw using the lower blade guard handle. WARNING: Attempting a bevel cut . ADJUSTING 0° BEVEL STOP Remove battery pack. Loosen bevel lock knob. Loosen hex nut securing adjusting screw. Turn adjusting screw and adjust base until square with the handle to serious injury. POCKET CUTTING See Figure 19, page 15. WARNING: Always adjust bevel setting to zero before making a pocket cut without having the bevel lock knob securely tightened can result in the reverse direction could...
... been factory adjusted to the base of the saw using the lower blade guard handle. WARNING: Attempting a bevel cut . ADJUSTING 0° BEVEL STOP Remove battery pack. Loosen bevel lock knob. Loosen hex nut securing adjusting screw. Turn adjusting screw and adjust base until square with the handle to serious injury. POCKET CUTTING See Figure 19, page 15. WARNING: Always adjust bevel setting to zero before making a pocket cut without having the bevel lock knob securely tightened can result in the reverse direction could...
Operation Manual
Page 11
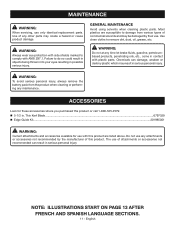
... damage. Thin Kerf Blade...6797329 Edge Guide Kit...201985001 WARNING: Current attachments and accessories available for these accessories where you purchased this product. English Most plastics are listed above. Chemicals can result in serious personal injury. Do not use any maintenance. Use clean cloths to comply with plastic parts. ACCESSORIES Look for use . GENERAL MAINTENANCE Avoid using solvents when cleaning plastic parts. Failure to damage...
... damage. Thin Kerf Blade...6797329 Edge Guide Kit...201985001 WARNING: Current attachments and accessories available for these accessories where you purchased this product. English Most plastics are listed above. Chemicals can result in serious personal injury. Do not use any maintenance. Use clean cloths to comply with plastic parts. ACCESSORIES Look for use . GENERAL MAINTENANCE Avoid using solvents when cleaning plastic parts. Failure to damage...

Parts Diagram
Page 2
ITEM NUMBER P505 11 10 SEE FIGURE B 12 14 9 8 13 7 6 53 4 3 2 31 30 32 33 FIGURE A 15 16 17 18 19 20 21 22 1 27 26 28 29 2 23 24 25 RYOBI 5-1/2 in. (140 mm) CIRCULAR SAW -
ITEM NUMBER P505 11 10 SEE FIGURE B 12 14 9 8 13 7 6 53 4 3 2 31 30 32 33 FIGURE A 15 16 17 18 19 20 21 22 1 27 26 28 29 2 23 24 25 RYOBI 5-1/2 in. (140 mm) CIRCULAR SAW -

Parts Diagram
Page 3
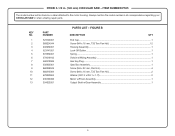
KEY PART NO. Key Nos. 30-33 1 Screw (M6 x 12 mm, Pan Hd 1 Screw (M4 x 16 mm, Pan Hd 1 Hex Nut (M4 1 Bevel Lock Knob 1 Not Shown Operator's Manual 3 Always mention the model number in ., 24T 1 Outer Blade Clamp 1 Blade Screw (M6 x 16 mm, Left Hand Threads 1 Depth Lock Knob 1 Washer (OD12 x ID6.4 x 1t 1 Screw (M6 x 22 mm, Pan Hd 1 Base Assembly (Incl. FIGURE A KEY PART QTY NO. ITEM NUMBER P505 The model number will be found on a label attached to...
KEY PART NO. Key Nos. 30-33 1 Screw (M6 x 12 mm, Pan Hd 1 Screw (M4 x 16 mm, Pan Hd 1 Hex Nut (M4 1 Bevel Lock Knob 1 Not Shown Operator's Manual 3 Always mention the model number in ., 24T 1 Outer Blade Clamp 1 Blade Screw (M6 x 16 mm, Left Hand Threads 1 Depth Lock Knob 1 Washer (OD12 x ID6.4 x 1t 1 Screw (M6 x 22 mm, Pan Hd 1 Base Assembly (Incl. FIGURE A KEY PART QTY NO. ITEM NUMBER P505 The model number will be found on a label attached to...
Parts Diagram
Page 5
... PARTS LIST - FIGURE B DESCRIPTION QTY End Cap...1 Screw (M4 x 16 mm, T20 Torx Pan Hd 12 Housing Assembly...1 Lock-Off Button...1 Spring...1 Switch w/Wiring Assembly 1 Hex Key Plug...1 Gear Box Assembly...1 Screw (M4 x 22 mm, Pan Hd 4 Screw (M4 x 16 mm, T25 Torx Pan Hd 2 Washer (OD7.2 x ID4.1 x 1.1t 2 Motor w/Pinion Assembly 1 Output Shaft w/Gear Assembly 1 5 Always mention the model number in . (140 mm) CIRCULAR SAW - RYOBI 5-1/2 in all correspondence regarding your CIRCULAR SAW or when ordering repair parts...
... PARTS LIST - FIGURE B DESCRIPTION QTY End Cap...1 Screw (M4 x 16 mm, T20 Torx Pan Hd 12 Housing Assembly...1 Lock-Off Button...1 Spring...1 Switch w/Wiring Assembly 1 Hex Key Plug...1 Gear Box Assembly...1 Screw (M4 x 22 mm, Pan Hd 4 Screw (M4 x 16 mm, T25 Torx Pan Hd 2 Washer (OD7.2 x ID4.1 x 1.1t 2 Motor w/Pinion Assembly 1 Output Shaft w/Gear Assembly 1 5 Always mention the model number in . (140 mm) CIRCULAR SAW - RYOBI 5-1/2 in all correspondence regarding your CIRCULAR SAW or when ordering repair parts...

Parts Diagram
Page 6
ITEM NUMBER P505 SWITCH CONTACT PLATE HOLDER RED RED MOTOR WIRING DIAGRAM 6 BLACK RYOBI 5-1/2 in. (140 mm) CIRCULAR SAW -
ITEM NUMBER P505 SWITCH CONTACT PLATE HOLDER RED RED MOTOR WIRING DIAGRAM 6 BLACK RYOBI 5-1/2 in. (140 mm) CIRCULAR SAW -


