

Repair Sheet
Page 3
... mm, Pan Hd 4 Spring Washer (M8 3 Washer (M8 7 Metal Foot 1 Side Protector 1 Base 1 Clamp Bracket 1 Foot 3 Quick Release Lever 1 Bolt (M8 x 30 mm, Hex Hd.)......3 Chain (Hold Down 1 Retaining Ring 1 Washer (D16 x D24 x 3t)...........1 Clamp Plate 1 Pin 1 Retaining Ring 2 Spring Pin (M6 x 35 mm)...........1 Tool Holder 1 Wrench 1 Chip Deflector 1 Washer (M10 4 Spring Washer (M10 4 Torsion Spring 1 Hex Nut (M8 1 Pivot Bracket 1 Fence 1 Tee Nut 1 Screw (M5 x 14 mm, Pan Hd 1 Fence Lock Lever 1 Screw (M10 x 20 mm 1 3 number 1 080029002002...
... mm, Pan Hd 4 Spring Washer (M8 3 Washer (M8 7 Metal Foot 1 Side Protector 1 Base 1 Clamp Bracket 1 Foot 3 Quick Release Lever 1 Bolt (M8 x 30 mm, Hex Hd.)......3 Chain (Hold Down 1 Retaining Ring 1 Washer (D16 x D24 x 3t)...........1 Clamp Plate 1 Pin 1 Retaining Ring 2 Spring Pin (M6 x 35 mm)...........1 Tool Holder 1 Wrench 1 Chip Deflector 1 Washer (M10 4 Spring Washer (M10 4 Torsion Spring 1 Hex Nut (M8 1 Pivot Bracket 1 Fence 1 Tee Nut 1 Screw (M5 x 14 mm, Pan Hd 1 Fence Lock Lever 1 Screw (M10 x 20 mm 1 3 number 1 080029002002...

Repair Sheet
Page 7
......1 Spindle Brake...1 Gear...1 Ball Bearing (629-2Z)...1 Retaining Ring...1 Compression Spring...1 Retaining Ring...1 Lock Bracket...1 Lock Pin...1 Screw (M5 x 10 mm, Pan Hd 2 Spring Washer (M5)...6 Washer (M5)...6 Rubber Plug...1 Armature Assembly (Inc. Key Nos. 27, 36, 39, 70 - 71, 81 - 89 and 92 - 102 1 Bolt (5/16-18 x 4 in., Mounting Bolts 3 Hang Tag Label Operator's Manual 7 Screw (M5 x 20 mm, Pan Hd 2 Output Spindle Assembly (Inc. R4141 KEY Part no. number 70...
......1 Spindle Brake...1 Gear...1 Ball Bearing (629-2Z)...1 Retaining Ring...1 Compression Spring...1 Retaining Ring...1 Lock Bracket...1 Lock Pin...1 Screw (M5 x 10 mm, Pan Hd 2 Spring Washer (M5)...6 Washer (M5)...6 Rubber Plug...1 Armature Assembly (Inc. Key Nos. 27, 36, 39, 70 - 71, 81 - 89 and 92 - 102 1 Bolt (5/16-18 x 4 in., Mounting Bolts 3 Hang Tag Label Operator's Manual 7 Screw (M5 x 20 mm, Pan Hd 2 Output Spindle Assembly (Inc. R4141 KEY Part no. number 70...

Operation Manual
Page 3
... use power tools in doubt, use outdoors and so marked. wheel coasts after being turned off when plugging in good working outdoors. Keep tools sharp and clean for lubricating and changing accessories. DISCONNECT TOOLS. Consult the operator's manual for alignment of moving parts, binding of moving parts. Check for recommended accessories. Keep cord from tool before servicing, or when changing attachments, blades, bits, cutters, etc., all tools should be properly repaired or replaced...
... use power tools in doubt, use outdoors and so marked. wheel coasts after being turned off when plugging in good working outdoors. Keep tools sharp and clean for lubricating and changing accessories. DISCONNECT TOOLS. Consult the operator's manual for alignment of moving parts, binding of moving parts. Check for recommended accessories. Keep cord from tool before servicing, or when changing attachments, blades, bits, cutters, etc., all tools should be properly repaired or replaced...

Operation Manual
Page 4
... and use . KEEP HANDS AWAY FROM CUTTING AREA. Have defective switches replaced by an authorized service center. Never touch wheel or other parts may create a hazard or cause product damage. Use only recommended accessories listed in . Do not remove the machine's wheel guards. specific safety rules FIRMLY CLAMP OR BOLT your body in the vise. Never hand hold a piece of accessories are not listed may...
... and use . KEEP HANDS AWAY FROM CUTTING AREA. Have defective switches replaced by an authorized service center. Never touch wheel or other parts may create a hazard or cause product damage. Use only recommended accessories listed in . Do not remove the machine's wheel guards. specific safety rules FIRMLY CLAMP OR BOLT your body in the vise. Never hand hold a piece of accessories are not listed may...
Operation Manual
Page 5
.... specific safety rules Do not turn the motor switch on how often you loan someone this tool, loan them to instruct other users. A harsh impact can cause the wheel to crack during operation. frequently clean dust from chemically-treated lumber. To reduce your cut -off machine) to cause a careless mistake. Excessive tightening can break the wheel. Before cutting press the trigger switch and allow the wheel...
.... specific safety rules Do not turn the motor switch on how often you loan someone this tool, loan them to instruct other users. A harsh impact can cause the wheel to crack during operation. frequently clean dust from chemically-treated lumber. To reduce your cut -off machine) to cause a careless mistake. Excessive tightening can break the wheel. Before cutting press the trigger switch and allow the wheel...
Operation Manual
Page 6
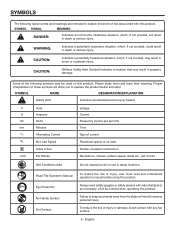
... understand operator's manual before using this product. WARNING: Indicates a potentially hazardous situation, which , if not avoided, will result in death or serious injury. Please study them and learn their meaning. CAUTION: (Without Safety Alert Symbol) Indicates a situation that may result in damp locations. English V A Hz min no .../min Volts Amperes Hertz Minutes Alternating Current No Load Speed...
... understand operator's manual before using this product. WARNING: Indicates a potentially hazardous situation, which , if not avoided, will result in death or serious injury. Please study them and learn their meaning. CAUTION: (Without Safety Alert Symbol) Indicates a situation that may result in damp locations. English V A Hz min no .../min Volts Amperes Hertz Minutes Alternating Current No Load Speed...
Operation Manual
Page 7
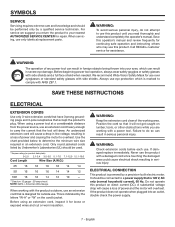
... understand completely the operator's manual. When servicing, use . Save this operator's manual and review frequently for use this product on the cord's jacket. Call RIDGID® customer service for loose or exposed wires and cut or worn insulation. We recommend Wide Vision Safety Mask for continuing safe operation and instructing others who may use over eyeglasses or standard safety glasses with a power tool. NOTE: AWG = American Wire Gauge When working with side shields...
... understand completely the operator's manual. When servicing, use . Save this operator's manual and review frequently for use this product on the cord's jacket. Call RIDGID® customer service for loose or exposed wires and cut or worn insulation. We recommend Wide Vision Safety Mask for continuing safe operation and instructing others who may use over eyeglasses or standard safety glasses with a power tool. NOTE: AWG = American Wire Gauge When working with side shields...
Operation Manual
Page 8
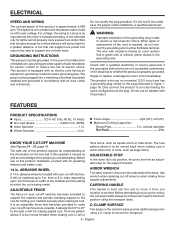
... outlet installed by the carrying handle always lock the power head in the down (full cut) position, the pivot arm hits an adjustable stop on your cut-off wheel or when making cuts in accordance with all local codes and ordinances. WARNING: Improper installation of the grounding plug is required, do not connect the grounding wire to either flat blade terminal. Check with an electric cord having...
... outlet installed by the carrying handle always lock the power head in the down (full cut) position, the pivot arm hits an adjustable stop on your cut-off wheel or when making cuts in accordance with all local codes and ordinances. WARNING: Improper installation of the grounding plug is required, do not connect the grounding wire to either flat blade terminal. Check with an electric cord having...
Operation Manual
Page 9
... each side of the vise crank handle. Abrasive Wheel 1 Flat Washers 3 Hex Head Bolts 3 Operator's Manual (not shown) WARNING: The use . ON/OFF SWITCH To start the tool, squeeze the trigger. VISE Clamp A vise clamp has been provided with the cut -off machine can be pivoted at a given angle then locked in the lowered position for making adjustments: Phillips Screwdriver. ASSEMBLY TOOLS NEEDED See Figure 3, page 18. Contact...
... each side of the vise crank handle. Abrasive Wheel 1 Flat Washers 3 Hex Head Bolts 3 Operator's Manual (not shown) WARNING: The use . ON/OFF SWITCH To start the tool, squeeze the trigger. VISE Clamp A vise clamp has been provided with the cut -off machine can be pivoted at a given angle then locked in the lowered position for making adjustments: Phillips Screwdriver. ASSEMBLY TOOLS NEEDED See Figure 3, page 18. Contact...
Operation Manual
Page 10
... release machine arm. Raise machine arm to snugly tighten. Depress the spindle lock and rotate bolt until assembly is complete. NOTE: Wheel bolt has right hand threads. Either of the cut -off machine. Select another wheel. Clean debris from rotating. Using the arbor wrench provided, securely tighten wheel bolt. installation / Removal of outer flange against wheel, then insert washer and wheel bolt into the machine base. Tighten...
... release machine arm. Raise machine arm to snugly tighten. Depress the spindle lock and rotate bolt until assembly is complete. NOTE: Wheel bolt has right hand threads. Either of the cut -off machine. Select another wheel. Clean debris from rotating. Using the arbor wrench provided, securely tighten wheel bolt. installation / Removal of outer flange against wheel, then insert washer and wheel bolt into the machine base. Tighten...
Operation Manual
Page 11
... safety goggles or safety glasses with tools to the desired angle. Retighten miter lock handle securing fence. 11 - Use "C" clamps that can result in serious personal injury. Also use blocks to loosen. Remove wheel bolt, washer, outer flange, and wheel. steel framing studs Cutting hard metal iron stock such as 2 in place adequately for the purposes listed below: Cutting all types of the machine base. To turn...
... safety goggles or safety glasses with tools to the desired angle. Retighten miter lock handle securing fence. 11 - Use "C" clamps that can result in serious personal injury. Also use blocks to loosen. Remove wheel bolt, washer, outer flange, and wheel. steel framing studs Cutting hard metal iron stock such as 2 in place adequately for the purposes listed below: Cutting all types of the machine base. To turn...
Operation Manual
Page 12
... to allow the wheel to stop rotating before raising the wheel out of material. WARNING: Never perform any cutting operation freehand (without repetitive turning of the vise crank handle. The adjustable fence is complete, release the on/off machine. Loosen the miter lock handle by grasping the handle and fully squeezing the on/off machine, use steady and even pressure to obtain a uniform cut See Figure...
... to allow the wheel to stop rotating before raising the wheel out of material. WARNING: Never perform any cutting operation freehand (without repetitive turning of the vise crank handle. The adjustable fence is complete, release the on/off machine. Loosen the miter lock handle by grasping the handle and fully squeezing the on/off machine, use steady and even pressure to obtain a uniform cut See Figure...
Operation Manual
Page 13
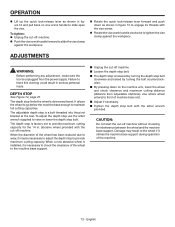
.... The depth stop to provide maximum cutting capacity. It allows the wheel to go below the machine base enough to slide the vise clamp against the workpiece. OPERATION Lift up the quick lock-release lever as shown in figure 13 to engage its threads with the vise screw. Rotate the vise crank handle clockwise to tighten the vise clamp against the...
.... The depth stop to provide maximum cutting capacity. It allows the wheel to go below the machine base enough to slide the vise clamp against the workpiece. OPERATION Lift up the quick lock-release lever as shown in figure 13 to engage its threads with the vise screw. Rotate the vise crank handle clockwise to tighten the vise clamp against the...
Operation Manual
Page 14
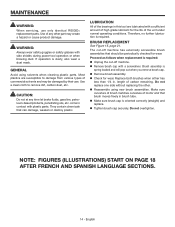
... a screwdriver. Make sure curvature of brush matches curvature of carbon remaining. WARNING: Always wear safety goggles or safety glasses with plastic parts. They contain chemicals that should be damaged by their use only identical RIDGID® replacement parts. Brush REPLACEMENT See Figure 15, page 21. The cut -off machine has externally accessible brush assemblies that can damage, weaken or destroy plastic. maintenance WARNING: When servicing, use . If operation is spring loaded...
... a screwdriver. Make sure curvature of brush matches curvature of carbon remaining. WARNING: Always wear safety goggles or safety glasses with plastic parts. They contain chemicals that should be damaged by their use only identical RIDGID® replacement parts. Brush REPLACEMENT See Figure 15, page 21. The cut -off machine has externally accessible brush assemblies that can damage, weaken or destroy plastic. maintenance WARNING: When servicing, use . If operation is spring loaded...
Operation Manual
Page 15
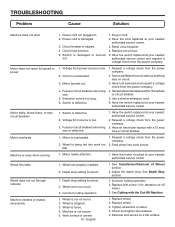
... the switch replaced at your nearest authorized service center Wheel hits table Wheel does not cut off wheel. 3. Motor burned out. 4. Extension cord is tripped. 4. Have an electrician replace with a new 14 in. Depth stop . See Cutting with the Cut-Off Machine. Machine is defective. 1. Check and tighten all hardware. 5. Relocate and secure on circuit. 3. Reset circuit breaker. 4. Switch is not secure. 5. See Installation/Removal of -round. 2. Power cord is loose. 4. Have tool serviced...
... the switch replaced at your nearest authorized service center Wheel hits table Wheel does not cut off wheel. 3. Motor burned out. 4. Extension cord is tripped. 4. Have an electrician replace with a new 14 in. Depth stop . See Cutting with the Cut-Off Machine. Machine is defective. 1. Check and tighten all hardware. 5. Relocate and secure on circuit. 3. Reset circuit breaker. 4. Switch is not secure. 5. See Installation/Removal of -round. 2. Power cord is loose. 4. Have tool serviced...

Operation Manual
Page 16
..., all original equipment packaged with the tool such as brushes, chucks, motors, switches, cords, gears and even cordless batteries in to the dealer from which vary from RIDGID®, Inc. You may obtain the location of the authorized service center nearest you may return the tool to an authorized service center for RIDGID® branded hand held and stationary power tools purchased 2/1/04 and after the date...
..., all original equipment packaged with the tool such as brushes, chucks, motors, switches, cords, gears and even cordless batteries in to the dealer from which vary from RIDGID®, Inc. You may obtain the location of the authorized service center nearest you may return the tool to an authorized service center for RIDGID® branded hand held and stationary power tools purchased 2/1/04 and after the date...


