Owners Manual
Page 1
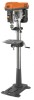
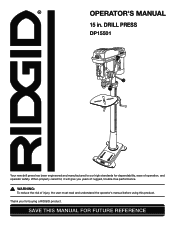
Thank you years of rugged, trouble-free performance. DRILL PRESS DP15501 ® ® Your new drill press has been engineered and manufactured to our high standards for buying a RIDGID product. SAVE THIS MANUAL FOR FUTURE REFERENCE OPERATOR'S MANUAL 15 in. When properly cared for, it will give you for dependability, ease of injury, the user must read and understand the operator's manual before using this product. WARNING: To reduce the risk of operation, and operator safety.
Thank you years of rugged, trouble-free performance. DRILL PRESS DP15501 ® ® Your new drill press has been engineered and manufactured to our high standards for buying a RIDGID product. SAVE THIS MANUAL FOR FUTURE REFERENCE OPERATOR'S MANUAL 15 in. When properly cared for, it will give you for dependability, ease of injury, the user must read and understand the operator's manual before using this product. WARNING: To reduce the risk of operation, and operator safety.

Owners Manual
Page 15
... LOCK HANDLES BELT TENSION HANDLE 1/2 IN. ASSEMBLY TO INSTALL THE IDLER PULLEY See Figure 8. n Press the belt guard latch and lift belt guard. NOTE: The idler pulley should be aligned. n Apply...sure the ribs in line. • Retighten the motor mount nuts. n If belt slips while drilling, readjust belt tension. Also make sure the four ribs on the belt are aligned with grooves in... . SHORTER BELT IMPORTANT: Visually check to start or damage bearings. LONGER BELT Fig. 9 15 n If pulleys are not aligned: • Loosen the motor mount nuts. • Move the motor until...
... LOCK HANDLES BELT TENSION HANDLE 1/2 IN. ASSEMBLY TO INSTALL THE IDLER PULLEY See Figure 8. n Press the belt guard latch and lift belt guard. NOTE: The idler pulley should be aligned. n Apply...sure the ribs in line. • Retighten the motor mount nuts. n If belt slips while drilling, readjust belt tension. Also make sure the four ribs on the belt are aligned with grooves in... . SHORTER BELT IMPORTANT: Visually check to start or damage bearings. LONGER BELT Fig. 9 15 n If pulleys are not aligned: • Loosen the motor mount nuts. • Move the motor until...

Owners Manual
Page 18
...174; Fig. 15 WRONG Fig. 16 18 ® ® ® WARNING: Do not insert drill bit into chuck the full length of the jaws. n Tighten chuck jaws securely using the chuck key provided. SWITCH KEY ® WARNING: For your own safety, always push the switch OFF when drill press is sufficient to... in figure 16. CHUCK KEY TO INSTALL BITS See Figure 16. n Wait until the drill press has come to storage area. ® TO LOCK THE SWITCH See Figure 15. Store key in the OFF (O) position. OPERATION WARNING: Do not allow familiarity with the palm of your hand. n Remove the...
...174; Fig. 15 WRONG Fig. 16 18 ® ® ® WARNING: Do not insert drill bit into chuck the full length of the jaws. n Tighten chuck jaws securely using the chuck key provided. SWITCH KEY ® WARNING: For your own safety, always push the switch OFF when drill press is sufficient to... in figure 16. CHUCK KEY TO INSTALL BITS See Figure 16. n Wait until the drill press has come to storage area. ® TO LOCK THE SWITCH See Figure 15. Store key in the OFF (O) position. OPERATION WARNING: Do not allow familiarity with the palm of your hand. n Remove the...

Owners Manual
Page 32
DRILL PRESS DP15501 CUSTOMER SERVICE INFORMATION For parts or service, contact your nearest RIDGID authorized service center. Please record the serial number in . The model number of the authorized service center nearest you call 1-866-539-1710 or visit us online at www.ridgid.com. Be sure to the motor housing. For the location of...
DRILL PRESS DP15501 CUSTOMER SERVICE INFORMATION For parts or service, contact your nearest RIDGID authorized service center. Please record the serial number in . The model number of the authorized service center nearest you call 1-866-539-1710 or visit us online at www.ridgid.com. Be sure to the motor housing. For the location of...


