Operation Manual
Page 1
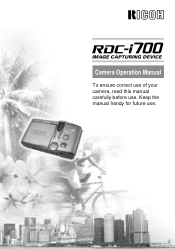
Camera Operation Manual To ensure correct use of your camera, read this manual carefully before use . Keep the manual handy for future use .
Camera Operation Manual To ensure correct use of your camera, read this manual carefully before use . Keep the manual handy for future use .
Operation Manual
Page 2
... mistakes or inaccuracies, please contact us at the address listed on the back cover. This manual explains the correct handling procedures and precautions for purchasing a Ricoh RDC-i700. Copyright Reproduction or alteration of copyrighted documents, magazines, music and other materials, other countries. SmartMedia™ is prohibited. Test Shots Check that your camera. If...
... mistakes or inaccuracies, please contact us at the address listed on the back cover. This manual explains the correct handling procedures and precautions for purchasing a Ricoh RDC-i700. Copyright Reproduction or alteration of copyrighted documents, magazines, music and other materials, other countries. SmartMedia™ is prohibited. Test Shots Check that your camera. If...
Operation Manual
Page 3
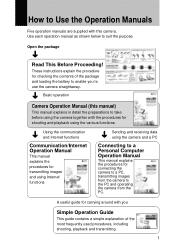
These instructions explain the procedure for checking the contents of the package and loading the battery to enable you Simple Operation Guide This guide contains a simple explanation of the most frequently used procedures, including shooting, playback and transmitting. 1 Open the package ➜ Read This Before Proceeding! Sending and receiving data using the camera and a PC Connecting to a Personal Computer Operation Manual This manual explains the procedures for connecting the camera to a PC, transmitting images from the camera to use the camera straightaway. A useful ...
These instructions explain the procedure for checking the contents of the package and loading the battery to enable you Simple Operation Guide This guide contains a simple explanation of the most frequently used procedures, including shooting, playback and transmitting. 1 Open the package ➜ Read This Before Proceeding! Sending and receiving data using the camera and a PC Connecting to a Personal Computer Operation Manual This manual explains the procedures for connecting the camera to a PC, transmitting images from the camera to use the camera straightaway. A useful ...

Operation Manual
Page 4
CONTENTS How to Use the Operation Manuals 1 Parts & Names 6 Safety Precautions 8 Chapter 1 Getting Started Before Using the Camera 14 Attaching the Neck Strap 14 Attaching the Lens Cap 14 Powering the Camera 15 Charging the Battery 15 Loading the Battery 16 Connecting an AC Adapter 18 Storage Memory 19 Inserting a CF Card or PC Card 20 Chapter 2 Basic Operations Turning On/Off the Camera 24 How to Use the Mode Dial 25 LCD Monitor and LCD Panel 26 Recording Mode 26 Play Mode 27 Adjusting the LCD Monitor 28 Adjusting the LCD Monitor Contrast 28 Using the Stylus Pen 28 Fine ...
CONTENTS How to Use the Operation Manuals 1 Parts & Names 6 Safety Precautions 8 Chapter 1 Getting Started Before Using the Camera 14 Attaching the Neck Strap 14 Attaching the Lens Cap 14 Powering the Camera 15 Charging the Battery 15 Loading the Battery 16 Connecting an AC Adapter 18 Storage Memory 19 Inserting a CF Card or PC Card 20 Chapter 2 Basic Operations Turning On/Off the Camera 24 How to Use the Mode Dial 25 LCD Monitor and LCD Panel 26 Recording Mode 26 Play Mode 27 Adjusting the LCD Monitor 28 Adjusting the LCD Monitor Contrast 28 Using the Stylus Pen 28 Fine ...
Operation Manual
Page 5
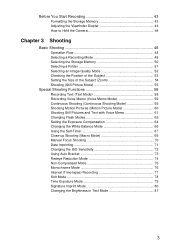
Before You Start Recording 43 Formatting the Storage Memory 43 Adjusting the Viewfinder Diopter 44 How to Hold the Camera 44 Chapter 3 Shooting Basic Shooting 48 Operation Flow 48 Selecting a Recording Mode 49 Selecting the Storage Memory 50 Selecting a Folder 51 Selecting an Image Quality Mode 52 Checking the Position of the Subject 53 Setting the Size of the Subject (Zoom 54 Shooting (Still Picture Mode 55 Special Shooting Functions 58 Recording Text (Text Mode 58 Recording Voice Memo (Voice Memo Mode 59 Continuous Shooting (Continuous Shooting Mode 59 Shooting Motion ...
Before You Start Recording 43 Formatting the Storage Memory 43 Adjusting the Viewfinder Diopter 44 How to Hold the Camera 44 Chapter 3 Shooting Basic Shooting 48 Operation Flow 48 Selecting a Recording Mode 49 Selecting the Storage Memory 50 Selecting a Folder 51 Selecting an Image Quality Mode 52 Checking the Position of the Subject 53 Setting the Size of the Subject (Zoom 54 Shooting (Still Picture Mode 55 Special Shooting Functions 58 Recording Text (Text Mode 58 Recording Voice Memo (Voice Memo Mode 59 Continuous Shooting (Continuous Shooting Mode 59 Shooting Motion ...

Operation Manual
Page 6
Chapter 4 Playback/Deleting Basic Playback 84 Files Playable on the Camera 84 Playing a Still Picture, Text or Continuous Shooting File 84 Playing a Voice Memo File 85 Playing a Motion Picture File 86 Playback Using a TV 88 Special Functions 89 Switching to Edit Mode 89 Displaying One File at a Time (Single Image Playback 89 Displaying Several Files at Once (Thumbnail Playback 90 Magnifying a File (Zoom Playback 91 Copying and Moving Files 92 Editing Images 94 Adding a Memo or Voice Memo to a File 97 Selecting a Folder 100 Protecting a File 100 Auto Playback 101 Setting DPOF (...
Chapter 4 Playback/Deleting Basic Playback 84 Files Playable on the Camera 84 Playing a Still Picture, Text or Continuous Shooting File 84 Playing a Voice Memo File 85 Playing a Motion Picture File 86 Playback Using a TV 88 Special Functions 89 Switching to Edit Mode 89 Displaying One File at a Time (Single Image Playback 89 Displaying Several Files at Once (Thumbnail Playback 90 Magnifying a File (Zoom Playback 91 Copying and Moving Files 92 Editing Images 94 Adding a Memo or Voice Memo to a File 97 Selecting a Folder 100 Protecting a File 100 Auto Playback 101 Setting DPOF (...
Operation Manual
Page 7
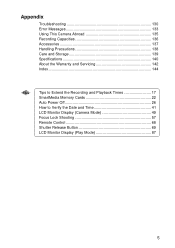
Appendix Troubleshooting 130 Error Messages 133 Using This Camera Abroad 135 Recording Capacities 136 Accessories 137 Handling Precautions 138 Care and Storage 139 Specifications 140 About the Warranty and Servicing 142 Index 144 Tips Tips to Extend the Recording and Playback Times 17 SmartMedia Memory Cards 22 Auto Power Off 26 How to Verify the Date and Time 41 LCD Monitor Display (Camera Mode 49 Focus Lock Shooting 57 Remote Control 68 Shutter Release Button 69 LCD Monitor Display (Play Mode 87 5
Appendix Troubleshooting 130 Error Messages 133 Using This Camera Abroad 135 Recording Capacities 136 Accessories 137 Handling Precautions 138 Care and Storage 139 Specifications 140 About the Warranty and Servicing 142 Index 144 Tips Tips to Extend the Recording and Playback Times 17 SmartMedia Memory Cards 22 Auto Power Off 26 How to Verify the Date and Time 41 LCD Monitor Display (Camera Mode 49 Focus Lock Shooting 57 Remote Control 68 Shutter Release Button 69 LCD Monitor Display (Play Mode 87 5
Operation Manual
Page 8
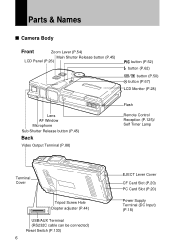
Parts & Names s Camera Body Front Zoom Lever (P.54) Main Shutter Release button (P.45) LCD Panel (P.26) button (P.52) button (P.62) button (P.50) button (P.67) LCD Monitor (P.28) Lens AF Window Microphone Sub Shutter Release button (P.45) Back Video Output Terminal (P.88) Flash Remote Control Reception (P.125)/ Self Timer Lamp Terminal Cover Tripod Screw Hole Diopter adjuster (P.44) USB/AUX Terminal (RS232C cable can be connected) Reset Switch (P.133) 6 EJECT Lever Cover CF Card Slot (P.20) PC Card Slot (P.20) Power Supply Terminal (DC Input) (P.18)
Parts & Names s Camera Body Front Zoom Lever (P.54) Main Shutter Release button (P.45) LCD Panel (P.26) button (P.52) button (P.62) button (P.50) button (P.67) LCD Monitor (P.28) Lens AF Window Microphone Sub Shutter Release button (P.45) Back Video Output Terminal (P.88) Flash Remote Control Reception (P.125)/ Self Timer Lamp Terminal Cover Tripod Screw Hole Diopter adjuster (P.44) USB/AUX Terminal (RS232C cable can be connected) Reset Switch (P.133) 6 EJECT Lever Cover CF Card Slot (P.20) PC Card Slot (P.20) Power Supply Terminal (DC Input) (P.18)
Operation Manual
Page 9
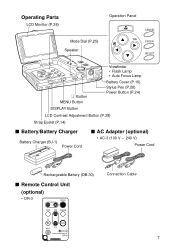
Operating Parts LCD Monitor (P.28) Operation Panel Mode Dial (P.25) Speaker Ô Button MENU Button Viewfinder • Flash Lamp • Auto Focus Lamp Battery Cover (P.16) Stylus Pen (P.28) Power Button (P.24) DISPLAY Button LCD Contrast Adjustment Button (P.28) Strap Eyelet (P.14) s Battery/Battery Charger Battery Charger (BJ-1) Power Cord s AC Adapter (optional) • AC-3 (100 V - 240 V) Power Cord Rechargeable Battery (DB-30) s Remote Control Unit (optional) • DR-3 Connection Cable 7
Operating Parts LCD Monitor (P.28) Operation Panel Mode Dial (P.25) Speaker Ô Button MENU Button Viewfinder • Flash Lamp • Auto Focus Lamp Battery Cover (P.16) Stylus Pen (P.28) Power Button (P.24) DISPLAY Button LCD Contrast Adjustment Button (P.28) Strap Eyelet (P.14) s Battery/Battery Charger Battery Charger (BJ-1) Power Cord s AC Adapter (optional) • AC-3 (100 V - 240 V) Power Cord Rechargeable Battery (DB-30) s Remote Control Unit (optional) • DR-3 Connection Cable 7
Operation Manual
Page 10
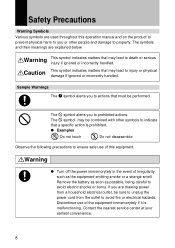
m The m symbol alerts you or other symbols to injury or physical damage if ignored or incorrectly handled. q Examples n q Do not touch Do not disassemble Observe the following precautions to ensure safe use of the equipment immemorytely if it is prohibited. RWarning o q Turn off the power immemorytely in the event of this operation manual and on the product to prevent physical harm to you to avoid electric shocks or burns. Discontinue use of irregularity, such as possible, being careful to prohibited actions. RCaution This symbol indicates matters that may lead to death...
m The m symbol alerts you or other symbols to injury or physical damage if ignored or incorrectly handled. q Examples n q Do not touch Do not disassemble Observe the following precautions to ensure safe use of the equipment immemorytely if it is prohibited. RWarning o q Turn off the power immemorytely in the event of this operation manual and on the product to prevent physical harm to you to avoid electric shocks or burns. Discontinue use of irregularity, such as possible, being careful to prohibited actions. RCaution This symbol indicates matters that may lead to death...

Operation Manual
Page 11
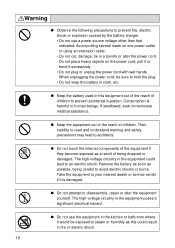
Discontinue use of the equipment immemorytely if it gets in your eyes, wash your eyes with clean water for the equipment. • Do not carry or store the battery with metallic ballpoint pens, necklaces, coins, hairpins, etc. • Remove the battery from the outlet to avoid electric shocks or burns. Follow the emergency measures below in the event of the liquid crystal is malfunctioning. Have the victim drink a large amount of the liquid crystal gets on your earliest convenience. m q Follow these precautions to prevent the battery from leaking, overheating, igniting or ...
Discontinue use of the equipment immemorytely if it gets in your eyes, wash your eyes with clean water for the equipment. • Do not carry or store the battery with metallic ballpoint pens, necklaces, coins, hairpins, etc. • Remove the battery from the outlet to avoid electric shocks or burns. Follow the emergency measures below in the event of the liquid crystal is malfunctioning. Have the victim drink a large amount of the liquid crystal gets on your earliest convenience. m q Follow these precautions to prevent the battery from leaking, overheating, igniting or ...
Operation Manual
Page 12
Do not place heavy objects on one power outlet or using an extension cable. • Do not cut, damage, tie in a bundle or alter the power cord. Their inability to read and understand warning and safety precautions may lead to disassemble, repair or alter the equipment yourself. n q Do not touch the internal components of the equipment if they become exposed as a result of children. q q Do not attempt to accidents. Remove the battery as soon as this equipment out of the reach of children to prevent accidental ingestion. Take the equipment to your nearest dealer or ...
Do not place heavy objects on one power outlet or using an extension cable. • Do not cut, damage, tie in a bundle or alter the power cord. Their inability to read and understand warning and safety precautions may lead to disassemble, repair or alter the equipment yourself. n q Do not touch the internal components of the equipment if they become exposed as a result of children. q q Do not attempt to accidents. Remove the battery as soon as this equipment out of the reach of children to prevent accidental ingestion. Take the equipment to your nearest dealer or ...

Operation Manual
Page 13
Other adapters pose the risk of explosion, fire or burns. m q To avoid the risk of fire, electric shock or failure, do not use the equipment near flammable gases, gasoline, benzine, thinner or similar substances to avoid the risk of fire, electric shock or failure. o q Wipe off any dust that accumulates on the electrical plug as this may lead to disasters or accidents. q Do not use the equipment in aircraft or other locations where usage is restricted or prohibited as this equipment (optional AC-3) in household electrical outlets. RWarning m q Do not use the AC adapter...
Other adapters pose the risk of explosion, fire or burns. m q To avoid the risk of fire, electric shock or failure, do not use the equipment near flammable gases, gasoline, benzine, thinner or similar substances to avoid the risk of fire, electric shock or failure. o q Wipe off any dust that accumulates on the electrical plug as this may lead to disasters or accidents. q Do not use the equipment in aircraft or other locations where usage is restricted or prohibited as this equipment (optional AC-3) in household electrical outlets. RWarning m q Do not use the AC adapter...
Operation Manual
Page 14
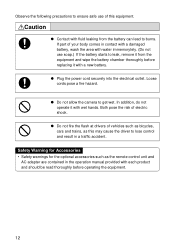
o q Plug the power cord securely into the electrical outlet. If part of your body comes in a traffic accident. In addition, do not operate it with wet hands. m q Do not allow the camera to burns. RCaution o q Contact with fluid leaking from the equipment and wipe the battery chamber thoroughly before operating the equipment. 12 m q Do not fire the flash at drivers of vehicles such as bicycles, cars and trains, as the remote control unit and AC adapter are contained in the operation manual provided with each product and should be read thoroughly before replacing it with ...
o q Plug the power cord securely into the electrical outlet. If part of your body comes in a traffic accident. In addition, do not operate it with wet hands. m q Do not allow the camera to burns. RCaution o q Contact with fluid leaking from the equipment and wipe the battery chamber thoroughly before operating the equipment. 12 m q Do not fire the flash at drivers of vehicles such as bicycles, cars and trains, as the remote control unit and AC adapter are contained in the operation manual provided with each product and should be read thoroughly before replacing it with ...

Operation Manual
Page 15
1Chapter Getting Started Before Using the Camera ....... 14 Attaching the Neck Strap 14 Attaching the Lens Cap 14 Powering the Camera 15 Charging the Battery 15 Loading the Battery 16 Connecting an AC Adapter .......... 18 Storage Memory 19 Inserting a CF Card or PC Card ... 20
1Chapter Getting Started Before Using the Camera ....... 14 Attaching the Neck Strap 14 Attaching the Lens Cap 14 Powering the Camera 15 Charging the Battery 15 Loading the Battery 16 Connecting an AC Adapter .......... 18 Storage Memory 19 Inserting a CF Card or PC Card ... 20
Operation Manual
Page 16
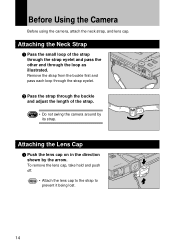
Before Using the Camera Before using the camera, attach the neck strap, and lens cap. Remove the strap from the buckle first and pass each loop through the loop as illustrated. Attaching the Lens Cap A Push the lens cap on in the direction shown by its strap. B Pass the strap through the buckle and adjust the length of the strap through the strap eyelet and pass the other end through the strap eyelet. Note • Attach the lens cap to the strap to prevent it being lost. 14 Important Note • Do not swing the camera around by the arrow. Attaching the Neck Strap A ...
Before Using the Camera Before using the camera, attach the neck strap, and lens cap. Remove the strap from the buckle first and pass each loop through the loop as illustrated. Attaching the Lens Cap A Push the lens cap on in the direction shown by its strap. B Pass the strap through the buckle and adjust the length of the strap through the strap eyelet and pass the other end through the strap eyelet. Note • Attach the lens cap to the strap to prevent it being lost. 14 Important Note • Do not swing the camera around by the arrow. Attaching the Neck Strap A ...
Operation Manual
Page 17
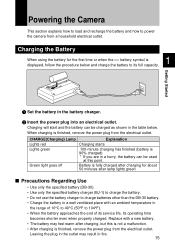
B Insert the power plug into an electrical outlet. Leaving the plug in a hurry, the battery can be used at this is not a malfunction. • After charging is finished, remove the power plug from the electrical outlet. Charging will start and the battery can be charged as shown in the battery charger. When charging is finished, remove the power plug from the electrical outlet. Getting Started A Set the battery in the table below and charge the battery to its operating time becomes shorter even when properly charged. CHARGE(Charging) Lamp Lights red Lights green Green light...
B Insert the power plug into an electrical outlet. Leaving the plug in a hurry, the battery can be used at this is not a malfunction. • After charging is finished, remove the power plug from the electrical outlet. Charging will start and the battery can be charged as shown in the battery charger. When charging is finished, remove the power plug from the electrical outlet. Getting Started A Set the battery in the table below and charge the battery to its operating time becomes shorter even when properly charged. CHARGE(Charging) Lamp Lights red Lights green Green light...

Operation Manual
Page 18
Close the battery cover until it in a playback mode at an ambient temperature of 20°C (68°F). q Shooting and Playback Guidelines The table below gives the approximate recording and playback times that the camera is not charged when the camera leaves the factory.) → P.15 "Charging the Battery" A Check that are available, as measured under the following test conditions. [Test conditions] During shooting: Shoot continuously in a recording mode (shoot at an ambient temperature of 30 seconds, without turning the camera off , and then open the battery cover by pressing ...
Close the battery cover until it in a playback mode at an ambient temperature of 20°C (68°F). q Shooting and Playback Guidelines The table below gives the approximate recording and playback times that the camera is not charged when the camera leaves the factory.) → P.15 "Charging the Battery" A Check that are available, as measured under the following test conditions. [Test conditions] During shooting: Shoot continuously in a recording mode (shoot at an ambient temperature of 30 seconds, without turning the camera off , and then open the battery cover by pressing ...
Operation Manual
Page 19
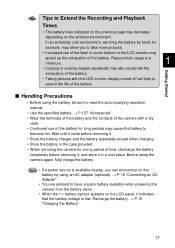
Getting Started s Handling Precautions • Before using an AC adapter (optional). → P.18 "Connecting an AC Adapter" • You are advised to have a spare battery available when powering the camera from the battery alone. • When the battery symbol appears on the LCD panel, it indicates that the battery voltage is available nearby, you to take more pictures. • Increased use of the battery for long periods may speed up the exhaustion of the battery. Note • If a power source is low. Recharge the battery. → P.15 "Charging the Battery" 17 ...
Getting Started s Handling Precautions • Before using an AC adapter (optional). → P.18 "Connecting an AC Adapter" • You are advised to have a spare battery available when powering the camera from the battery alone. • When the battery symbol appears on the LCD panel, it indicates that the battery voltage is available nearby, you to take more pictures. • Increased use of the battery for long periods may speed up the exhaustion of the battery. Note • If a power source is low. Recharge the battery. → P.15 "Charging the Battery" 17 ...
Operation Manual
Page 20
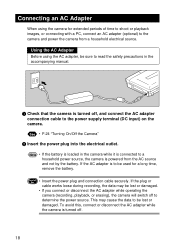
Using the AC Adapter Before using the camera for a long time, remove the battery. A Check that the camera is turned off. 18 See • P.24 "Turning On/Off the Camera" B Insert the power plug into the electrical outlet. Note • If the battery is loaded in the accompanying manual. If the plug or cable works loose during recording, the data may cause the data to be lost or damaged. • If you connect or disconnect the AC adapter while operating the camera (recording, playback, or erasing), the camera will switch off , and connect the AC adapter connection cable to the ...
Using the AC Adapter Before using the camera for a long time, remove the battery. A Check that the camera is turned off. 18 See • P.24 "Turning On/Off the Camera" B Insert the power plug into the electrical outlet. Note • If the battery is loaded in the accompanying manual. If the plug or cable works loose during recording, the data may cause the data to be lost or damaged. • If you connect or disconnect the AC adapter while operating the camera (recording, playback, or erasing), the camera will switch off , and connect the AC adapter connection cable to the ...