
User Guide
Page 1
... about the functions used to customize the camera settings, print pictures, and use . Camera User Guide This manual is for the first time, read this section. Advanced Operations Read this section when you are using the camera for GX200 and GX200 VF KIT. GX200 VF KIT is not charged at the... time of how to be charged before use the camera with an LCD viewfinder (VF-1). This section provides a basic overview of purchase....
... about the functions used to customize the camera settings, print pictures, and use . Camera User Guide This manual is for the first time, read this section. Advanced Operations Read this section when you are using the camera for GX200 and GX200 VF KIT. GX200 VF KIT is not charged at the... time of how to be charged before use the camera with an LCD viewfinder (VF-1). This section provides a basic overview of purchase....

User Guide
Page 2
Ricoh Co., Ltd. In particular, operating the camera close to a radio or television may not be changed in the vicinity of other than for information on how to contact us. If interference occurs, follow the procedures below. • Move the camera as far away as warnings on its content. The ...; 2008 RICOH CO., LTD. Should the product fail or malfunction while you have a question, spot an error, or find a description lacking, please refer to the end of your camera, be sure to do some test shooting to make the best use of Adobe Systems Incorporated. All trademarked company ...
Ricoh Co., Ltd. In particular, operating the camera close to a radio or television may not be changed in the vicinity of other than for information on how to contact us. If interference occurs, follow the procedures below. • Move the camera as far away as warnings on its content. The ...; 2008 RICOH CO., LTD. Should the product fail or malfunction while you have a question, spot an error, or find a description lacking, please refer to the end of your camera, be sure to do some test shooting to make the best use of Adobe Systems Incorporated. All trademarked company ...

User Guide
Page 4
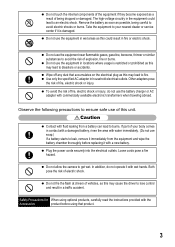
... immediately in the event of abnormalities such as ballpoint pens, necklaces, coins, hairpins, etc. • Do not put the battery into the camera. Remove the battery as soon as possible, being careful to human beings. Remove the battery and memory card as soon as possible, being emitted.... • If leakage of the equipment immediately if it is malfunctioning. is noticed during use or during charging, remove the battery from the camera or battery charger immediately and keep it away from leaking, overheating, igniting or exploding. • Do not use of children to prevent the...
... immediately in the event of abnormalities such as ballpoint pens, necklaces, coins, hairpins, etc. • Do not put the battery into the camera. Remove the battery as soon as possible, being careful to human beings. Remove the battery and memory card as soon as possible, being emitted.... • If leakage of the equipment immediately if it is malfunctioning. is noticed during use or during charging, remove the battery from the camera or battery charger immediately and keep it away from leaking, overheating, igniting or exploding. • Do not use of children to prevent the...
User Guide
Page 5
..., benzene, thinner or similar substances to disasters or accidents. Do not use the battery charger or AC adapter with a new battery. Do not allow the camera to an electric shock. Remove the battery as soon as this could lead to get wet.
..., benzene, thinner or similar substances to disasters or accidents. Do not use the battery charger or AC adapter with a new battery. Do not allow the camera to an electric shock. Remove the battery as soon as this could lead to get wet.

User Guide
Page 6
... display and edit them on your GX200/GX200 VF KIT. To copy the User Guide onto your hard disk, copy the PDF file from the camera to install the provided software on your computer. * The "Camera User Guide" (English edition) is provided with your computer. "Camera User Guide" (English edition) (PDF...to your computer. For how to 5:00 PM 4 For more information on your hard disk. "Camera User Guide" (This booklet) This guide explains the usage and functions of the camera. The camera is available from the provided CD-ROM as a PDF file. Using These Manuals The following folders ...
... display and edit them on your GX200/GX200 VF KIT. To copy the User Guide onto your hard disk, copy the PDF file from the camera to install the provided software on your computer. * The "Camera User Guide" (English edition) is provided with your computer. "Camera User Guide" (English edition) (PDF...to your computer. For how to 5:00 PM 4 For more information on your hard disk. "Camera User Guide" (This booklet) This guide explains the usage and functions of the camera. The camera is available from the provided CD-ROM as a PDF file. Using These Manuals The following folders ...

User Guide
Page 7
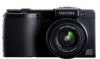
...CCD with approx. 12.1 effective megapixels and RAW mode capable of digital SLR cameras. This small, compact, and lightweight camera has advanced modes that supports DNG files). When taking pictures in other situations where camera shake may differ from the actual items. Wide-angle zoom lens ...at night and in RAW mode, a JPEG file based on a 35 mm camera Camera shake correction function reduces blurring (P.137) The camera comes with a camera shake correction function to allow you can capture wideangle pictures This camera has a compact body only 25 mm thick, featuring a 24-72 mm* ...
...CCD with approx. 12.1 effective megapixels and RAW mode capable of digital SLR cameras. This small, compact, and lightweight camera has advanced modes that supports DNG files). When taking pictures in other situations where camera shake may differ from the actual items. Wide-angle zoom lens ...at night and in RAW mode, a JPEG file based on a 35 mm camera Camera shake correction function reduces blurring (P.137) The camera comes with a camera shake correction function to allow you can capture wideangle pictures This camera has a compact body only 25 mm thick, featuring a 24-72 mm* ...

User Guide
Page 8
... various menu operations. lever for faster and easier operations (P.26) You can also take clear macro shots even under low light conditions. The camera uses a level indicator displayed on the picture display and a level sound to let you know whether the image is useful for keeping the ... equipped with close-up -down dial and ADJ. lever to quickly and easily make various shooting settings. 6 Enhance your shooting purpose (use the camera with a 0.79× wide conversion lens (19-mm*) or 1.88× tele conversion lens (135-mm*), according to your photographic experience with a...
... various menu operations. lever for faster and easier operations (P.26) You can also take clear macro shots even under low light conditions. The camera uses a level indicator displayed on the picture display and a level sound to let you know whether the image is useful for keeping the ... equipped with close-up -down dial and ADJ. lever to quickly and easily make various shooting settings. 6 Enhance your shooting purpose (use the camera with a 0.79× wide conversion lens (19-mm*) or 1.88× tele conversion lens (135-mm*), according to your photographic experience with a...

User Guide
Page 9
...traveling. Direct printing without using still images, video clips, audio, and music files. This allows for long periods of shooting and playback, the camera is assigned to either of the two Fn (Function) buttons, you can perform the assigned function, such as switching to JPEG mode or RAW... you to the Fn1/Fn2 button. You can also use of a computer (P.177) A direct print-compatible printer can be connected to the camera with those registered settings. Easily customize your favorite shooting settings with my settings mode (P.99) You can customize three groups of settings, and then...
...traveling. Direct printing without using still images, video clips, audio, and music files. This allows for long periods of shooting and playback, the camera is assigned to either of the two Fn (Function) buttons, you can perform the assigned function, such as switching to JPEG mode or RAW... you to the Fn1/Fn2 button. You can also use of a computer (P.177) A direct print-compatible printer can be connected to the camera with those registered settings. Easily customize your favorite shooting settings with my settings mode (P.99) You can customize three groups of settings, and then...

User Guide
Page 10
... Safety Precautions 1 Using These Manuals 4 Key Features 5 Contents 8 Basic Operations 15 If you are using the camera for the first time, read this section. Packing List 16 Optional Accessories 19 Camera System and Accessories 22 Names of Parts 23 How to Use the Mode Dial 25 How to Use the Up-down... SD Memory Card 37 Turning the Power On/Off 39 Setting the Language 41 Setting the Date and Time 42 Basic Shooting 43 Holding the Camera 43 Shooting 45 Using the Zoom Function 48 Shooting Close-Ups (Macro Shooting 49 Using the Flash 51 t Using the Self-Timer 54 Playing Back...
... Safety Precautions 1 Using These Manuals 4 Key Features 5 Contents 8 Basic Operations 15 If you are using the camera for the first time, read this section. Packing List 16 Optional Accessories 19 Camera System and Accessories 22 Names of Parts 23 How to Use the Mode Dial 25 How to Use the Up-down... SD Memory Card 37 Turning the Power On/Off 39 Setting the Language 41 Setting the Date and Time 42 Basic Shooting 43 Holding the Camera 43 Shooting 45 Using the Zoom Function 48 Shooting Close-Ups (Macro Shooting 49 Using the Flash 51 t Using the Self-Timer 54 Playing Back...

User Guide
Page 11
... 89 Shooting with an Combined Aperture Value and Shutter Speed (P: Program Shift Mode 92 Shooting with Optimal Settings According to learn more about the different camera functions. 1 Various Shooting Functions 72 Using the ADJ. Button 64 About the Electronic Level 67 Histogram 70 Advanced Operations 71 Read this section when you...
... 89 Shooting with an Combined Aperture Value and Shutter Speed (P: Program Shift Mode 92 Shooting with Optimal Settings According to learn more about the different camera functions. 1 Various Shooting Functions 72 Using the ADJ. Button 64 About the Electronic Level 67 Histogram 70 Advanced Operations 71 Read this section when you...

User Guide
Page 12
...in Manual Flash Mode (Man. Comp 144 Changing the Sensitivity (ISO Setting 146 Returning the Shooting Menu Settings to Prevent Camera Shake (Camera Shake Cor 137 Changing the Exposure (Exposure Comp 138 Using Natural and Artificial Lighting (White Balance 140 Setting the White ...132 Shooting Pictures Automatically at Set Intervals (Interval)........ 134 Inserting the Date into a Still Image (Date Imprint 136 Using the Camera Shake Correction Function to their Defaults (Restore Defaults 148 Automatically Changing the Aperture Value in My Settings Mode (Switch Shooting Mode 150...
...in Manual Flash Mode (Man. Comp 144 Changing the Sensitivity (ISO Setting 146 Returning the Shooting Menu Settings to Prevent Camera Shake (Camera Shake Cor 137 Changing the Exposure (Exposure Comp 138 Using Natural and Artificial Lighting (White Balance 140 Setting the White ...132 Shooting Pictures Automatically at Set Intervals (Interval)........ 134 Inserting the Date into a Still Image (Date Imprint 136 Using the Camera Shake Correction Function to their Defaults (Restore Defaults 148 Automatically Changing the Aperture Value in My Settings Mode (Switch Shooting Mode 150...

User Guide
Page 13
...the Zoom to a Printer 178 Printing Still Images 179 Printing One or All Still Images 179 Printing Several Still Images 181 5 Changing Camera Settings 183 Setup Menu 183 Using the Setup Menu 184 Preparing the SD Memory Card (Format [Card 186 Formatting the Internal Memory (Format...171 Correcting the Image Color Tone (White Balance Compensation 173 Viewing on a Television 175 4 Direct Printing 177 Direct Print Function 177 Connecting the Camera to a Fixed Focal Length (Step Zoom 193 11 3 Other Playback Functions 155 Playback Menu 155 Using the Menu 156 Displaying Photos in ...
...the Zoom to a Printer 178 Printing Still Images 179 Printing One or All Still Images 179 Printing Several Still Images 181 5 Changing Camera Settings 183 Setup Menu 183 Using the Setup Menu 184 Preparing the SD Memory Card (Format [Card 186 Formatting the Internal Memory (Format...171 Correcting the Image Color Tone (White Balance Compensation 173 Viewing on a Television 175 4 Direct Printing 177 Direct Print Function 177 Connecting the Camera to a Fixed Focal Length (Step Zoom 193 11 3 Other Playback Functions 155 Playback Menu 155 Using the Menu 156 Displaying Photos in ...
User Guide
Page 14
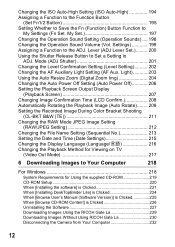
...Changing the Operation Sound Setting (Operation Sounds) .... 198 Changing the Operation Sound Volume (Vol. Light 203 Using the Auto Resize Zoom (Digital Zoom Img 204 Changing the Auto Power Off Setting (Auto Power Off 206 Setting the Playback Screen Output Display (Playback Screen 207 Changing ... When [Browse CD-ROM Content] is Clicked 226 Uninstalling the Software 227 Downloading Images Using the RICOH Gate La 229 Downloading Images Without Using RICOH Gate La 230 Disconnecting the Camera from Your Computer 232 12 Changing the ISO Auto-High Setting (ISO Auto-High 194 Assigning a...
...Changing the Operation Sound Setting (Operation Sounds) .... 198 Changing the Operation Sound Volume (Vol. Light 203 Using the Auto Resize Zoom (Digital Zoom Img 204 Changing the Auto Power Off Setting (Auto Power Off 206 Setting the Playback Screen Output Display (Playback Screen 207 Changing ... When [Browse CD-ROM Content] is Clicked 226 Uninstalling the Software 227 Downloading Images Using the RICOH Gate La 229 Downloading Images Without Using RICOH Gate La 230 Disconnecting the Camera from Your Computer 232 12 Changing the ISO Auto-High Setting (ISO Auto-High 194 Assigning a...

User Guide
Page 15
For Macintosh 233 Downloading Images to Your Computer 233 Disconnecting the Camera from Your Computer 234 7 Appendices 235 Troubleshooting 235 Error Messages 235 Camera Troubleshooting 236 Software and Computer Troubleshooting 243 Specifications 245 Number of Images That Can be Stored in Internal Memory/ SD ...249 Using the AC Adapter (sold separately 250 Using the External Flash 252 Defaults Settings/Functions Whose Defaults are Restored When Camera is Turned Off 253 Using Your Camera Abroad 255 Cautions on Use 256 Care and Storage 257 Warranty and Servicing 258 Index 260 13
For Macintosh 233 Downloading Images to Your Computer 233 Disconnecting the Camera from Your Computer 234 7 Appendices 235 Troubleshooting 235 Error Messages 235 Camera Troubleshooting 236 Software and Computer Troubleshooting 243 Specifications 245 Number of Images That Can be Stored in Internal Memory/ SD ...249 Using the AC Adapter (sold separately 250 Using the External Flash 252 Defaults Settings/Functions Whose Defaults are Restored When Camera is Turned Off 253 Using Your Camera Abroad 255 Cautions on Use 256 Care and Storage 257 Warranty and Servicing 258 Index 260 13
User Guide
Page 17
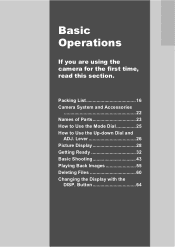
Packing List 16 Camera System and Accessories 22 Names of Parts 23 How to Use the Mode Dial 25 How to Use the Up-down Dial and ADJ. Button 64 Lever 26 Picture Display 28 Getting Ready 32 Basic Shooting 43 Playing Back Images 55 Deleting Files 60 Changing the Display with the DISP. Basic Operations If you are using the camera for the first time, read this section.
Packing List 16 Camera System and Accessories 22 Names of Parts 23 How to Use the Mode Dial 25 How to Use the Up-down Dial and ADJ. Button 64 Lever 26 Picture Display 28 Getting Ready 32 Basic Shooting 43 Playing Back Images 55 Deleting Files 60 Changing the Display with the DISP. Basic Operations If you are using the camera for the first time, read this section.

User Guide
Page 18
If you are included. * The actual appearance of the camera. GX200 Rechargeable Battery The serial number of the camera is provided on a TV. Warranty 16 Packing List Open the package and make sure all the items are using the camera for the first time, read this section. Handstrap USB Cable (mini-B type) Used to connect the camera to view your images on the bottom face of items included may differ. Battery Charger Hot Shoe Cover Included with the camera. Lens Cap Lens Cap Strap AV Cable Used to a computer or direct printcompatible printer.
If you are included. * The actual appearance of the camera. GX200 Rechargeable Battery The serial number of the camera is provided on a TV. Warranty 16 Packing List Open the package and make sure all the items are using the camera for the first time, read this section. Handstrap USB Cable (mini-B type) Used to connect the camera to view your images on the bottom face of items included may differ. Battery Charger Hot Shoe Cover Included with the camera. Lens Cap Lens Cap Strap AV Cable Used to a computer or direct printcompatible printer.

User Guide
Page 19
... languages. Attaching the lens cap strap to display the Software User Guide. (Only on the camera and loop the ends as shown. If you are not guaranteed on this section. Operations are using the camera for the first time, read this CD-ROM. English, French, German, Spanish, Italian, ...Chinese (Traditional, Simplified), Korean Note Attaching the handstrap to the camera Thread the small end of the strap through the strap eyelet on...
... languages. Attaching the lens cap strap to display the Software User Guide. (Only on the camera and loop the ends as shown. If you are not guaranteed on this section. Operations are using the camera for the first time, read this CD-ROM. English, French, German, Spanish, Italian, ...Chinese (Traditional, Simplified), Korean Note Attaching the handstrap to the camera Thread the small end of the strap through the strap eyelet on...

User Guide
Page 20
If you are included. • LCD viewfinder (VF-1) • VF-1 case • VF-1 user guide • VF-1 warranty • Turn the camera off when attaching the LCD viewfinder. 18 About GX200 VF KIT In addition to the items included with GX200, the following items are using the camera for the first time, read this section.
If you are included. • LCD viewfinder (VF-1) • VF-1 case • VF-1 user guide • VF-1 warranty • Turn the camera off when attaching the LCD viewfinder. 18 About GX200 VF KIT In addition to the items included with GX200, the following items are using the camera for the first time, read this section.

User Guide
Page 21
... viewfinder attaches to the lens movement. 19 For information on how to use the VF-1, refer to the camera. The LCD viewfinder (VF-1) is included in the GX200 VF KIT. If you are using the camera for the first time, read this adapter for power supply from a household outlet to the user guide...
... viewfinder attaches to the lens movement. 19 For information on how to use the VF-1, refer to the camera. The LCD viewfinder (VF-1) is included in the GX200 VF KIT. If you are using the camera for the first time, read this adapter for power supply from a household outlet to the user guide...

User Guide
Page 22
If you are using the camera for the first time, read this section. Note For information on optional accessories, see P.249. • For the latest information on optional accessories, see the Ricoh website (http://www.ricohpmmc.com/). 20 Soft Case (SC-45) Neck Strap (ST-2) ST-1 cannot be used. Note Attaching the neck strap (ST-2) and lens cap (supplied) to the camera Remove the end of the neck strap (ST-2) from the connector and attach it as shown in the figure.
If you are using the camera for the first time, read this section. Note For information on optional accessories, see P.249. • For the latest information on optional accessories, see the Ricoh website (http://www.ricohpmmc.com/). 20 Soft Case (SC-45) Neck Strap (ST-2) ST-1 cannot be used. Note Attaching the neck strap (ST-2) and lens cap (supplied) to the camera Remove the end of the neck strap (ST-2) from the connector and attach it as shown in the figure.
