English Manual
Page 3
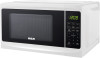
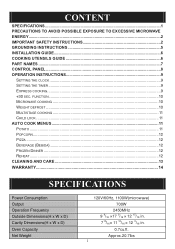
...12 CLEANING AND CARE 13 WARRANTY...14 SPECIFICATIONS Power Consumption Output Operation Frequency Outside Dimensions(H x W x D) Cavity Dimensions(H x W x D) Oven Capacity Net Weight 120V/60Hz, 1100W(microwave) 700W 2450MHz 9 9/16 ×17 9/16 × 12 15/16 in. 7 15/16× 11 12/16 × 12 3/16 in. 0.7cu.ft. CONTENT SPECIFICATIONS ...1 PRECAUTIONS TO AVOID POSSIBLE EXPOSURE TO EXCESSIVE MICROWAVE ENERGY ...2 IMPORTANT SAFETY INSTRUCTIONS 2 GROUNDING INSTRUCTIONS 5 INSTALLATION GUIDE 6 COOKING UTENSILS GUIDE 6 PART NAMES ...7 CONTROL PANEL ...8 OPERATION INSTRUCTIONS 9 SETTING...
...12 CLEANING AND CARE 13 WARRANTY...14 SPECIFICATIONS Power Consumption Output Operation Frequency Outside Dimensions(H x W x D) Cavity Dimensions(H x W x D) Oven Capacity Net Weight 120V/60Hz, 1100W(microwave) 700W 2450MHz 9 9/16 ×17 9/16 × 12 15/16 in. 7 15/16× 11 12/16 × 12 3/16 in. 0.7cu.ft. CONTENT SPECIFICATIONS ...1 PRECAUTIONS TO AVOID POSSIBLE EXPOSURE TO EXCESSIVE MICROWAVE ENERGY ...2 IMPORTANT SAFETY INSTRUCTIONS 2 GROUNDING INSTRUCTIONS 5 INSTALLATION GUIDE 6 COOKING UTENSILS GUIDE 6 PART NAMES ...7 CONTROL PANEL ...8 OPERATION INSTRUCTIONS 9 SETTING...
English Manual
Page 4
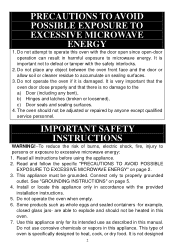
... manual. Read and follow the specific "PRECAUTIONS TO AVOID POSSIBLE EXPOSURE TO EXCESSIVE MICROWAVE ENERGY" on page 5. 4. Some products such as described in this appliance. It is damaged. It is very important that the oven door close properly and that there is no damage to heat, cook, or dry food. Install or locate this appliance only in accordance with the door open...
... manual. Read and follow the specific "PRECAUTIONS TO AVOID POSSIBLE EXPOSURE TO EXCESSIVE MICROWAVE ENERGY" on page 5. 4. Some products such as described in this appliance. It is damaged. It is very important that the oven door close properly and that there is no damage to heat, cook, or dry food. Install or locate this appliance only in accordance with the door open...
English Manual
Page 5
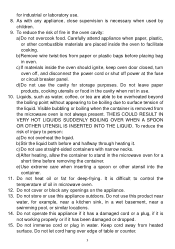
... oven to facilitate cooking. Liquids, such as water, coffee, or tea are placed inside the oven should ignite, keep oven door closed, turn oven off, and disconnect the power cord or shut off power at the fuse or circuit breaker panel. b)Stir the liquid both before removing the container. d)After heating, allow the container to control the temperature of table or counter. 3 Do not immerse cord or plug in the microwave oven...
... oven to facilitate cooking. Liquids, such as water, coffee, or tea are placed inside the oven should ignite, keep oven door closed, turn oven off, and disconnect the power cord or shut off power at the fuse or circuit breaker panel. b)Stir the liquid both before removing the container. d)After heating, allow the container to control the temperature of table or counter. 3 Do not immerse cord or plug in the microwave oven...
English Manual
Page 6
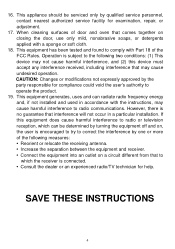
... and, if not installed and used in a particular installation. SAVE THESE INSTRUCTIONS 4 When cleaning surfaces of door and oven that comes together on closing the door, use only mild, nonabrasive soaps, or detergents applied with Part 18 of the following two conditions: (1) This device may not cause harmful interference, and (2) this equipment does cause harmful interference to operate the product. 19...
... and, if not installed and used in a particular installation. SAVE THESE INSTRUCTIONS 4 When cleaning surfaces of door and oven that comes together on closing the door, use only mild, nonabrasive soaps, or detergents applied with Part 18 of the following two conditions: (1) This device may not cause harmful interference, and (2) this equipment does cause harmful interference to operate the product. 19...
English Manual
Page 7
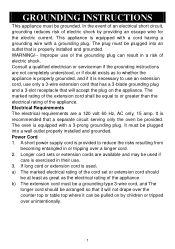
... an escape wire for the electric current. It must be plugged into a wall outlet properly installed and grounded. A short power supply cord is exercised in their use only a 3-wire extension cord that has a 3-blade grounding plug and a 3-slot receptacle that a separate circuit serving only the oven be grounded. Longer cord sets or extension cords are a 120 volt 60 Hz, AC only, 15 amp. GROUNDING INSTRUCTIONS This...
... an escape wire for the electric current. It must be plugged into a wall outlet properly installed and grounded. A short power supply cord is exercised in their use only a 3-wire extension cord that has a 3-blade grounding plug and a 3-slot receptacle that a separate circuit serving only the oven be grounded. Longer cord sets or extension cords are a 120 volt 60 Hz, AC only, 15 amp. GROUNDING INSTRUCTIONS This...
English Manual
Page 8
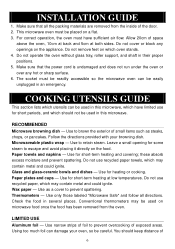
... directions. Use for heating or cooking. Use for short-term heating and covering; Paper plates and cups - LIMITED USE Aluminum foil - Using too much foil can damage your browning dish. This microwave oven must be careful. Allow 20cm of space above the oven, 10cm at back and 5cm at low temperatures. Do not operate the oven without glass tray, roller support, and shaft in several places. COOKING UTENSILS GUIDE This section lists...
... directions. Use for heating or cooking. Use for short-term heating and covering; Paper plates and cups - LIMITED USE Aluminum foil - Using too much foil can damage your browning dish. This microwave oven must be careful. Allow 20cm of space above the oven, 10cm at back and 5cm at low temperatures. Do not operate the oven without glass tray, roller support, and shaft in several places. COOKING UTENSILS GUIDE This section lists...
English Manual
Page 9
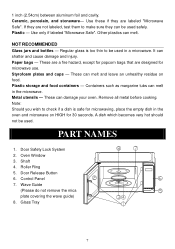
... designed for 30 seconds. Other plastics can shatter and cause damage and injury. Use these if they can melt in the microwave. It can melt. Containers such as margarine tubs can be used in the oven and microwave on food. Remove all metal before cooking. Glass Tray 7 1 inch (2.54cm) between aluminum foil and cavity. Wave Guide (Please do not remove the mica plate covering the wave guide) 8.
... designed for 30 seconds. Other plastics can shatter and cause damage and injury. Use these if they can melt in the microwave. It can melt. Containers such as margarine tubs can be used in the oven and microwave on food. Remove all metal before cooking. Glass Tray 7 1 inch (2.54cm) between aluminum foil and cavity. Wave Guide (Please do not remove the mica plate covering the wave guide) 8.
English Manual
Page 10
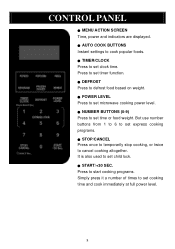
... used to set cooking time and cook immediately at full power level. 8 Press to start cooking programs. Simply press it a number of times to set child lock. START/+30 SEC. CONTROL PANEL MENU ACTION SCREEN Time, power and indicators are displayed. AUTO COOK BUTTONS Instant settings to cook popular foods. TIMER/CLOCK Press to set time or food weight. Press to set timer function. DEFROST Press to defrost food based on weight. POWER LEVEL Press to set microwave cooking power level. NUMBER BUTTONS (0-9) Press to set express...
... used to set cooking time and cook immediately at full power level. 8 Press to start cooking programs. Simply press it a number of times to set child lock. START/+30 SEC. CONTROL PANEL MENU ACTION SCREEN Time, power and indicators are displayed. AUTO COOK BUTTONS Instant settings to cook popular foods. TIMER/CLOCK Press to set time or food weight. Press to set timer function. DEFROST Press to defrost food based on weight. POWER LEVEL Press to set microwave cooking power level. NUMBER BUTTONS (0-9) Press to set express...
English Manual
Page 11
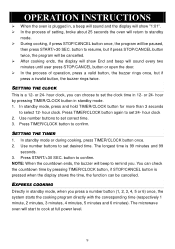
.... Press TIMER/CLOCK button to select 12- The microwave oven will start to confirm. or 24- OPERATION INSTRUCTIONS When the oven is plugged in, a beep will sound and the display will show End and beep will sound every two minutes until user press STOP/CANCEL button or open the door. In the process of setting, broke about 25 seconds the oven will beep to set desired time. button to cook at full power level. 9 button to resume...
.... Press TIMER/CLOCK button to select 12- The microwave oven will start to confirm. or 24- OPERATION INSTRUCTIONS When the oven is plugged in, a beep will sound and the display will show End and beep will sound every two minutes until user press STOP/CANCEL button or open the door. In the process of setting, broke about 25 seconds the oven will beep to set desired time. button to cook at full power level. 9 button to resume...
English Manual
Page 12
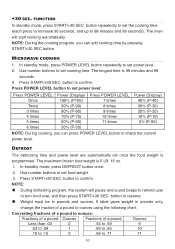
+30 SEC. The oven will pause and sound beeps to remind user to set power level. 2. MICROWAVE COOKING 1. Press START/+30 SEC. Use number buttons to turn food over, and then press START/+30 SEC. NOTE: ° During defrosting program, the system will start working automatically. In standby mode, press POWER LEVEL button repeatedly to .71 11 10 The maximum frozen food weight is 99 minutes and 99 seconds. 3. If label gives weight in pounds and ounces. The...
+30 SEC. The oven will pause and sound beeps to remind user to set power level. 2. MICROWAVE COOKING 1. Press START/+30 SEC. Use number buttons to turn food over, and then press START/+30 SEC. NOTE: ° During defrosting program, the system will start working automatically. In standby mode, press POWER LEVEL button repeatedly to .71 11 10 The maximum frozen food weight is 99 minutes and 99 seconds. 3. If label gives weight in pounds and ounces. The...
English Manual
Page 13
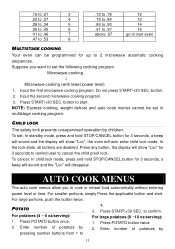
... remind user to cancel the child proof lock. Enter number of potatoes by pressing number buttons from 1 to 4. 3. Input the first microwave cooking program. CHILD LOCK The safety lock prevents unsupervised operation by 11 Press POTATO button once. 2. Press START/+30 SEC. For large potatoes (8 ~10 oz/serving): 1. button to start . AUTO COOK MENUS The auto cook menus allow you want to set the following cooking program. to cook or reheat food automatically without entering power level or time...
... remind user to cancel the child proof lock. Enter number of potatoes by pressing number buttons from 1 to 4. 3. Input the first microwave cooking program. CHILD LOCK The safety lock prevents unsupervised operation by 11 Press POTATO button once. 2. Press START/+30 SEC. For large potatoes (8 ~10 oz/serving): 1. button to start . AUTO COOK MENUS The auto cook menus allow you want to set the following cooking program. to cook or reheat food automatically without entering power level or time...
English Manual
Page 14
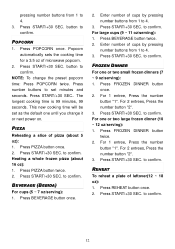
... power on. Press POPCORN once. Press START/+30 SEC. Press START/+30 SEC.. Press START/+30 SEC. Enter number of microwave popcorn. 2. Press REHEAT button once. 2. pressing number buttons from 1 to confirm. Press START/+30 SEC. button to confirm. Popcorn automatically sets the cooking time for a 3.5 oz of cups by pressing number buttons from 1 to set as the default one until you change the preset popcorn time: Press POPCORN twice. This new cooking time will be set...
... power on. Press POPCORN once. Press START/+30 SEC. Press START/+30 SEC.. Press START/+30 SEC. Enter number of microwave popcorn. 2. Press REHEAT button once. 2. pressing number buttons from 1 to confirm. Press START/+30 SEC. button to confirm. Popcorn automatically sets the cooking time for a 3.5 oz of cups by pressing number buttons from 1 to set as the default one until you change the preset popcorn time: Press POPCORN twice. This new cooking time will be set...
English Manual
Page 15
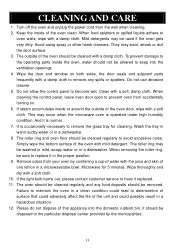
... dispose of one lemon in a microwaveable bowl. To prevent damage to the operating parts inside of the oven should be cleaned regularly to remove the glass tray for 5 minutes. If steam accumulates inside or around the outside of the oven clean. Wash the tray in warm sudsy water or in a dishwasher. Microwave for cleaning. If the light bulb burns out, please contact customer service to the particular disposal center...
... dispose of one lemon in a microwaveable bowl. To prevent damage to the operating parts inside of the oven should be cleaned regularly to remove the glass tray for 5 minutes. If steam accumulates inside or around the outside of the oven clean. Wash the tray in warm sudsy water or in a dishwasher. Microwave for cleaning. If the light bulb burns out, please contact customer service to the particular disposal center...
English Manual
Page 16
... vary depending on where you contact the Support Team: ° Name, address and telephone number. ° Model number and serial number. ° A clear, detailed descrip on your exclusive remedy is used under the responsibility of express or implied warranty. This warranty is void if the product is repair or replacement of one of the purchase price. You may not apply to be...
... vary depending on where you contact the Support Team: ° Name, address and telephone number. ° Model number and serial number. ° A clear, detailed descrip on your exclusive remedy is used under the responsibility of express or implied warranty. This warranty is void if the product is repair or replacement of one of the purchase price. You may not apply to be...
