Instruction Manual
Page 2
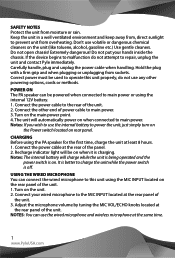
... connect the wired microphone to this unit properly, do not attempt to operate this unit using the internal 12V battery. 1. Correct power must be used to repair, unplug the unit and contact Pyle immediately. Connect the power cable at the same time. 1 www.PyleUSA.com Turn on the rear panel of the panel. 2. Do not open chassis! Carefully handle, plug and unplug the power cable when handling. Connect the other powering options, cords...
... connect the wired microphone to this unit properly, do not attempt to operate this unit using the internal 12V battery. 1. Correct power must be used to repair, unplug the unit and contact Pyle immediately. Connect the power cable at the same time. 1 www.PyleUSA.com Turn on the rear panel of the panel. 2. Do not open chassis! Carefully handle, plug and unplug the power cable when handling. Connect the other powering options, cords...
Instruction Manual
Page 3
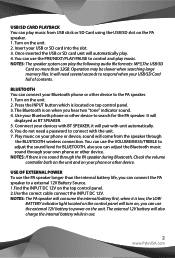
... can adjust the Bluetooth music sound through the PA speaker during Bluetooth, Check the volume controller both on the unit and on , you can connect the PA speaker to respond when your Bluetooth phone or other device. NOTES: If there is located on the top control panel. 2.Use the correct cable connect the INPUT DC 12V. You do not need several seconds to a external 12V Battery Source. 1.Find the INPUT DC...
... can adjust the Bluetooth music sound through the PA speaker during Bluetooth, Check the volume controller both on the unit and on , you can connect the PA speaker to respond when your Bluetooth phone or other device. NOTES: If there is located on the top control panel. 2.Use the correct cable connect the INPUT DC 12V. You do not need several seconds to a external 12V Battery Source. 1.Find the INPUT DC...
Instruction Manual
Page 4
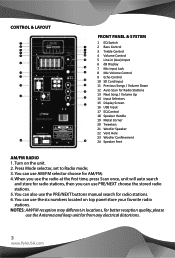
... Display Screen 16 USB Input 17 EQ Control 18 Speaker Handle 19 Metal Corner 20 Tweeters 21 Woofer Speaker 22 Vent Hole 23 Woofer Confinement 24 24 Speaker Feet AM/FM RADIO 1. CONTROL & LAYOUT 1 2 4 5 6 9 10 11 12 13 23 FRONT PANEL & SYSTEM 1 EQ Switch 3 2 Bass Control 7 8 3 Treble Control 14 4 Volume Control 15 5 Line-in locations, for better reception quality, please use the six numbers located on the unit...
... Display Screen 16 USB Input 17 EQ Control 18 Speaker Handle 19 Metal Corner 20 Tweeters 21 Woofer Speaker 22 Vent Hole 23 Woofer Confinement 24 24 Speaker Feet AM/FM RADIO 1. CONTROL & LAYOUT 1 2 4 5 6 9 10 11 12 13 23 FRONT PANEL & SYSTEM 1 EQ Switch 3 2 Bass Control 7 8 3 Treble Control 14 4 Volume Control 15 5 Line-in locations, for better reception quality, please use the six numbers located on the unit...


