Instruction Manual
Page 2
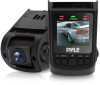
..., to change , refer to upgrade, update and other occasions such as meetings, monitoring and forensics, location shooting and video evidence. INTRODUCTION PLDVRCAM71 DVR Dash Cam is a blend of wide dynamic digital industry leading camera, no leakage of seconds, seamless circular camera, ultra wide angle shooting, with display real-time playback, mobile detection camera, parking guard technology in one; This product is developed to install, operate...
..., to change , refer to upgrade, update and other occasions such as meetings, monitoring and forensics, location shooting and video evidence. INTRODUCTION PLDVRCAM71 DVR Dash Cam is a blend of wide dynamic digital industry leading camera, no leakage of seconds, seamless circular camera, ultra wide angle shooting, with display real-time playback, mobile detection camera, parking guard technology in one; This product is developed to install, operate...
Instruction Manual
Page 3
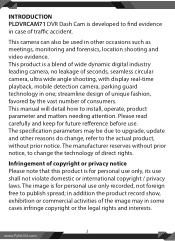
To determine the lens in the windshield wiper is in range, ensure good vision, and also good in camera or photograph to modify the power line. Attention • Please use the original standard charger • Please do not dismantle the machine to avoid a ecting the scope of warranty. • Please nd... with your ngers, the nger's grease may remain in the lens, resulting in rainy environments. PRODUCT STRUCTURE DESCRIPTION 3 www.PyleUSA.com INSTALLATION NOTES This product should be unclear, please clean the lens regularly. Don't touch the lens with the original rear-view mirror.
To determine the lens in the windshield wiper is in range, ensure good vision, and also good in camera or photograph to modify the power line. Attention • Please use the original standard charger • Please do not dismantle the machine to avoid a ecting the scope of warranty. • Please nd... with your ngers, the nger's grease may remain in the lens, resulting in rainy environments. PRODUCT STRUCTURE DESCRIPTION 3 www.PyleUSA.com INSTALLATION NOTES This product should be unclear, please clean the lens regularly. Don't touch the lens with the original rear-view mirror.
Instruction Manual
Page 4
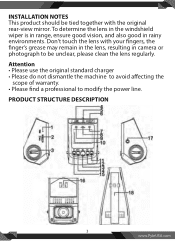
... back-light of the screen without a ecting the video recording function). 2. Knob 12. USB Interface 13. AV Interface 15. Cable Slot Description of the main menu. Then, the DASHCAM saves the video-recording le automatically and powers OFF. Button FUNCTION 1: MENU BUTTON In standby state, press the button to con rm the selected option. Screen 2. MIC Button 3. MIC Indicator 16. Reset Button 9. 1. GPS Interface (optional) 14. Power Indicator 17. In power-ON...
... back-light of the screen without a ecting the video recording function). 2. Knob 12. USB Interface 13. AV Interface 15. Cable Slot Description of the main menu. Then, the DASHCAM saves the video-recording le automatically and powers OFF. Button FUNCTION 1: MENU BUTTON In standby state, press the button to con rm the selected option. Screen 2. MIC Button 3. MIC Indicator 16. Reset Button 9. 1. GPS Interface (optional) 14. Power Indicator 17. In power-ON...

Instruction Manual
Page 5
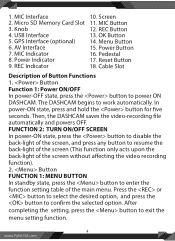
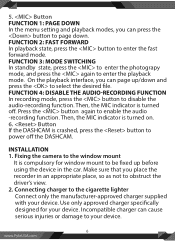
FUNCTION 2: PHOTOGRAPH In photograph mode, press the button to suspend. FUNCTION 4: PLAY In playback mode, press the button to play video data and press the button again to take photos. Button FUNCTION 1: PAGE UP In the menu setting and playback modes, you can press to save the video-recording data into a separate folder in the memory card. Button FUNCTION 1: LOCKING During the video-recording process, press the button to page up. NOTE: In playback mode, a key-shaped...
FUNCTION 2: PHOTOGRAPH In photograph mode, press the button to suspend. FUNCTION 4: PLAY In playback mode, press the button to play video data and press the button again to take photos. Button FUNCTION 1: PAGE UP In the menu setting and playback modes, you can press to save the video-recording data into a separate folder in the memory card. Button FUNCTION 1: LOCKING During the video-recording process, press the button to page up. NOTE: In playback mode, a key-shaped...
Instruction Manual
Page 6
... MIC indicator is turned o . Make sure that you can press the button to your device. Incompatible charger can page up before using the device in an appropriate place, so as not to disable the audio-recording function. Button FUNCTION 1: PAGE DOWN In the menu setting and playback modes, you place the recorder in the car. Button If the DASHCAM is compulsory for your device. FUNCTION 3: MODE SWITCHING In standby...
... MIC indicator is turned o . Make sure that you can press the button to your device. Incompatible charger can page up before using the device in an appropriate place, so as not to disable the audio-recording function. Button FUNCTION 1: PAGE DOWN In the menu setting and playback modes, you place the recorder in the car. Button If the DASHCAM is compulsory for your device. FUNCTION 3: MODE SWITCHING In standby...
Instruction Manual
Page 7
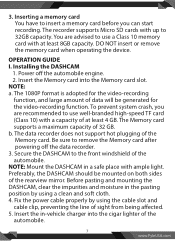
... soft cloth. 4. Installing the DASHCAM 1. Fix the power cable properly by using the cable slot and cable clip, preventing the line of the rearview mirror. Insert the in a safe place with a capacity of at least 8GB capacity. You are recommended to use a Class 10 memory card with up to remove the Memory card after powering o the data recorder. 3. 3. The recorder supports Micro SD cards...
... soft cloth. 4. Installing the DASHCAM 1. Fix the power cable properly by using the cable slot and cable clip, preventing the line of the rearview mirror. Insert the in a safe place with a capacity of at least 8GB capacity. You are recommended to use a Class 10 memory card with up to remove the Memory card after powering o the data recorder. 3. 3. The recorder supports Micro SD cards...
Instruction Manual
Page 8
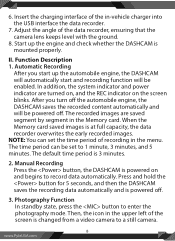
... saved images is mounted properly. Insert the charging interface of the screen is powered on the screen blinks. Start up the automobile engine, the DASHCAM will automatically start and recording function will be enabled. The recorded images are turned on, and the REC indicator on and begins to a still camera. 8 www.PyleUSA.com Manual Recording Press the button, the DASHCAM is changed...
... saved images is mounted properly. Insert the charging interface of the screen is powered on the screen blinks. Start up the automobile engine, the DASHCAM will automatically start and recording function will be enabled. The recorded images are turned on, and the REC indicator on and begins to a still camera. 8 www.PyleUSA.com Manual Recording Press the button, the DASHCAM is changed...
Instruction Manual
Page 9
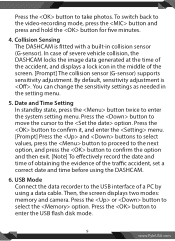
... DASHCAM locks the image data generated at the time of the screen. [Prompt] The collision sensor (G-sensor) supports sensitivity adjustment. Date and Time Setting In standby state, press the button twice to the option. Then, the screen displays two modes: memory and camera. Collision Sensing The DASHCAM is . Press the button to move the cursor to enter the system setting menu. You can change the sensitivity settings as needed in the setting menu...
... DASHCAM locks the image data generated at the time of the screen. [Prompt] The collision sensor (G-sensor) supports sensitivity adjustment. Date and Time Setting In standby state, press the button twice to the option. Then, the screen displays two modes: memory and camera. Collision Sensing The DASHCAM is . Press the button to move the cursor to enter the system setting menu. You can change the sensitivity settings as needed in the setting menu...
Instruction Manual
Page 10
Then, the screen displays two modes: memory and camera. PC Camera Connect the data recorder to enter the playback mode. Playback of Recording File In power-on the camera. 10 www.PyleUSA.com [Prompt] When you use a PC to copy a video-recording le, it is installed in the TF card to the PC. 7. Press the or button to nd the desired type of a PC by using a data cable. After a driver is...
Then, the screen displays two modes: memory and camera. PC Camera Connect the data recorder to enter the playback mode. Playback of Recording File In power-on the camera. 10 www.PyleUSA.com [Prompt] When you use a PC to copy a video-recording le, it is installed in the TF card to the PC. 7. Press the or button to nd the desired type of a PC by using a data cable. After a driver is...

