User Manual
Page 1
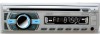
Car In-dash AM/FM MPX Receiver with CD, CD-R/RW, MP3 Playback & USB/SD/ AUX Inputs Receiver Models: PLCD43MRB/PLCD43BTM CLK USER'S MANUAL
Car In-dash AM/FM MPX Receiver with CD, CD-R/RW, MP3 Playback & USB/SD/ AUX Inputs Receiver Models: PLCD43MRB/PLCD43BTM CLK USER'S MANUAL
User Manual
Page 2
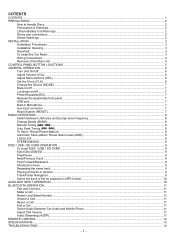
... CONTROL PANEL BUTTON LOACTIONS ...5 GENERAL OPERATION ...6 Turn Unit On/Off ...6 Adjust Volume (VOL)...6 Adjust Menu Options (SEL) ...6 Set the Clock (CLK)...6 Change the Source (MODE) ...7 Mute on/off ...7 Loudness on/off...7 Preset Equalizer(EQ) ...7 Release the detachable front panel ...7 USB port...7 Built-in Microphone...7 Aux input connector...7 Reset System (RESET)...7 RADIO OPERATION...8 Switch Between USA area and Europe area Frequency 8 Change Bands (BAND) ...8 Manual Tuning ( / ) ...8 Auto Seek Tuning ( / )...8 To Store / Recall Preset Stations ...8 Automatic Store station/ Preset...
... CONTROL PANEL BUTTON LOACTIONS ...5 GENERAL OPERATION ...6 Turn Unit On/Off ...6 Adjust Volume (VOL)...6 Adjust Menu Options (SEL) ...6 Set the Clock (CLK)...6 Change the Source (MODE) ...7 Mute on/off ...7 Loudness on/off...7 Preset Equalizer(EQ) ...7 Release the detachable front panel ...7 USB port...7 Built-in Microphone...7 Aux input connector...7 Reset System (RESET)...7 RADIO OPERATION...8 Switch Between USA area and Europe area Frequency 8 Change Bands (BAND) ...8 Manual Tuning ( / ) ...8 Auto Seek Tuning ( / )...8 To Store / Recall Preset Stations ...8 Automatic Store station/ Preset...
User Manual
Page 3
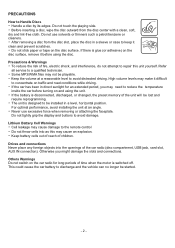
... edges. Otherwise you may need to reduce the temperature inside the car before using the unit. 噝 If the battery is disconnected, discharged, or changed, the preset memory of the unit will be started. - 2 - Others Warnings Do not switch on the disc surface. PRECAUTIONS How to the remote control 噝 Do not throw cells into the openings of the car radio (disc compartment, USB jack, card slot, AUX IN connection).
... edges. Otherwise you may need to reduce the temperature inside the car before using the unit. 噝 If the battery is disconnected, discharged, or changed, the preset memory of the unit will be started. - 2 - Others Warnings Do not switch on the disc surface. PRECAUTIONS How to the remote control 噝 Do not throw cells into the openings of the car radio (disc compartment, USB jack, card slot, AUX IN connection).
User Manual
Page 4
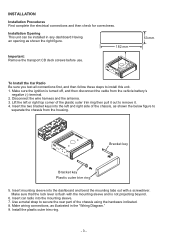
... using the hardware indicated. 8. Make sure that the lock lever is flush with a screwdriver. Use a metal strap to install this unit. 1. Installation Opening This unit can be installed in any dashboard Having an opening as illustrated in the "Wiring Diagram." 9. Make wiring connections, as shown the right figure. 182 mm Important: Remove the transport CD deck screws before use. 53 mm To Install the Car Radio Be sure you test all connections...
... using the hardware indicated. 8. Make sure that the lock lever is flush with a screwdriver. Use a metal strap to install this unit. 1. Installation Opening This unit can be installed in any dashboard Having an opening as illustrated in the "Wiring Diagram." 9. Make wiring connections, as shown the right figure. 182 mm Important: Remove the transport CD deck screws before use. 53 mm To Install the Car Radio Be sure you test all connections...
User Manual
Page 5
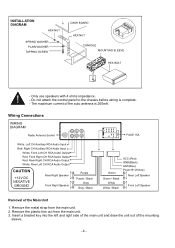
... current of the auto antenna is complete. - Wiring Connections WIRING DIAGRAM Radio Antenna Socket White: Left CH Auxiliary RCA Audio Input Red: Right CH Auxiliary RCA Audio Input White: Front Left CH RCA Audio Output Red: Front Right CH RCA Audio Output Red: Rear Right CH RCA Audio Output White: Rear Left CH RCA Audio Output CAUTION +12V DC NEGATIVE GROUND Rear Right Speaker Front Right Speaker Purple Purple / Black Gray Gray / Black FUSE 15A Green Green / Black White White / Black ACC (Red) GND(Black) ANT(Blue) Power B+(Yellow) Rear Left Speaker Front Left Speaker Removal of the...
... current of the auto antenna is complete. - Wiring Connections WIRING DIAGRAM Radio Antenna Socket White: Left CH Auxiliary RCA Audio Input Red: Right CH Auxiliary RCA Audio Input White: Front Left CH RCA Audio Output Red: Front Right CH RCA Audio Output Red: Rear Right CH RCA Audio Output White: Rear Left CH RCA Audio Output CAUTION +12V DC NEGATIVE GROUND Rear Right Speaker Front Right Speaker Purple Purple / Black Gray Gray / Black FUSE 15A Green Green / Black White White / Black ACC (Red) GND(Black) ANT(Blue) Power B+(Yellow) Rear Left Speaker Front Left Speaker Removal of the...
User Manual
Page 6
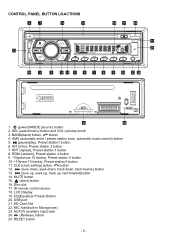
...button 14. EQ(Equalizer Preset) Button 20. INT (intro), Preset station 2 button 7. LCD Display 19. USB port 21. RESET button - 5 - SEL (select/menu) button and VOL (volume) knob 3. BAND(band) button, button 4. AUX IN (auxiliary input) jack 24. (Release) button 25. CONTROL PANEL BUTTON LOACTIONS 4 1 14 16 18 15 22 17 20 12 CLK 19 3 2 11 13 5 6 7 8 9 10 23 24 RESET 21 25 1. (power)/MODE (source) button 2. MUTE button 15. (eject) button 16. SD Card Slot 22. RDM (random), Preset station 4 button 9. -10(previous 10 tracks), Preset station 5 button...
...button 14. EQ(Equalizer Preset) Button 20. INT (intro), Preset station 2 button 7. LCD Display 19. USB port 21. RESET button - 5 - SEL (select/menu) button and VOL (volume) knob 3. BAND(band) button, button 4. AUX IN (auxiliary input) jack 24. (Release) button 25. CONTROL PANEL BUTTON LOACTIONS 4 1 14 16 18 15 22 17 20 12 CLK 19 3 2 11 13 5 6 7 8 9 10 23 24 RESET 21 25 1. (power)/MODE (source) button 2. MUTE button 15. (eject) button 16. SD Card Slot 22. RDM (random), Preset station 4 button 9. -10(previous 10 tracks), Preset station 5 button...
User Manual
Page 7
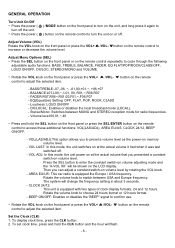
... frequency. Rotate the volume knob to choose 24 hours format or 12 hours format. - Rotate the volume knob to switch between MONO and STEREO reception mode for radio frequencies. - To display clock time, press the CLK button. 2. button on the remote control to Adjust Menu Options (SEL) 噝 Press the SEL button on the front panel or on the remote control repeatedly to cycle through the following adjustable audio functions: BASS, TREBLE, BALANCE, FADER...
... frequency. Rotate the volume knob to choose 24 hours format or 12 hours format. - Rotate the volume knob to switch between MONO and STEREO reception mode for radio frequencies. - To display clock time, press the CLK button. 2. button on the remote control to Adjust Menu Options (SEL) 噝 Press the SEL button on the front panel or on the remote control repeatedly to cycle through the following adjustable audio functions: BASS, TREBLE, BALANCE, FADER...
User Manual
Page 8
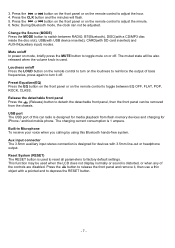
... RADIO, BT(Bluetooth), DISC(with a CD/MP3 disc inside the disc slot), USB(with USB device inserted), CARD(with 3.5mm line-out or headphone output. Aux input connector The 3.5mm auxiliary input stereo connection is designed for devices with SD card inserted) and AUX-IN(auxiliary input) modes. Mute on/off In power on the remote control to detach the detachable front panel, then the front panel can not be used . Reset System (RESET) The RESET button is 1 ampere. Change the Source (MODE...
... RADIO, BT(Bluetooth), DISC(with a CD/MP3 disc inside the disc slot), USB(with USB device inserted), CARD(with 3.5mm line-out or headphone output. Aux input connector The 3.5mm auxiliary input stereo connection is designed for devices with SD card inserted) and AUX-IN(auxiliary input) modes. Mute on/off In power on the remote control to detach the detachable front panel, then the front panel can not be used . Reset System (RESET) The RESET button is 1 ampere. Change the Source (MODE...
User Manual
Page 9
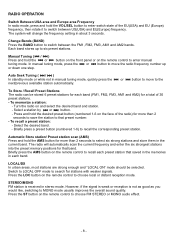
... saved in the memories in manual tuning mode, quickly press the or button to move the radio frequency number up to that preset number. - Turn the radio on the face of 30 preset stations. - To recall a preset station: - Switch to LOCAL OFF mode to recall the corresponding preset station. RADIO OPERATION Switch Between USA area and Europe area Frequency In radio mode, press and hold the or button on the front panel or on the remote control...
... saved in the memories in manual tuning mode, quickly press the or button to move the radio frequency number up to that preset number. - Turn the radio on the face of 30 preset stations. - To recall a preset station: - Switch to LOCAL OFF mode to recall the corresponding preset station. RADIO OPERATION Switch Between USA area and Europe area Frequency In radio mode, press and hold the or button on the front panel or on the remote control...
User Manual
Page 10
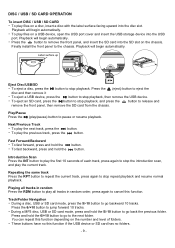
... function depending on a USB device, open the USB port cover and insert the USB storage device into the disc slot. Playback will begin automatically. 噝 To play files on the number and level of each track, press again to cancel this function if the USB device or SD card has no folders. - 9 - Press and hold the 6/+10 button to go to pause or resume playback. Finally install...
... function depending on a USB device, open the USB port cover and insert the USB storage device into the disc slot. Playback will begin automatically. 噝 To play files on the number and level of each track, press again to cancel this function if the USB device or SD card has no folders. - 9 - Press and hold the 6/+10 button to go to pause or resume playback. Finally install...
User Manual
Page 11
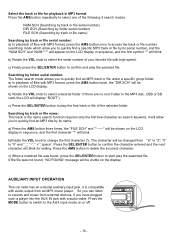
... AMS button to the AUX input mode on the LCD display in the MP3 disc, USB or SD card, the LCD will display "ROOT") c) Press the SEL/ENTER button to confirm the character entered and the next character will appear on or off. - 10 - AUXILIARY INPUT OPERATION This car radio has an external auxiliary input jack, it is compatible with MP3 format, press the AMS button once to access the track or file number searching mode...
... AMS button to the AUX input mode on the LCD display in the MP3 disc, USB or SD card, the LCD will display "ROOT") c) Press the SEL/ENTER button to confirm the character entered and the next character will appear on or off. - 10 - AUXILIARY INPUT OPERATION This car radio has an external auxiliary input jack, it is compatible with MP3 format, press the AMS button once to access the track or file number searching mode...

User Manual
Page 12
... will automatically be displayed. 3. b) If a number has been incorrectly inputted, press the DEL button or button to using the Bluetooth device as a hands-free system for a Bluetooth-enabled mobile phone for the first time, you must pair and connect the two devices as follows: 1. Adjust Talk Volume 噝 During a call is paired, music played through the car audio system. 3. Press the /MODE button to mute sound. /VOL- Press the button to pair and connect with this bluetooth hands-free system: a) When linking...
... will automatically be displayed. 3. b) If a number has been incorrectly inputted, press the DEL button or button to using the Bluetooth device as a hands-free system for a Bluetooth-enabled mobile phone for the first time, you must pair and connect the two devices as follows: 1. Adjust Talk Volume 噝 During a call is paired, music played through the car audio system. 3. Press the /MODE button to mute sound. /VOL- Press the button to pair and connect with this bluetooth hands-free system: a) When linking...
User Manual
Page 13
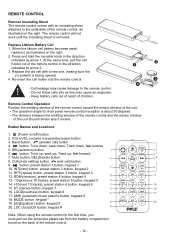
... lithium cell battery becomes weak, replace it as this may cause damage to the underside of children. Track up ; INT(intro) button, preset station 2 button, keypad 2 11. LOUD(loudness) button, keypad 8 17. LOC (local)/DX button, keypad # Note: When using the remote control for front panel remote control reception is facing upward. 4. VOL+/VOL-(volume increase/decrease) button 3. CLK(clock setting) button, (end call ) button 4. The remote control will not work until...
... lithium cell battery becomes weak, replace it as this may cause damage to the underside of children. Track up ; INT(intro) button, preset station 2 button, keypad 2 11. LOUD(loudness) button, keypad 8 17. LOC (local)/DX button, keypad # Note: When using the remote control for front panel remote control reception is facing upward. 4. VOL+/VOL-(volume increase/decrease) button 3. CLK(clock setting) button, (end call ) button 4. The remote control will not work until...
User Manual
Page 15
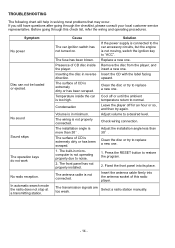
... the antenna cable firmly into its place. Select a radio station manually. - 14 - Before going through this radio player. Cause The car ignition switch has not turned on. Insert the CD with the label facing upward. Adjust volume to restore the program. 2. Press the RESET button to a desired level. Presence of this check list, refer the wiring and operating procedures. Temperature inside the player. The antenna cable is not operating properly due...
... the antenna cable firmly into its place. Select a radio station manually. - 14 - Before going through this radio player. Cause The car ignition switch has not turned on. Insert the CD with the label facing upward. Adjust volume to restore the program. 2. Press the RESET button to a desired level. Presence of this check list, refer the wiring and operating procedures. Temperature inside the player. The antenna cable is not operating properly due...

