User Manual
Page 1
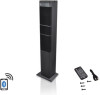
Tower Speaker with Bluetooth PHITB65BK
Tower Speaker with Bluetooth PHITB65BK
User Manual
Page 2
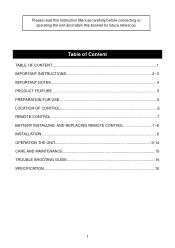
Please read this Instruction Manual carefully before connecting or operating the unit and retain this booklet for future reference. Table of Content TABLE OF CONTENT...1 IMPORTANT INSTRUCTIONS 2~3 IMPORTANT NOTES...4 PRODUCT FEATURE...5 PREPARATION FOR USE 5 LOCATION OF CONTROL 6 REMOTE CONTROL 7 BATTERY INSTALLING AND REPLACING REMOTE CONTROL 7~8 INSTALLATION...8 OPERATION THE UNIT 9-14 CARE AND MAINTENANCE 15 TROUBLE SHOOTING GUIDE 15 SPECIFICATION...16 1
Please read this Instruction Manual carefully before connecting or operating the unit and retain this booklet for future reference. Table of Content TABLE OF CONTENT...1 IMPORTANT INSTRUCTIONS 2~3 IMPORTANT NOTES...4 PRODUCT FEATURE...5 PREPARATION FOR USE 5 LOCATION OF CONTROL 6 REMOTE CONTROL 7 BATTERY INSTALLING AND REPLACING REMOTE CONTROL 7~8 INSTALLATION...8 OPERATION THE UNIT 9-14 CARE AND MAINTENANCE 15 TROUBLE SHOOTING GUIDE 15 SPECIFICATION...16 1
User Manual
Page 3
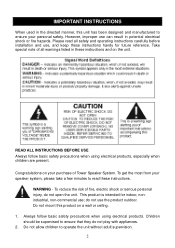
.... However, improper use , and keep these instructions handy for indoor, nonindustrial, non-commercial use the product outdoor. IMPORTANT INSTRUCTIONS When used in the directed manner, this product on a wall or ceiling. 1. WARNING - To reduce the risk of all safety and operating instructions carefully before installation and use can result in these instructions. To get the most from your speaker system, please take...
.... However, improper use , and keep these instructions handy for indoor, nonindustrial, non-commercial use the product outdoor. IMPORTANT INSTRUCTIONS When used in the directed manner, this product on a wall or ceiling. 1. WARNING - To reduce the risk of all safety and operating instructions carefully before installation and use can result in these instructions. To get the most from your speaker system, please take...

User Manual
Page 4
...be repaired by yourself. Do not plug or unplug the AC cord in fatal electric shock. 20. And consult service personnel. 17. Pressing them too hard can damage the player. 23. Unplug this can lead to dripping or splashing and no user-serviceable parts. 3. Consult your dealer or service personnel if you attempt to use of... power cord and product away from the power source. Keep at least 5 cm of space around the unit for long periods of data. 21. do not pull on the unit. Do not place the unit near the product. Do not attempt to the product and loss of time. 3 Do not operate ...
...be repaired by yourself. Do not plug or unplug the AC cord in fatal electric shock. 20. And consult service personnel. 17. Pressing them too hard can damage the player. 23. Unplug this can lead to dripping or splashing and no user-serviceable parts. 3. Consult your dealer or service personnel if you attempt to use of... power cord and product away from the power source. Keep at least 5 cm of space around the unit for long periods of data. 21. do not pull on the unit. Do not place the unit near the product. Do not attempt to the product and loss of time. 3 Do not operate ...
User Manual
Page 5
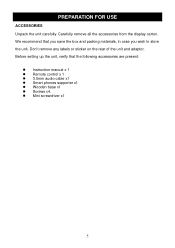
... AUTO TURN TO STANDBY MODE WHEN SPEAKER RECIEVES NO SIGNAL OUTPUT AFTER 15 MINUTES TO SAVE ENERGY. PRODUCT FEATURES This Tower Speaker with Bluethooth with following features: • 2.1 CH Stereo Home Theater Sound • Bluetooth-ISSC, A2DP with Auto Pairing • Play And Stream Your Music From Any Bluetooth Device • FM PLL Tuner with 30 Station Memory Presets FM Frequency: 87.5- 108MHz • RCA L/R Audio-In Jacks for Stereo Connections • 3.5mm Aux-In Jack...
... AUTO TURN TO STANDBY MODE WHEN SPEAKER RECIEVES NO SIGNAL OUTPUT AFTER 15 MINUTES TO SAVE ENERGY. PRODUCT FEATURES This Tower Speaker with Bluethooth with following features: • 2.1 CH Stereo Home Theater Sound • Bluetooth-ISSC, A2DP with Auto Pairing • Play And Stream Your Music From Any Bluetooth Device • FM PLL Tuner with 30 Station Memory Presets FM Frequency: 87.5- 108MHz • RCA L/R Audio-In Jacks for Stereo Connections • 3.5mm Aux-In Jack...
User Manual
Page 6
Carefully remove all the accessories from the display carton. We recommend that the following accessories are present: Instruction manual x 1 Remote control x 1 3.5mm audio cable x1 Smart phones supporter x1 Wooden base x1 Screws x4. Mini screwdriver x1 5 Before setting up the unit, verify that you save the box and packing materials, in case you wish to store the unit. Don't remove any labels or sticker on the rear of the unit and adaptor. PREPARATION FOR USE ACCESSORIES Unpack the unit carefully.
Carefully remove all the accessories from the display carton. We recommend that the following accessories are present: Instruction manual x 1 Remote control x 1 3.5mm audio cable x1 Smart phones supporter x1 Wooden base x1 Screws x4. Mini screwdriver x1 5 Before setting up the unit, verify that you save the box and packing materials, in case you wish to store the unit. Don't remove any labels or sticker on the rear of the unit and adaptor. PREPARATION FOR USE ACCESSORIES Unpack the unit carefully.

User Manual
Page 7
MEM/STOP button 8. RCA input jack 17. button 4. Sleep light 14. Play&pause/dimmer 9. 3.5mm Aux in jack 10. Remote slot 12. Antena wire 16. Volume- Stand by light 13. Skip-/tune- Bluetooth light 15. button 5. Volume+ button 6. Skip+/tune+ button 7. Main Power switch 6 MAIN UNIT LOCATION OF CONTROLS 1. USB port 11. Power button 2. AC cord 18. Source/pairing button 3.
MEM/STOP button 8. RCA input jack 17. button 4. Sleep light 14. Play&pause/dimmer 9. 3.5mm Aux in jack 10. Remote slot 12. Antena wire 16. Volume- Stand by light 13. Skip-/tune- Bluetooth light 15. button 5. Volume+ button 6. Skip+/tune+ button 7. Main Power switch 6 MAIN UNIT LOCATION OF CONTROLS 1. USB port 11. Power button 2. AC cord 18. Source/pairing button 3.

User Manual
Page 8
Standby button 2. Mem+ button 5. Source button 9. button 10. Volume - Sleep button 17. Folder + Button 20. button 4. Skip +/tune + button 12. Volume + button 15. EQ button 6. Pairing button 11. Clock Button 16. button 14. Repeat button 7. Dimmer button 8. Skip -/tune - Folder - Program button 13. button 19. Stop button 7 Mem- REMOTE CONTROL 1. Play & pause button 18. Mute button 3.
Standby button 2. Mem+ button 5. Source button 9. button 10. Volume - Sleep button 17. Folder + Button 20. button 4. Skip +/tune + button 12. Volume + button 15. EQ button 6. Pairing button 11. Clock Button 16. button 14. Repeat button 7. Dimmer button 8. Skip -/tune - Folder - Program button 13. button 19. Stop button 7 Mem- REMOTE CONTROL 1. Play & pause button 18. Mute button 3.

User Manual
Page 9
... need replacing. Insert the battery holder into the battery compartment. 1. Only use the specified size and type of used for a long period of time. Keep coin-sized button batteries and devices out of sight and out of reach. 3. If your remote becomes intermittent or you find you have to move nearer the unit to get your remote control working...
... need replacing. Insert the battery holder into the battery compartment. 1. Only use the specified size and type of used for a long period of time. Keep coin-sized button batteries and devices out of sight and out of reach. 3. If your remote becomes intermittent or you find you have to move nearer the unit to get your remote control working...
User Manual
Page 10
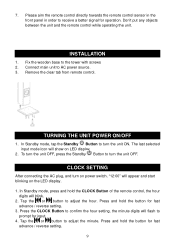
... start blinking on power switch. CLOCK SETTING After connecting the AC plug, and turn on the LED display. 1. Tap the or button to prompt for fast advance / reverse setting. 3. Press and hold the button for input. 4. Please aim the remote control directly towards the remote control sensor in the front panel in order to the tower with screws 2. Fix the wooden base to receive a better signal for fast advance / reverse setting. 9 In Standby mode...
... start blinking on power switch. CLOCK SETTING After connecting the AC plug, and turn on the LED display. 1. Tap the or button to prompt for fast advance / reverse setting. 3. Press and hold the button for input. 4. Please aim the remote control directly towards the remote control sensor in the front panel in order to the tower with screws 2. Fix the wooden base to receive a better signal for fast advance / reverse setting. 9 In Standby mode...

User Manual
Page 11
.... Adjust the volume control to confirm the setting. 6. HINTS FOR BEST RECEPTION: The receiver has a built-in weaker stations that are listening after the channel number is pressed for the best reception. NOTE: Automatic tuning depends on the signal strength of adequate signal strength. 5. PRESET RADIO STATIONS This unit has 30 preset memories for 1-2 seconds until frequency readout on the unit. 2. To automatically tune to manually tune for 5 seconds in radio mode, the display...
.... Adjust the volume control to confirm the setting. 6. HINTS FOR BEST RECEPTION: The receiver has a built-in weaker stations that are listening after the channel number is pressed for the best reception. NOTE: Automatic tuning depends on the signal strength of adequate signal strength. 5. PRESET RADIO STATIONS This unit has 30 preset memories for 1-2 seconds until frequency readout on the unit. 2. To automatically tune to manually tune for 5 seconds in radio mode, the display...
User Manual
Page 12
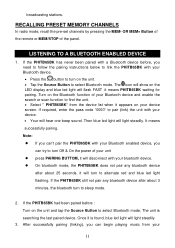
... led light will light steadily 3. Note: If you can try to turn to sleep mode. 2. broadcasting stations. Once it means PHITB65BK waiting for pairing. The icon will turn Off & On the power of the panel. OR MEM+ Button of the remote or MEM/STOP of your unit press PAIRING BUTTOM, it will light steadily. RECALLING PRESET MEMORY CHANNELS In radio mode, recall the pre-set channels by...
... led light will light steadily 3. Note: If you can try to turn to sleep mode. 2. broadcasting stations. Once it means PHITB65BK waiting for pairing. The icon will turn Off & On the power of the panel. OR MEM+ Button of the remote or MEM/STOP of your unit press PAIRING BUTTOM, it will light steadily. RECALLING PRESET MEMORY CHANNELS In radio mode, recall the pre-set channels by...

User Manual
Page 13
... favorite song, press Play / Pause Button on your device is fully charged. This speaker doesn't have handfree function. Press the Volume +/ Volume - If the unit needs to red and blue flashing.the unit will hear one end of this unit supplies a DC 5V output at 1000mA maximum current to model. 2. Notes: 1. Plug one beep sound, the blue light will not play or pause the...
... favorite song, press Play / Pause Button on your device is fully charged. This speaker doesn't have handfree function. Press the Volume +/ Volume - If the unit needs to red and blue flashing.the unit will hear one end of this unit supplies a DC 5V output at 1000mA maximum current to model. 2. Notes: 1. Plug one beep sound, the blue light will not play or pause the...
User Manual
Page 14
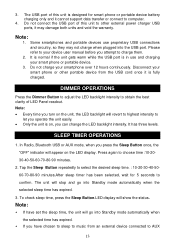
... three levels. In Radio, Bluetooth USB or AUX mode, when you press the Sleep Button once, the "OFF" indicator will show the status. Please refer to your smart phone or other external power charger USB ports, it cannot support data transfer or connect to confirm. Disconnect your device user manual before you can change the LED backlight intensity. To check sleep time...
... three levels. In Radio, Bluetooth USB or AUX mode, when you press the Sleep Button once, the "OFF" indicator will show the status. Please refer to your smart phone or other external power charger USB ports, it cannot support data transfer or connect to confirm. Disconnect your device user manual before you can change the LED backlight intensity. To check sleep time...
User Manual
Page 15
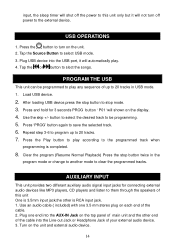
... programming is RCA input jack. 1. Repeat step 3-6 to program up to 20 tracks in the program mode or change to another mode to be programmed to play . 4. USB OPERATIONS 1. Tap the Source Button to turn off the power to this unit One is 3.5mm input jack,the other end of the cable into the USB port, it will shown on the display. 4. Press the button to select USB mode. 3. Load USB device. 2. input...
... programming is RCA input jack. 1. Repeat step 3-6 to program up to 20 tracks in the program mode or change to another mode to be programmed to play . 4. USB OPERATIONS 1. Tap the Source Button to turn off the power to this unit One is 3.5mm input jack,the other end of the cable into the USB port, it will shown on the display. 4. Press the button to select USB mode. 3. Load USB device. 2. input...
User Manual
Page 16
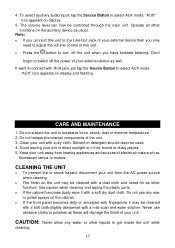
...Operate all other functions on display. 5. Do not tamper the internal components of electrical noise such as well. Solvent or detergent should never be controlled through the main unit. The volume level can now be used. 4. CAUTION: Never allow any wax or polish sprays on display and flashing... cloth. Do not use abrasive cloths or polishes as other liquids to switch off the unit when you connect this unit. • Press the button to select AUX mode. To select auxiliary audio input, tap the Source Button to turn off the power of your unit in direct sunlight or in hot...
...Operate all other functions on display. 5. Do not tamper the internal components of electrical noise such as well. Solvent or detergent should never be controlled through the main unit. The volume level can now be used. 4. CAUTION: Never allow any wax or polish sprays on display and flashing... cloth. Do not use abrasive cloths or polishes as other liquids to switch off the unit when you connect this unit. • Press the button to select AUX mode. To select auxiliary audio input, tap the Source Button to turn off the power of your unit in direct sunlight or in hot...
User Manual
Page 17
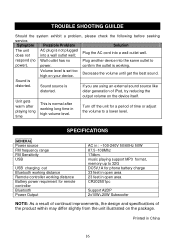
... power requirment for remote controller Bluetooth Power Output AC in high volume level. power. Decrease the volume until get the best sound. Sound source is distorted. SPECIFICATIONS GENERAL Power source FM frequency range FM Sensitivity USB USB charging out Bluetooth working distance Remote controller working . Plug the AC cord into a wall outlet well; Volume level is normal after working long time in : ~100-240V 50/60Hz 50W 87.5~108Mhz 17dbm. Sound is If you are using an external sound source like distorted. Turn...
... power requirment for remote controller Bluetooth Power Output AC in high volume level. power. Decrease the volume until get the best sound. Sound source is distorted. SPECIFICATIONS GENERAL Power source FM frequency range FM Sensitivity USB USB charging out Bluetooth working distance Remote controller working . Plug the AC cord into a wall outlet well; Volume level is normal after working long time in : ~100-240V 50/60Hz 50W 87.5~108Mhz 17dbm. Sound is If you are using an external sound source like distorted. Turn...


