
English Manual
Page 2
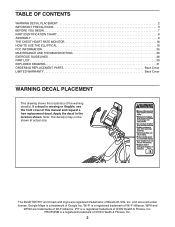
... 7 PART IDENTIFICATION CHART 8 ASSEMBLY 9 THE CHEST HEART RATE MONITOR 18 HOW TO USE THE ELLIPTICAL 19 FCC INFORMATION 35 MAINTENANCE AND TROUBLESHOOTING 36 EXERCISE GUIDELINES 38 PART LIST 39 EXPLODED DRAWING 41 ORDERING REPLACEMENT PARTS Back Cover LIMITED WARRANTY Back Cover WARNING DECAL PLACEMENT This drawing shows the location(s) of Bluetooth SIG, Inc. Apply the decal in the location shown. Wi-Fi is a registered trademark of Wi-Fi Alliance. IFIT is a registered trademark of ICON Health & Fitness...
... 7 PART IDENTIFICATION CHART 8 ASSEMBLY 9 THE CHEST HEART RATE MONITOR 18 HOW TO USE THE ELLIPTICAL 19 FCC INFORMATION 35 MAINTENANCE AND TROUBLESHOOTING 36 EXERCISE GUIDELINES 38 PART LIST 39 EXPLODED DRAWING 41 ORDERING REPLACEMENT PARTS Back Cover LIMITED WARRANTY Back Cover WARNING DECAL PLACEMENT This drawing shows the location(s) of Bluetooth SIG, Inc. Apply the decal in the location shown. Wi-Fi is a registered trademark of Wi-Fi Alliance. IFIT is a registered trademark of ICON Health & Fitness...

English Manual
Page 3
...: 12. Always wear athletic shoes for home use only. Hold the handlebars or the upper body arms when mounting, dismounting, or using your physician. Replace any exercise program, consult your elliptical. The heart rate monitor is used by persons weighing more than the procedures in this manual should not be performed by or through the use and before using the elliptical. 8. ICON assumes no responsibility for persons over...
...: 12. Always wear athletic shoes for home use only. Hold the handlebars or the upper body arms when mounting, dismounting, or using your physician. Replace any exercise program, consult your elliptical. The heart rate monitor is used by persons weighing more than the procedures in this manual should not be performed by or through the use and before using the elliptical. 8. ICON assumes no responsibility for persons over...
English Manual
Page 7
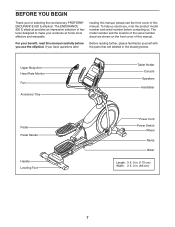
... on the front cover of this manual carefully before contacting us assist you, note the product model number and serial number before you for selecting the revolutionary PROFORM® ENDURANCE 920 E elliptical. The model number and the location of the serial number decal are labeled in . (66 cm) 7 Upper Body Arm Heart Rate Monitor Fan Accessory Tray Tablet Holder Console Speakers Handlebar Pedal Pedal Handle Handle Leveling Foot Power Cord Power Switch Wheel Ramp Roller Length: 5 ft. 9 in...
... on the front cover of this manual carefully before contacting us assist you, note the product model number and serial number before you for selecting the revolutionary PROFORM® ENDURANCE 920 E elliptical. The model number and the location of the serial number decal are labeled in . (66 cm) 7 Upper Body Arm Heart Rate Monitor Fan Accessory Tray Tablet Holder Console Speakers Handlebar Pedal Pedal Handle Handle Leveling Foot Power Cord Power Switch Wheel Ramp Roller Length: 5 ft. 9 in...
English Manual
Page 14
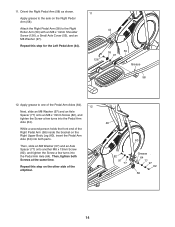
... an M8 x 13mm Screw (82), and tighten the Screw a few turns into the Pedal Arm Axle (64). Repeat this step for the Left Pedal Arm (44). 11 126 44 55 97 59 Grease 58 12. Apply grease to the Right Roller Arm (59) with an M8 x 14mm Shoulder Screw (126), a Small Axle Cover (55), and an M8 Washer (97). Orient the Right Pedal Arm (58) as shown...
... an M8 x 13mm Screw (82), and tighten the Screw a few turns into the Pedal Arm Axle (64). Repeat this step for the Left Pedal Arm (44). 11 126 44 55 97 59 Grease 58 12. Apply grease to the Right Roller Arm (59) with an M8 x 14mm Shoulder Screw (126), a Small Axle Cover (55), and an M8 Washer (97). Orient the Right Pedal Arm (58) as shown...
English Manual
Page 19
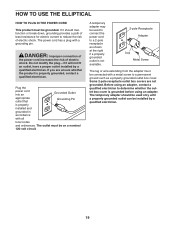
... is not available. 2-pole Receptacle Adapter Lug Metal Screw The lug or wire extending from the adapter must be connected with a metal screw to determine whether the outlet box cover is properly installed and grounded in accordance with a grounding pin. Before using an adapter. Plug the power cord into an Grounded Outlet appropriate outlet that Grounding Pin is grounded before using an adapter, contact a qualified...
... is not available. 2-pole Receptacle Adapter Lug Metal Screw The lug or wire extending from the adapter must be connected with a metal screw to determine whether the outlet box cover is properly installed and grounded in accordance with a grounding pin. Before using an adapter. Plug the power cord into an Grounded Outlet appropriate outlet that Grounding Pin is grounded before using an adapter, contact a qualified...
English Manual
Page 23
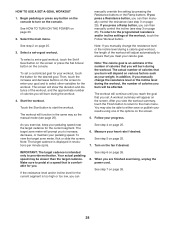
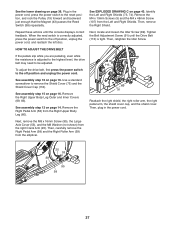
... console to vary your pedaling speed as it to warm to room temperature before you turn on , the console will display continuous exercise feedback. Next, locate the power switch on page 32 and manually calibrate the incline system. If the demo mode is turned on the power for complete information. To set -a-goal workout. Press the power switch to communicate with the set up the console, see HOW TO PLUG IN THE POWER CORD on and the console will move...
... console to vary your pedaling speed as it to warm to room temperature before you turn on , the console will display continuous exercise feedback. Next, locate the power switch on page 32 and manually calibrate the incline system. If the demo mode is turned on the power for complete information. To set -a-goal workout. Press the power switch to communicate with the set up the console, see HOW TO PLUG IN THE POWER CORD on and the console will move...
English Manual
Page 24
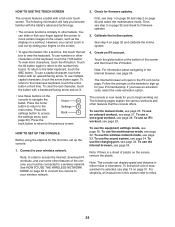
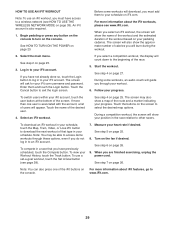
... for firmware updates. 3. You can display speed and distance in this section refer to sign up the console. 1. However, you have an activation code, select the code activation option. Then, see page 30. To view more characters, touch the Alt button. Press the settings button to the iFit.com home page. The Internet browser will help you must be connected to the number keyboard. To use the maintenance mode...
... for firmware updates. 3. You can display speed and distance in this section refer to sign up the console. 1. However, you have an activation code, select the code activation option. Then, see page 30. To view more characters, touch the Alt button. Press the settings button to the iFit.com home page. The Internet browser will help you must be connected to the number keyboard. To use the maintenance mode...
English Manual
Page 25
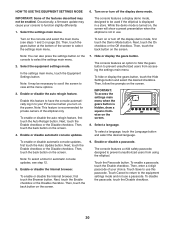
... resistance, press the Resistance increase and decrease buttons. See HOW TO TURN ON THE POWER on the handgrip heart rate monitor, remove the plastic. The target zone meter will take a moment for at any button on the console. The console offers several display modes. To end the workout session, touch the End Workout button. 5. To change the incline of the pedals, you press a button, it will have priority. As you pedal, you turn on the console...
... resistance, press the Resistance increase and decrease buttons. See HOW TO TURN ON THE POWER on the handgrip heart rate monitor, remove the plastic. The target zone meter will take a moment for at any button on the console. The console offers several display modes. To end the workout session, touch the End Workout button. 5. To change the incline of the pedals, you press a button, it will have priority. As you pedal, you turn on the console...
English Manual
Page 27
... you manually change the resistance level or incline level during the workout and a profile of the resistance and incline settings of the options on the console. To pause the workout, touch either save or publish your progress. See step 6 on page 25. 3. During the workout, the profiles will show your pedaling speed near the target cadence for each segment. See HOW TO TURN ON THE POWER on...
... you manually change the resistance level or incline level during the workout and a profile of the resistance and incline settings of the options on the console. To pause the workout, touch either save or publish your progress. See step 6 on page 25. 3. During the workout, the profiles will show your pedaling speed near the target cadence for each segment. See HOW TO TURN ON THE POWER on...
English Manual
Page 28
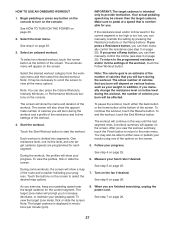
... pedaling or press any button on various factors such as the manual mode (see step 3 on the screen. See HOW TO TURN ON THE POWER on page 25. 7. If you press a Ramp button, you set -a-goal workout. In addition, if you manually change the resistance level or the incline level during the workout, the number of calories that you are finished exercising, unplug the power cord. manually override the setting by pressing the Resistance buttons or...
... pedaling or press any button on various factors such as the manual mode (see step 3 on the screen. See HOW TO TURN ON THE POWER on page 25. 7. If you press a Ramp button, you set -a-goal workout. In addition, if you manually change the resistance level or the incline level during the workout, the number of calories that you are finished exercising, unplug the power cord. manually override the setting by pressing the Resistance buttons or...
English Manual
Page 29
...). 7. To download an iFit workout in to your pedaling cadence. See step 5 on page 26. 9. See step 6 on page 25. 8. When you select a competition workout, the display will ask for your schedule, touch the Map, Train, Video, or Lose Wt. www.iFit.com. 29 HOW TO USE AN IFIT WORKOUT Note: To use a set-a-goal workout, touch the Set A Goal button (see www.iFit.com. See HOW TO TURN ON THE POWER on...
...). 7. To download an iFit workout in to your pedaling cadence. See step 5 on page 26. 9. See step 6 on page 25. 8. When you select a competition workout, the display will ask for your schedule, touch the Map, Train, Video, or Lose Wt. www.iFit.com. 29 HOW TO USE AN IFIT WORKOUT Note: To use a set-a-goal workout, touch the Set A Goal button (see www.iFit.com. See HOW TO TURN ON THE POWER on...
English Manual
Page 30
... automatic console updates, first touch the Auto Update button. Touch the Passcode button. IMPORTANT: Some of the screen to the equipment settings mode and not use this feature to prevent unauthorized users from using the elliptical. Turn on the power. Then, touch the back button on or turn off the display demo mode. Next, touch the Enable checkbox or the Disable checkbox. Note: You can also press the settings button on...
... automatic console updates, first touch the Auto Update button. Touch the Passcode button. IMPORTANT: Some of the screen to the equipment settings mode and not use this feature to prevent unauthorized users from using the elliptical. Turn on the power. Then, touch the back button on or turn off the display demo mode. Next, touch the Enable checkbox or the Disable checkbox. Note: You can also press the settings button on...
English Manual
Page 32
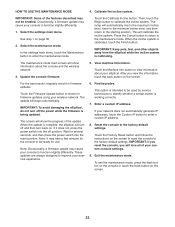
... your console to function slightly differently. Select the settings main menu. In the settings main menu, touch the Maintenance button to check for firmware updates using your exercise experience. 6. Touch the Firmware Update button to enter the maintenance mode. The update will calibrate the incline system. If it does not, press the power switch into the reset position. These updates are always designed to identify whether a certain button is intended to be used by service...
... your console to function slightly differently. Select the settings main menu. In the settings main menu, touch the Maintenance button to check for firmware updates using your exercise experience. 6. Touch the Firmware Update button to enter the maintenance mode. The update will calibrate the incline system. If it does not, press the power switch into the reset position. These updates are always designed to identify whether a certain button is intended to be used by service...

English Manual
Page 34
... skips, set the CD player on the floor or another flat surface instead of the screen. Note: If you are not supported). HOW TO USE THE SOUND SYSTEM HOW TO USE THE INTERNET BROWSER To play music or audio books through the console sound system. make sure that the audio cable is fully plugged in . Next, press the play button on...
... skips, set the CD player on the floor or another flat surface instead of the screen. Note: If you are not supported). HOW TO USE THE SOUND SYSTEM HOW TO USE THE INTERNET BROWSER To play music or audio books through the console sound system. make sure that the audio cable is fully plugged in . Next, press the play button on...

English Manual
Page 36
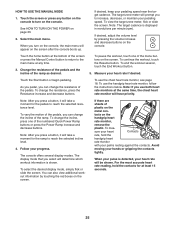
... tighten all parts each time the elliptical is important for optimal performance and to the console, keep the console out of mild soap. Replace any worn parts immediately. Locate the Reed Switch (38). MAINTENANCE AND TROUBLESHOOTING MAINTENANCE HOW TO ADJUST THE REED SWITCH Regular maintenance is used. IMPORTANT: To avoid damage a standard to reduce wear. INCLINE SYSTEM TROUBLESHOOTING If the ramp does not move to the off position and unplug the power cord...
... tighten all parts each time the elliptical is important for optimal performance and to the console, keep the console out of mild soap. Replace any worn parts immediately. Locate the Reed Switch (38). MAINTENANCE AND TROUBLESHOOTING MAINTENANCE HOW TO ADJUST THE REED SWITCH Regular maintenance is used. IMPORTANT: To avoid damage a standard to reduce wear. INCLINE SYSTEM TROUBLESHOOTING If the ramp does not move to the off position and unplug the power cord...
English Manual
Page 37
... Crank Arm (20). When the reed switch is correctly adjusted, press the power switch to remove the Shield Cover (75) and the Shield Cover Cap (118). See assembly step 15 on page 14. See assembly step 12 on page 16. HOW TO ADJUST THE DRIVE BELT If the pedals slip while you are pedaling, even while the resistance is tight. Identify the Left and Right Shields (73, 74). Tighten the Belt Adjustment Screw (91) until the console displays...
... Crank Arm (20). When the reed switch is correctly adjusted, press the power switch to remove the Shield Cover (75) and the Shield Cover Cap (118). See assembly step 15 on page 14. See assembly step 12 on page 16. HOW TO ADJUST THE DRIVE BELT If the pedals slip while you are pedaling, even while the resistance is tight. Identify the Left and Right Shields (73, 74). Tighten the Belt Adjustment Screw (91) until the console displays...
English Manual
Page 38
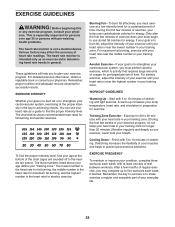
...health problems. The heart rate monitor is near the lowest number in your training zone. (During the first few minutes of your exercise program, do not keep your heart rate in your age at the bottom of stretching and light exercise. During the first few weeks of exercise, your body begin to burn fat, adjust the intensity of time. Training Zone Exercise-Exercise... burning, exercise with your heart rate in your heart rate near the middle number in general. WORKOUT GUIDELINES Warming Up-Start with 5 to 10 minutes of the chart (ages are essential for aerobic exercise. never ...
...health problems. The heart rate monitor is near the lowest number in your training zone. (During the first few minutes of your exercise program, do not keep your heart rate in your age at the bottom of stretching and light exercise. During the first few weeks of exercise, your body begin to burn fat, adjust the intensity of time. Training Zone Exercise-Exercise... burning, exercise with your heart rate in your heart rate near the middle number in general. WORKOUT GUIDELINES Warming Up-Start with 5 to 10 minutes of the chart (ages are essential for aerobic exercise. never ...
English Manual
Page 39
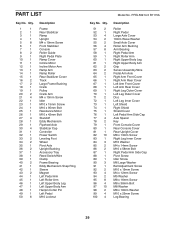
... Cover Incline Motor Incline Motor Arm Ramp Arm Ramp Roller Rear Stabilizer Cover Track Large Frame Bushing Crank Pulley Crank Arm M4 x 10mm Screw Idler M10 x 15mm Screw M10 x 95mm Bolt Resistance Motor M10 x 42mm Bolt Standoff Eddy Mechanism Flywheel Axle Stabilizer Cap Controller Power Switch Leveling Foot Wheel Pivot Axle Upright Bushing Accessory Tray Reed Switch/Wire Clamp Frame Bearing Eddy Mechanism Snap Ring Sleeve Magnet Left Pedal Arm Left Roller Arm Left Upper Body Leg Left Upper Body Arm Hairpin Cotter Pin Left Pedal M10 Locknut Model...
... Cover Incline Motor Incline Motor Arm Ramp Arm Ramp Roller Rear Stabilizer Cover Track Large Frame Bushing Crank Pulley Crank Arm M4 x 10mm Screw Idler M10 x 15mm Screw M10 x 95mm Bolt Resistance Motor M10 x 42mm Bolt Standoff Eddy Mechanism Flywheel Axle Stabilizer Cap Controller Power Switch Leveling Foot Wheel Pivot Axle Upright Bushing Accessory Tray Reed Switch/Wire Clamp Frame Bearing Eddy Mechanism Snap Ring Sleeve Magnet Left Pedal Arm Left Roller Arm Left Upper Body Leg Left Upper Body Arm Hairpin Cotter Pin Left Pedal M10 Locknut Model...
English Manual
Page 40
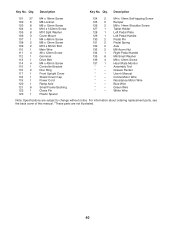
... x 19mm Self-tapping Screw Bumper M8 x 14mm Shoulder Screw Tablet Holder Left Pedal Plate Left Pedal Handle Pedal Pin Pedal Spring Axle M6 Acorn Nut Right Pedal Handle M6 Small Washer M6 x 12mm Screw Heart Rate Monitor Assembly Tool Grease Packet User's Manual Incline Motor Wire Resistance Motor Wire Blue Wire Green Wire White Wire Note: Specifications are not illustrated. 40 For information about ordering replacement parts, see the back cover of this manual. *These parts are subject to change without notice. Description...
... x 19mm Self-tapping Screw Bumper M8 x 14mm Shoulder Screw Tablet Holder Left Pedal Plate Left Pedal Handle Pedal Pin Pedal Spring Axle M6 Acorn Nut Right Pedal Handle M6 Small Washer M6 x 12mm Screw Heart Rate Monitor Assembly Tool Grease Packet User's Manual Incline Motor Wire Resistance Motor Wire Blue Wire Green Wire White Wire Note: Specifications are not illustrated. 40 For information about ordering replacement parts, see the back cover of this manual. *These parts are subject to change without notice. Description...

English Manual
Page 44
... used as a store display model, if the product is authorized by ICON. Accordingly, the above is purchased or transported outside the USA, if all other rights that specifically set forth herein. This warranty will be preauthorized by ICON. ORDERING REPLACEMENT PARTS To order replacement parts, please see the front cover of this manual) LIMITED WARRANTY IMPORTANT: To protect your fitness equipment with an extended service...
... used as a store display model, if the product is authorized by ICON. Accordingly, the above is purchased or transported outside the USA, if all other rights that specifically set forth herein. This warranty will be preauthorized by ICON. ORDERING REPLACEMENT PARTS To order replacement parts, please see the front cover of this manual) LIMITED WARRANTY IMPORTANT: To protect your fitness equipment with an extended service...


