
English Manual
Page 2
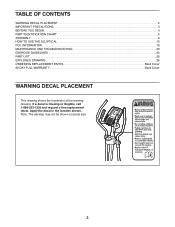
... a free replacement decal. TABLE OF CONTENTS WARNING DECAL PLACEMENT 2 IMPORTANT PRECAUTIONS 3 BEFORE YOU BEGIN 4 PART IDENTIFICATION CHART 5 ASSEMBLY 6 HOW TO USE THE ELLIPTICAL 15 FCC INFORMATION 19 MAINTENANCE AND TROUBLESHOOTING 20 EXERCISE GUIDELINES 22 PART LIST 25 EXPLODED DRAWING 26 ORDERING REPLACEMENT PARTS Back Cover 90 DAY FULL WARRANTY Back Cover WARNING...
... a free replacement decal. TABLE OF CONTENTS WARNING DECAL PLACEMENT 2 IMPORTANT PRECAUTIONS 3 BEFORE YOU BEGIN 4 PART IDENTIFICATION CHART 5 ASSEMBLY 6 HOW TO USE THE ELLIPTICAL 15 FCC INFORMATION 19 MAINTENANCE AND TROUBLESHOOTING 20 EXERCISE GUIDELINES 22 PART LIST 25 EXPLODED DRAWING 26 ORDERING REPLACEMENT PARTS Back Cover 90 DAY FULL WARRANTY Back Cover WARNING...
English Manual
Page 20
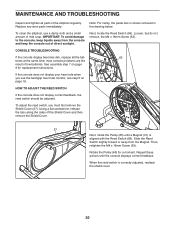
... on page 9 for a moment. Loosen, but do not remove, the M4 x 16mm Screw (53). most console problems are the result of the elliptical regularly. Rotate the Pulley (65) for replacement instructions. IMPORTANT: To avoid damage to the console, keep liquids away from the Magnet. To adjust the ... Switch (58). Then, retighten the M4 x 16mm Screw (53). When the reed switch is shown removed in the drawing below. MAINTENANCE AND TROUBLESHOOTING Inspect and tighten all the batteries at the same time; Replace any worn parts immediately. Note: For clarity, the pedal disc is correctly adjusted...
... on page 9 for a moment. Loosen, but do not remove, the M4 x 16mm Screw (53). most console problems are the result of the elliptical regularly. Rotate the Pulley (65) for replacement instructions. IMPORTANT: To avoid damage to the console, keep liquids away from the Magnet. To adjust the ... Switch (58). Then, retighten the M4 x 16mm Screw (53). When the reed switch is shown removed in the drawing below. MAINTENANCE AND TROUBLESHOOTING Inspect and tighten all the batteries at the same time; Replace any worn parts immediately. Note: For clarity, the pedal disc is correctly adjusted...

