Owner's Manual
Page 4
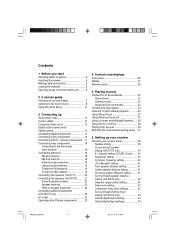
...(VSX-D711 20 Connecting the speakers (VSX-D811S 21 A and B speaker systems 22 Speaker terminals 22 Hints on speaker placement 22 Connecting additional amplifiers (VSX-D811S only 24 AC outlet 25 Operating other Pioneer components .......... 25 4 Controls and displays Front panel 26 Display 27 Remote ... 37 6 Setting up your receiver Choosing your receiver setup 38 Speaker setting 39 Surround back speaker setting (VSX-D811S only 40 6.1 channel setting (VSX-D811S only) ....... 40 Subwoofer setting 40 Crossover frequency setting 40 LFE attenuator setting 41 Front speaker distance...
...(VSX-D711 20 Connecting the speakers (VSX-D811S 21 A and B speaker systems 22 Speaker terminals 22 Hints on speaker placement 22 Connecting additional amplifiers (VSX-D811S only 24 AC outlet 25 Operating other Pioneer components .......... 25 4 Controls and displays Front panel 26 Display 27 Remote ... 37 6 Setting up your receiver Choosing your receiver setup 38 Speaker setting 39 Surround back speaker setting (VSX-D811S only 40 6.1 channel setting (VSX-D811S only) ....... 40 Subwoofer setting 40 Crossover frequency setting 40 LFE attenuator setting 41 Front speaker distance...

Owner's Manual
Page 5
... other components 49 Selecting preset codes directly 49 Searching for preset codes 50 Programming signals from other remote controls (VSX-D811S only 50 Erasing one of the remote control button settings (VSX-D811S only 51 Clearing all the remote control settings ........ 51 Direct function 52 Confirming preset codes 52 Controls for TVs 53 Controls for...
... other components 49 Selecting preset codes directly 49 Searching for preset codes 50 Programming signals from other remote controls (VSX-D811S only 50 Erasing one of the remote control button settings (VSX-D811S only 51 Clearing all the remote control settings ........ 51 Direct function 52 Confirming preset codes 52 Controls for TVs 53 Controls for...
Owner's Manual
Page 6
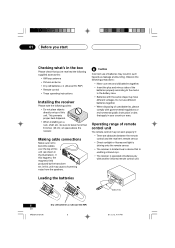
... a humming noise from the speakers. Incorrect use different batteries together. • When disposing of used batteries, please comply with another infrared remote control unit. 01 Before you 've received the following supplied accessories: • AM loop antenna • FM wire antenna • Dry... cell batteries x 2 (AA size IEC R6P) • Remote control • These operating instructions Installing the receiver Please note the following precautions: • Never use new and old batteries together. •...
... a humming noise from the speakers. Incorrect use different batteries together. • When disposing of used batteries, please comply with another infrared remote control unit. 01 Before you 've received the following supplied accessories: • AM loop antenna • FM wire antenna • Dry... cell batteries x 2 (AA size IEC R6P) • Remote control • These operating instructions Installing the receiver Please note the following precautions: • Never use new and old batteries together. •...
Owner's Manual
Page 11
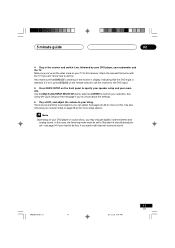
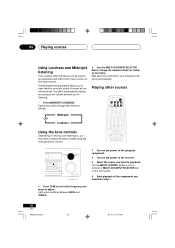
... subwoofer and the TV. Depending on your receiver setup on page 38-43 for more setup options. If it isn't, press DVD/LD on the remote control to set the video input on this . There are several other sound options you may only get digital 2 channel stereo and analog sound.
... subwoofer and the TV. Depending on your receiver setup on page 38-43 for more setup options. If it isn't, press DVD/LD on the remote control to set the video input on this . There are several other sound options you may only get digital 2 channel stereo and analog sound.
Owner's Manual
Page 25
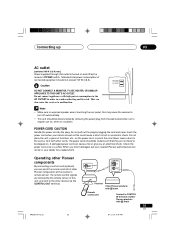
...devices via the CONTROL OUT terminal. A damaged power cord can also cause the receiver to malfunction. Operating other Pioneer components By connecting a control cord (optional), you can point the remote controls of other cords. Connecting up 03 AC outlet [switched 100 W (0.8 A) max] Power supplied through ...plug from the wall socket when not in a while. This can cause a fire or give you find it with other Pioneer components at the receiver's remote sensor. Do not connect appliances with high power consumption to CONTROL IN terminal of furniture, etc., on vacation). XRB3013A.13...
...devices via the CONTROL OUT terminal. A damaged power cord can also cause the receiver to malfunction. Operating other Pioneer components By connecting a control cord (optional), you can point the remote controls of other cords. Connecting up 03 AC outlet [switched 100 W (0.8 A) max] Power supplied through ...plug from the wall socket when not in a while. This can cause a fire or give you find it with other Pioneer components at the receiver's remote sensor. Do not connect appliances with high power consumption to CONTROL IN terminal of furniture, etc., on vacation). XRB3013A.13...
Owner's Manual
Page 26
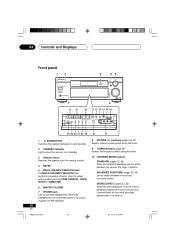
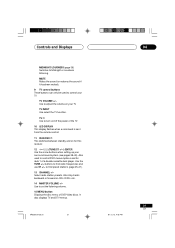
...STATION (+/-) buttons (pages 46-47) Selects station presets when using the tuner. 2 STANDBY indicator Lights when the receiver is no sound output from the remote control. 4 ENTER 5 MULTI JOG/INPUT SELECTOR dial The MULTI JOG/INPUT SELECTOR dial performs a number of a source. 26 En XRB3013A.26.31...43 PM When the headphones are connected, there is in standby. 9 TUNING buttons (page 45) Selects the frequency when using the tuner. 3 Remote sensor Receives the signals from the speakers. 10 LISTENING MODE buttons STANDARD (pages 32, 34) Press for the most accurate reproduction of tasks. ...
...STATION (+/-) buttons (pages 46-47) Selects station presets when using the tuner. 2 STANDBY indicator Lights when the receiver is no sound output from the remote control. 4 ENTER 5 MULTI JOG/INPUT SELECTOR dial The MULTI JOG/INPUT SELECTOR dial performs a number of a source. 26 En XRB3013A.26.31...43 PM When the headphones are connected, there is in standby. 9 TUNING buttons (page 45) Selects the frequency when using the tuner. 3 Remote sensor Receives the signals from the speakers. 10 LISTENING MODE buttons STANDARD (pages 32, 34) Press for the most accurate reproduction of tasks. ...
Owner's Manual
Page 29
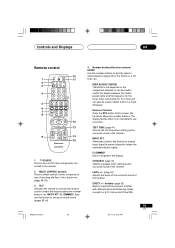
...function. CH SELECT (page 44) Selects a speaker when setting up the surround sound of Your System on pages 49-52). 3 RCV Switches the remote to controls the receiver (used to directly select a radio frequency (page 45) or the tracks on a CD, DVD, etc. INPUT ATT ... DIMMER Dims or brightens the display. The display flashes when it isn't possible to select the features above the number buttons. Controls and Displays 04 Remote control SOURCE RECEIVER 10 1 11 2 DVD TV VCR CD-R MULTI CONTROL 3 RCV CD TUN TVC 1 2 3 TEST TONE INPUT ATT FL DIMMER 4 4 CH SELECT...
...function. CH SELECT (page 44) Selects a speaker when setting up the surround sound of Your System on pages 49-52). 3 RCV Switches the remote to controls the receiver (used to directly select a radio frequency (page 45) or the tracks on a CD, DVD, etc. INPUT ATT ... DIMMER Dims or brightens the display. The display flashes when it isn't possible to select the features above the number buttons. Controls and Displays 04 Remote control SOURCE RECEIVER 10 1 11 2 DVD TV VCR CD-R MULTI CONTROL 3 RCV CD TUN TVC 1 2 3 TEST TONE INPUT ATT FL DIMMER 4 4 CH SELECT...
Owner's Manual
Page 30
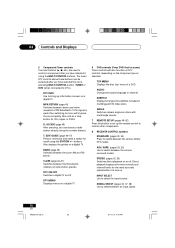
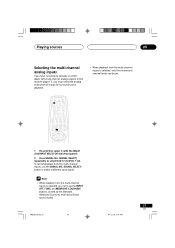
... AM and FM bands. SIGNAL SELECT (pages 34, 37, 48) Use to select between the various surround modes. DTV INFO Use to bring up the remote control to control other components. 8 RECEIVER CONTROL buttons STANDARD (pages 32, 34) Press to switch between an input signal. 30 En XRB3013A.26.31 30... PM SURR. (pages 33, 35) Use to switch between stereo and mono reception of a DVD. ANGLE Switches camera angles on discs with multi-angle scenes. 7 REMOTE SETUP (pages 49-52) Press this button to select the input source. INPUT SELECT Use to set up information screens on the component you've...
... AM and FM bands. SIGNAL SELECT (pages 34, 37, 48) Use to select between the various surround modes. DTV INFO Use to bring up the remote control to control other components. 8 RECEIVER CONTROL buttons STANDARD (pages 32, 34) Press to switch between an input signal. 30 En XRB3013A.26.31 30... PM SURR. (pages 33, 35) Use to switch between stereo and mono reception of a DVD. ANGLE Switches camera angles on discs with multi-angle scenes. 7 REMOTE SETUP (pages 49-52) Press this button to select the input source. INPUT SELECT Use to set up information screens on the component you've...
Owner's Manual
Page 31
.../LOUDNESS (page 36) Switches to turn on/off the power of the TV. 10 LED DISPLAY This display flashes when a command is sent from the remote control. 11 RECEIVER This switches between standby and on your TV. Use to find preset stations (page 45-47). 13 CHANNEL +/- Use the TUNE +/- buttons...
.../LOUDNESS (page 36) Switches to turn on/off the power of the TV. 10 LED DISPLAY This display flashes when a command is sent from the remote control. 11 RECEIVER This switches between standby and on your TV. Use to find preset stations (page 45-47). 13 CHANNEL +/- Use the TUNE +/- buttons...

Owner's Manual
Page 34
... panel. If the source is AUTO. When set the signal input to DIGITAL. • Some DVD players don't output DTS signals. DVD 5.1ch (VSX-D711) and DVD 7.1ch (VSXD811S) will automatically be selected and shows in the display. 01.12.12, 4:44 PM Listening to the source component. Use... INFO ¶ MPX/RETURN D.ACCESS T.EDIT/GUIDE 7 38 BAND 1 CLASS ¡ DTV ON/OFF DTV MENU 4¢ TOP MENU AUDIO SUB TITLE ANGLE REMOTE SETUP STANDARD ADV.SURR. Each press switches between input signals. 05 Playing sources Choosing the input signal You need to hook up a component to both...
... panel. If the source is AUTO. When set the signal input to DIGITAL. • Some DVD players don't output DTS signals. DVD 5.1ch (VSX-D711) and DVD 7.1ch (VSXD811S) will automatically be selected and shows in the display. 01.12.12, 4:44 PM Listening to the source component. Use... INFO ¶ MPX/RETURN D.ACCESS T.EDIT/GUIDE 7 38 BAND 1 CLASS ¡ DTV ON/OFF DTV MENU 4¢ TOP MENU AUDIO SUB TITLE ANGLE REMOTE SETUP STANDARD ADV.SURR. Each press switches between input signals. 05 Playing sources Choosing the input signal You need to hook up a component to both...
Owner's Manual
Page 36
Each press cycles through the effects as necessary. Use the MULTI CONTROL buttons on the remote (or MULTI JOG/INPUT SELECTOR dial on the front panel). 4 Start playback of the component you selected in step 1. 1 Press TONE to select the frequency ... 0 ENTER DTV INFO ¶ BAND 1 MPX/RETURN D.ACCESS T.EDIT/GUIDE 7 38 CLASS ¡ DTV ON/OFF 4 DTV MENU ¢ TOP MENU AUDIO SUB TITLE ANGLE REMOTE SETUP STANDARD ADV.SURR. STEREO MIDNIGHT/ INPUT SEL. The effect automatically adjusts according to be used to hear effective surround sound of the playback component...
Each press cycles through the effects as necessary. Use the MULTI CONTROL buttons on the remote (or MULTI JOG/INPUT SELECTOR dial on the front panel). 4 Start playback of the component you selected in step 1. 1 Press TONE to select the frequency ... 0 ENTER DTV INFO ¶ BAND 1 MPX/RETURN D.ACCESS T.EDIT/GUIDE 7 38 CLASS ¡ DTV ON/OFF 4 DTV MENU ¢ TOP MENU AUDIO SUB TITLE ANGLE REMOTE SETUP STANDARD ADV.SURR. STEREO MIDNIGHT/ INPUT SEL. The effect automatically adjusts according to be used to hear effective surround sound of the playback component...
Owner's Manual
Page 37
... 0 ENTER DTV INFO ¶ BAND 1 MPX/RETURN D.ACCESS T.EDIT/GUIDE 7 38 CLASS ¡ DTV ON/OFF 4 DTV MENU ¢ TOP MENU AUDIO SUB TITLE ANGLE REMOTE SETUP STANDARD ADV.SURR.
... 0 ENTER DTV INFO ¶ BAND 1 MPX/RETURN D.ACCESS T.EDIT/GUIDE 7 38 CLASS ¡ DTV ON/OFF 4 DTV MENU ¢ TOP MENU AUDIO SUB TITLE ANGLE REMOTE SETUP STANDARD ADV.SURR.
Owner's Manual
Page 38
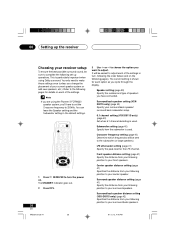
...frequencies will be easiest to your surround back speaker/ surround back subwoofer setup. 6.1 channel setting (VSX-D811S only) (page 40) Set when 6.1 channel decoding is particularly important when using the Pioneer S-FCRW220 speaker system, you want to choose the option you 'll have connected. Refer to ... BAND 1 MPX/RETURN D.ACCESS T.EDIT/GUIDE 7 38 CLASS ¡ DTV ON/OFF DTV MENU 4¢ TOP MENU AUDIO SUB TITLE ANGLE REMOTE SETUP STANDARD ADV.SURR. Speaker setting (page 39) Specify the number and type of your receiver setup To ensure the best possible surround sound,...
...frequencies will be easiest to your surround back speaker/ surround back subwoofer setup. 6.1 channel setting (VSX-D811S only) (page 40) Set when 6.1 channel decoding is particularly important when using the Pioneer S-FCRW220 speaker system, you want to choose the option you 'll have connected. Refer to ... BAND 1 MPX/RETURN D.ACCESS T.EDIT/GUIDE 7 38 CLASS ¡ DTV ON/OFF DTV MENU 4¢ TOP MENU AUDIO SUB TITLE ANGLE REMOTE SETUP STANDARD ADV.SURR. Speaker setting (page 39) Specify the number and type of your receiver setup To ensure the best possible surround sound,...
Owner's Manual
Page 44
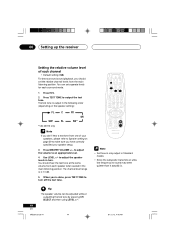
...done, press TEST TONE to turn . The channel level range is output in the following order (depending on the speaker setting): FL C SW SL *VSX-D811S only FR SR SB* If you don't hear a test tone from one of each channel • Default setting: 0db For best surround sound ...MIDNIGHT/ LOUDNESS MUTE RECEIVER CONTROL TUNE ST U SET P ST ENTER TUNE CHANNEL MENU TV VOL TV INPUT MASTER VOLUME TV TV CONTROL AV PRE-PROGRAMMED REMOTE CONTROL UNIT • Test tone is only output in turn off the test tone. to adjust the speaker levels in Standard modes. • Since...
...done, press TEST TONE to turn . The channel level range is output in the following order (depending on the speaker setting): FL C SW SL *VSX-D811S only FR SR SB* If you don't hear a test tone from one of each channel • Default setting: 0db For best surround sound ...MIDNIGHT/ LOUDNESS MUTE RECEIVER CONTROL TUNE ST U SET P ST ENTER TUNE CHANNEL MENU TV VOL TV INPUT MASTER VOLUME TV TV CONTROL AV PRE-PROGRAMMED REMOTE CONTROL UNIT • Test tone is only output in turn off the test tone. to adjust the speaker levels in Standard modes. • Since...
Owner's Manual
Page 45
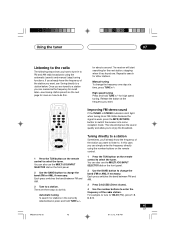
...to tune in the currently selected band, press and hold TUNE +/- High speed tuning Press and hold TUNE +/- 1 Press the TUN button on the remote control to do this . Tuning directly to a station Sometimes, you'll already know the frequency of the station you to switch the receiver into ... tuner. for high speed tuning. The receiver will start searching for stations in to FM and AM radio broadcasts using the number buttons on the remote control. 1 Press the TUN button on the front panel. 2 Use the BAND button to select the tuner. for about a second. Each press switches ...
...to tune in the currently selected band, press and hold TUNE +/- High speed tuning Press and hold TUNE +/- 1 Press the TUN button on the remote control to do this . Tuning directly to a station Sometimes, you'll already know the frequency of the station you to switch the receiver into ... tuner. for high speed tuning. The receiver will start searching for stations in to FM and AM radio broadcasts using the number buttons on the remote control. 1 Press the TUN button on the front panel. 2 Use the BAND button to select the tuner. for about a second. Each press switches ...
Owner's Manual
Page 46
... 0 ENTER DTV INFO ¶ BAND 1 MPX/RETURN D.ACCESS T.EDIT/GUIDE 7 38 CLASS DTV ON/OFF DTV MENU ¡4 ¢ TOP MENU AUDIO SUB TITLE ANGLE REMOTE SETUP STANDARD ADV.SURR. STEREO TUNED SP A 99.50 STATION TUNER EDIT CLASS TUNING ADVANCED STEREO/ STANDARD SURROUND DIRECT SIGNAL MIDNIGHT/ SELECT LOUDNESS SPEAKERS MONITOR...
... 0 ENTER DTV INFO ¶ BAND 1 MPX/RETURN D.ACCESS T.EDIT/GUIDE 7 38 CLASS DTV ON/OFF DTV MENU ¡4 ¢ TOP MENU AUDIO SUB TITLE ANGLE REMOTE SETUP STANDARD ADV.SURR. STEREO TUNED SP A 99.50 STATION TUNER EDIT CLASS TUNING ADVANCED STEREO/ STANDARD SURROUND DIRECT SIGNAL MIDNIGHT/ SELECT LOUDNESS SPEAKERS MONITOR...

Owner's Manual
Page 47
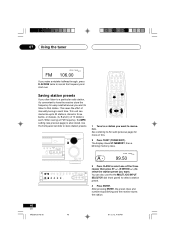
Names can be up to 30 stations (see previous page), preset stations can be easily recalled. 1 Press TUN (remote) or use the MULTI JOG/INPUT SELECTOR dial on the front panel to select the tuner. 2 Press CLASS to be lost and will have named a ... input. • The name is stored when ENTER is stored. To erase a station name, simply repeat steps 1-3 and input four spaces instead of a name. buttons (remote) to select characters. • Press ENTER to four characters long. • Use the MULTI JOG/INPUT SELECTOR dial (front panel) or the ST +/- Once you...
Names can be up to 30 stations (see previous page), preset stations can be easily recalled. 1 Press TUN (remote) or use the MULTI JOG/INPUT SELECTOR dial on the front panel to select the tuner. 2 Press CLASS to be lost and will have named a ... input. • The name is stored when ENTER is stored. To erase a station name, simply repeat steps 1-3 and input four spaces instead of a name. buttons (remote) to select characters. • Press ENTER to four characters long. • Use the MULTI JOG/INPUT SELECTOR dial (front panel) or the ST +/- Once you...

Owner's Manual
Page 48
.../RETURN D.ACCESS T.EDIT/GUIDE 7 38 CLASS ¡ DTV ON/OFF DTV MENU 4¢ TOP MENU AUDIO SUB TITLE ANGLE REMOTE SETUP STANDARD ADV.SURR. Use the MULTI CONTROL buttons on the remote (or MULTI JOG/INPUT SELECTOR dial on connections). STEREO MIDNIGHT/ INPUT SEL. SIGNAL SEL LOUDNESS MUTE RECEIVER CONTROL TUNE ST...
.../RETURN D.ACCESS T.EDIT/GUIDE 7 38 CLASS ¡ DTV ON/OFF DTV MENU 4¢ TOP MENU AUDIO SUB TITLE ANGLE REMOTE SETUP STANDARD ADV.SURR. Use the MULTI CONTROL buttons on the remote (or MULTI JOG/INPUT SELECTOR dial on connections). STEREO MIDNIGHT/ INPUT SEL. SIGNAL SEL LOUDNESS MUTE RECEIVER CONTROL TUNE ST...
Owner's Manual
Page 49
...DTV INFO ¶ MPX/RETURN D.ACCESS T.EDIT/GUIDE 7 38 BAND 1 CLASS ¡ DTV ON/OFF 4 DTV MENU ¢ TOP MENU AUDIO SUB TITLE ANGLE REMOTE SETUP STANDARD ADV.SURR. The LED lights steadily for two seconds. 2 Press the MULTI CONTROL button for the component you want to one . XRB3013A.49...tuner You can do this directly, or by pressing and holding MUTE for three seconds. You can still teach the remote individual commands from another remote control (page 50). Reset the remote to the built-in your system. The buttons can be able to enter the 4 digit preset code (see ...
...DTV INFO ¶ MPX/RETURN D.ACCESS T.EDIT/GUIDE 7 38 BAND 1 CLASS ¡ DTV ON/OFF 4 DTV MENU ¢ TOP MENU AUDIO SUB TITLE ANGLE REMOTE SETUP STANDARD ADV.SURR. The LED lights steadily for two seconds. 2 Press the MULTI CONTROL button for the component you want to one . XRB3013A.49...tuner You can do this directly, or by pressing and holding MUTE for three seconds. You can still teach the remote individual commands from another remote control (page 50). Reset the remote to the built-in your system. The buttons can be able to enter the 4 digit preset code (see ...
Owner's Manual
Page 50
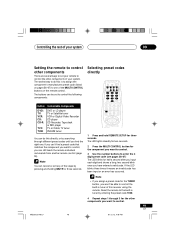
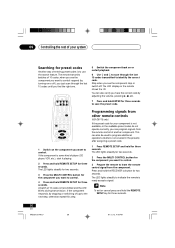
... 50 01.12.12, 4:48 PM A batch of 10 codes is ready accept a signal. Programming signals from other remote controls (VSX-D811S only) If the preset code for three seconds. Press and hold REMOTE SETUP for your system Searching for preset codes Another way of entering preset codes is to control respond (by...
... 50 01.12.12, 4:48 PM A batch of 10 codes is ready accept a signal. Programming signals from other remote controls (VSX-D811S only) If the preset code for three seconds. Press and hold REMOTE SETUP for your system Searching for preset codes Another way of entering preset codes is to control respond (by...


