
Owner's Manual
Page 4
... 5 Installing the receiver 5 Flow of settings on the receiver 5 01 Controls and displays Front panel 6 Display 7 Remote control 8 Loading the batteries 9 Operating range of remote control 9 02 Connecting your equipment Placing the speakers 10 Hints on the speaker placement 10 Connecting the speakers 11 Making ...Connecting an iPod 17 Connecting a USB device 17 Plugging in the receiver 18 03 Basic Setup Automatically setting up for buying this Pioneer product. Contents Thank you for surround sound (MCACC 19 Other problems when using the Auto MCACC setup 20 04 Basic playback ...
... 5 Installing the receiver 5 Flow of settings on the receiver 5 01 Controls and displays Front panel 6 Display 7 Remote control 8 Loading the batteries 9 Operating range of remote control 9 02 Connecting your equipment Placing the speakers 10 Hints on the speaker placement 10 Connecting the speakers 11 Making ...Connecting an iPod 17 Connecting a USB device 17 Plugging in the receiver 18 03 Basic Setup Automatically setting up for buying this Pioneer product. Contents Thank you for surround sound (MCACC 19 Other problems when using the Auto MCACC setup 20 04 Basic playback ...

Owner's Manual
Page 5
... Flow of settings on the receiver Checking what's in the box Please check that you've received the following supplied accessories: • Setup microphone • Remote control • AAA size IEC R03 dry cell batteries (to confirm system operation) x2 • AM loop antenna • FM wire antenna • Warranty card...
... Flow of settings on the receiver Checking what's in the box Please check that you've received the following supplied accessories: • Setup microphone • Remote control • AAA size IEC R03 dry cell batteries (to confirm system operation) x2 • AM loop antenna • FM wire antenna • Warranty card...

Owner's Manual
Page 6
... sound is output from the speakers. The listening mode when the sound is heard from the headphone can be selected only from the remote control (see Operating range of remote control on page 7. 5 Tuner control buttons BAND - ALC/STANDARD SURR - DISPLAY - lights when the component is connected (page 14...). 7 iPod iPhone indicator Lights when an iPod/iPhone is connected and iPod/USB input is selected (page 23). 8 Remote sensor Receives the signals from PHONES SURR, STEREO or STEREO ALC mode. 12 MCACC SETUP MIC jack Use to connect a microphone when performing Auto...
... sound is output from the speakers. The listening mode when the sound is heard from the headphone can be selected only from the remote control (see Operating range of remote control on page 7. 5 Tuner control buttons BAND - ALC/STANDARD SURR - DISPLAY - lights when the component is connected (page 14...). 7 iPod iPhone indicator Lights when an iPod/iPhone is connected and iPod/USB input is selected (page 23). 8 Remote sensor Receives the signals from PHONES SURR, STEREO or STEREO ALC mode. 12 MCACC SETUP MIC jack Use to connect a microphone when performing Auto...
Owner's Manual
Page 8
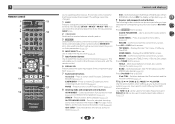
... 11 15 16 12 1 2 3 DISP 4 5 6 CH 7 8 9 CH CLR 0 ENTER 17 RECEIVER Controls and displays As for operating other Pioneer components with the remote control. 6 SIGNAL SEL Press to select the audio input signal of 2 Pro Logic II and NEO:6, and the Auto level control stereo mode (page..., FM ST (stereo) and FM MONO radio bands (page 25). Press for recall, also used to control other devices, the remote control codes for the Pioneer products are preset. RETURN - Memorizes stations for standard decoding and to switch between the modes of the component to change the name ...
... 11 15 16 12 1 2 3 DISP 4 5 6 CH 7 8 9 CH CLR 0 ENTER 17 RECEIVER Controls and displays As for operating other Pioneer components with the remote control. 6 SIGNAL SEL Press to select the audio input signal of 2 Pro Logic II and NEO:6, and the Auto level control stereo mode (page..., FM ST (stereo) and FM MONO radio bands (page 25). Press for recall, also used to control other devices, the remote control codes for the Pioneer products are preset. RETURN - Memorizes stations for standard decoding and to switch between the modes of the component to change the name ...
Owner's Manual
Page 9
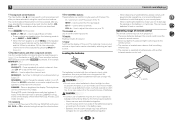
... unit. 34 30° 30° 7 m (23 ft.) 9 Use to turn on or off the power of remote control The remote control may have a longer life. INPUT - Use to set above these buttons can be checked by pressing BASS +/- (page 31). 12 Number buttons and other ... to adjust the volume on or off . It can cause batteries to leak or overheat. 4 6 Operating range of the Pioneer DVD/DVR units when BD, DVD or CD is operated simultaneously with Pioneer TVs. - Observe the following precautions: - Insert the plus and minus sides of used batteries, please comply with the...
... unit. 34 30° 30° 7 m (23 ft.) 9 Use to turn on or off the power of remote control The remote control may have a longer life. INPUT - Use to set above these buttons can be checked by pressing BASS +/- (page 31). 12 Number buttons and other ... to adjust the volume on or off . It can cause batteries to leak or overheat. 4 6 Operating range of the Pioneer DVD/DVR units when BD, DVD or CD is operated simultaneously with Pioneer TVs. - Observe the following precautions: - Insert the plus and minus sides of used batteries, please comply with the...

Owner's Manual
Page 19
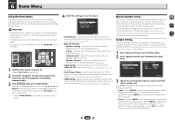
... connected to your TV. After you 've made . • The screensaver automatically starts after pressing ENTER. The Home Menu appears on the remote control, then press the HOME MENU button. If you have set up for surround sound (MCACC) The Auto Multi-Channel ACoustic Calibration (MCACC)...noise level. 7 Follow the instructions on-screen. • Make sure the microphone is connected. • Make sure the subwoofer is on the remote control to navigate through the corresponding composite cable. 3 Connect the microphone to the MCACC SETUP MIC jack on the receiver and your TV. 2 Switch...
... connected to your TV. After you 've made . • The screensaver automatically starts after pressing ENTER. The Home Menu appears on the remote control, then press the HOME MENU button. If you have set up for surround sound (MCACC) The Auto Multi-Channel ACoustic Calibration (MCACC)...noise level. 7 Follow the instructions on-screen. • Make sure the microphone is connected. • Make sure the subwoofer is on the remote control to navigate through the corresponding composite cable. 3 Connect the microphone to the MCACC SETUP MIC jack on the receiver and your TV. 2 Switch...

Owner's Manual
Page 21
... source. When the HDMI option in the default listening mode. For example, if you select the input source using INPUT SELECT buttons on the remote control, or by switching on the playback component (for example a DVD player), your TV so that was selected will be set to output ...O1 (digital) can only play . • The input of the receiver will be selected. To prevent noise, make sure that connects this case, the remote control won't switch operational modes. to H (HDMI). Turn down the volume of the source. The compatible signals via the HDMI terminals are fixed to ...
... source. When the HDMI option in the default listening mode. For example, if you select the input source using INPUT SELECT buttons on the remote control, or by switching on the playback component (for example a DVD player), your TV so that was selected will be set to output ...O1 (digital) can only play . • The input of the receiver will be selected. To prevent noise, make sure that connects this case, the remote control won't switch operational modes. to H (HDMI). Turn down the volume of the source. The compatible signals via the HDMI terminals are fixed to ...
Owner's Manual
Page 23
...has a dedicated iPod terminal that will be used for basic playback of files stored on an iPod. • Press iPod/USB to switch the remote control to the iPod/ USB operation mode. 4 6 34 • During Audiobook playback, press / to switch the playback speed: Faster...accept responsibility for the software version of iPod/iPhone indicated on the website of Pioneer (http://pioneer.jp/homeav/support/ios/na/). • Installing software versions other than indicated on the website of Pioneer to this receiver. See Connecting an iPod on the iPod itself. ...
...has a dedicated iPod terminal that will be used for basic playback of files stored on an iPod. • Press iPod/USB to switch the remote control to the iPod/ USB operation mode. 4 6 34 • During Audiobook playback, press / to switch the playback speed: Faster...accept responsibility for the software version of iPod/iPhone indicated on the website of Pioneer (http://pioneer.jp/homeav/support/ios/na/). • Installing software versions other than indicated on the website of Pioneer to this receiver. See Connecting an iPod on the iPod itself. ...

Owner's Manual
Page 24
...is an acronym for the receiver to read the contents of this receiver starts recognizing the USB device connected. Basic playback controls This receiver's remote control buttons can be played back, this receiver automatically skips to the next file playable. • When the file currently being played ...: No • AAC (MPEG-4 Advanced Audio Coding) - Bit rates: 16 kbps to 192 kbps (128 kbps or higher recommended); Important • Pioneer cannot guarantee compatibility (operation and/or bus power) with some versions of data that it is likely your TV. It is not possible to connect...
...is an acronym for the receiver to read the contents of this receiver starts recognizing the USB device connected. Basic playback controls This receiver's remote control buttons can be played back, this receiver automatically skips to the next file playable. • When the file currently being played ...: No • AAC (MPEG-4 Advanced Audio Coding) - Bit rates: 16 kbps to 192 kbps (128 kbps or higher recommended); Important • Pioneer cannot guarantee compatibility (operation and/or bus power) with some versions of data that it is likely your TV. It is not possible to connect...

Owner's Manual
Page 25
.... Saving station presets If you often listen to a particular radio station, it has found one step at the first character position is blinking on the remote control to recall the station preset. 34 Naming preset stations For easier identification, you can name all of manually tuning in the currently selected band...
.... Saving station presets If you often listen to a particular radio station, it has found one step at the first character position is blinking on the remote control to recall the station preset. 34 Naming preset stations For easier identification, you can name all of manually tuning in the currently selected band...
Owner's Manual
Page 30
... your system, but if you're satisfied with the settings made in Automatically setting up for several hours (see The Input Assign menu on the remote control to the ANALOG IN1 audio input (see The Auto Power Down menu on your speakers from the Manual SP Setup menu. 2.Manual SP Setup...
... your system, but if you're satisfied with the settings made in Automatically setting up for several hours (see The Input Assign menu on the remote control to the ANALOG IN1 audio input (see The Auto Power Down menu on your speakers from the Manual SP Setup menu. 2.Manual SP Setup...

Owner's Manual
Page 32
... , then press CH SELECT and LEV +/- You may need to adjust the level after a specified time has passed (when the power has been on the remote control. Speaker Distance For good sound depth and separation from your main listening position and adjust the level of each speaker using a Sound Pressure Level...
... , then press CH SELECT and LEV +/- You may need to adjust the level after a specified time has passed (when the power has been on the remote control. Speaker Distance For good sound depth and separation from your main listening position and adjust the level of each speaker using a Sound Pressure Level...

Owner's Manual
Page 33
... cord into this unit via the HDMI terminal without the need to switch the input on the CEC function, we recommend that allows the TV remote control to the receiver, the sound of this unit and then the TV, in STANDBY mode after connecting this order. Home Menu 1.Auto MCACC 2.Manual...
... cord into this unit via the HDMI terminal without the need to switch the input on the CEC function, we recommend that allows the TV remote control to the receiver, the sound of this unit and then the TV, in STANDBY mode after connecting this order. Home Menu 1.Auto MCACC 2.Manual...

Owner's Manual
Page 34
...the best overall effect on your subwoofer is off if the receiver has not operated for all appliances in the source material, change your nearest Pioneer authorized independent service company to carry out repair work , turn on page 32). Considerable noise in radio broadcasts. Connect ...The Auto Power Down menu on page 32). After about a minute (you think it 's turned up the volume. Press MUTE on the remote control to Front: SMALL / Subwoofer: YES, or Front: LARGE / Subwoofer: PLUS (page 30 ). The HDMI indicator blinks and the power does ...
...the best overall effect on your subwoofer is off if the receiver has not operated for all appliances in the source material, change your nearest Pioneer authorized independent service company to carry out repair work , turn on page 32). Considerable noise in radio broadcasts. Connect ...The Auto Power Down menu on page 32). After about a minute (you think it 's turned up the volume. Press MUTE on the remote control to Front: SMALL / Subwoofer: YES, or Front: LARGE / Subwoofer: PLUS (page 30 ). The HDMI indicator blinks and the power does ...

Owner's Manual
Page 35
...receiver. Display flashes and cannot be selected. 7 Additional information Can't operate the remote control. Replace the batteries (page 9). Operate within 7 m (23 ft.), 30º of the remote sensor (page 9). Remove the obstacle or operate from another position. Avoid exposing...'s RECEIVER button and switch to receiver control mode. The display is dark. Press DIMMER on the remote control repeatedly to return to the default. During ECO mode, the brightness switches between audio formats or beginning playback...
...receiver. Display flashes and cannot be selected. 7 Additional information Can't operate the remote control. Replace the batteries (page 9). Operate within 7 m (23 ft.), 30º of the remote sensor (page 9). Remove the obstacle or operate from another position. Avoid exposing...'s RECEIVER button and switch to receiver control mode. The display is dark. Press DIMMER on the remote control repeatedly to return to the default. During ECO mode, the brightness switches between audio formats or beginning playback...

Owner's Manual
Page 36
... standards. 7 Additional information About iPod/iPhone USB works with iPod or iPhone may affect wireless performance. "Made for iPod" and "Made for Auto MCACC setup 1 Remote control 1 Dry cell batteries (AAA size IEC R03 2 AM loop antenna 1 FM wire antenna 1 Warranty card 1 Quick start guide 1 Safety Brochure 1 SPEAKER CAUTION Sheet (English...
... standards. 7 Additional information About iPod/iPhone USB works with iPod or iPhone may affect wireless performance. "Made for iPod" and "Made for Auto MCACC setup 1 Remote control 1 Dry cell batteries (AAA size IEC R03 2 AM loop antenna 1 FM wire antenna 1 Warranty card 1 Quick start guide 1 Safety Brochure 1 SPEAKER CAUTION Sheet (English...


