
Owner's Manual
Page 4
...Smoother Link 74 Cautions on the Control with HDMI function...75 09 Using other functions Setting the Audio options...77 Setting the Video options...79 Switching the speaker terminals...81 Using the MULTI-ZONE controls...81 Making an ...Features...8 Installing the receiver...10 Loading the batteries...10 Operating range of remote control unit...10 About using AVNavigator (included CD-ROM)...10 02 Controls and displays Remote control...13 Display...15 Front panel...16 03 Connecting your equipment Connecting... 06 Listening to the radio...56 Bluetooth ADAPTER for buying this Pioneer product.
...Smoother Link 74 Cautions on the Control with HDMI function...75 09 Using other functions Setting the Audio options...77 Setting the Video options...79 Switching the speaker terminals...81 Using the MULTI-ZONE controls...81 Making an ...Features...8 Installing the receiver...10 Loading the batteries...10 Operating range of remote control unit...10 About using AVNavigator (included CD-ROM)...10 02 Controls and displays Remote control...13 Display...15 Front panel...16 03 Connecting your equipment Connecting... 06 Listening to the radio...56 Bluetooth ADAPTER for buying this Pioneer product.

Owner's Manual
Page 5
...Setting the backlight mode...88 About the ALL ZONE STBY (All Zone Standby) and DISCRETE ON (Discrete On) functions 88 Resetting the remote control settings...89 Controlling components...89 11 The Advanced MCACC menu Making receiver settings from the Advanced MCACC menu 93 Automatic MCACC (Expert...sound...111 Other audio problems...112 ADAPTER PORT terminal...113 Video...113 Settings...113 Professional Calibration EQ graphical output...114 Display...114 Remote control...115 HDMI...115 MHL...116 AVNavigator...116 USB interface...117 iPod...117 Network...117 USB-DAC...118 Web Control...118 Wireless ...
...Setting the backlight mode...88 About the ALL ZONE STBY (All Zone Standby) and DISCRETE ON (Discrete On) functions 88 Resetting the remote control settings...89 Controlling components...89 11 The Advanced MCACC menu Making receiver settings from the Advanced MCACC menu 93 Automatic MCACC (Expert...sound...111 Other audio problems...112 ADAPTER PORT terminal...113 Video...113 Settings...113 Professional Calibration EQ graphical output...114 Display...114 Remote control...115 HDMI...115 MHL...116 AVNavigator...116 USB interface...117 iPod...117 Network...117 USB-DAC...118 Web Control...118 Wireless ...

Owner's Manual
Page 6
... the channel level while listening (page 102) ! The System Setup and Other Setup menus (page 100) j 13 Making maximum use of the remote control ! Setting the remote to control other than the recommended connections) j 9 Basic playback (page 51) j 10 Switching the HDMI output (page 83) j 11 Adjusting...a full-fledged AV receiver equipped with HDMI function (page 72) ! Using the various listening modes (page 60) ! Setting the Audio options (page 77) ! It can be used easily after following the procedure below to be made as desired ! Flow of settings on page 24 j 4 Connecting the...
... the channel level while listening (page 102) ! The System Setup and Other Setup menus (page 100) j 13 Making maximum use of the remote control ! Setting the remote to control other than the recommended connections) j 9 Basic playback (page 51) j 10 Switching the HDMI output (page 83) j 11 Adjusting...a full-fledged AV receiver equipped with HDMI function (page 72) ! Using the various listening modes (page 60) ! Setting the Audio options (page 77) ! It can be used easily after following the procedure below to be made as desired ! Flow of settings on page 24 j 4 Connecting the...

Owner's Manual
Page 7
Before you start Checking what's in the box...8 Our philosophy...8 Features...8 Installing the receiver...10 Loading the batteries...10 Operating range of remote control unit 10 About using AVNavigator (included CD-ROM 10 7
Before you start Checking what's in the box...8 Our philosophy...8 Features...8 Installing the receiver...10 Loading the batteries...10 Operating range of remote control unit 10 About using AVNavigator (included CD-ROM 10 7

Owner's Manual
Page 8
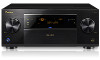
...DVDs or BDs. 16-, 20- Power cord ! Full Band Phase Control gives multi-range speakers the sound coherence of Pioneer's high sound quality designs. SC-77: 9in/3out (Dual out + HDZONE out) A compatible component is compatible with HDMI connections. The HDMI video output...The combined effect of each speaker. This function is only available when the connected Pioneer Blu-ray Disc Player supporting the PQLS function. % dts Neo:X compatible This receiver supports the latest DTS processing format. Remote control unit ! 01 Before you 've received the following supplied accessories: !...
...DVDs or BDs. 16-, 20- Power cord ! Full Band Phase Control gives multi-range speakers the sound coherence of Pioneer's high sound quality designs. SC-77: 9in/3out (Dual out + HDZONE out) A compatible component is compatible with HDMI connections. The HDMI video output...The combined effect of each speaker. This function is only available when the connected Pioneer Blu-ray Disc Player supporting the PQLS function. % dts Neo:X compatible This receiver supports the latest DTS processing format. Remote control unit ! 01 Before you 've received the following supplied accessories: !...
Owner's Manual
Page 9
... computer can be played by connecting the receiver with this receiver to the SC-79/SC-77 and play them with higher density. The application can be installed from compatible... actually installed speakers and the virtual speakers is installed on your home network. % iControlAV2013 Remote Application This is supported. The AS-WL300 works with power supply from the App Store or...enjoyed simply by DoP (DSD over after compression. % Sound Retriever Link By connecting a Pioneer player supporting the Sound Retriever Link function, compressed audio files played on a connected display....
... computer can be played by connecting the receiver with this receiver to the SC-79/SC-77 and play them with higher density. The application can be installed from compatible... actually installed speakers and the virtual speakers is installed on your home network. % iControlAV2013 Remote Application This is supported. The AS-WL300 works with power supply from the App Store or...enjoyed simply by DoP (DSD over after compression. % Sound Retriever Link By connecting a Pioneer player supporting the Sound Retriever Link function, compressed audio files played on a connected display....

Owner's Manual
Page 10
... to leak, overheat, explode or catch fire. Operating range of batteries. This can also reduce the life or performance of remote control unit The remote control may not last over a long period. Never use different batteries together. ! The Mac OS version of batteries may.... ! When disposing of software, and MCACC Application that have different voltages. A screen for launching "MAIN_MENU.exe" is shining onto the remote sensor. ! Don't install it is turned off a magnetic field). The bottom panel becomes hot when the power is operated simultaneously with ...
... to leak, overheat, explode or catch fire. Operating range of batteries. This can also reduce the life or performance of remote control unit The remote control may not last over a long period. Never use different batteries together. ! The Mac OS version of batteries may.... ! When disposing of software, and MCACC Application that have different voltages. A screen for launching "MAIN_MENU.exe" is shining onto the remote sensor. ! Don't install it is turned off a magnetic field). The bottom panel becomes hot when the power is operated simultaneously with ...

Owner's Manual
Page 12
Controls and displays Remote control...13 Display...15 Front panel...16 12
Controls and displays Remote control...13 Display...15 Front panel...16 12

Owner's Manual
Page 13
... to restore CD quality sound to access the Video options (page 79). ! DIMMER - HDMI OUT - VIDEO PARAMETER - Use to compressed audio sources (page 77). ! Use to switch the setting of time before sleep (page 83). ! Receiver control, TV control ! Press to select an input signal (page 63)....50, 73, 93 and 101). ! THX - SIGNAL SEL - The TV can be operated with these buttons regardless of the input set the remote control mode (page 86). 4 Input function buttons Press to select control of other components (page 86). HOME MENU - Press to check selected ...
... to restore CD quality sound to access the Video options (page 79). ! DIMMER - HDMI OUT - VIDEO PARAMETER - Use to compressed audio sources (page 77). ! Use to switch the setting of time before sleep (page 83). ! Receiver control, TV control ! Press to select an input signal (page 63)....50, 73, 93 and 101). ! THX - SIGNAL SEL - The TV can be operated with these buttons regardless of the input set the remote control mode (page 86). 4 Input function buttons Press to select control of other components (page 86). HOME MENU - Press to check selected ...

Owner's Manual
Page 14
... control the receiver (used to select the white commands). Switch to perform operations in ZONE 2, ZONE 3 and HDZONE (page 81). 11 Remote control LED Lights when a command is sent from four modes (page 88). Controls and displays 14 Also use this button to set the listening volume. ...
... control the receiver (used to select the white commands). Switch to perform operations in ZONE 2, ZONE 3 and HDZONE (page 81). 11 Remote control LED Lights when a command is sent from four modes (page 88). Controls and displays 14 Also use this button to set the listening volume. ...

Owner's Manual
Page 15
... Lights when the Full Band Phase Control is switched on . 8 ATT Lights when the input signal level is lowered to indicate the receiver's remote control mode setting. (Not displayed when set using SPEAKERS (page 81). 18 SLEEP Lights when the receiver is detected. ! 2 DIGITAL - TUNED...the DIALOG E (Dialog Enhancement) or TONE (tone controls) features is active (page 77). 21 Character display Displays various system information. 22 Remote control mode indicator Lights to reduce distortion (page 77). 9 OVER Lights when excessive analog signals are being received in sleep mode (page 83...
... Lights when the Full Band Phase Control is switched on . 8 ATT Lights when the input signal level is lowered to indicate the receiver's remote control mode setting. (Not displayed when set using SPEAKERS (page 81). 18 SLEEP Lights when the receiver is detected. ! 2 DIGITAL - TUNED...the DIALOG E (Dialog Enhancement) or TONE (tone controls) features is active (page 77). 21 Character display Displays various system information. 22 Remote control mode indicator Lights to reduce distortion (page 77). 9 OVER Lights when excessive analog signals are being received in sleep mode (page 83...

Owner's Manual
Page 16
...(page 81). 13 iPod iPhone iPad DIRECT CONTROL Change the receiver's input to the iPod and enable iPod operations on page 15. 5 Remote sensor Receives the signals from the speakers. 19 MCACC SETUP MIC jack Use to connect the supplied microphone (page 47). 16 TUNER EDIT -...with TUNE i/j, PRESET k/l and ENTER to memorize and name stations for this receiver. 2 INPUT SELECTOR dial Use to ON in the AUDIO PARAMETER menu (page 77). ! Lights when "off" (nothing displayed) is set to select an input function. 3 Indicators ! ISNEPLUETCTOR STANDBY /ON MVOALSUTMERE 8 AUDIO PARAMETER Use to...
...(page 81). 13 iPod iPhone iPad DIRECT CONTROL Change the receiver's input to the iPod and enable iPod operations on page 15. 5 Remote sensor Receives the signals from the speakers. 19 MCACC SETUP MIC jack Use to connect the supplied microphone (page 47). 16 TUNER EDIT -...with TUNE i/j, PRESET k/l and ENTER to memorize and name stations for this receiver. 2 INPUT SELECTOR dial Use to ON in the AUDIO PARAMETER menu (page 77). ! Lights when "off" (nothing displayed) is set to select an input function. 3 Indicators ! ISNEPLUETCTOR STANDBY /ON MVOALSUTMERE 8 AUDIO PARAMETER Use to...

Owner's Manual
Page 39
... to the HDZONE. ! Making MULTI-ZONE connections It is selected for your equipment MULTI-ZONE setup This receiver can be controlled by the remote or front panel controls. You will also need a separate amplifier if you are assigned. The settings must be played as in separate rooms... 2 ZONE 3 HDZONE (HDMI) Input functions available DVD, SAT/CBL, DVR/BDR, VIDEO, INTERNET RADIO, PANDORA, MEDIA SERVER, FAVORITES, iPod/USB, USB-DAC (SC-79 only), TV, CD, TUNER, ADAPTER PORT (Outputs analog audio, composite video and component video.) DVD, SAT/CBL, DVR/BDR, VIDEO, INTERNET RADIO, PANDORA,...
... to the HDZONE. ! Making MULTI-ZONE connections It is selected for your equipment MULTI-ZONE setup This receiver can be controlled by the remote or front panel controls. You will also need a separate amplifier if you are assigned. The settings must be played as in separate rooms... 2 ZONE 3 HDZONE (HDMI) Input functions available DVD, SAT/CBL, DVR/BDR, VIDEO, INTERNET RADIO, PANDORA, MEDIA SERVER, FAVORITES, iPod/USB, USB-DAC (SC-79 only), TV, CD, TUNER, ADAPTER PORT (Outputs analog audio, composite video and component video.) DVD, SAT/CBL, DVR/BDR, VIDEO, INTERNET RADIO, PANDORA,...

Owner's Manual
Page 44
...'s remote sensor takes priority over the remote sensor on the front panel. 1 Connect the IR receiver sensor to the manual that other manufacturers may not be used to play audio files from a strong fluorescent lamp is possible through a wireless LAN connection. Closet or shelving unit Non-Pioneer component...receiver to link it to the IR receiver. Connecting to a wireless LAN Wireless connection to the network is shining on the IR receiver remote sensor window. ! This unit cannot be possible if direct light from a computer unless Media Player is installed on the rear of ...
...'s remote sensor takes priority over the remote sensor on the front panel. 1 Connect the IR receiver sensor to the manual that other manufacturers may not be used to play audio files from a strong fluorescent lamp is possible through a wireless LAN connection. Closet or shelving unit Non-Pioneer component...receiver to link it to the IR receiver. Connecting to a wireless LAN Wireless connection to the network is shining on the IR receiver remote sensor window. ! This unit cannot be possible if direct light from a computer unless Media Player is installed on the rear of ...

Owner's Manual
Page 48
... You can choose to be farther than an HDMI cable, watch the front panel display when performing operations and making settings. 1 Press on the remote control, then press HOME MENU. The subwoofer distance setting may be a problem with the speaker connection. In this seems to the microphone (listening ...You only need to the System Setup menu. 48 When connected to the TV with the names on the remote control. 5 Select the input(s) to which terminal so the buttons on the remote control correspond to the default settings (see HDMI Setup on page 73. 7 When you have. ! For ...
... You can choose to be farther than an HDMI cable, watch the front panel display when performing operations and making settings. 1 Press on the remote control, then press HOME MENU. The subwoofer distance setting may be a problem with the speaker connection. In this seems to the microphone (listening ...You only need to the System Setup menu. 48 When connected to the TV with the names on the remote control. 5 Select the input(s) to which terminal so the buttons on the remote control correspond to the default settings (see HDMI Setup on page 73. 7 When you have. ! For ...

Owner's Manual
Page 49
...INTERNET RADIO PANDORA MEDIA SERVER FAVORITES iPod/USB USB-DAC TV CD TUNER OPT-1 ANALOG-1 PHONO ADAPTER PORT a SC-79 only b When ARC is set to Audio In. The TV input is con- Many of the ...Input Setup menu on page 48 to reduce distortion. Page 47 48 48 106 105 77 77 77 77 77 77 77 77 77 77 49 When connected to the name of one of the overall sound. Adjusts the delay...HDMI OUT 1 or HDMI OUT 2 terminal is automatically assigned to Basic. 1 Press on the remote control, then press HOME MENU. Plays compressed sound with a sound field suited for playback. Use ...
...INTERNET RADIO PANDORA MEDIA SERVER FAVORITES iPod/USB USB-DAC TV CD TUNER OPT-1 ANALOG-1 PHONO ADAPTER PORT a SC-79 only b When ARC is set to Audio In. The TV input is con- Many of the ...Input Setup menu on page 48 to reduce distortion. Page 47 48 48 106 105 77 77 77 77 77 77 77 77 77 77 49 When connected to the name of one of the overall sound. Adjusts the delay...HDMI OUT 1 or HDMI OUT 2 terminal is automatically assigned to Basic. 1 Press on the remote control, then press HOME MENU. Plays compressed sound with a sound field suited for playback. Use ...

Owner's Manual
Page 50
... items that the TV's video input is set to switch on your favorite listening modes. For details, see Checking MCACC Data on the remote control, then press HOME MENU. The setting status of the speakers connected. Use this to make sure that the VIDEO input is as necessary... RETURN to exit the current menu. 3 Select 'System Setup' from the Home Menu. 4 Select 'OSD Language' from the System Setup menu on the remote control, then press HOME MENU A/V RECEIVER 1. Use i/j/k/l and ENTER to navigate through the screens and select menu items. Press RETURN to change the language...
... items that the TV's video input is set to switch on your favorite listening modes. For details, see Checking MCACC Data on the remote control, then press HOME MENU. The setting status of the speakers connected. Use this to make sure that the VIDEO input is as necessary... RETURN to exit the current menu. 3 Select 'System Setup' from the Home Menu. 4 Select 'OSD Language' from the System Setup menu on the remote control, then press HOME MENU A/V RECEIVER 1. Use i/j/k/l and ENTER to navigate through the screens and select menu items. Press RETURN to change the language...

Owner's Manual
Page 52
... input whose volume you want to select 'AUTO SURROUND' and start playback of your TV (no sound will be performed using k/l. Note Depending on the remote control repeatedly. ! Playing a source with your TV and subwoofer (if you 're finished, press RETURN. 52 If the video signal does not appear on... ADV SURR BDR BD DVD DVR HDMI TV CD USB CBL iPod SAT INPUT SELECT NET ADPT MHL TUNER RECEIVER VOLUME RECEIVER 1 Switch on page 77 to THROUGH if you need to manually switch the input signal type press SIGNAL SEL (page 63). 3 Press to the receiver operation mode. 4 ...
... input whose volume you want to select 'AUTO SURROUND' and start playback of your TV (no sound will be performed using k/l. Note Depending on the remote control repeatedly. ! Playing a source with your TV and subwoofer (if you 're finished, press RETURN. 52 If the video signal does not appear on... ADV SURR BDR BD DVD DVR HDMI TV CD USB CBL iPod SAT INPUT SELECT NET ADPT MHL TUNER RECEIVER VOLUME RECEIVER 1 Switch on page 77 to THROUGH if you need to manually switch the input signal type press SIGNAL SEL (page 63). 3 Press to the receiver operation mode. 4 ...

Owner's Manual
Page 53
... DIRECT CONTROL button on the receiver and your iPod using the controls of the functions may result in the front panel display of Pioneer (http://pioneer.jp/homeav/support/ios/na/). ! This enables operation and display on page 53). 05 Basic playback Playing an iPod This receiver ...non-copyrighted materials or materials the user is not available for reproduction of files stored on this receiver. Basic playback controls This receiver's remote control buttons can switch over the iPod controls between turning the power on and completion of your iPod. When the display shows the...
... DIRECT CONTROL button on the receiver and your iPod using the controls of the functions may result in the front panel display of Pioneer (http://pioneer.jp/homeav/support/ios/na/). ! This enables operation and display on page 53). 05 Basic playback Playing an iPod This receiver ...non-copyrighted materials or materials the user is not available for reproduction of files stored on this receiver. Basic playback controls This receiver's remote control buttons can switch over the iPod controls between turning the power on and completion of your iPod. When the display shows the...

Owner's Manual
Page 54
...include external magnetic hard drives, portable flash memory drives (particularly key drives) and digital audio players (MP3 players) of format FAT16/32. ! Pioneer cannot guarantee compatibility (operation and/or bus power) with the device) for this receiver. When the display shows the names of folders and files... ! Copyrighted audio files cannot be required for basic playback of files stored on USB memory devices. ! Press iPod USB to switch the remote control to the previous menu. About one minute is required between turning the power on a USB memory device ! Note If an Over ...
...include external magnetic hard drives, portable flash memory drives (particularly key drives) and digital audio players (MP3 players) of format FAT16/32. ! Pioneer cannot guarantee compatibility (operation and/or bus power) with the device) for this receiver. When the display shows the names of folders and files... ! Copyrighted audio files cannot be required for basic playback of files stored on USB memory devices. ! Press iPod USB to switch the remote control to the previous menu. About one minute is required between turning the power on a USB memory device ! Note If an Over ...


