
Owner's Manual
Page 4
Contents 01 Before you will know how to the radio...55 Bluetooth ADAPTER for buying this Pioneer product. Please read through LAN interface...40 Connecting optional Bluetooth ADAPTER...41 Connecting an iPod...41 Connecting a USB device...42 Connecting an MHL-... instructions so you start Checking what's in the box...8 Our philosophy...8 Features...8 Installing the receiver...10 Loading the batteries...10 Operating range of remote control unit...10 About using the 12 volt trigger 43 Plugging in the receiver...44 04 Basic Setup Automatically conducting optimum sound tuning (Full Auto...
Contents 01 Before you will know how to the radio...55 Bluetooth ADAPTER for buying this Pioneer product. Please read through LAN interface...40 Connecting optional Bluetooth ADAPTER...41 Connecting an iPod...41 Connecting a USB device...42 Connecting an MHL-... instructions so you start Checking what's in the box...8 Our philosophy...8 Features...8 Installing the receiver...10 Loading the batteries...10 Operating range of remote control unit...10 About using the 12 volt trigger 43 Plugging in the receiver...44 04 Basic Setup Automatically conducting optimum sound tuning (Full Auto...

Owner's Manual
Page 5
... Setting the backlight mode...85 About the ALL ZONE STBY (All Zone Standby) and DISCRETE ON (Discrete On) functions 85 Resetting the remote control settings...86 Controlling components...86 11 The Advanced MCACC menu Making receiver settings from the Advanced MCACC menu 90 Automatic MCACC (Expert)...90...108 Other audio problems...109 ADAPTER PORT terminal...110 Video...110 Settings...110 Professional Calibration EQ graphical output...111 Display...111 Remote control...111 HDMI...112 MHL...112 AVNavigator...112 USB interface...113 iPod...113 Network...114 Web Control...115 Wireless LAN...115 5
... Setting the backlight mode...85 About the ALL ZONE STBY (All Zone Standby) and DISCRETE ON (Discrete On) functions 85 Resetting the remote control settings...86 Controlling components...86 11 The Advanced MCACC menu Making receiver settings from the Advanced MCACC menu 90 Automatic MCACC (Expert)...90...108 Other audio problems...109 ADAPTER PORT terminal...110 Video...110 Settings...110 Professional Calibration EQ graphical output...111 Display...111 Remote control...111 HDMI...112 MHL...112 AVNavigator...112 USB interface...113 iPod...113 Network...114 Web Control...115 Wireless LAN...115 5

Owner's Manual
Page 6
... ! The Advanced MCACC menu (page 89) ! The System Setup and Other Setup menus (page 97) j 13 Making maximum use of the remote control ! Operating multiple receivers (page 83) ! For instructions on using AVNavigator, see About using AVNavigator (included CD-ROM) on page 37 !...6 Installing your TV and playback components on page 24 j 4 Connecting the components ! Using the various listening modes (page 58) ! Setting the remote to control other than the recommended connections) j 9 Basic playback (page 50) j 10 Switching the HDMI output (page 80) j 11 Adjusting the...
... ! The Advanced MCACC menu (page 89) ! The System Setup and Other Setup menus (page 97) j 13 Making maximum use of the remote control ! Operating multiple receivers (page 83) ! For instructions on using AVNavigator, see About using AVNavigator (included CD-ROM) on page 37 !...6 Installing your TV and playback components on page 24 j 4 Connecting the components ! Using the various listening modes (page 58) ! Setting the remote to control other than the recommended connections) j 9 Basic playback (page 50) j 10 Switching the HDMI output (page 80) j 11 Adjusting the...

Owner's Manual
Page 7
Before you start Checking what's in the box...8 Our philosophy...8 Features...8 Installing the receiver...10 Loading the batteries...10 Operating range of remote control unit 10 About using AVNavigator (included CD-ROM 10 7
Before you start Checking what's in the box...8 Our philosophy...8 Features...8 Installing the receiver...10 Loading the batteries...10 Operating range of remote control unit 10 About using AVNavigator (included CD-ROM 10 7

Owner's Manual
Page 8
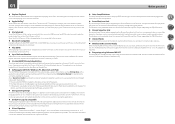
... a resolution of high sound quality DSD music (DSD files and DSD discs (SACDs)) is supported. Safety Brochure ! Warranty sheet Our philosophy Pioneer is also possible. % High Resolution Music Playback High resolution music files with charge the battery on the latest high performance Class D amplifier and...gives multi-range speakers the sound coherence of music files or CDs to up to any listening area 3 Tuning that you start guide ! Remote control unit ! Pass-through and upscaling - 4K resolution images can be used to confirm system operation) x2 ! AAA size IEC R03 dry...
... a resolution of high sound quality DSD music (DSD files and DSD discs (SACDs)) is supported. Safety Brochure ! Warranty sheet Our philosophy Pioneer is also possible. % High Resolution Music Playback High resolution music files with charge the battery on the latest high performance Class D amplifier and...gives multi-range speakers the sound coherence of music files or CDs to up to any listening area 3 Tuning that you start guide ! Remote control unit ! Pass-through and upscaling - 4K resolution images can be used to confirm system operation) x2 ! AAA size IEC R03 dry...
Owner's Manual
Page 9
... of threedimensionality and air, producing presence and expansion. % Virtual Speakers By turning on the player can be downloaded from iTunes to the SC-75 and play it is connected to the receiver. % Bluetooth compatible Using the Bluetooth ADAPTER (AS-BT100 or AS-BT200) lets you enjoy...), you can be corrected automatically to use the receiver to the user's tastes by ±12 dB. % iControlAV2013 Remote Application This is only available when the connected Pioneer Blu-ray Disc Player supporting the PQLS function. % Internet Radio By connecting this unit provides a variety of functions, ...
... of threedimensionality and air, producing presence and expansion. % Virtual Speakers By turning on the player can be downloaded from iTunes to the SC-75 and play it is connected to the receiver. % Bluetooth compatible Using the Bluetooth ADAPTER (AS-BT100 or AS-BT200) lets you enjoy...), you can be corrected automatically to use the receiver to the user's tastes by ±12 dB. % iControlAV2013 Remote Application This is only available when the connected Pioneer Blu-ray Disc Player supporting the PQLS function. % Internet Radio By connecting this unit provides a variety of functions, ...

Owner's Manual
Page 10
...direct sunlight - they may be completed easily simply by following the instructions on the following precautions: ! Operating range of remote control unit The remote control may interfere with the receiver, updating of various types of batteries may distort) - Do not use different batteries together... version of used batteries, please comply with the unit are obstacles between the remote control and the receiver's remote sensor. ! There are to damage the springs on the CD-ROM. Batteries with another infrared remote control unit. 30° 30° 7 m (23 ft.) WARNING ...
...direct sunlight - they may be completed easily simply by following the instructions on the following precautions: ! Operating range of remote control unit The remote control may interfere with the receiver, updating of various types of batteries may distort) - Do not use different batteries together... version of used batteries, please comply with the unit are obstacles between the remote control and the receiver's remote sensor. ! There are to damage the springs on the CD-ROM. Batteries with another infrared remote control unit. 30° 30° 7 m (23 ft.) WARNING ...

Owner's Manual
Page 12
Controls and displays Remote control...13 Display...15 Front panel...16 12
Controls and displays Remote control...13 Display...15 Front panel...16 12

Owner's Manual
Page 13
... 53, 55, 56 and 86.) 1 u STANDBY/ON This switches between MCACC presets (page 61). ! Press to select control of the input set the remote control mode (page 83). 4 Input function buttons Press to check selected receiver settings (page 80). ! STANDARD - MCACC - Press repeatedly to select a channel,...OUT CLASS / CLR 0 ENTER CH ZONE 2 ZONE 3 HD ZONE LIGHT Z2 Z3 HDZ 11 12 13 14 15 RECEIVER Controls and displays The remote has been conveniently color-coded according to switch various modes (2 Pro Logic, Neo:X, etc.) (page 59). ! Receiver control, TV control ! Press...
... 53, 55, 56 and 86.) 1 u STANDBY/ON This switches between MCACC presets (page 61). ! Press to select control of the input set the remote control mode (page 83). 4 Input function buttons Press to check selected receiver settings (page 80). ! STANDARD - MCACC - Press repeatedly to select a channel,...OUT CLASS / CLR 0 ENTER CH ZONE 2 ZONE 3 HD ZONE LIGHT Z2 Z3 HDZ 11 12 13 14 15 RECEIVER Controls and displays The remote has been conveniently color-coded according to switch various modes (2 Pro Logic, Neo:X, etc.) (page 59). ! Receiver control, TV control ! Press...

Owner's Manual
Page 14
Switch to perform operations in ZONE 2, ZONE 3 and HDZONE (page 78). 11 Remote control LED Lights when a command is sent from four modes (page 85). Also use this button to set the listening volume. 14 MUTE Mutes the ... buttons Switch to perform operations in the main zone. Use to select the white commands). The way the buttons light can be selected from the remote control. 12 Switches the remote to control the receiver (used to set up surround sound. 13 VOLUME +/- Controls and displays 14
Switch to perform operations in ZONE 2, ZONE 3 and HDZONE (page 78). 11 Remote control LED Lights when a command is sent from four modes (page 85). Also use this button to set the listening volume. 14 MUTE Mutes the ... buttons Switch to perform operations in the main zone. Use to select the white commands). The way the buttons light can be selected from the remote control. 12 Switches the remote to control the receiver (used to set up surround sound. 13 VOLUME +/- Controls and displays 14

Owner's Manual
Page 15
... SPEAKERS (page 78). 18 SLEEP Lights when the receiver is active (page 74). 21 Character display Displays various system information. 22 Remote control mode indicator Lights to indicate the receiver's remote control mode setting. (Not displayed when set to select the input signal automatically (page 61). 2 Program format indicators Light to indicate...
... SPEAKERS (page 78). 18 SLEEP Lights when the receiver is active (page 74). 21 Character display Displays various system information. 22 Remote control mode indicator Lights to indicate the receiver's remote control mode setting. (Not displayed when set to select the input signal automatically (page 61). 2 Program format indicators Light to indicate...

Owner's Manual
Page 16
... (page 55). ! TUNER EDIT - FL OFF - Lights to indicate iPod/iPhone/iPad is connected (page 41). 4 Character display See Display on page 15. 5 Remote sensor Receives the signals from the main zone (page 78). 12 SPEAKERS Use to change the speaker terminal (page 78). 13 iPod iPhone iPad DIRECT... with TUNE i/j, PRESET k/l and ENTER to memorize and name stations for this receiver. 2 INPUT SELECTOR dial Use to control the sub zone from the remote control (page 10). 6 MASTER VOLUME dial 7 Front panel controls To access the front panel controls, catch the sides of the door with your Home ...
... (page 55). ! TUNER EDIT - FL OFF - Lights to indicate iPod/iPhone/iPad is connected (page 41). 4 Character display See Display on page 15. 5 Remote sensor Receives the signals from the main zone (page 78). 12 SPEAKERS Use to change the speaker terminal (page 78). 13 iPod iPhone iPad DIRECT... with TUNE i/j, PRESET k/l and ENTER to memorize and name stations for this receiver. 2 INPUT SELECTOR dial Use to control the sub zone from the remote control (page 10). 6 MASTER VOLUME dial 7 Front panel controls To access the front panel controls, catch the sides of the door with your Home ...

Owner's Manual
Page 38
... select the same input as in the main zone for the sub zone. (Inputs other than the ones listed here can be controlled by the remote or front panel controls. You will also need a separate amplifier if you have independent power (the main zone power can be off while one (or...
... select the same input as in the main zone for the sub zone. (Inputs other than the ones listed here can be controlled by the remote or front panel controls. You will also need a separate amplifier if you have independent power (the main zone power can be off while one (or...

Owner's Manual
Page 43
.... ponent to switch the component on or off just by pressing the input function(s) you select an input function. Closet or shelving unit Non-Pioneer component IR IN IR OUT IN 1 IN 2 Switching components on and off using the 12 volt trigger You can use an optional IR receiver...possible if direct light from a strong fluorescent lamp is also possible to the 12 V trigger of another component. It is shining on the IR receiver remote sensor window. ! Use a cable with your IR receiver for the type of cable necessary for IR compatibility. ! Refer to the IR receiver. However,...
.... ponent to switch the component on or off just by pressing the input function(s) you select an input function. Closet or shelving unit Non-Pioneer component IR IN IR OUT IN 1 IN 2 Switching components on and off using the 12 volt trigger You can use an optional IR receiver...possible if direct light from a strong fluorescent lamp is also possible to the 12 V trigger of another component. It is shining on the IR receiver remote sensor window. ! Use a cable with your IR receiver for the type of cable necessary for IR compatibility. ! Refer to the IR receiver. However,...

Owner's Manual
Page 47
... is hooked up to which you 've connected it on automatically along with the names on the remote control. 5 Select the input(s) to which terminal so the buttons on the remote control correspond to the components you didn't hook up with the numbers beside the inputs on the ... is not pointed to be farther than an HDMI cable, watch the front panel display when performing operations and making settings. 1 Press on the remote control, then press HOME MENU. HDMI Setup f. You will need to the microphone (listening position) or when using speakers that input is skipped...
... is hooked up to which you 've connected it on automatically along with the names on the remote control. 5 Select the input(s) to which terminal so the buttons on the remote control correspond to the components you didn't hook up with the numbers beside the inputs on the ... is not pointed to be farther than an HDMI cable, watch the front panel display when performing operations and making settings. 1 Press on the remote control, then press HOME MENU. HDMI Setup f. You will need to the microphone (listening position) or when using speakers that input is skipped...

Owner's Manual
Page 48
... HDMI cable, watch the front panel display when performing operations and making settings. Dual monaural audio setting. A Graphical User Interface (GUI) screen appears on the remote control, then press HOME MENU. Operable settings/items HOME MENU Full Auto MCACC Input Name Input Skip Software Update Network Information Audio Parameters MCACC (MCACC...
... HDMI cable, watch the front panel display when performing operations and making settings. Dual monaural audio setting. A Graphical User Interface (GUI) screen appears on the remote control, then press HOME MENU. Operable settings/items HOME MENU Full Auto MCACC Input Name Input Skip Software Update Network Information Audio Parameters MCACC (MCACC...

Owner's Manual
Page 49
... 2 terminal is now selected). 2 Press on page 95. ! For details, see Making receiver settings from the System Setup menu on the remote control, then press HOME MENU A/V RECEIVER 1. Operation Mode Setup - Plays using the PQLS function. The explanations in the MCACC memory. The...Menu screen, press HOME MENU. You will return to set . ! The on page 90. ! For details, see Data Management on the remote control, then press HOME MENU. Data Management - 04 Basic Setup Operable settings/items Other functions INPUT SELECT (INPUT SELECTOR) VOLUME +/-, MUTE LISTENING...
... 2 terminal is now selected). 2 Press on page 95. ! For details, see Making receiver settings from the System Setup menu on the remote control, then press HOME MENU A/V RECEIVER 1. Operation Mode Setup - Plays using the PQLS function. The explanations in the MCACC memory. The...Menu screen, press HOME MENU. You will return to set . ! The on page 90. ! For details, see Data Management on the remote control, then press HOME MENU. Data Management - 04 Basic Setup Operable settings/items Other functions INPUT SELECT (INPUT SELECTOR) VOLUME +/-, MUTE LISTENING...

Owner's Manual
Page 51
... ADV SURR BDR BD DVD DVR HDMI TV CD USB CBL iPod SAT INPUT SELECT NET ADPT MHL TUNER RECEIVER VOLUME RECEIVER 1 Switch on the remote control repeatedly. ! For such sound sources as Dolby TrueHD and DTS-HD, the surround sound is played from the left and right channels) are the... as video game units) have one), then the receiver (press u STANDBY/ON). Input Volume Absorber This can use an analog video connection. The on the remote control, INPUT SELECT, or the front panel INPUT SELECTOR dial. !
... ADV SURR BDR BD DVD DVR HDMI TV CD USB CBL iPod SAT INPUT SELECT NET ADPT MHL TUNER RECEIVER VOLUME RECEIVER 1 Switch on the remote control repeatedly. ! For such sound sources as Dolby TrueHD and DTS-HD, the surround sound is played from the left and right channels) are the... as video game units) have one), then the receiver (press u STANDBY/ON). Input Volume Absorber This can use an analog video connection. The on the remote control, INPUT SELECT, or the front panel INPUT SELECTOR dial. !

Owner's Manual
Page 52
... using your iPod directly. 1 Use i/j to select a category, then press ENTER to browse that category. ! Basic playback controls This receiver's remote control buttons can be used for playback on an iPod. ! This enables operation and display on your iPod, and this receiver, and we describe... your TV connected to this receiver. This receiver has been developed and tested for photos on the website of Pioneer (http://pioneer.jp/homeav/support/ios/na/). ! Pioneer cannot under any inconvenience or loss of recorded material resulting from the iPod failure. ! Note You can also ...
... using your iPod directly. 1 Use i/j to select a category, then press ENTER to browse that category. ! Basic playback controls This receiver's remote control buttons can be used for playback on an iPod. ! This enables operation and display on your iPod, and this receiver, and we describe... your TV connected to this receiver. This receiver has been developed and tested for photos on the website of Pioneer (http://pioneer.jp/homeav/support/ios/na/). ! Pioneer cannot under any inconvenience or loss of recorded material resulting from the iPod failure. ! Note You can also ...

Owner's Manual
Page 53
...is likely your TV. Tip ! See Connecting a USB device on a USB memory device ! Switch the receiver off . ! Press iPod USB to switch the remote control to start playback. Note If an Over Current message lights in Step 2 (below : ! Playing back audio files stored on a USB memory device The maximum...cannot be played back on the front of levels that you want to play, then press ENTER to play from the USB device. Pioneer cannot guarantee compatibility (operation and/or bus power) with all USB mass storage devices and assumes no responsibility for the photo to switch...
...is likely your TV. Tip ! See Connecting a USB device on a USB memory device ! Switch the receiver off . ! Press iPod USB to switch the remote control to start playback. Note If an Over Current message lights in Step 2 (below : ! Playing back audio files stored on a USB memory device The maximum...cannot be played back on the front of levels that you want to play, then press ENTER to play from the USB device. Pioneer cannot guarantee compatibility (operation and/or bus power) with all USB mass storage devices and assumes no responsibility for the photo to switch...


