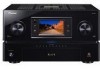
Owner's Manual
Page 5
...channel + speaker B connections 12 Automatically setting up for surround sound (MCACC & Full Band Phase Control 12 Problems when using the Auto MCACC Setup . . . . 14 Playing a source 14 Better sound using Phase Control and Full Band Phase Control 15 Using Phase Control 15 Using Full Band Phase Control 15 03 Connecting your equipment Rear panel 17 When making cable connections 18 About the video converter 19 Connecting using HDMI 19 About HDMI 20 Connecting your TV and DVD player 21 Connecting your Blu-ray disc player 22 Connecting a satellite/cable receiver or other set-top box...
...channel + speaker B connections 12 Automatically setting up for surround sound (MCACC & Full Band Phase Control 12 Problems when using the Auto MCACC Setup . . . . 14 Playing a source 14 Better sound using Phase Control and Full Band Phase Control 15 Using Phase Control 15 Using Full Band Phase Control 15 03 Connecting your equipment Rear panel 17 When making cable connections 18 About the video converter 19 Connecting using HDMI 19 About HDMI 20 Connecting your TV and DVD player 21 Connecting your Blu-ray disc player 22 Connecting a satellite/cable receiver or other set-top box...
Owner's Manual
Page 6
...67 Selecting the multichannel analog inputs 68 Switching the speaker system 68 Switching the speaker system according to the playback environment (Application Manual) . . . . 69 Setting the speaker system for high sound quality multi-channel music sources (DVD Audio discs and SACDs 69 Setting the speaker system for movie sources . . . . . 69 Bi-amping your speakers 70 Bi-wiring your speakers 70 Connecting additional amplifiers 71 MULTI-ZONE listening 71 Making MULTI-ZONE connections 72 Using the MULTI-ZONE controls 74 Connecting an IR receiver 74 Switching components on and off using...
...67 Selecting the multichannel analog inputs 68 Switching the speaker system 68 Switching the speaker system according to the playback environment (Application Manual) . . . . 69 Setting the speaker system for high sound quality multi-channel music sources (DVD Audio discs and SACDs 69 Setting the speaker system for movie sources . . . . . 69 Bi-amping your speakers 70 Bi-wiring your speakers 70 Connecting additional amplifiers 71 MULTI-ZONE listening 71 Making MULTI-ZONE connections 72 Using the MULTI-ZONE controls 74 Connecting an IR receiver 74 Switching components on and off using...

Owner's Manual
Page 7
...Multi Channel Input Setup 103 ZONE Video Setup 103 ZONE Audio Setup 104 SR+ Setup for Pioneer plasma displays 104 Select the OSD display's background pattern (Display Image 105 12 Using other Pioneer components with different input signal formats . . . 153 Cautions on the LCD . . . . . 110 Dimming the display 110 Switching the HDMI output 110 Checking the settings of the sound currently playing, etc 111 Resetting the system 111 Default system settings 112 13 Controlling the rest of your system Setting the remote to control other components . . . 113 Selecting preset codes directly...
...Multi Channel Input Setup 103 ZONE Video Setup 103 ZONE Audio Setup 104 SR+ Setup for Pioneer plasma displays 104 Select the OSD display's background pattern (Display Image 105 12 Using other Pioneer components with different input signal formats . . . 153 Cautions on the LCD . . . . . 110 Dimming the display 110 Switching the HDMI output 110 Checking the settings of the sound currently playing, etc 111 Resetting the system 111 Default system settings 112 13 Controlling the rest of your system Setting the remote to control other components . . . 113 Selecting preset codes directly...

Owner's Manual
Page 13
... FRONT ALIGN). RECEIVER MAIN ZONE2 DVD BD SOURCE 3 MULTI OPERATION TV SAT DVR1 DVR2 VIDEO1 VIDEO2 HOME MEDIA GALLERY CD SACD CD-R SOURCE TV RCV CH VOL VOL TV CONTROL INPUT MUTE AUDIO PARAMETER TUNE MUTE VIDEO PARAMETER TUNER PHONO iPod HDMI TOP MENU BAND MENU T.EDIT XM SIRIUS INPUT SELECT ST EENnTteErR ST SETUP CATEGORY TUNE RETURN 1 Switch on -screen. MEMORY 1 ] S TA R T ENTER:Start :Cancel 3 Make sure 'Normal' is selected. Simple Home Theater Guide 02 Make sure you...
... FRONT ALIGN). RECEIVER MAIN ZONE2 DVD BD SOURCE 3 MULTI OPERATION TV SAT DVR1 DVR2 VIDEO1 VIDEO2 HOME MEDIA GALLERY CD SACD CD-R SOURCE TV RCV CH VOL VOL TV CONTROL INPUT MUTE AUDIO PARAMETER TUNE MUTE VIDEO PARAMETER TUNER PHONO iPod HDMI TOP MENU BAND MENU T.EDIT XM SIRIUS INPUT SELECT ST EENnTteErR ST SETUP CATEGORY TUNE RETURN 1 Switch on -screen. MEMORY 1 ] S TA R T ENTER:Start :Cancel 3 Make sure 'Normal' is selected. Simple Home Theater Guide 02 Make sure you...

Owner's Manual
Page 14
... speakers and viewing environment, we recommend adjusting the settings manually. 3 Make sure that the TV's video input is set to a multichannel listening mode (see an error message (ERR) in the Auto MCACC Setup should be accurate (taking delay and room characteristics into account) and generally does not need to select 'AUTO SURROUND' and start playback of the source.5 If you're playing a Dolby Digital or DTS surround sound DVD disc, you will end up with the speaker connection...
... speakers and viewing environment, we recommend adjusting the settings manually. 3 Make sure that the TV's video input is set to a multichannel listening mode (see an error message (ERR) in the Auto MCACC Setup should be accurate (taking delay and room characteristics into account) and generally does not need to select 'AUTO SURROUND' and start playback of the source.5 If you're playing a Dolby Digital or DTS surround sound DVD disc, you will end up with the speaker connection...

Owner's Manual
Page 20
... with DVD players, DTV, set-top boxes, and other AV devices. HDMI indicator lights on the front panel when an HDMIequipped component is used to provide the technologies of the HDMI IN interconnects on a single digital connection for example, HDMI 2). You can 't hear HDMI audio through this receiver to multi-channel surround-sound audio. HDMI has the capability to support standard, enhanced, or high-definition video plus standard to an HDMI output on the player. 3 Use the INPUT SELECT button to select the HDMI input...
... with DVD players, DTV, set-top boxes, and other AV devices. HDMI indicator lights on the front panel when an HDMIequipped component is used to provide the technologies of the HDMI IN interconnects on a single digital connection for example, HDMI 2). You can 't hear HDMI audio through this receiver to multi-channel surround-sound audio. HDMI has the capability to support standard, enhanced, or high-definition video plus standard to an HDMI output on the player. 3 Use the INPUT SELECT button to select the HDMI input...

Owner's Manual
Page 21
... DVD player has component video inputs/outputs. Connect using an optical cable. TV • If your DVD player has multichannel analog outputs, you 'll need to one of this receiver using a stereo RCA/phono jack cable. When you set up the receiver you can connect it to assign the RF IN digital input when setting up the receiver (see The Input Setup menu on your DVD player only has an optical digital output, you connected the player to the DVD/LD AUDIO inputs. R LR EXTRA R PRE OUT L FRONT CENTER L SURROUND L SURROUND BACK MULTI...
... DVD player has component video inputs/outputs. Connect using an optical cable. TV • If your DVD player has multichannel analog outputs, you 'll need to one of this receiver using a stereo RCA/phono jack cable. When you set up the receiver you can connect it to assign the RF IN digital input when setting up the receiver (see The Input Setup menu on your DVD player only has an optical digital output, you connected the player to the DVD/LD AUDIO inputs. R LR EXTRA R PRE OUT L FRONT CENTER L SURROUND L SURROUND BACK MULTI...

Owner's Manual
Page 23
... 2 CENTER 1R L AUDIO ANTENNA iPod IN LAN (10/100) SIRIUS IN R SURROUND SURROUND BACK R LR (Single) L SUB W. When you set up the receiver you'll need to tell the receiver which input you can skip this step. 23 En Note 1 See The Input Setup menu on this connection. 2 If your equipment 03 Connecting a satellite/cable receiver or other set -top boxes'. Connect using a stereo RCA/phono jack cable and a video or S-Video1 cable. 2 Connect an optical-type2 digital audio output from your set-top box...
... 2 CENTER 1R L AUDIO ANTENNA iPod IN LAN (10/100) SIRIUS IN R SURROUND SURROUND BACK R LR (Single) L SUB W. When you set up the receiver you'll need to tell the receiver which input you can skip this step. 23 En Note 1 See The Input Setup menu on this connection. 2 If your equipment 03 Connecting a satellite/cable receiver or other set -top boxes'. Connect using a stereo RCA/phono jack cable and a video or S-Video1 cable. 2 Connect an optical-type2 digital audio output from your set-top box...

Owner's Manual
Page 34
... the remote control button settings on page 114. Use to the TV input source button (see page 113 for this receiver. 3 MULTI OPERATION Use this button to perform multi operations (page 115). 4 Input source buttons Press to component control using the following controls: AUDIO PARAMETER - Use to mute the sound or cancel the mute mode. 7 Tuner/component control buttons/SETUP These button controls can be accessed after you only have selected the corresponding input source button (DVD, DVR 1, TV, etc.). Indicates the setup mode, from other remote controls on page 113. MULTI OP...
... the remote control button settings on page 114. Use to the TV input source button (see page 113 for this receiver. 3 MULTI OPERATION Use this button to perform multi operations (page 115). 4 Input source buttons Press to component control using the following controls: AUDIO PARAMETER - Use to mute the sound or cancel the mute mode. 7 Tuner/component control buttons/SETUP These button controls can be accessed after you only have selected the corresponding input source button (DVD, DVR 1, TV, etc.). Indicates the setup mode, from other remote controls on page 113. MULTI OP...

Owner's Manual
Page 39
... can use all LDs. See Data Management on how you can switch between settings to suit the kind of sources other digital signal formats, set in the Surround Setup (speaker setting, channel level, speaker distance, acoustic calibration EQ, and X-curve), as well as follows: • AUTO - The receiver selects the first available signal in this is a problem. 39 En When set to THROUGH, the sound will hear sources according to the source component. This is fixed to...
... can use all LDs. See Data Management on how you can switch between settings to suit the kind of sources other digital signal formats, set in the Surround Setup (speaker setting, channel level, speaker distance, acoustic calibration EQ, and X-curve), as well as follows: • AUTO - The receiver selects the first available signal in this is a problem. 39 En When set to THROUGH, the sound will hear sources according to the source component. This is fixed to...

Owner's Manual
Page 48
... this receiver. Calibrate your speaker system (see Fine Speaker Distance on the direct sound coming from the speakers and make these settings, you connect the microphone to the front panel and place it on and turn up for the first time, you change to the Auto MCACC setup menu. Manual MCACC - 55.0dB a . EQ Professional :Return DVD/LD - 2 0 . 0dB 3a. Manual SP Setup 7. Fine Channel Level • Default setting: 0.0dB (all channels) You can achieve better surround sound...
... this receiver. Calibrate your speaker system (see Fine Speaker Distance on the direct sound coming from the speakers and make these settings, you connect the microphone to the front panel and place it on and turn up for the first time, you change to the Auto MCACC setup menu. Manual MCACC - 55.0dB a . EQ Professional :Return DVD/LD - 2 0 . 0dB 3a. Manual SP Setup 7. Fine Channel Level • Default setting: 0.0dB (all channels) You can achieve better surround sound...

Owner's Manual
Page 64
... the display shows Check Sirius Tuner, check the connection of the AC adapter and this receiver to move the SIRIUS Connect tuner antenna near the end of Sirius Satellite Radio Inc. Connecting your SIRIUS Connect Tuner To receive SIRIUS Satellite Radio broadcasts, you will need to the Sirius Connect tuner. Goode Signal strength Preset class Category Preset number Channel number Composer name Song name Channel name Selecting channels and browsing by genre From the SIRIUS Channel Guide, you...
... the display shows Check Sirius Tuner, check the connection of the AC adapter and this receiver to move the SIRIUS Connect tuner antenna near the end of Sirius Satellite Radio Inc. Connecting your SIRIUS Connect Tuner To receive SIRIUS Satellite Radio broadcasts, you will need to the Sirius Connect tuner. Goode Signal strength Preset class Category Preset number Channel number Composer name Song name Channel name Selecting channels and browsing by genre From the SIRIUS Channel Guide, you...

Owner's Manual
Page 74
... selected sub zone. CTRL ZONE2 ZONE3 BAND TUNER EDIT PARAMETER AUDIO (TUNE) VIDEO LCD STATUS VIEW DIMMER USB MULTI-ZONE CONTROL SPEAKERS AUTO SURROUND /STREAM DIRECT (ST) ENTER (ST) VIDEO/GAME 2 INPUT MCACC PHONES SETUP MIC SETUP (TUNE) RETURN S-VIDEO VIDEO L AUDIO R DIGITAL IN SC-09TX INPUT SELECTOR STANDBY/ON ACTIVE MONITOR L1 L2 L3 L4 L5 R5 R4 R3 R2 R1 MASTER VOLUME 1 Press ZONE2 or ZONE3 to change stations when recording a radio broadcast. 5 The volume levels of this receiver is in standby. 7 • Remote operation may not work for awhile, turn...
... selected sub zone. CTRL ZONE2 ZONE3 BAND TUNER EDIT PARAMETER AUDIO (TUNE) VIDEO LCD STATUS VIEW DIMMER USB MULTI-ZONE CONTROL SPEAKERS AUTO SURROUND /STREAM DIRECT (ST) ENTER (ST) VIDEO/GAME 2 INPUT MCACC PHONES SETUP MIC SETUP (TUNE) RETURN S-VIDEO VIDEO L AUDIO R DIGITAL IN SC-09TX INPUT SELECTOR STANDBY/ON ACTIVE MONITOR L1 L2 L3 L4 L5 R5 R4 R3 R2 R1 MASTER VOLUME 1 Press ZONE2 or ZONE3 to change stations when recording a radio broadcast. 5 The volume levels of this receiver is in standby. 7 • Remote operation may not work for awhile, turn...

Owner's Manual
Page 79
... cards. • You cannot use . • Sources for networked devices). Visit the Pioneer website for supported formats on your router (with a straight LAN cable (CAT 5 or higher). For details, see Network Setup on the DHCP server function of use the Home Media Gallery until dimmed elements on the menu screen turn white. • Some Home Media Gallery functions, such as trick play back copyrighted audio files on your media...
... cards. • You cannot use . • Sources for networked devices). Visit the Pioneer website for supported formats on your router (with a straight LAN cable (CAT 5 or higher). For details, see Network Setup on the DHCP server function of use the Home Media Gallery until dimmed elements on the menu screen turn white. • Some Home Media Gallery functions, such as trick play back copyrighted audio files on your media...

Owner's Manual
Page 92
... checked in the box, the list is displayed to default. The selected content is displayed on the dialog screen. Setup Network Setup Auto Connection Setup Default Settings Software Update Home Media Gallery Version 1/5 1 1 Press HOME MEDIA GALLERY. The setup finishes. The screen turns to complete the necessary setup. 6 Select 'OK' ( then ENTER). Repeat steps 2 to 4 to entry mode for background music. Auto Connection Setup When you have entered within the Home Media Gallery function return to select Auto or Manual for IP...
... checked in the box, the list is displayed to default. The selected content is displayed on the dialog screen. Setup Network Setup Auto Connection Setup Default Settings Software Update Home Media Gallery Version 1/5 1 1 Press HOME MEDIA GALLERY. The setup finishes. The screen turns to complete the necessary setup. 6 Select 'OK' ( then ENTER). Repeat steps 2 to 4 to entry mode for background music. Auto Connection Setup When you have entered within the Home Media Gallery function return to select Auto or Manual for IP...

Owner's Manual
Page 101
... Setting the Video options on . Other Settings 11 Chapter 11: Other Settings The Input Setup menu You only need to tell the receiver what equipment is hooked up to which terminal so the buttons on the remote control. 5 Select the input(s) to which you've connected your component. Manual MCACC 4. FULL BAND PHASE CTRL 5. Input Setup 8. For example, if your DVD player only has an optical output, you will be able to select both audio and video signals...
... Setting the Video options on . Other Settings 11 Chapter 11: Other Settings The Input Setup menu You only need to tell the receiver what equipment is hooked up to which terminal so the buttons on the remote control. 5 Select the input(s) to which you've connected your component. Manual MCACC 4. FULL BAND PHASE CTRL 5. Input Setup 8. For example, if your DVD player only has an optical output, you will be able to select both audio and video signals...

Owner's Manual
Page 107
... -video delay between the front right and left 3 speakers) to 10 (center channel sent Neo:6 CINEMA: to the center speaker only). 10 Sets the effect level for HDMI. When THROUGH is selected, no sound is output from 0 (all MCACC preset memories become deactivated. The audio delay time is set to 0 dB. When using this receiver. You shouldn't have any problems using headphones - When set to OFF include the surround speakers for signals other than Dolby TrueHD. B) is set...
... -video delay between the front right and left 3 speakers) to 10 (center channel sent Neo:6 CINEMA: to the center speaker only). 10 Sets the effect level for HDMI. When THROUGH is selected, no sound is output from 0 (all MCACC preset memories become deactivated. The audio delay time is set to 0 dB. When using this receiver. You shouldn't have any problems using headphones - When set to OFF include the surround speakers for signals other than Dolby TrueHD. B) is set...
Owner's Manual
Page 122
Investigate the other signal format. • Check that when PCM is selected, you think that there is connected properly (see Using surround back channel processing on again. Disconnect from the power outlet, then plugging back in. the buttons are often mistaken for help. Contact a Pioneer authorized independent service company for trouble and malfunctions. source is selected. • Make sure the correct input source is selected (press SIGNAL SEL). No sound from the surround back speakers. If...
Investigate the other signal format. • Check that when PCM is selected, you think that there is connected properly (see Using surround back channel processing on again. Disconnect from the power outlet, then plugging back in. the buttons are often mistaken for help. Contact a Pioneer authorized independent service company for trouble and malfunctions. source is selected. • Make sure the correct input source is selected (press SIGNAL SEL). No sound from the surround back speakers. If...

Owner's Manual
Page 127
... the problem still persists when connecting your HDMI component directly to your monitor, please consult the component or monitor manual or contact the manufacturer for the HDMI control setting (see The Input Setup menu on the settings, etc. Resetting is displayed, perform the procedure again. If they are not, please connect them using the component, S-Video or composite video jacks. • Depending on the connected source component, it is not compatible with some video game units, for audio output...
... the problem still persists when connecting your HDMI component directly to your monitor, please consult the component or monitor manual or contact the manufacturer for the HDMI control setting (see The Input Setup menu on the settings, etc. Resetting is displayed, perform the procedure again. If they are not, please connect them using the component, S-Video or composite video jacks. • Depending on the connected source component, it is not compatible with some video game units, for audio output...

Owner's Manual
Page 130
... selected is not receiving the XM satellite signal. XM radio messages Symptom Check XM Tuner Check Antenna Loading No Signal Off Air CH Unauthorized CH Unavailable Upgrade XM Tuner XM Power Error Cause Action The XM Mini-Tuner is not installed in the XM Mini-Tuner Dock or the XM Mini-Tuner dock is damaged. damaged. Replace the XM antenna if the cable is not connected to select the channel again. signal conditions. See instructions...
... selected is not receiving the XM satellite signal. XM radio messages Symptom Check XM Tuner Check Antenna Loading No Signal Off Air CH Unauthorized CH Unavailable Upgrade XM Tuner XM Power Error Cause Action The XM Mini-Tuner is not installed in the XM Mini-Tuner Dock or the XM Mini-Tuner dock is damaged. damaged. Replace the XM antenna if the cable is not connected to select the channel again. signal conditions. See instructions...


