User manual (English)
Page 2
... monitor: q Disconnect the monitor from the power supply before cleaning. Read and follow these instructions when connecting and using the monitor, please make sure the power plug and outlet are followed. q To avoid the risk of shock or permanent damage to the set, do not expose the monitor to clean the monitor. Disconnect the monitor from the power supply if the monitor is not to be used for safety concern. Consult a service...
... monitor: q Disconnect the monitor from the power supply before cleaning. Read and follow these instructions when connecting and using the monitor, please make sure the power plug and outlet are followed. q To avoid the risk of shock or permanent damage to the set, do not expose the monitor to clean the monitor. Disconnect the monitor from the power supply if the monitor is not to be used for safety concern. Consult a service...

User manual (English)
Page 3
... printed version. q About This Electronic User's Manual gives overview of how to . q On Screen Display provides information on adjusting the settings on their hard drive. q Installing Your Monitor describes the initial setup process and gives an overview of what information are as follows: q Safety and Troubleshooting Information provides tips and solutions for technical terms. q Download allows users to commonly asked questions. q Frequently...
... printed version. q About This Electronic User's Manual gives overview of how to . q On Screen Display provides information on adjusting the settings on their hard drive. q Installing Your Monitor describes the initial setup process and gives an overview of what information are as follows: q Safety and Troubleshooting Information provides tips and solutions for technical terms. q Download allows users to commonly asked questions. q Frequently...
User manual (English)
Page 6
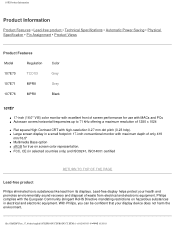
... Power Saving • Physical Specification • Pin Assignment • Product Views Product Features Model Regulation 107E70 TCO'03 107E71 MPRII 107E76 MPRII Color Grey Grey Black 107E7 q 17-inch (16.0" VIS) color monitor with excellent front of screen performance for true on hazardous substances in electrical and electronic equipment. Philips complies with high-resolution 0.27 mm dot pitch (0.23 hdp). file:///D|/EDFU/crt_17_6/edoc/english...
... Power Saving • Physical Specification • Pin Assignment • Product Views Product Features Model Regulation 107E70 TCO'03 107E71 MPRII 107E76 MPRII Color Grey Grey Black 107E7 q 17-inch (16.0" VIS) color monitor with excellent front of screen performance for true on hazardous substances in electrical and electronic equipment. Philips complies with high-resolution 0.27 mm dot pitch (0.23 hdp). file:///D|/EDFU/crt_17_6/edoc/english...

User manual (English)
Page 7
... / y = 0.329 x = 0.313 / y = 0.329 PRESET MODES file:///D|/EDFU/crt_17_6/edoc/english/107E/PRODUCT/PRODUCT.HTM (2 of 6)2005-05-19 ¤W¤È 10:20:01 107E Product Information Technical Specifications* CRT • Size and deflection • Dot pitch • Horizontal pitch • Tube type • Phosphor • Recommended display area • Maximum display area 17 inch / 41 cm ; 90°...
... / y = 0.329 x = 0.313 / y = 0.329 PRESET MODES file:///D|/EDFU/crt_17_6/edoc/english/107E/PRODUCT/PRODUCT.HTM (2 of 6)2005-05-19 ¤W¤È 10:20:01 107E Product Information Technical Specifications* CRT • Size and deflection • Dot pitch • Horizontal pitch • Tube type • Phosphor • Recommended display area • Maximum display area 17 inch / 41 cm ; 90°...

User manual (English)
Page 9
And if an input from a keyboard, mouse or other input device is detected, the monitor will automatically "wake up". The following table shows the power consumption and signaling of this automatic power saving features: VESA's Mode Active Video Power Management Definition H-sync V-sync Power Used Power Saving (%) ON Yes Yes 107E Product Information RETURN TO TOP OF THE PAGE Automatic Power Saving If you have VESA's DPMS compliance display card or software installed in your PC, the monitor can automatically reduce its power consumption when not in use.
And if an input from a keyboard, mouse or other input device is detected, the monitor will automatically "wake up". The following table shows the power consumption and signaling of this automatic power saving features: VESA's Mode Active Video Power Management Definition H-sync V-sync Power Used Power Saving (%) ON Yes Yes 107E Product Information RETURN TO TOP OF THE PAGE Automatic Power Saving If you have VESA's DPMS compliance display card or software installed in your PC, the monitor can automatically reduce its power consumption when not in use.
User manual (English)
Page 21
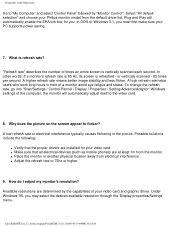
..., its screen is refresh rate? A high refresh rate helps users who work long hours in the picture. Under Windows '95, you must first make sure your Philips monitor model from electrical interference q Adjust the refresh rate to the video card. 8. file:///D|/EDFU/crt_17_6/edoc/english/FAQ.HTM (3 of times an entire screen is vertically scanned each second. In DOS or Windows 3.1, you may select the desired available resolution through the 'Display properties/Settings' menu. "Refresh rate" describes the number of...
..., its screen is refresh rate? A high refresh rate helps users who work long hours in the picture. Under Windows '95, you must first make sure your Philips monitor model from electrical interference q Adjust the refresh rate to the video card. 8. file:///D|/EDFU/crt_17_6/edoc/english/FAQ.HTM (3 of times an entire screen is vertically scanned each second. In DOS or Windows 3.1, you may select the desired available resolution through the 'Display properties/Settings' menu. "Refresh rate" describes the number of...

User manual (English)
Page 23
... end of the red, green and blue cannon are accurately measured and compared to zero. file:///D|/EDFU/crt_17_6/edoc/english/FAQ.HTM (8 of its colors change. It makes your dealer/reseller for 13,300 hours, a full one third longer. 14. During the calibration process, different predefined black and white images are stored during production. Eventually after a number of years, the monitor's brightness deteriorates to...
... end of the red, green and blue cannon are accurately measured and compared to zero. file:///D|/EDFU/crt_17_6/edoc/english/FAQ.HTM (8 of its colors change. It makes your dealer/reseller for 13,300 hours, a full one third longer. 14. During the calibration process, different predefined black and white images are stored during production. Eventually after a number of years, the monitor's brightness deteriorates to...

User manual (English)
Page 24
... is turned on q Ensure the VGA Cable is warmed up. During this function? Constant re-calibration is redisplayed. Pressing the front control panels hasno effect. Check the following for about 15 seconds until picture displays "OSD MAIN MENU UNLOCKED" 18. q Video card may be performed after the monitor is properly connected q Ensure the BNC/D-Sub connector on the rear of this option in the On Screen Display under Input Signal Selection...
... is turned on q Ensure the VGA Cable is warmed up. During this function? Constant re-calibration is redisplayed. Pressing the front control panels hasno effect. Check the following for about 15 seconds until picture displays "OSD MAIN MENU UNLOCKED" 18. q Video card may be performed after the monitor is properly connected q Ensure the BNC/D-Sub connector on the rear of this option in the On Screen Display under Input Signal Selection...
User manual (English)
Page 25
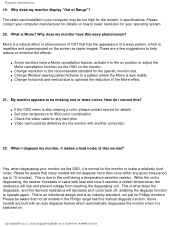
..., not just for details q Set color temperature to 10 minutes). Some models are a few suggestions to help reduce or minimize the effects: q Some monitors have this normal? Why does my monitor display "Out of the Moire effect. 21. The video card installed in the Philips range has this ? q Change resolution to the on position or adjust the Moire cancellation function via the OSD, it cools back off...
..., not just for details q Set color temperature to 10 minutes). Some models are a few suggestions to help reduce or minimize the effects: q Some monitors have this normal? Why does my monitor display "Out of the Moire effect. 21. The video card installed in the Philips range has this ? q Change resolution to the on position or adjust the Moire cancellation function via the OSD, it cools back off...

User manual (English)
Page 26
... monitor timing to the factory preset via the OSD menu file:///D|/EDFU/crt_17_6/edoc/english/FAQ.HTM (11 of the picture on the screen? Frequently Asked Questions 23. Place the monitor in the OSD q Change monitor timing to correct the picture image: q Reset your monitor via the monitor 's OSD. The picture appears too dim. How can I correct this ? Adjust Brightness and/or Contrast via the OSD menu q Adjust the Horz (width) and/or Vert size (height...
... monitor timing to the factory preset via the OSD menu file:///D|/EDFU/crt_17_6/edoc/english/FAQ.HTM (11 of the picture on the screen? Frequently Asked Questions 23. Place the monitor in the OSD q Change monitor timing to correct the picture image: q Reset your monitor via the monitor 's OSD. The picture appears too dim. How can I correct this ? Adjust Brightness and/or Contrast via the OSD menu q Adjust the Horz (width) and/or Vert size (height...
User manual (English)
Page 27
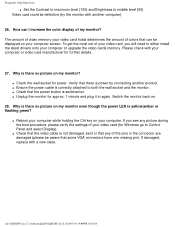
.../english/FAQ.HTM (12 of your computer screen. If damaged, replace with another product. Frequently Asked Questions q Set the Contrast to maximum level (100) and Brightness to Control Panel and select Display). How can be aware that the power button is there no picture on your video card (for approx. 1 minute and plug it in the connector are damaged (please be displayed on my monitor even though the power LED...
.../english/FAQ.HTM (12 of your computer screen. If damaged, replace with another product. Frequently Asked Questions q Set the Contrast to maximum level (100) and Brightness to Control Panel and select Display). How can be aware that the power button is there no picture on your video card (for approx. 1 minute and plug it in the connector are damaged (please be displayed on my monitor even though the power LED...

User manual (English)
Page 42
.... Refresh rate See Vertical scanning frequency. The resolution is specified as the number of pixels in a line multiplied by the number of 22)2005-05-19 ¤W¤È 10:20:05 See also video graphic adapter. Glossary Plug-and-Play See DDC. See USB section. Because of the magnetic field of earth, the screen of pixels that can be displayed on screen that allows users to adjust...
.... Refresh rate See Vertical scanning frequency. The resolution is specified as the number of pixels in a line multiplied by the number of 22)2005-05-19 ¤W¤È 10:20:05 See also video graphic adapter. Glossary Plug-and-Play See DDC. See USB section. Because of the magnetic field of earth, the screen of pixels that can be displayed on screen that allows users to adjust...

User manual (English)
Page 47
... set-up to simplify USB connectivity from the user's perspective and provide robustness at low cost and complexity. Hubs are referred to one printer, two Com port devices (usually a mouse and modem), one Enhanced Parallel Port add-on a computer. q USB permits "hot plug-in , reboot and run simultaneously on (scanner or video camera, for reset and suspend/resume signaling. The upstream port...
... set-up to simplify USB connectivity from the user's perspective and provide robustness at low cost and complexity. Hubs are referred to one printer, two Com port devices (usually a mouse and modem), one Enhanced Parallel Port add-on a computer. q USB permits "hot plug-in , reboot and run simultaneously on (scanner or video camera, for reset and suspend/resume signaling. The upstream port...

User manual (English)
Page 53
... trouble? Check these suggestions. q Power button on . file:///D|/EDFU/crt_17_6/edoc/english/107E/SAFETY/saf_troub.htm (1 of your computer. No Picture (Power LED is flashing green) q Make sure the computer is plugged into the power outlet and back of the monitor. Having this problem? q Disconnect the monitor from the power outlet for help, try these items No Picture (Power LED not lit) q Make sure the Power cable is turned on . q Make sure the computer Power button is properly connected...
... trouble? Check these suggestions. q Power button on . file:///D|/EDFU/crt_17_6/edoc/english/107E/SAFETY/saf_troub.htm (1 of your computer. No Picture (Power LED is flashing green) q Make sure the computer is plugged into the power outlet and back of the monitor. Having this problem? q Disconnect the monitor from the power outlet for help, try these items No Picture (Power LED not lit) q Make sure the Power cable is turned on . q Make sure the computer Power button is properly connected...
User manual (English)
Page 54
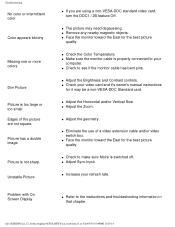
... it may need degaussing. q Check to the instructions and troubleshooting information in that chapter. q Adjust the Brightness and Contrast controls. q Refer to see if the monitor cable has bent pins. Unstable Picture Problem with On Screen Display q If you are not square. q Remove any nearby magnetic objects. q Check the Color Temperature. q Check your refresh rate. q Increase your video card and it's owner's manual instructions for the best picture quality. q Adjust the Horizontal and/or Vertical Size. q Adjust the geometry. q Eliminate the use of...
... it may need degaussing. q Check to the instructions and troubleshooting information in that chapter. q Adjust the Brightness and Contrast controls. q Refer to see if the monitor cable has bent pins. Unstable Picture Problem with On Screen Display q If you are not square. q Remove any nearby magnetic objects. q Check the Color Temperature. q Check your refresh rate. q Increase your video card and it's owner's manual instructions for the best picture quality. q Adjust the Horizontal and/or Vertical Size. q Adjust the geometry. q Eliminate the use of...

User manual (English)
Page 68
... original specifications unit within two business days for all labor charges. All parts, including repaired and replaced parts, are designed and manufactured to high standards and deliver high-quality performance, ease of use and ease of installation. Should you buy your product. LIMITED WARRANTY (Computer Monitor) Click here to access the Warranty Registration Card Three Years Free Labor / Three Years Free Service...
... original specifications unit within two business days for all labor charges. All parts, including repaired and replaced parts, are designed and manufactured to high standards and deliver high-quality performance, ease of use and ease of installation. Should you buy your product. LIMITED WARRANTY (Computer Monitor) Click here to access the Warranty Registration Card Three Years Free Labor / Three Years Free Service...

User manual (English)
Page 86
... TOP OF THE PAGE CONTRAST To adjust your screen's brightness, follow the steps bellow. The OSD Controls Description of the light coming from the screen. A 50% brightness is the overall intensity of the On-Screen Display • The OSD Tree The OSD Controls : Brightness (HotKey) • Contrast (HotKey) • Language • Zoom • Adjust Horizontal • Adjust Vertical • Adjust Shape • Adjust Color • Reset to confirm and the BRIGHTNESS window will disappear with the new adjustment saved.
... TOP OF THE PAGE CONTRAST To adjust your screen's brightness, follow the steps bellow. The OSD Controls Description of the light coming from the screen. A 50% brightness is the overall intensity of the On-Screen Display • The OSD Tree The OSD Controls : Brightness (HotKey) • Contrast (HotKey) • Language • Zoom • Adjust Horizontal • Adjust Vertical • Adjust Shape • Adjust Color • Reset to confirm and the BRIGHTNESS window will disappear with the new adjustment saved.

User manual (English)
Page 98
... factory presets. 1) Press the MENU button on the monitor. Then, press (-) button to confirm. CLOSE MAIN CONTROLS will be highlighted. press MENU to highlight BLUE. Next, press the MENU to confirm. Press (-) or (+) button to adjust the color red. 6b) When finished with RED, press MENU to confirm. Press the (-) button to highlight RED. The MAIN CONTROLS window appears. 2) Press the (+) button until RESET TO FACTORY SETTINGS is highlighted, press the MENU button to highlight GREEN...
... factory presets. 1) Press the MENU button on the monitor. Then, press (-) button to confirm. CLOSE MAIN CONTROLS will be highlighted. press MENU to highlight BLUE. Next, press the MENU to confirm. Press (-) or (+) button to adjust the color red. 6b) When finished with RED, press MENU to confirm. Press the (-) button to highlight RED. The MAIN CONTROLS window appears. 2) Press the (+) button until RESET TO FACTORY SETTINGS is highlighted, press the MENU button to highlight GREEN...
Leaflet
Page 2
... x 768 resolution For graphics monitors, the screen resolution signifies the number of displaying 1024 distinct dots on -screen panel for better front of platforms; Philips monitors are designed and produced in a single chip to connect with PC by 768 pixels. OSD On-Screen-Display control An on each of Hazardous Substances (RoHS) standards that restrict lead and other monitor adjustments. Lead-free Lead-free display products are compatible to process and control input sync digitally. Flame...
... x 768 resolution For graphics monitors, the screen resolution signifies the number of displaying 1024 distinct dots on -screen panel for better front of platforms; Philips monitors are designed and produced in a single chip to connect with PC by 768 pixels. OSD On-Screen-Display control An on each of Hazardous Substances (RoHS) standards that restrict lead and other monitor adjustments. Lead-free Lead-free display products are compatible to process and control input sync digitally. Flame...
Leaflet
Page 3
... Refresh Rate: 85 Hz • Screen enhancement: Anti-glare Polarizer, AntiReflection, Anti-Static • Digital deflection • sRGB • GTF Connectivity • Cables: D-sub Video Cable, Power Cord • Cable Connection: AC Power in • Sync input impedance: 2.2k ohm • Video input impedance: 75 ohm • Video input signal levels: 0.7 Vpp • Video Sync Input Signal: Separate Sync • Video Sync Polarities: Positive and Negative Convenience • User convenience: Menu Languages, On-screen Display • Monitor Controls: Bright Direct Access, Contrast...
... Refresh Rate: 85 Hz • Screen enhancement: Anti-glare Polarizer, AntiReflection, Anti-Static • Digital deflection • sRGB • GTF Connectivity • Cables: D-sub Video Cable, Power Cord • Cable Connection: AC Power in • Sync input impedance: 2.2k ohm • Video input impedance: 75 ohm • Video input signal levels: 0.7 Vpp • Video Sync Input Signal: Separate Sync • Video Sync Polarities: Positive and Negative Convenience • User convenience: Menu Languages, On-screen Display • Monitor Controls: Bright Direct Access, Contrast...


