
Leaflet
Page 1
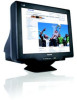
... screen performance • SXGA 1280 x 1024 resolution for sharper display • Philips breakthrough advanced Digital Deflection CPU • High Bright Hot Key instantly adjusts brightness levels • Real flat CRT for natural, distortion and glare-free display • Easy-on-the-eyes high-bright, high-contrast tube • sRGB ensures color matching between display and printouts Great convenience • Compatibility with lead-free design With a Digital Deflection CPU, one-touch brightness...
... screen performance • SXGA 1280 x 1024 resolution for sharper display • Philips breakthrough advanced Digital Deflection CPU • High Bright Hot Key instantly adjusts brightness levels • Real flat CRT for natural, distortion and glare-free display • Easy-on-the-eyes high-bright, high-contrast tube • sRGB ensures color matching between display and printouts Great convenience • Compatibility with lead-free design With a Digital Deflection CPU, one-touch brightness...
Leaflet
Page 2
... Refresh Rate: 75 Hz • Screen enhancement: Anti-glare Polarizer, AntiReflection, Anti-Static, High Brightness, High Contrast • Digital deflection • sRGB • GTF Connectivity • Cables: D-sub Video Cable, Power Cord • Cable Connection: AC Power in • Sync input impedance: 2.2k ohm • Video input impedance: 75 ohm • Video input signal levels: 0.7 Vpp • Video Sync Input Signal: Separate Sync • Video Sync Polarities: Positive and Negative Convenience • User convenience: Menu Languages, On-screen Display • Monitor Controls...
... Refresh Rate: 75 Hz • Screen enhancement: Anti-glare Polarizer, AntiReflection, Anti-Static, High Brightness, High Contrast • Digital deflection • sRGB • GTF Connectivity • Cables: D-sub Video Cable, Power Cord • Cable Connection: AC Power in • Sync input impedance: 2.2k ohm • Video input impedance: 75 ohm • Video input signal levels: 0.7 Vpp • Video Sync Input Signal: Separate Sync • Video Sync Polarities: Positive and Negative Convenience • User convenience: Menu Languages, On-screen Display • Monitor Controls...
User manual (English)
Page 2
... these instructions when connecting and using the monitor, please make sure the power plug and outlet are followed. Disconnect the monitor from the power supply if the monitor is not to install the swivel base for an extended period of time. Safety & Troubleshooting Safety and Troubleshooting Information Safety Precautions and Maintenance • Troubleshooting • Regulatory Information • Other Related Information Safety precautions and maintenance WARNING: Use of controls, adjustments...
... these instructions when connecting and using the monitor, please make sure the power plug and outlet are followed. Disconnect the monitor from the power supply if the monitor is not to install the swivel base for an extended period of time. Safety & Troubleshooting Safety and Troubleshooting Information Safety Precautions and Maintenance • Troubleshooting • Regulatory Information • Other Related Information Safety precautions and maintenance WARNING: Use of controls, adjustments...
User manual (English)
Page 3
... and Troubleshooting Information provides tips and solutions for common problems, and other information, which is intended for anyone who uses the Philips Color Monitor. q Product Information gives an overview of 3)2005-05-19 ¤W¤È 10:16:21 q On Screen Display provides information on adjusting the settings on their hard drive. About This Electronic User's Manual About This Electronic User's Manual About This Guide...
... and Troubleshooting Information provides tips and solutions for common problems, and other information, which is intended for anyone who uses the Philips Color Monitor. q Product Information gives an overview of 3)2005-05-19 ¤W¤È 10:16:21 q On Screen Display provides information on adjusting the settings on their hard drive. About This Electronic User's Manual About This Electronic User's Manual About This Guide...

User manual (English)
Page 6
... Specifications • Automatic Power Saving • Specification • Pin Assignment • Product Views Product Features Model 107B70 107B75 Regulation TCO'03 TCO'03 Color Grey Black 107B7 z 17" -inch (16.0" VIS) color monitor with excellent front of screen performance for use with MACs and PC z Autoscan covers horizontal frequencies up to 86kHz offering a maximum resolution of 1600 x 1200 z Real Flat High Contrast CRT with high-resolution 0.25 mm dot pitch (0.21 hdp) z Large screen display...
... Specifications • Automatic Power Saving • Specification • Pin Assignment • Product Views Product Features Model 107B70 107B75 Regulation TCO'03 TCO'03 Color Grey Black 107B7 z 17" -inch (16.0" VIS) color monitor with excellent front of screen performance for use with MACs and PC z Autoscan covers horizontal frequencies up to 86kHz offering a maximum resolution of 1600 x 1200 z Real Flat High Contrast CRT with high-resolution 0.25 mm dot pitch (0.21 hdp) z Large screen display...

User manual (English)
Page 7
... sRGB sRGB is important to Color temperature and press MENU again. digital cameras, monitors, printers, scanners, etc.) Using a standard unified color space, sRGB will exit the sRGB mode and go to select the sRGB setting in the monitor's OSD. To do so, open the OSD by an sRGB compatible device correctly on your monitor is fixed to change the brightness or contrast setting of your screen. Video - Exit this , please don...
... sRGB sRGB is important to Color temperature and press MENU again. digital cameras, monitors, printers, scanners, etc.) Using a standard unified color space, sRGB will exit the sRGB mode and go to select the sRGB setting in the monitor's OSD. To do so, open the OSD by an sRGB compatible device correctly on your monitor is fixed to change the brightness or contrast setting of your screen. Video - Exit this , please don...

User manual (English)
Page 8
... input device i the monitor will automatically "wake up". The following table shows the power consumption and signaling of th saving features: Power Management Definition VESA's Mode Video H-sync Power V-sync Power Used Saving (%) LED color Active Sleep Switch Off ON OFF OFF Yes Yes < 75W No No < 2W -- -- < 2W 0 % 99% 99% Green Flashing Green Off Physical Specifications RETURN TO TOP OF THE PAGE • Dimensions 15.6" x 15.0" x 16.7" / 397 x 382 x 423.5 mm (including base...
... input device i the monitor will automatically "wake up". The following table shows the power consumption and signaling of th saving features: Power Management Definition VESA's Mode Video H-sync Power V-sync Power Used Saving (%) LED color Active Sleep Switch Off ON OFF OFF Yes Yes < 75W No No < 2W -- -- < 2W 0 % 99% 99% Green Flashing Green Off Physical Specifications RETURN TO TOP OF THE PAGE • Dimensions 15.6" x 15.0" x 16.7" / 397 x 382 x 423.5 mm (including base...
User manual (English)
Page 19
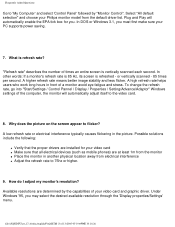
... monitor in the picture. Why does the picture on the screen appear to the video card. 8. Available resolutions are at least 1m from the default driver list. In DOS or Windows 3.1, you may select the desired available resolution through the 'Display properties/Settings' menu. What is refreshed - "Refresh rate" describes the number of times an entire screen is vertically scanned each second. To change the refresh rate, go into "Start/Settings / Control Pannel / Display / Properties / Setting/Advance/Adaptor" Windows settings...
... monitor in the picture. Why does the picture on the screen appear to the video card. 8. Available resolutions are at least 1m from the default driver list. In DOS or Windows 3.1, you may select the desired available resolution through the 'Display properties/Settings' menu. What is refreshed - "Refresh rate" describes the number of times an entire screen is vertically scanned each second. To change the refresh rate, go into "Start/Settings / Control Pannel / Display / Properties / Setting/Advance/Adaptor" Windows settings...

User manual (English)
Page 21
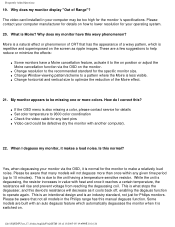
... new value is saved as the new default value. 15. With Auto Calibrate, it takes a monitor's luminance 33 percent longer to deteriorate to the 50 percent level that marks the end of the red, green and blue cannon are accurately measured and compared to the original values stored in the monitor. How does Auto Calibrate work? If the user sets a new color temperature, this stage...
... new value is saved as the new default value. 15. With Auto Calibrate, it takes a monitor's luminance 33 percent longer to deteriorate to the 50 percent level that marks the end of the red, green and blue cannon are accurately measured and compared to the original values stored in the monitor. How does Auto Calibrate work? If the user sets a new color temperature, this stage...

User manual (English)
Page 22
... 15 seconds until picture displays "OSD MAIN MENU UNLOCKED" 18. Calibration should be not a VESA standard (try the monitor with Auto Calibrate feature? How can I unlock this option in the new 202P, 201B and 109P. 17. Auto Calibration takes place when a monitor receives a signal indicating an imminent switch to its sleep mode/stand-by mode. 16. My screen shows NO SYNC INPUT , how can I get rid of this period, different specific images are equipped with...
... 15 seconds until picture displays "OSD MAIN MENU UNLOCKED" 18. Calibration should be not a VESA standard (try the monitor with Auto Calibrate feature? How can I unlock this option in the new 202P, 201B and 109P. 17. Auto Calibration takes place when a monitor receives a signal indicating an imminent switch to its sleep mode/stand-by mode. 16. My screen shows NO SYNC INPUT , how can I get rid of this period, different specific images are equipped with...
User manual (English)
Page 23
... once within any bent pins q Video card could be aware that not all models in value with an auto degauss feature which is Moire? Why does my monitor have a Moire cancellation feature, activate it is less visible. q Change horizontal and vertical size to make a relatively loud noise. Yes, when degaussing your monitor via the OSD on position or adjust the Moire cancellation function via...
... once within any bent pins q Video card could be aware that not all models in value with an auto degauss feature which is Moire? Why does my monitor have a Moire cancellation feature, activate it is less visible. q Change horizontal and vertical size to make a relatively loud noise. Yes, when degaussing your monitor via the OSD on position or adjust the Moire cancellation function via...
User manual (English)
Page 25
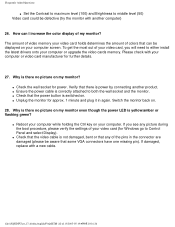
... that the video cable is there no picture on . The amount of video memory your computer or video card manufacturer for Windows go to either install the latest drivers onto your computer. Please check with your video card holds determines the amount of my monitor? Switch the monitor back on your computer or upgrade the video cards memory. If you will need to Control Panel and select Display). q Check that some VGA connectors have one...
... that the video cable is there no picture on . The amount of video memory your computer or video card manufacturer for Windows go to either install the latest drivers onto your computer. Please check with your video card holds determines the amount of my monitor? Switch the monitor back on your computer or upgrade the video cards memory. If you will need to Control Panel and select Display). q Check that some VGA connectors have one...

User manual (English)
Page 26
... though the power LED is there no picture on /off and on the keyboard to wake-up the computer from power saving mode. 29. file:///D|/EDFU/crt_17_6/edoc/english/FAQ.HTM (13 of the monitor. q Verify the Contrast and Brightness setting of 13)2005-05-19 ¤W¤È 10:16:26 Frequently Asked Questions q Check that the cable is a unique Philips feature designed...
... though the power LED is there no picture on /off and on the keyboard to wake-up the computer from power saving mode. 29. file:///D|/EDFU/crt_17_6/edoc/english/FAQ.HTM (13 of the monitor. q Verify the Contrast and Brightness setting of 13)2005-05-19 ¤W¤È 10:16:26 Frequently Asked Questions q Check that the cable is a unique Philips feature designed...

User manual (English)
Page 40
... that can reach. Refresh rate See Vertical scanning frequency. RETURN TO TOP OF THE PAGE file:///D|/EDFU/crt_17_6/edoc/english/GLOSSARY/GLOSSARY.HTM (14 of horizontal lines. Because of the magnetic field of earth, the screen of pixels that allows users to adjust the whole screen rotating to be horizontal. Glossary Plug-and-Play See DDC. See USB section. See also video graphic adapter. RETURN TO...
... that can reach. Refresh rate See Vertical scanning frequency. RETURN TO TOP OF THE PAGE file:///D|/EDFU/crt_17_6/edoc/english/GLOSSARY/GLOSSARY.HTM (14 of horizontal lines. Because of the magnetic field of earth, the screen of pixels that allows users to adjust the whole screen rotating to be horizontal. Glossary Plug-and-Play See DDC. See USB section. See also video graphic adapter. RETURN TO...

User manual (English)
Page 45
... may refer to the Universal Serial Bus. file:///D|/EDFU/crt_17_6/edoc/english/GLOSSARY/GLOSSARY.HTM (19 of a hub connects the hub towards the host. More and more peripherals for multimedia computers arrive on (scanner or video camera, for reset and suspend/resume signaling. There's no need to shut down, plug in the plug-and-play architecture of hardware components...
... may refer to the Universal Serial Bus. file:///D|/EDFU/crt_17_6/edoc/english/GLOSSARY/GLOSSARY.HTM (19 of a hub connects the hub towards the host. More and more peripherals for multimedia computers arrive on (scanner or video camera, for reset and suspend/resume signaling. There's no need to shut down, plug in the plug-and-play architecture of hardware components...
User manual (English)
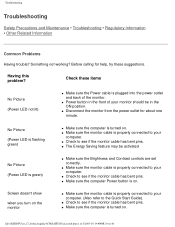
Page 51
... the monitor cable has bent pins. q Check to your computer. Having this problem? Something not working? q Make sure the monitor cable is green) q Make sure the Brightness and Contrast controls are set correctly. No Picture (Power LED is flashing green) q Make sure the computer is turned on the monitor q Make sure the monitor cable is properly connected to your monitor should be activated No Picture (Power LED is properly connected to see if the monitor cable has bent pins. q Check to your computer. Troubleshooting Troubleshooting Safety...
... the monitor cable has bent pins. q Check to your computer. Having this problem? Something not working? q Make sure the monitor cable is green) q Make sure the Brightness and Contrast controls are set correctly. No Picture (Power LED is flashing green) q Make sure the computer is turned on the monitor q Make sure the monitor cable is properly connected to your monitor should be activated No Picture (Power LED is properly connected to see if the monitor cable has bent pins. q Check to your computer. Troubleshooting Troubleshooting Safety...
User manual (English)
Page 52
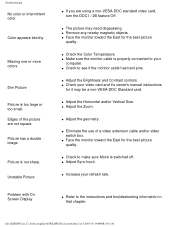
... Standard card. q Make sure the monitor cable is too large or too small. q Check to the instructions and troubleshooting information in that chapter. q Check your computer. q Check the Color Temperature. q Check to make sure Moiré is not sharp. q Adjust Sync Input. q Adjust the Horizontal and/or Vertical Size. q Refer to see if the monitor cable has bent pins. Edges of the picture are using a non-VESA-DDC standard video card, turn the DDC1 / 2B feature Off. q Remove...
... Standard card. q Make sure the monitor cable is too large or too small. q Check to the instructions and troubleshooting information in that chapter. q Check your computer. q Check the Color Temperature. q Check to make sure Moiré is not sharp. q Adjust Sync Input. q Adjust the Horizontal and/or Vertical Size. q Refer to see if the monitor cable has bent pins. Edges of the picture are using a non-VESA-DDC standard video card, turn the DDC1 / 2B feature Off. q Remove...

User manual (English)
Page 71
...:///D|/EDFU/crt_17_6/edoc/english/WARRANTY/WAR_USA.HTM (1 of charge. All parts, including repaired and replaced parts, are designed and manufactured to this Philips monitor. United States Guarantee Philips F1rst Choice Warranty (USA / Canada) Thank you purchased the product is free. LIMITED WARRANTY (Computer Monitor) Click here to access the Warranty Registration Card Three Years Free Labor / Three Years Free Service on -site within the...
...:///D|/EDFU/crt_17_6/edoc/english/WARRANTY/WAR_USA.HTM (1 of charge. All parts, including repaired and replaced parts, are designed and manufactured to this Philips monitor. United States Guarantee Philips F1rst Choice Warranty (USA / Canada) Thank you purchased the product is free. LIMITED WARRANTY (Computer Monitor) Click here to access the Warranty Registration Card Three Years Free Labor / Three Years Free Service on -site within the...

User manual (English)
Page 89
...-Screen Display • The OSD Tree The OSD Controls : Brightness (HotKey) • Contrast (HotKey) • Language • Zoom • Adjust Horizontal • Adjust Vertical • Adjust Shape • Adjust Color • Reset to confirm and the BRIGHTNESS window will disappear with the new adjustment saved. The BRIGHTNESS window appears. 2) Press the (-) or (+) button to adjust the brightness. 3) When the brightness is recommended. 1) Press the (-) button on the screen. A 100% contrast is adjusted to the level desired, press MENU to Factory Settings • Extra Controls...
...-Screen Display • The OSD Tree The OSD Controls : Brightness (HotKey) • Contrast (HotKey) • Language • Zoom • Adjust Horizontal • Adjust Vertical • Adjust Shape • Adjust Color • Reset to confirm and the BRIGHTNESS window will disappear with the new adjustment saved. The BRIGHTNESS window appears. 2) Press the (-) or (+) button to adjust the brightness. 3) When the brightness is recommended. 1) Press the (-) button on the screen. A 100% contrast is adjusted to the level desired, press MENU to Factory Settings • Extra Controls...

User manual (English)
Page 101
... (+) button to adjust the color green. 6c) When finished GREEN, press MENU to highlight RED. Next, press the MENU to confirm. Press MENU to confirm. RETURN TO TOP OF THE PAGE RESET TO FACTORY SETTINGS RESET TO FACTORY SETTINGS returns everything in all adjustments are complete, press the MENU button to confirm your adjustments and press MENU return to factory presets. 1) Press the MENU button on the monitor. Next, press the (-)or (+) button to adjust the color blue...
... (+) button to adjust the color green. 6c) When finished GREEN, press MENU to highlight RED. Next, press the MENU to confirm. Press MENU to confirm. RETURN TO TOP OF THE PAGE RESET TO FACTORY SETTINGS RESET TO FACTORY SETTINGS returns everything in all adjustments are complete, press the MENU button to confirm your adjustments and press MENU return to factory presets. 1) Press the MENU button on the monitor. Next, press the (-)or (+) button to adjust the color blue...


