
Owner's Manual
Page 20
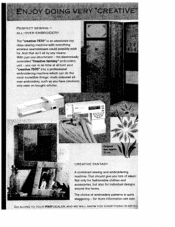
... choice of ideas! GO ALONG TO YOUR PFAFF DEALER, AND WE WILL SHOW YOU EVERYTHING IN DE1A the electronically controlled "Creative fantasy" embroidery unit - That should give you have previously only seen on bought articles. for . ALL-OVER EMBROIDERY The "creative 7570" is quite staggering - And that isn't all turn your "creative 7570" into a professional embroidering machine which can...
... choice of ideas! GO ALONG TO YOUR PFAFF DEALER, AND WE WILL SHOW YOU EVERYTHING IN DE1A the electronically controlled "Creative fantasy" embroidery unit - That should give you have previously only seen on bought articles. for . ALL-OVER EMBROIDERY The "creative 7570" is quite staggering - And that isn't all turn your "creative 7570" into a professional embroidering machine which can...

Owner's Manual
Page 187
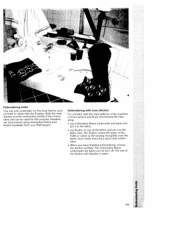
Parts of the "creative fantasy" embroidery unit: I I I I I I I I 3 Embroidery unit from front Large and small frame Embroidery unit from rear I 1 Metal track for attaching the frame 2 Release lever for removing the frame I 3 Connection bushing for the machine 4 Fastening spigot for connecting to the machine I 5 Guide strip for engaging the embroidery unit 6 Release lever for removing the embroidery unit 7 Engaging spigot I 8 2 engaging spigots 9 Retaining screw for attaching the fabric L L L L L
Parts of the "creative fantasy" embroidery unit: I I I I I I I I 3 Embroidery unit from front Large and small frame Embroidery unit from rear I 1 Metal track for attaching the frame 2 Release lever for removing the frame I 3 Connection bushing for the machine 4 Fastening spigot for connecting to the machine I 5 Guide strip for engaging the embroidery unit 6 Release lever for removing the embroidery unit 7 Engaging spigot I 8 2 engaging spigots 9 Retaining screw for attaching the fabric L L L L L

Owner's Manual
Page 188
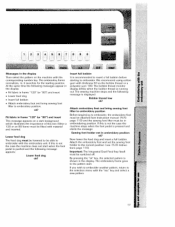
... before connecting or releasing the 2. or chemical products such as petrol or liquid chemicals I I 1. Cleaning: When cleaning the housing use insecticides to ensure that the embroidery unit does not get bumped or dropped. soft, lint-free cloth. rt"Tphesehselnoetadwfreoetmnoestdteblw.ypr.oeinidTdgahe"lerycksaeepynw.robBicneyegrspesrmleeissaascssienhtadgirn.tteTehdheisewfsoeittmoohtpbtpprhoeeediddafeolbroyaytgppparerienodscastlehi.sneAsgefttmhaeenrbnyprorckeioedsnyseitrnieyngxupcterehospectienotshkdseekisey p 5. Notes on safety I I Always store the PC...
... before connecting or releasing the 2. or chemical products such as petrol or liquid chemicals I I 1. Cleaning: When cleaning the housing use insecticides to ensure that the embroidery unit does not get bumped or dropped. soft, lint-free cloth. rt"Tphesehselnoetadwfreoetmnoestdteblw.ypr.oeinidTdgahe"lerycksaeepynw.robBicneyegrspesrmleeissaascssienhtadgirn.tteTehdheisewfsoeittmoohtpbtpprhoeeediddafeolbroyaytgppparerienodscastlehi.sneAsgefttmhaeenrbnyprorckeioedsnyseitrnieyngxupcterehospectienotshkdseekisey p 5. Notes on safety I I Always store the PC...
Owner's Manual
Page 189
... Combining monograms Combining motifs Combining motifs to form a border Combining motifs with word sequences Connecting / removing the embroidery unit Connection bushing of the Creative 7570 Correcting monograms Creating a word sequence Creative Fantasy cards Cursor keys Deleting from the Creative Card Embroidering Embroidering a word sequence Embroidering a word sequence Embroidering borders Embroidering chiffon Embroidering contours Embroidering frotté...
... Combining monograms Combining motifs Combining motifs to form a border Combining motifs with word sequences Connecting / removing the embroidery unit Connection bushing of the Creative 7570 Correcting monograms Creating a word sequence Creative Fantasy cards Cursor keys Deleting from the Creative Card Embroidering Embroidering a word sequence Embroidering a word sequence Embroidering borders Embroidering chiffon Embroidering contours Embroidering frotté...
Owner's Manual
Page 190
Index Fitting the fabric into the embroidery frame Info Inserting / removing the embroidery pattern card Lowering the feed dog rn-p key Marking the fabric Maxi pattern combinations from the card Messages in the display Mirroring patterns... monograms in frames Placing the pattern in the frame Release key of the embroidery unit Richelieu Rotating the pattern Selecting an alphabet Sewingfootlifter Sewing monograms Sewing recommendations Sewing with the embroidery unit Sticking on embroidered motifs Storing on the Creative Card Symbols in the display Symbols of the pattern sequence Tips and examples...
Index Fitting the fabric into the embroidery frame Info Inserting / removing the embroidery pattern card Lowering the feed dog rn-p key Marking the fabric Maxi pattern combinations from the card Messages in the display Mirroring patterns... monograms in frames Placing the pattern in the frame Release key of the embroidery unit Richelieu Rotating the pattern Selecting an alphabet Sewingfootlifter Sewing monograms Sewing recommendations Sewing with the embroidery unit Sticking on embroidered motifs Storing on the Creative Card Symbols in the display Symbols of the pattern sequence Tips and examples...
Owner's Manual
Page 194
removing the embroidery card Engaging/ removing the frame in! darning Position Page 8 Page 8 Page 9 Page 9 Page 9 Page 9 Page 10 Page 10 7 from the embroidery unit Bringing the sewing foot to embroidery! I7 4 PEAFF creative 7570 jail r Contents Connectjng/ removing the embroidery unit Changing the sewing foot Connecting the mains cord and foot pedal Switching the machine on Lowering the feed dog Inserting!
removing the embroidery card Engaging/ removing the frame in! darning Position Page 8 Page 8 Page 9 Page 9 Page 9 Page 9 Page 10 Page 10 7 from the embroidery unit Bringing the sewing foot to embroidery! I7 4 PEAFF creative 7570 jail r Contents Connectjng/ removing the embroidery unit Changing the sewing foot Connecting the mains cord and foot pedal Switching the machine on Lowering the feed dog Inserting!
Owner's Manual
Page 195
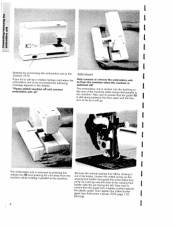
ok" Attention! Only connect or remove the embroidery unit to call up a creative fantasy embroidery unit is switched off and connect embroidery unit. attiTshhrhmeeselimrdeaemsaaacrflbhoaorirnofngaietdhs.ebeTiretyamtwwkuaielenclecihtgnaionris.etehctewloicfhelkionleoedsrubirpenelitanottghetahahtenetldhbdeuthpsghaeurinaifdrlgleeeelo-(n5to) I I I I I I I I I I Bushing Creative for connecting 7570. the embroidery unit to the If you try to /from the machine when the machine is not connected the message appears in the display: card when following the "...
ok" Attention! Only connect or remove the embroidery unit to call up a creative fantasy embroidery unit is switched off and connect embroidery unit. attiTshhrhmeeselimrdeaemsaaacrflbhoaorirnofngaietdhs.ebeTiretyamtwwkuaielenclecihtgnaionris.etehctewloicfhelkionleoedsrubirpenelitanottghetahahtenetldhbdeuthpsghaeurinaifdrlgleeeelo-(n5to) I I I I I I I I I I Bushing Creative for connecting 7570. the embroidery unit to the If you try to /from the machine when the machine is not connected the message appears in the display: card when following the "...
Owner's Manual
Page 196
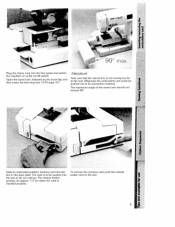
... approx. 1/2 cm when the card is not swung too far to be pushed out of the swivel arm should not I exceed 90° I I I Slide an embroidery-pattern memory card into the foot pedal and switch the machine on at the on/off switch. The card is to the rear. •0 II... card push the release button next to the slot. 9 Open the swivel arm, followed by the hook flap and then lower the feed dog (see 7570 page 37). The maximum angle of its connection bushing. Otherwise the embroidery unit could be pushed into the slot as far as it will go.
... approx. 1/2 cm when the card is not swung too far to be pushed out of the swivel arm should not I exceed 90° I I I Slide an embroidery-pattern memory card into the foot pedal and switch the machine on at the on/off switch. The card is to the rear. •0 II... card push the release button next to the slot. 9 Open the swivel arm, followed by the hook flap and then lower the feed dog (see 7570 page 37). The maximum angle of its connection bushing. Otherwise the embroidery unit could be pushed into the slot as far as it will go.
Owner's Manual
Page 197
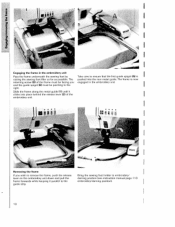
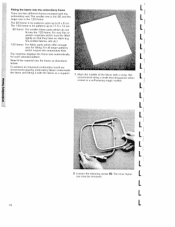
...I hi A I I I If you and the guide spigot (8) must be pointing to the embroidery/darning position). The retaining screw (9) of the embroidery unit Take care to ensure that the first guide spigot (A) is now engaged in the embroidery unit. 1 •• I . . •I ii .1L Removing the frame I Engaging the...frame must be facing you wish to remove the frame, push the release Bring the sewing foot holder to embroidery/ lever on the embroidery unit down and pull the darning position (see instruction manual page 110 frame forwards while keeping it parallel to the right....
...I hi A I I I If you and the guide spigot (8) must be pointing to the embroidery/darning position). The retaining screw (9) of the embroidery unit Take care to ensure that the first guide spigot (A) is now engaged in the embroidery unit. 1 •• I . . •I ii .1L Removing the frame I Engaging the...frame must be facing you wish to remove the frame, push the release Bring the sewing foot holder to embroidery/ lever on the embroidery unit down and pull the darning position (see instruction manual page 110 frame forwards while keeping it parallel to the right....

Owner's Manual
Page 200
- - PFAFF creative 7570 tj -- 1 234 66 I60 I Contents Embroidering with the embroidery unit Messages in the display Fitting the fabric into the embroidery frame Explanation of the symbols in the display Info Embroidery/single colour Embroidery/multicolour Multicoloured embroidery with repeating colours Embroidering individual segments Error messages in embroidery mode Sewing with the embroidery unit Pages 14-17 Page 1 7 Pages 1 8, 1 9 Pages 20-23 Page 24 Page 25 Page 26 Page 27 Page 28 Page 29 Page 30 I I I 13
- - PFAFF creative 7570 tj -- 1 234 66 I60 I Contents Embroidering with the embroidery unit Messages in the display Fitting the fabric into the embroidery frame Explanation of the symbols in the display Info Embroidery/single colour Embroidery/multicolour Multicoloured embroidery with repeating colours Embroidering individual segments Error messages in embroidery mode Sewing with the embroidery unit Pages 14-17 Page 1 7 Pages 1 8, 1 9 Pages 20-23 Page 24 Page 25 Page 26 Page 27 Page 28 Page 29 Page 30 I I I 13
Owner's Manual
Page 201
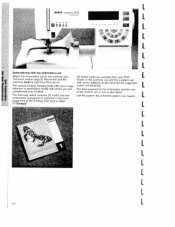
...PFAFF creative 7570 L ii I, 1;'i I I selection of the Creative. I embroidery monograms is included in the basic equipment of embroidery motifs with which contains 25 motifs and two of the motif in cm or mm is called 1 I Embroidering with all the patterns on the card and the suggested The various Creative...Creative. Remember that the dealer. The first card, which you can The time required for the embroidery and the size complement your Pfatf L Technical section page 8>. I I I L I L L [ 14 I 234bS7 S20 - with the embroidery unit Attach the embroidery unit...
...PFAFF creative 7570 L ii I, 1;'i I I selection of the Creative. I embroidery monograms is included in the basic equipment of embroidery motifs with which contains 25 motifs and two of the motif in cm or mm is called 1 I Embroidering with all the patterns on the card and the suggested The various Creative...Creative. Remember that the dealer. The first card, which you can The time required for the embroidery and the size complement your Pfatf L Technical section page 8>. I I I L I L L [ 14 I 234bS7 S20 - with the embroidery unit Attach the embroidery unit...
Owner's Manual
Page 204
... Before beginning to embroider with material and inserted. Lower feed dog The feed dog must be fitted with the embroidery unit. The sewing machine stops and the following messages appear in the display: • Fit fabric in frame "1 20" (or "80") and insert This message appears ... must be switched off. If you wish to embroider another pattern, return to the correct position (see Instruction manual 7570 page 11 0) and the sewing foot lifter must be attached (see 7570 Instruc tions page 11 0). At the same time the following message is displayed: Bobbin thread low ok? If this ...
... Before beginning to embroider with material and inserted. Lower feed dog The feed dog must be fitted with the embroidery unit. The sewing machine stops and the following messages appear in the display: • Fit fabric in frame "1 20" (or "80") and insert This message appears ... must be switched off. If you wish to embroider another pattern, return to the correct position (see Instruction manual 7570 page 11 0) and the sewing foot lifter must be attached (see 7570 Instruc tions page 11 0). At the same time the following message is displayed: Bobbin thread low ok? If this ...
Owner's Manual
Page 205
... which must be removed. For all larger patterns I Now fit the material into the embroidery frame L There are two different frames included with a cross. Mark the middle of the fabric with the embroidery unit The smaller one is the 80 and the larger one is the 1 20 frame.... The machine displays the frame size automatically for fitting. L L L 18 L The inner frame can now be fitted tightly so that disappears when I recommend placing embroidery fleece underneath the ...
... which must be removed. For all larger patterns I Now fit the material into the embroidery frame L There are two different frames included with a cross. Mark the middle of the fabric with the embroidery unit The smaller one is the 80 and the larger one is the 1 20 frame.... The machine displays the frame size automatically for fitting. L L L 18 L The inner frame can now be fitted tightly so that disappears when I recommend placing embroidery fleece underneath the ...

Owner's Manual
Page 206
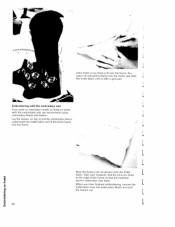
I 0 I,' 4 PFAFF cieafr757O uI" I 4 5. Then tighten the retaining screw. Now attach the frame onto the embroidery unit of the fabric onto which you wish to embroider must be facing upwards. Press the fabric into the frame, make sure that screw 9 is facing ... the right. 4. 3. When inserting the material into the outer frame with the inner frame. Pull the retaining screw lightly and tighten the fabric and the embroidery fleece. The side of the sewing machine (see Technical section page 9). 19 Lay the...
I 0 I,' 4 PFAFF cieafr757O uI" I 4 5. Then tighten the retaining screw. Now attach the frame onto the embroidery unit of the fabric onto which you wish to embroider must be facing upwards. Press the fabric into the frame, make sure that screw 9 is facing ... the right. 4. 3. When inserting the material into the outer frame with the inner frame. Pull the retaining screw lightly and tighten the fabric and the embroidery fleece. The side of the sewing machine (see Technical section page 9). 19 Lay the...

Owner's Manual
Page 211
I t PMf Instruction manual C Embroidery unit 7570 PFAP creatIve 7570 -
I t PMf Instruction manual C Embroidery unit 7570 PFAP creatIve 7570 -
Owner's Manual
Page 218
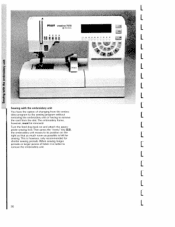
... 30 L L PFAFF creative 7570 L üüi a i 41 I 7 I I I the card from the embro idery program to the sewing program without removing the embroidery unit or having to remove I III L ... - This is left for shorter sewing periods. Then press the "menu' key (22), the embroidery unit moves to remove the embroidery unit. Turn the feed ... longer periods or larger pieces of changing from the slot. I I I, I. ( I I L Sewing with the embroidery unit I You have the option of fabric it is better to its position on and attach the appro priate sewing foot. The...
... 30 L L PFAFF creative 7570 L üüi a i 41 I 7 I I I the card from the embro idery program to the sewing program without removing the embroidery unit or having to remove I III L ... - This is left for shorter sewing periods. Then press the "menu' key (22), the embroidery unit moves to remove the embroidery unit. Turn the feed ... longer periods or larger pieces of changing from the slot. I I I, I. ( I I L Sewing with the embroidery unit I You have the option of fabric it is better to its position on and attach the appro priate sewing foot. The...
Owner's Manual
Page 276
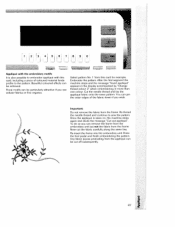
To do so you can remove the frame from the embroidery unit but not the fabric from the appliqué can pin the outer .... Floral motifs can be achieved. You can be particularly attractive if you wish. Re-insert the frame into the embroidery unit. Select pattern No. 1 from the frame. Important: Do not remove the fabric from this card. Once the ...be cut the fabric carefully along the sewn line. 4J 1 2 13 67 89 0 5j Appliqué with the embroidery motifs It is sewn on, the machine stops again and elicits the message "Cut out appliqué. Including a piece...
To do so you can remove the frame from the embroidery unit but not the fabric from the appliqué can pin the outer .... Floral motifs can be achieved. You can be particularly attractive if you wish. Re-insert the frame into the embroidery unit. Select pattern No. 1 from the frame. Important: Do not remove the fabric from this card. Once the ...be cut the fabric carefully along the sewn line. 4J 1 2 13 67 89 0 5j Appliqué with the embroidery motifs It is sewn on, the machine stops again and elicits the message "Cut out appliqué. Including a piece...
Owner's Manual
Page 278
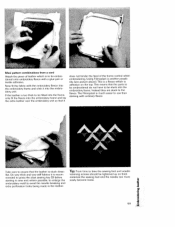
... the Creative. C C 89 d Embroidering frotté You can even embroider on tine loop fabrics such as frottO or velvet with the maxi patterns of the machine or from your Pfaff dealer). The rest of the embro idery unit can be used for this purpose. I A 9XXXJ(XXr.l - -,-. The embroidery fleece... underneath the fabric can be torn off. Both the maxi stitches and the embroidery motifs of the Avalon will dissolve in ...
... the Creative. C C 89 d Embroidering frotté You can even embroider on tine loop fabrics such as frottO or velvet with the maxi patterns of the machine or from your Pfaff dealer). The rest of the embro idery unit can be used for this purpose. I A 9XXXJ(XXr.l - -,-. The embroidery fleece... underneath the fabric can be torn off. Both the maxi stitches and the embroidery motifs of the Avalon will dissolve in ...
Owner's Manual
Page 279
... close [ to embroider motifs on top of and the embroidery fleece underneath the frotté fabric and fit the three layers into the frame and stick the frotté fabric onto it with the embroidery unit, we recommend using embroidery fleece and Avalon. When you wish to the edge of... embroidery fleece into the frame. I L 90 I Now the Avalon can be pinned onto the frotté ...
... close [ to embroider motifs on top of and the embroidery fleece underneath the frotté fabric and fit the three layers into the frame and stick the frotté fabric onto it with the embroidery unit, we recommend using embroidery fleece and Avalon. When you wish to the edge of... embroidery fleece into the frame. I L 90 I Now the Avalon can be pinned onto the frotté ...
Owner's Manual
Page 288
...parts to be embroidered do not have to be stuck into the embroidery frame and lay the extra leather over the embroidery unit so that the leather is to be embro idered onto embroidery fleece with the embroidery fleece into the embroidery frame and click it is recom Tip: From time to use ... much easier to time the sewing foot and needle retaining screws should be fitted into the frame, only fit the fleece into the embroidery frame. I a) embroidery motif to the fleece. Instead they are stuck to avoid the needle breaking and extra perforation holes being made in the leather. This...
...parts to be embroidered do not have to be stuck into the embroidery frame and lay the extra leather over the embroidery unit so that the leather is to be embro idered onto embroidery fleece with the embroidery fleece into the embroidery frame and click it is recom Tip: From time to use ... much easier to time the sewing foot and needle retaining screws should be fitted into the frame, only fit the fleece into the embroidery frame. I a) embroidery motif to the fleece. Instead they are stuck to avoid the needle breaking and extra perforation holes being made in the leather. This...


