
Owner's Manual
Page 4
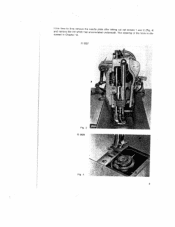
needle plate accumulated after taking underneath. out The set screws cleaning of 1 and 2 (Fig. 4) the hook is dis R 9927 I Fig. 3 R 9928 Fig. 4 3 From time to time remove the and remove the lint which has cussed in Chapter 13.
needle plate accumulated after taking underneath. out The set screws cleaning of 1 and 2 (Fig. 4) the hook is dis R 9927 I Fig. 3 R 9928 Fig. 4 3 From time to time remove the and remove the lint which has cussed in Chapter 13.
Owner's Manual
Page 9
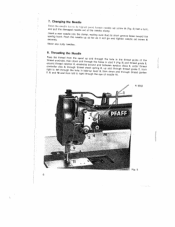
..., making Push the needle up as far as sure that it will go its short groove faces toward the and tighten needle set screw A (Fig. 8) half a turn, Insert a new sewing hook. et8hd)trihtosharcuenrsgeadahd4dt,htghruguernuieaddiaddeederg7gu,tohiufdfriredetoahem2dse, R9932 '' 8 Fig.8 securely. set screw A Never use rusty needles 8. Changing the Needle aRnadiseputlhl ethneeeddalme abgaerdtoneietsdlheigohuetstofpothinet, loosen needle needle clamp. Threading the Needle 7rcatP,ihorgaorn9hseu,ttsarnadotdnotlhlduetelnrhe1wrf0tdethiiansrtadhedcnaredodrr5,ue...
..., making Push the needle up as far as sure that it will go its short groove faces toward the and tighten needle set screw A (Fig. 8) half a turn, Insert a new sewing hook. et8hd)trihtosharcuenrsgeadahd4dt,htghruguernuieaddiaddeederg7gu,tohiufdfriredetoahem2dse, R9932 '' 8 Fig.8 securely. set screw A Never use rusty needles 8. Changing the Needle aRnadiseputlhl ethneeeddalme abgaerdtoneietsdlheigohuetstofpothinet, loosen needle needle clamp. Threading the Needle 7rcatP,ihorgaorn9hseu,ttsarnadotdnotlhlduetelnrhe1wrf0tdethiiansrtadhedcnaredodrr5,ue...


