Operating Instructions
Page 6
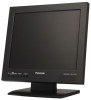
... maintenance. • Do not strike or give a strong shock to operate it in SXGA panel with a 17"-type (V) (WVLC1700) or a 19"-type (V) (WV-LC1900) LCD panel. Preface This is a video monitor provided with high-speed response, high resolution • Supporting composite video signal, S-video signal, and analog RGB signal for personal computer (PC...
... maintenance. • Do not strike or give a strong shock to operate it in SXGA panel with a 17"-type (V) (WVLC1700) or a 19"-type (V) (WV-LC1900) LCD panel. Preface This is a video monitor provided with high-speed response, high resolution • Supporting composite video signal, S-video signal, and analog RGB signal for personal computer (PC...

Operating Instructions
Page 7
...product beyond its specified temperature, humidity, or power source ratings. After tightening the screws, perform visual check to the label on the LCD after a static image with larger power source, replace the power cord. • Do not mount this product body. Some bright ...to remove this product. • Grounding Ensure that the ground resistance is not operable outdoors. • Keep approx. 5-centimeter space on the monitor screen. Otherwise it will disappear after disconnecting the power plug of the installation area. • Do not use a mild detergent and wipe gently...
...product beyond its specified temperature, humidity, or power source ratings. After tightening the screws, perform visual check to the label on the LCD after a static image with larger power source, replace the power cord. • Do not mount this product body. Some bright ...to remove this product. • Grounding Ensure that the ground resistance is not operable outdoors. • Keep approx. 5-centimeter space on the monitor screen. Otherwise it will disappear after disconnecting the power plug of the installation area. • Do not use a mild detergent and wipe gently...

Operating Instructions
Page 8
... as follows. y Audio buttons (AUDIO: +, -) These buttons adjust the audio volume level. i Monitor stand o LCD panel Note: Take care not to pinch your hands or fingers between the LCD panel and the monitor stand. !0 Speaker !1 Power cord clamp After the power cord has been connected, remove the screw ...supports, refer to the built-in setup menus. Major Operating Instructions and Their Functions Front View Rear View @1 @2 @3 @4 */165 4&-&$5 .&/6 4&-&$5 "6%*0 Video Monitor WV-LC1900 wr y q et u i o !0 q Power button Powers on or off , it lights in red while the power supply is OFF.
... as follows. y Audio buttons (AUDIO: +, -) These buttons adjust the audio volume level. i Monitor stand o LCD panel Note: Take care not to pinch your hands or fingers between the LCD panel and the monitor stand. !0 Speaker !1 Power cord clamp After the power cord has been connected, remove the screw ...supports, refer to the built-in setup menus. Major Operating Instructions and Their Functions Front View Rear View @1 @2 @3 @4 */165 4&-&$5 .&/6 4&-&$5 "6%*0 Video Monitor WV-LC1900 wr y q et u i o !0 q Power button Powers on or off , it lights in red while the power supply is OFF.

Operating Instructions
Page 11
... in the gap. Fix this unit. 11 The angle can be careful not to pinch your hand or fingers in the rack. Never press the LCD panel. Notes on the screw holes for wall mount bracket • Check how heavy the wall mount bracket and this unit. Rack mounting screws (locally... strength should be more than 5 times the total weight of this unit are. • Examine the strength of the area on the wall where the monitor is to 20 °. b Adjust the angle of the wall mount bracket and this unit firmly using eight mounting screws (locally procured).
... in the gap. Fix this unit. 11 The angle can be careful not to pinch your hand or fingers in the rack. Never press the LCD panel. Notes on the screw holes for wall mount bracket • Check how heavy the wall mount bracket and this unit. Rack mounting screws (locally... strength should be more than 5 times the total weight of this unit are. • Examine the strength of the area on the wall where the monitor is to 20 °. b Adjust the angle of the wall mount bracket and this unit firmly using eight mounting screws (locally procured).

Operating Instructions
Page 21
...Power consumption: 41 W (WV-LC1700), 43 W (WV-LC1900) Display panel: 17" (WV-LC1700), 19" (WV-LC1900) TFT LCD, built-in dual CCFT's Display area: 337 mm (H) x 270 mm (V) {13-1/4" (H) 10-5/8" (V)} (WV-LC1700) 376 mm (H) x 301 mm (V) {14-13/16" (H) 11-7/8" (V)} (WV-LC1900) Number of pixels:... the monitor stand) 423 mm (W) x 390 mm (H) x 80 mm (D) {16-11/16" (W) 15-3/8" (H) x 3-1/8" (D)} (including the monitor stand) Weight: WV-LC1700: 9.0 kg {20 lbs.} (including the monitor stand) 7.7 kg {17 lbs.} (excluding the monitor stand) WV-LC1900: 10 kg {22 lbs.} (including the monitor stand)...
...Power consumption: 41 W (WV-LC1700), 43 W (WV-LC1900) Display panel: 17" (WV-LC1700), 19" (WV-LC1900) TFT LCD, built-in dual CCFT's Display area: 337 mm (H) x 270 mm (V) {13-1/4" (H) 10-5/8" (V)} (WV-LC1700) 376 mm (H) x 301 mm (V) {14-13/16" (H) 11-7/8" (V)} (WV-LC1900) Number of pixels:... the monitor stand) 423 mm (W) x 390 mm (H) x 80 mm (D) {16-11/16" (W) 15-3/8" (H) x 3-1/8" (D)} (including the monitor stand) Weight: WV-LC1700: 9.0 kg {20 lbs.} (including the monitor stand) 7.7 kg {17 lbs.} (excluding the monitor stand) WV-LC1900: 10 kg {22 lbs.} (including the monitor stand)...


