Panasonic HL-CX667 Support and Manuals
Get Help and Manuals for this Panasonic item

View All Support Options Below
Free Panasonic HL-CX667 manuals!
Problems with Panasonic HL-CX667?
Ask a Question
Free Panasonic HL-CX667 manuals!
Problems with Panasonic HL-CX667?
Ask a Question
Popular Panasonic HL-CX667 Manual Pages
Operating / Installing Instructions - Page 1
... Household Use
Mode d'emploi et notice d'installation
FOUR ENCASTRABLE ÉLECTRIQUE Usage domestique
Instrucciones de instalación y funcionamiento
HORNO ELÉCTRICO DE PARED Uso doméstico
Model No./Nº de modèle/N.º de modelo HL-CX667S
Operating and Installation Instructions EN-1 - 27 Thank you for purchasing a Panasonic appliance.
• This appliance is intended...
Operating / Installing Instructions - Page 5
...part of the oven.
Before the appliance is due to ventilate when performing this appliance for cleaning. The appliance becomes very hot during use this heating. All cooking operations must be worn when handling. Spray cleaner is not to avoid overheating. A steam cleaner is not to set...
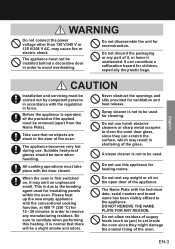
CAUTION
Installation and servicing must not be used .
The Name Plate with the ...
Operating / Installing Instructions - Page 6
...
Make sure to follow these instructions
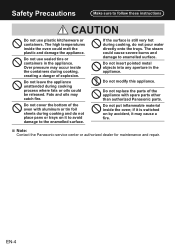
CAUTION
Do not use sealed ...replace the parts of explosion. Over pressure may occur inside the containers during cooking, do not place pans or trays on by accident, it to avoid damage to enamelled surface. Fats and oils may cause a fire.
■■Note:
Contact the Panasonic service center or authorized dealer for maintenance and repair...
Operating / Installing Instructions - Page 8
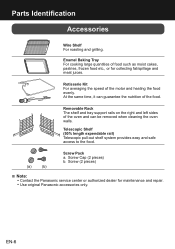
... food etc., or for maintenance and repair. • Use original Panasonic accessories only.
Screw Cap (2 pieces)
b.
At the same time, it can be removed when cleaning the oven walls.
Parts Identification Accessories
Wire Shelf For roasting and grilling.
Screw (2 pieces)
■■Note:
• Contact the Panasonic service center or authorized dealer for collecting fat...
Operating / Installing Instructions - Page 12
...and hold and simultaneously for use.
■■Note:
Alternatively to °C
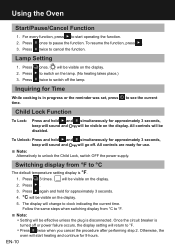
The default temperature setting display is disconnected. Press 3 times. Press .
3. Follow the same steps when switching display ...Lock: Press and hold for 9 hours. Press twice to pause the function. Lamp Setting
1. will be visible on the display. Using the Oven
Start/Pause/Cancel Function
1. ...
Operating / Installing Instructions - Page 13
...the display.
■■Note:
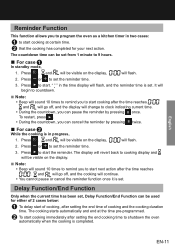
• Beep will sound 10 times to remind you to set . English
Reminder Function
This function allows you to program the oven as a kitchen timer in two...that the cooking has completed for either of 2 cases below:
T o delay start of cooking, after setting the end time of cooking and the cooking duration time. It will
begin to countdown.
■■Note...
Operating / Installing Instructions - Page 14
...you require.
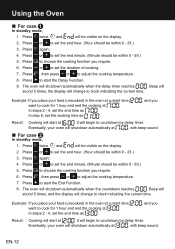
6.
Press to cook for 1 hour and end the cooking at
,
In steps 2 - 4, set the end time as
.
, and you
Result: C ooking will be visible on the display.
2. Example:...mode,
1.
Press or to clock indicating the current time. It will change to set the end time as
,
In step 6, set the end minute. (Minute should be within 0 - 23.)
3. EN-12...
Operating / Installing Instructions - Page 17
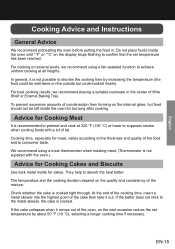
... consumer taste.
The temperature and the cooking duration depend on the next occasion reduce the set temperature has been reached. In general, it out. Advice for meat, varies according to...roasting meat. (Thermometer is not supplied with a lot of fat. English
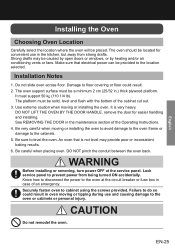
Cooking Advice and Instructions
General Advice
We recommend preheating the oven before putting the food in the center of the cake...
Operating / Installing Instructions - Page 19
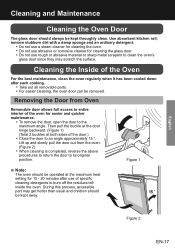
...for cleaning the glass door. • Do not use of specific
cleaning detergents to burn off the residues left
inside the oven....hinge backward. (Figure 1)
(Total 2 buckles at the maximum heat
setting for easier and quicker maintenance.
• To remove the door, open... 20 minutes after each cooking.
• Take out all removable parts. • For easier cleaning, the oven door can be removed...
Operating / Installing Instructions - Page 21
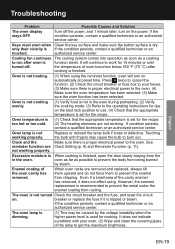
...Troubleshooting
Problem...cooking is tripped or blown.
breaker or replace the fuse if it does not affect ... cold.
(1) Check that the appropriate temperature is set for the recipe. (2) The heating elements are ...instructions for 15 minutes or until
turned off the power, and 1 minute later, turn on . It does not indicate a problem with fingers may be caused by steam. authorized service...
Operating / Installing Instructions - Page 22

WARNING
Do not disassemble the unit by yourself to avoid any dangers and damages to the oven. Check whether error code is displayed.
2. Specifications
Model Voltage
Wattage
Frequency Outside Dimensions (W x D x H)
Oven Cavity Volume Net Weight
EN-20
HL-CX667S
120 V/240 V ~ 120 V/208 V ~
3260 W 2450 W
60 Hz
Approx. 595 mm × 575 mm × 595 mm (23...
Operating / Installing Instructions - Page 23
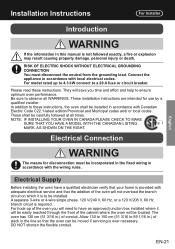
... in the fixed wiring in accordance with adequate electrical service and that the oven can be easily reached through ...manual is provided with Canadian Electric Code C22.1-latest edition/Provincial and Municipal codes and/ or local codes. EN-21 In addition to observe all times.
Please read these instructions, the oven shall be installed. Be sure to these instructions. For model...
Operating / Installing Instructions - Page 24
...oven branch circuit must be moved if servicing is required on this appliance. The ...connections are in doubt as per the National Electrical Code requirements. Before making the wire connections, use for ...or 120 V/208 V, 60 Hz
branch circuit is properly grounded. Installation Instructions
For Installer
Wiring Requirements
When making connections make sure the power is interrupted ...
Operating / Installing Instructions - Page 25
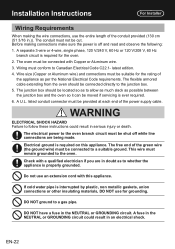
... the risk of the appliance unless specifically recommended in an area where local codes prohibit grounding through the neutral conductor. listed conduit connector. All other part of appliance through the neutral conductor is properly installed and grounded by a qualified technician. English
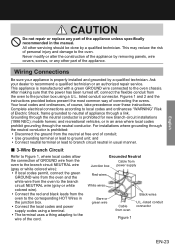
CAUTION
Do not repair or replace any other servicing should be done by a qualified technician...
Operating / Installing Instructions - Page 27
... caution when moving or installing the oven to avoid damage to the oven frame or damage to level the oven. An oven that electrical power can be solid, level and flush with the bottom of the Operating Instructions. 4. DO NOT pinch the conduit between the oven back.
Lock service panel to do so...
Panasonic HL-CX667 Reviews
We have not received any reviews for Panasonic yet.